How to Remove Dried Paint From Fiberglass Bathtub Easily
You can remove dried paint from a fiberglass bathtub by first identifying the paint type—latex softens with rubbing alcohol or warm vinegar, oil-based needs mineral spirits or acetone—then ventilate, wear gloves and goggles, and protect drains. Start with warm soapy water, soften the paint, and gently lift with a plastic scraper and soft brush, reapplying solvent as needed; finish by rinsing and polishing with a microfiber cloth. Keep going to learn safer techniques and troubleshooting.
Quick Plan: Remove Dried Paint From a Fiberglass Tub
Start by evaluating the paint: scrape away any loose flakes with a plastic putty knife, then test a small, hidden area with your chosen remover or solvent to make sure it won’t damage the fiberglass finish.
Next, gather mild solvent, soft cloths, plastic scraper, and protective gloves.
Follow gentle paint removal techniques, rinse thoroughly, and keep these fiberglass maintenance tips for routine care and prevention.
Assess the Paint: Why Type Matters for Fiberglass
Before you start, identify whether the paint is water-based or oil-based since solvent choice and technique depend on it.
Check how old the paint is — fresh splatters come off much easier than paint that’s cured for months.
Also note the tub’s surface finish (glossy or textured) because that affects how aggressive you can be without damaging the fiberglass.
Identify Paint Type
1 key step is figuring out what kind of paint you’re dealing with, because the remover and technique that’ll work on latex won’t necessarily work on enamel or oil-based finishes.
You’ll use simple paint identification methods: solvent tests (water for latex, alcohol or mineral spirits for others) and visual clues.
Knowing type ahead reduces paint removal challenges and prevents damage to your fiberglass.
Check Paint Age
Now that you know what kind of paint you’re dealing with, check how long it’s been on the tub—age affects adhesion and how stubborn the paint will be to remove.
Older coatings bond harder; newer drips often lift with mild solvents or gentle scraping.
Estimate paint lifespan from project date, consider previous cleaning frequency, and choose removal methods accordingly to avoid damaging the fiberglass.
Note Surface Finish
Because the paint’s finish—glossy, semi-gloss, satin, or flat—changes how it adheres and how aggressive your removal can be, take a close look and feel the surface before you pick a method.
Consider finish to avoid damage and plan surface protection and finish restoration.
- Glossy: tougher adhesion, gentler solvents first
- Satin/semi-gloss: moderate approach, test small area
- Flat: may lift easily, watch for staining
How To Test If Paint Is Latex, Acrylic, or Oil-Based
You can start by gently scratching a small, inconspicuous area to see how the paint layer responds.
Wipe the spot with rubbing alcohol—latex and acrylic will soften or come off, while oil-based paint usually won’t.
If alcohol does nothing, try a dab of mineral spirits or paint thinner on a hidden area to confirm an oil-based finish.
Scratch Test Surface
Start by picking a small, inconspicuous spot and gently scratching the dried paint with a fingernail or a plastic scraper to see how it responds. This quick surface test helps you tell whether the finish is latex/acrylic (which will often lift or curl) or oil-based (which tends to stay hard and chip).
- Note lift or curl for latex/acrylic.
- Check scratch durability.
- Record results for surface testing.
Solubing Alcohol Wipe
If a small scratch didn’t give you a clear answer, grab a cotton ball or white cloth, dampen it with rubbing alcohol, and wipe a discreet patch of the dried paint—latex and acrylic will usually soften or smudge, while oil-based paints stay intact. This quick solvent effectiveness check helps determine paint compatibility before choosing removal methods.
| Test | Result | Next step |
|---|---|---|
| Alcohol wipe | Smudges | Use water-based remover |
| Alcohol wipe | No change | Try oil tester |
| Alcohol wipe | Partial | Repeat test |
Oil-Based Solvent Spot
Apply a small amount of mineral spirits or acetone to a cotton swab and rub a hidden patch of the dried paint to see how it reacts—oil-based paints will soften or lift, while latex and acrylic will resist or smear differently.
Test results guide your next step; follow solvent safety and ventilate the area.
- Observe texture change
- Note residue behavior
- Proceed with appropriate remover
When To Hire a Pro for Fiberglass Paint Removal
Sometimes the job is beyond what you can safely or effectively tackle yourself—call a professional if the paint covers large areas, multiple layers, or if the bathtub has cracks, faded gelcoat, or delicate finishes that could be ruined by aggressive removal.
You should hire professional services when damage risk is high, you lack tools, or time.
Get quotes, check reviews, and weigh cost considerations before deciding.
Wear Safety Gear and Ventilate Properly
Put on proper protective gear and open windows before you start—removing dried paint can release dust, fumes, and solvent vapors that irritate your skin, eyes, and lungs.
Follow simple safety precautions and ventilation tips so you work confidently and reduce risks:
- Wear gloves, goggles, and a respirator rated for solvents.
- Use fans to push fumes outside.
- Take breaks to avoid prolonged exposure.
Tools and Cleaners for Fiberglass Paint Removal
You’ll want a few key tools on hand: soft-bristle brushes to avoid scratching the gelcoat, plus cloths and a plastic scraper for gentle work.
Try mild solvent options first—like rubbing alcohol or a citrus-based remover—and test in an inconspicuous spot.
Don’t forget protective gear essentials: gloves, eye protection, and good ventilation while you work.
Soft-Bristle Brushes
Soft-bristle brushes are one of the gentlest tools you can use to lift paint flakes and loosen softened residue without scratching fiberglass.
You’ll appreciate soft bristle benefits for delicate surfaces and simple cleaning techniques that avoid damage. Use them to gently agitate loosened paint, rinse debris, and follow up with cloth drying:
- Sweep loosened flakes
- Agitate softened spots
- Rinse and blot dry
Mild Solvent Options
When mechanical methods can’t remove all the dried paint, mild solvents give you a controlled chemical option that won’t harm fiberglass when used correctly.
You can try rubbing alcohol, acetone sparingly, or citrus-based eco friendly solvents for small spots.
Test a hidden area first, apply with a soft cloth, and rinse thoroughly.
Consider alternative methods if residue persists.
Protective Gear Essentials
Although you might be tempted to plunge in with just a rag, you should gear up properly: safety glasses, chemical-resistant gloves, and a respirator rated for organic vapors will protect you from splashes and fumes while you work on removing paint from fiberglass.
Follow basic safety precautions and wear protective clothing.
Essential items:
- Goggles and respirator
- Chemical-resistant gloves
- Long sleeves and apron
Protect Drains, Fixtures, and Surrounding Surfaces
Before you start scraping or applying solvents, cover drains, fixtures, and any nearby surfaces so paint and chemicals can’t cause damage.
Use tape and plastic or cloth for drain protection and fixture safeguarding, masking exposed hardware.
Extend surface covering to walls and floor.
This area preparation prevents stains, chemical contact, and accidental scratches, keeping cleanup simpler and protecting finishes while you work.
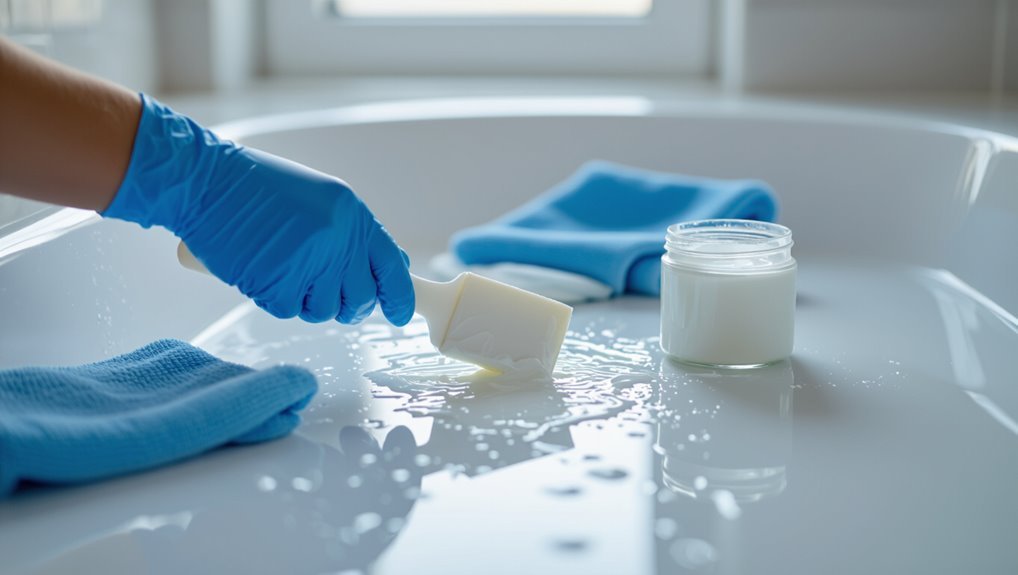
Start With Warm Soapy Water and a Soft Cloth
Once drains and fixtures are protected, grab a bucket of warm water mixed with a few drops of mild dish soap and a soft cloth or sponge.
You’ll gently loosen fresh paint without harming the finish, using basic cleaning techniques and simple maintenance tips.
- Wring cloth to avoid drips
- Work in small sections
- Rinse and inspect frequently
Use a Plastic Scraper to Lift Dried Paint From Fiberglass
Grab a plastic scraper and work gently along the paint edges to lift flakes without scratching the fiberglass.
Use short, controlled strokes and keep the blade flat to avoid gouges.
Use short, controlled strokes, keeping the blade flat to prevent gouges and protect the surface.
Pause to wipe debris away and inspect progress.
This basic paint removal technique complements other paint removal techniques and supports proper fiberglass care, preserving finish while you remove remaining spots carefully.
Soften Water-Based Spots With White Vinegar
If the paint is water-based, mix equal parts white vinegar and warm water to soften the spots.
Apply the solution and let it sit for 10–20 minutes, checking periodically so you don’t over-soak the fiberglass.
Rinse the area, repeat as needed, and wipe dry between attempts.
Vinegar And Water Ratio
A simple 1:1 mix of white vinegar and warm water usually softens water-based paint spots on fiberglass without harming the finish; use a spray bottle or a soft cloth to apply, let it sit for 5–10 minutes, then gently rub to lift the paint.
- Note vinegar benefits: mild, nonabrasive cleaner.
- Adjust water temperature to warm, not hot.
- Rinse and repeat if needed.
Application Timing Tips
When you’re ready to treat water‑based paint spots with the vinegar solution, apply it while the surface is at room temperature so the acid can penetrate without evaporating too quickly.
For proper surface preparation, wipe away dust and loose debris, then test a small hidden area.
Time your application for low humidity and minimal breeze to maximize dwell time and effective application timing.
Rinse And Repeat
Start by rinsing the area with warm water to remove loose paint and loosened residue. Then apply white vinegar to the remaining water‑based spots and let it sit for 5–10 minutes so the acid can soften the paint.
Then:
- Gently scrub with a soft cloth, testing paint removal techniques on a small area.
- Rinse thoroughly to protect fiberglass care.
- Repeat until spots lift, avoiding harsh abrasives.
Dissolve Thin Paint With Rubbing Alcohol (IPA)
You can often dissolve thin, water-based paint with isopropyl rubbing alcohol (IPA) without damaging fiberglass; dampen a clean cloth, press gently, and let it sit a minute.
You’ll rub in small circular motions, rewetting as needed. This paint removal method’s gentle cleaning techniques work well for light spots—always test an inconspicuous area first and ventilate the room.
Use Acetone or Nail Polish Remover on Oil-Based Paint
Reach for acetone or a non-acetone nail polish remover containing acetone to tackle oil-based paint spots on fiberglass, since acetone dissolves tough alkyd and enamel paints more effectively than water-based solvents.
You should:
- Test a small hidden area first and use gloves for safety precautions.
- Apply with a soft cloth, rub gently, rinse frequently.
- Use paint removal techniques cautiously to avoid finish damage.
When a Commercial Fiberglass-Safe Remover Is Worth It
When DIY solvents haven’t budged stubborn paint or you’re worried about damaging the tub’s gel coat, it’s worth using a commercial fiberglass-safe remover.
These products are formulated to strip paint without etching or discoloring, saving you time and reducing the risk of costly repairs.
You’ll choose commercial alternatives when speed, safety, and cost effectiveness outweigh DIY attempts—just follow instructions and test a small area first.
Choose a Fiberglass-Safe Solvent: Labels to Trust
Before you grab anything, read the product label carefully to confirm it’s designed for fiberglass surfaces.
Choose cleaners that explicitly state “fiberglass safe” or list non-abrasive, non-reactive ingredients.
Steer clear of harsh solvents like acetone or methylene chloride that can etch or discolor the tub.
Read Product Labels Carefully
1 key step is to read product labels carefully so you pick a solvent that’s safe for fiberglass and effective on the paint type you have.
You should check ingredients, warnings, and directions to match paint removal techniques and guarantee product effectiveness.
- Look for listed compatible surfaces.
- Note required dwell times.
- Verify ventilation and PPE recommendations.
Look For “Fiberglass Safe”
Pick a solvent that specifically says “fiberglass safe” on the label so you won’t damage the tub’s gel coat while removing paint.
You should trust products labeled for fiberglass care and look for manufacturer guidance or certifications.
Test a small area, follow directions, and keep ventilation good.
Choosing the right solvent helps paint prevention by reducing the need for aggressive follow-up treatments.
Avoid Harsh Solvents
When removing dried paint from a fiberglass tub, don’t reach for strong solvents that can etch or cloud the gel coat; instead, choose products labeled “fiberglass safe” or “for gel coat” so you protect the surface while dissolving paint.
Use tested, gentle cleaners and consider eco friendly options or alternative methods:
- Water-based paint removers rated for gel coat
- Citrus or soy-based solvents
- Mechanical removal with plastic tools
Patch-Test Any Remover on an Inconspicuous Spot
Before you use any solvent or commercial remover on the tub, test it on an out-of-the-way spot like behind the faucet or under the tub lip so you can confirm it won’t damage the finish. You’ll try simple patch test techniques on inconspicuous areas, wait, inspect, and proceed only if no discoloration or softening appears.
| Spot | Remover | Result |
|---|---|---|
| Behind faucet | Rubbing alcohol | OK |
| Under lip | Acetone-free | Faint |
| Floor edge | Citrus remover | Safe |
Use Heat Safely (Hair Dryer or Heat Gun Without Warping)
Keep the heat source at least 6–8 inches from the fiberglass and move it in a steady, sweeping motion to avoid hotspots.
Use low to medium heat settings and test a small area first so you don’t soften or warp the surface.
Cover nearby fixtures, caulk lines, and tiles with a heat-resistant cloth or cardboard to protect surrounding surfaces.
Safe Heat Distance
Because fiberglass can warp from concentrated heat, hold a hair dryer or heat gun several inches away and keep it moving so you don’t overheat one spot.
You should treat all heat sources with care and follow safety precautions. Aim for consistent motion and distance:
- Maintain 4–8 inches and sweep evenly.
- Monitor surface feel; stop if it softens.
- Wear gloves and eye protection.
Temperature Control Tips
Now that you’ve covered safe distances and motion, focus on precise temperature control to heat paint without warping the fiberglass. You’ll use temperature regulation: keep heat low, move constantly, and test in small areas. Control heat application time and distance to soften paint, then scrape gently.
| Tool | Setting |
|---|---|
| Hair dryer | Low/medium |
| Heat gun | Low |
| Test area | 5–10s |
Protect Surrounding Surfaces
When you apply heat to soften dried paint, protect nearby tiles, fixtures, and grout with heat-resistant materials so they don’t discolor or warp; drape a silicone mat or heavy-duty cloth over surfaces and tape down edges to shield them from stray warmth.
You should also use safe cleaning techniques and surface protection to avoid damage:
- Keep heat moving; don’t linger.
- Test low settings first.
- Ventilate the area.
Remove Stubborn Paint With Fine Abrasive Pads Safely
Scrub gently with a fine abrasive pad to lift stubborn paint without scratching the fiberglass surface.
Scrub gently with a fine abrasive pad to lift paint—use light pressure to avoid scratching the fiberglass surface.
Wear gloves and eye protection, work in short strokes, and keep the pad wet to reduce abrasion—follow abrasive pad safety guidelines.
Test a hidden spot first, use moderate pressure, and switch pads if clogging occurs.
Combine with solvent-soaked cloths for effective paint removal techniques without damaging the tub.
Buff and Polish Small Areas After Paint Removal
Finish the job by buffing and polishing the small area to restore the gloss and blend the repair into the rest of the tub.
Use gentle buffing techniques and suitable polishing products, then:
- Work in small circular motions with a soft pad.
- Wipe residue with a microfiber cloth to check progress.
- Apply a final polish layer sparingly and buff to a matched sheen.
Repair Minor Scratches or Dull Spots on Fiberglass
After buffing and matching the sheen, you may still spot light scratches or dull patches that need targeted repair.
For scratch repair, clean the area, sand very gently with fine grit, then apply a polishing compound.
Use microfiber and circular motions for surface polishing until the finish blends.
Finish with a protective sealant and let cure to restore uniform gloss and prevent further wear.
Remove Paint From Caulk, Grout, and Metal Fixtures
Before you start, cover nearby tile and fixtures so stray solvent or scrubbing won’t cause more damage.
Choose a mild, paint-safe solvent that won’t eat caulk or metal, testing it first in an inconspicuous spot.
Use soft brushes or nylon pads and gentle pressure to lift paint without gouging grout or scratching fixtures.
Protect Surrounding Surfaces
When working near caulk, grout, and metal fixtures, protect them first so paint removal doesn’t create more damage; you’ll want to isolate each area and choose methods that won’t harm the material.
Use surface protection techniques and surrounding area precautions to limit risk.
- Mask edges with painter’s tape.
- Cover fixtures with plastic.
- Test a tiny patch before proceeding.
Safe Solvent Selection
Now that you’ve protected edges and fixtures, pick solvents that remove paint without harming caulk, grout, or metal.
Test solvent types on a hidden spot first—water-based removers, citrus-based gels, and rubbing alcohol often work safely.
Avoid harsh methylene chloride or strong alkalis near seals.
Consider eco-friendly options for indoor use; ventilate well and rinse surfaces promptly to prevent residue damage.
Gentle Scrubbing Techniques
Start by softening the paint with your chosen solvent and let it sit just long enough to loosen without soaking the caulk or metal; then use a soft-bristled brush, a plastic scraper, or a cotton swab to lift the paint gently, working from the edges inward to avoid driving pigment into grout lines or under fixture seals.
- Use gentle tools to avoid damage.
- Target grout with a cotton swab.
- Rinse and repeat with effective methods.
Handle Large Flakes and Peeling Finishes
Assess the damage first so you know whether you’re dealing with loose flakes you can remove yourself or an underlying finish that’s failing.
If flakes lift easily, gently pry them with a plastic scraper, keeping paint adhesion issues and fiberglass care in mind.
Clean residue with mild detergent, rinse, and dry.
If peeling is extensive, stop and consult refinishing guidance to avoid worsening the tub.
Strip and Refinish a Heavily Painted Fiberglass Tub
Strip the old paint carefully and refinish the tub only when the damage is extensive enough that simple touch-ups won’t hold; you’ll save long-term headaches by doing a full strip when paint is thick, flaking widely, or bonded unevenly.
- Use proper Refinishing Techniques: chemical stripper or sanding, follow instructions.
- Prioritize Surface Preparation: clean, degrease, sand to feather edges.
- Apply compatible primer and topcoat, curing between coats for durable results.
Prevent Paint Mishaps During Bathroom Projects
Before you reach the point of stripping and refinishing, take practical steps to prevent paint mishaps during bathroom projects so you won’t have to repair or refinish later.
Plan paint preparation carefully: test products, use appropriate primers, and limit splatter. Protect fixtures and caulk edges.
Maintain strict workspace organization, cover drains, ventilate, and keep cleaning supplies handy so small mistakes don’t become major fixes.
Time and Cost Estimates for Common Removal Methods
Often you’ll find that the time and cost to remove dried paint from a fiberglass tub varies widely by method, so plan based on the size of the job and the materials involved.
You’ll want a quick cost analysis and focus on time efficiency when choosing a technique:
- Simple scrubbing: low cost, moderate time.
- Chemical remover: higher cost, faster.
- Professional service: highest cost, minimal time.
Troubleshooting: Common Problems and Mistakes to Avoid
Mistakes happen, but catching them early will save your tub — and your time.
Check solvent compatibility first; don’t scrub with metal tools that scratch fiberglass. Test a small area, wear gloves, and ventilate.
Test solvents first; avoid metal scrubbing on fiberglass, try a small patch, wear gloves, and ventilate well.
If paint softens unevenly, reapply gentle remover rather than force.
These paint removal tips help avoid common pitfalls like surface damage, staining, or spreading residue during cleanup.
Dispose of Paint Chips and Solvents Responsibly
How will you get rid of paint chips and leftover solvents without harming yourself or the environment?
Follow safe paint disposal steps, use eco-friendly solvents when possible, and keep waste contained.
- Bag chips in sealed containers labeled hazardous.
- Take solvents to a household hazardous waste drop-off; don’t pour down drains.
- Recycle empty cans per local rules and document disposal for compliance.
Quick Checklist: Step-By-Step Plan to Remove Dried Paint From Fiberglass
Start by gathering your tools and safety gear so you can work efficiently and protect yourself: rubber gloves, safety goggles, a soft plastic scraper, microfiber cloths, denatured alcohol or an appropriate paint remover for fiberglass, a spray bottle, and a small bucket of warm soapy water.
Work methodically: test remover, soften paint, scrape gently, clean residue, rinse, dry.
Follow paint removal techniques and cleaning safety at each step.
Frequently Asked Questions
Can Dried Paint Release Toxic Fumes When Mixed With Solvents?
Yes — you can inhale harmful fumes if dried paint contains toxic pigments or binders and you mix it with solvents; prioritize paint toxicity info, guarantee solvent safety by ventilating, wearing respirators, and using low-VOC products.
Will Paint Removal Void My Bathtub Manufacturer’s Warranty?
Yes — you might: like walking a tightrope, you’ll risk voiding the paint warranty if you ignore manufacturer guidelines. Always check manufacturer guidelines first, follow their instructions, and document approved paint removal to protect your warranty.
Can Painted Fiberglass Develop Invisible Microcracks From Scraping?
Yes — you can create microcrack formation when scraping painted fiberglass; you’ll compromise fiberglass durability if you use aggressive tools or solvents, so work gently, test a small area, and favor plastic scrapers and mild removers.
How Do I Remove Paint From a Textured Fiberglass Surface?
Use gentle scraping, use chemical strippers, use fine sanding—start small, test first, protect finishes. You’ll use paint removal techniques suited for textured surfaces: soften paint, work with texture, rinse frequently, and avoid aggressive abrasives that gouge.
Can I Use Automotive Polish to Restore Gloss After Removal?
Yes — you can use automotive polish; it offers automotive polish benefits like cutting minor scratches and boosting gloss, so you’ll effectively restore bathtub shine on fiberglass after paint removal while using gentle pads and testing compatibility first.
Conclusion
You’ve got this—start by identifying the paint type, then gently test removers on a hidden spot so you don’t harm the tub’s finish. Use nonabrasive tools and the gentlest solvent that works; call a pro if the paint’s stubborn or the gelcoat’s damaged. Wear gloves and ventilate like it’s the age of sail with a window flung open, and dispose of waste properly. Follow the step-by-step checklist and your fiberglass tub will look fresh again.