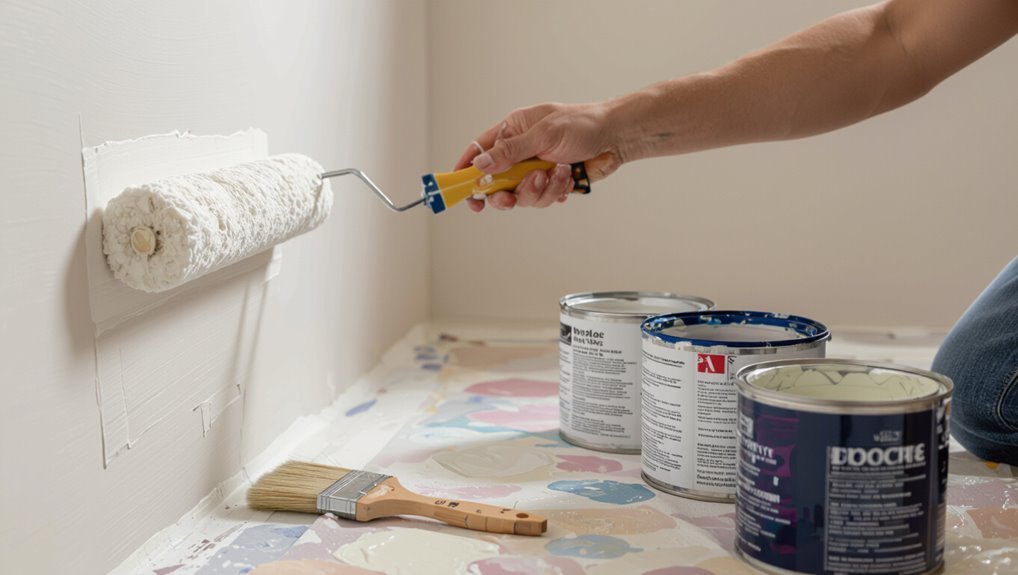
What Paint to Use on Latex Painted Surfaces
You can usually repaint latex with latex paint because the binders match and adhesion is best, but you’ll want to clean, scuff-sand glossy areas, and use a primer if the old finish is damaged, chalky, or oil-based. Oil or alkyd can be applied after thorough sanding and a bonding primer for stain resistance, while hybrids sit between with less prep. Pick sheen for use—satin for walls, semi-gloss for trim—and keep curing times in mind if you want more detail on prep and product choices.
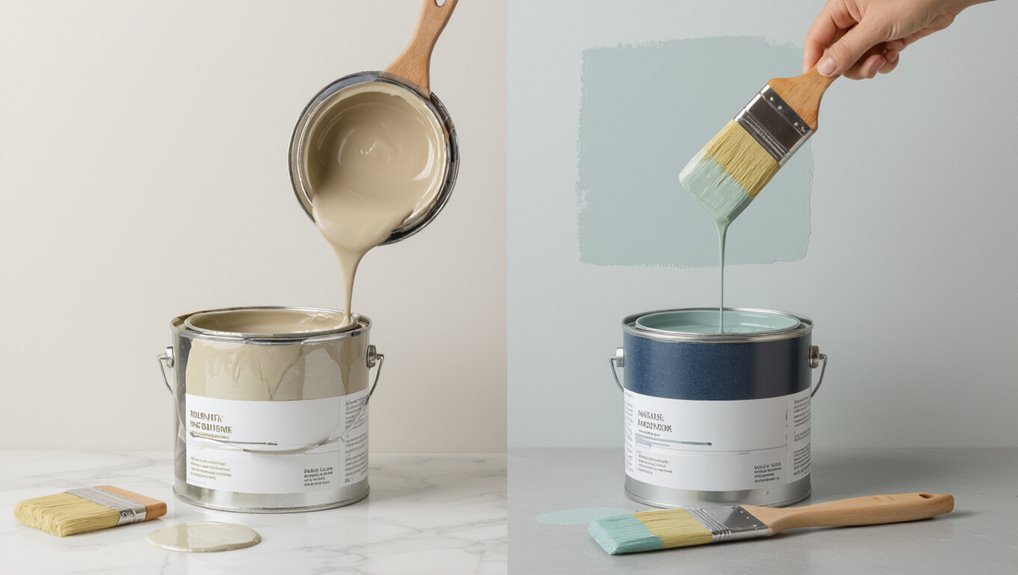
Quick Answer: Can You Repaint Latex With Latex, Oil, or Hybrid?
Can you repaint latex with latex, oil, or a hybrid? You can usually repaint latex with latex for easiest adhesion; that’s the safest latex paint compatibility option.
Oil can work after proper sanding and a bonding primer. Hybrids offer moderate flexibility and fewer prep steps.
Follow these repainting tips: clean, sand glossy areas, prime when switching bases, and cure fully between coats.
How to Use This Guide to Choose the Right Product
Start by inspecting the existing surface for sheen, adhesion, and any damage so you know what prep it needs.
Then match the paint type—latex, oil, or a hybrid—to the condition and desired finish to guarantee compatibility.
Use the guide’s quick checks and recommendations to pick a product that’ll stick and perform.
Assess Existing Surface
Before you pick a paint, inspect the existing latex surface so you know what you’re working with and which products will bond and perform best.
Check surface condition: look for peeling, chalking, mildew, or glossy finishes.
Test adhesion with tape.
Note previous coatings and substrate type to judge paint compatibility.
Clean, sand, or prime only as needed to guarantee proper adhesion and longevity.
Match Paint Type
When choosing paint for a latex surface, match the product to the substrate, existing coating, and the room’s conditions so you’ll get durable adhesion and the finish you want.
Check latex paint compatibility with primers and cleaners, choose paint finish types appropriate for moisture and traffic, and pick durable formulations.
Test a small area to confirm adhesion and color before committing to the whole job.
Confirm the Existing Finish Is Latex (Simple Tests)
Before you pick new paint, make sure the current finish is latex by doing a few quick checks.
Scrape a small, inconspicuous area with a putty knife, perform a soap test (rub soapy water on the surface to see if it softens), and note the paint sheen—latex often has a consistent, even finish.
These simple steps will tell you whether you can proceed with latex-compatible products.
Scrape A Small Area
Grab a razor or putty knife and gently scrape a small, inconspicuous spot to see what flakes off—latex finish will peel away in flexible, slightly gummy flakes, while oil-based paint chips off in hard, brittle pieces.
This quick check guides your surface preparation and guarantees paint compatibility; if flakes are flexible, you can proceed with latex-focused prep, sanding, and cleaning before recoating.
Perform A Soap Test
If you’re unsure whether the existing finish is latex, perform a quick soap test: mix mild soap solution and water, dampen a cloth, and rub a small, inconspicuous area.
If paint softens, becomes tacky, or comes off, it’s likely latex.
This simple surface testing method’s quick result helps you decide whether to proceed with latex-compatible primers and paints.
Check Paint Sheen
Curious how shiny your paint is? Check sheen variations by wiping a small area and observing light reflection at different angles.
Matte hides glare; satin, eggshell, semi-gloss, and gloss show increasing shine. If light reveals a smooth, reflective surface, it’s likely latex with a glossier finish.
Note results before repainting so you pick compatible paint and prep correctly.
Decision Checklist: When to Choose Each Paint Type
Choosing the right paint for latex surfaces comes down to a few practical factors you can check quickly: surface condition, desired durability, finish, exposure to moisture, and whether you need fast recoat times.
Decide based on paint compatibility with existing coatings, how much surface preparation you’ll do, room use, and traffic.
Pick water-based for ease, alkyd for stain resistance, or specialized trim paints where needed.
Why Latex-to-Latex Recoats Are Usually Best
When you recoat latex with latex, you get the best adhesion because the binders are compatible, so the finish holds up longer.
You’ll also have an easier time matching colors since latex formulas reflect and tint similarly.
Plus, latex dries faster than many oil or alkyd options, letting you finish jobs sooner.
Best Adhesion Characteristics
Because latex paints share similar polymer bases and drying mechanisms, they chemically and mechanically bond to each other much better than to oil-based or specialty coatings.
You’ll get stronger, more flexible films when recoating latex with latex. Use proper surface preparation and simple adhesion techniques—cleaning, scuff sanding, and a compatible primer when needed—to guarantee consistent bonding and long-lasting performance without peeling or cracking.
Easier Color Matching
Good adhesion matters, but color matching is another practical reason to stick with latex-to-latex recoats.
You’ll find paint behaves predictably, letting you use color blending techniques to feather edges and hide undertones.
When you pick new hues, follow clear shade selection tips: test small patches under real light, compare wet and dry results, and adjust tint strength for seamless changes.
Faster Drying Times
If you need a quick turnaround, latex-to-latex recoats usually win because they dry and cure faster than switching to oil-based products.
You’ll get fast drying under ideal conditions—low humidity, moderate temperature, and good ventilation. That means you can recoat sooner, finish projects faster, and reduce downtime.
Stick with compatible latex for predictable dry times and fewer adhesion surprises.
When to Choose Water‑Based Latex: Pros and Limits
When you need a low-odor, fast-drying finish that’s easy to clean up, water-based latex is usually the smarter choice; it works well for most interior walls, ceilings, and trim and lets you repaint sooner because it dries and cures faster than oil-based alternatives.
You’ll appreciate water-based advantages like low VOCs and easy cleanup, but note latex limitations: less toughness on high-wear surfaces.
When to Consider Oil‑Based or Alkyd Paints
If oil-based or alkyd paint is on the table, it’s usually because you need something tougher than latex can provide.
You’ll reach for oil when it burns through a latex finish, when you need a product that bonds to slick, previously painted latex, or when a high-wear surface demands extra durability.
Before switching, check compatibility and prep requirements so the new coat actually adheres and performs.
When Oil Burns Through
Because oil-based finishes can bleed through latex, you’ll want to recognize the signs—yellowing, dark patches, or a tacky surface—so you can choose an oil or alkyd product that blocks stains and bonds to the old coating.
If you see burn-through, assess oil paint compatibility and do proper surface preparation: clean, degloss, and prime with a stain-blocking primer before applying alkyd or oil paint.
Bonding To Slick Latex
Although latex paints generally adhere well, slick, glossy latex surfaces can repel new coatings and make adhesion unreliable.
So you’ll need to evaluate whether an oil-based or alkyd product is the safer choice. You should test adhesion, sand or degloss for proper surface preparation, and clean thoroughly.
When sanding isn’t possible, oil/alkyd primers or specific adhesion techniques will bond reliably to glossy latex.
High‑Wear Durability Needs
Durability matters when surfaces take daily abuse—trim, doors, cabinets, and high-traffic walls—so you should consider oil-based or alkyd paints for those jobs because they resist scuffs, clean easily, and hold up longer than most waterborne latex options.
For high traffic areas, prioritize proper surface preparation: clean, sand, prime and guarantee adhesion.
Choose oil/alkyd for longevity and easy maintenance.
What Acrylic‑Latex Hybrids Offer vs. Straight Latex
If you want paint that blends the easy cleanup of latex with improved adhesion and weather resistance, acrylic‑latex hybrids deliver that middle ground.
You’ll get acrylic benefits like better film strength and UV resistance while keeping latex’s low odor and water cleanup.
Hybrid formulations often resist chalking and hold color longer than straight latex, making them a practical choice for exterior and high‑traffic areas.
Best Sheen for Latex-Painted Walls and Trim
For walls, you’ll usually pick an eggshell or satin latex sheen because it hides imperfections while still being washable.
For trim, you’ll want a higher gloss—semi‑gloss or gloss—so it’s durable and easy to clean.
Next, we’ll compare appearance, durability, and where each sheen works best.
Best Sheen For Walls
When choosing a sheen for latex-painted walls and trim, consider how much light the room gets and how often surfaces will need cleaning.
You’ll balance durability and appearance; sheen selection affects washability while texture impact hides imperfections.
Choose:
- Matte — hides flaws, low sheen.
- Eggshell — subtle, scrubbable.
- Satin — durable, easier to clean.
Best Sheen For Trim
Which sheen should you pick for trim to balance durability and appearance?
You’ll usually choose semi-gloss or gloss for trim sheen options because they resist scuffs and wipe clean easily. These sheens highlight details and reflect light, so they need careful prep.
If you want subtler shine, use satin sparingly.
Prioritize finish durability in high-traffic areas for long-lasting results.
Interior vs. Exterior Latex Products: What to Pick
Wondering whether to grab interior or exterior latex paint? You’ll choose based on use and exposure. Consider:
- Interior considerations: low odor, easier cleanup, scuff resistance for walls.
- Exterior durability: UV, moisture, and temperature resistance for siding and trim.
- Match the product to location—don’t swap outside paint indoors or vice versa for best performance.
Primer Basics: When to Skip Primer and When to Prime
If the surface is clean, previously painted with the same sheen, and in good condition, you can often skip primer and go straight to latex paint; prime instead when you’re covering bare wood, staining, drastic color changes, or patched areas that’ll show through. Choose primer types by substrate; follow proper primer application to guarantee adhesion and uniform finish.
| Situation | Recommended Primer | Notes |
|---|---|---|
| Bare wood | Oil-based | Seals tannins |
| Dark color | High-hide | Prevents bleed |
| Repairs | Latex bonding | Smooths texture |
Best Bonding Primers for Glossy or Slick Latex
When you’re painting over glossy or slick latex, pick a bonding primer designed to adhere to nonporous surfaces so your topcoat won’t peel or flake.
Use quality bonding agents and proper surface preparation.
Consider these options:
- Shellac-based primer — fast adhesion and stain blocking.
- Acrylic bonding primer — flexible, water-resistant.
- Epoxy bonding primer — extreme durability for high-wear areas.
Prep Checklist That Makes New Paint Stick
Before you touch a brush, get the surface clean, dry, and smooth so the primer and paint can bond properly.
Check for peeling, chalking, or mildew and remove contaminants. Fill cracks, sand rough edges, and wipe dust.
Use appropriate surface preparation products and follow adhesion techniques like primer selection and tack-free timing.
Inspect once more before painting.
How to Sand, Degloss, and Clean Latex Surfaces
You’ve prepped the surface, so now focus on sanding, deglossing, and cleaning to create the right texture and remove residues that block adhesion.
- Use fine-grit sandpaper and proper sanding techniques to dull gloss without damaging edges.
- Apply deglossing methods (chemical or scuffing pads) where sanding isn’t ideal.
- Clean with TSP substitute, rinse, and dry thoroughly before priming or repainting.
Spot Repairs: Matching Sheen and Paint Type
If a small area needs touch-up, match both the paint type (latex vs. alkyd) and the sheen to make the repair disappear; using the wrong base or finish will leave visible edges or inconsistent light reflection.
Test sheen matching by applying a tiny patch, let it fully cure, and compare under natural light.
Verify paint compatibility and use identical formulation for seamless blending.
Handling Stains, Tannin Bleed, and Water Damage
When stains, tannin bleed, or water damage show up on latex-painted surfaces, you’ll need to identify the source first so you can stop further staining and choose the right remediation steps; organic stains (like tannins from wood or rust) and water discoloration each demand different primers and prep.
- Clean and test for stain removal and assess surface preparation.
- Use a shellac or oil-based stain-blocking primer for tannin prevention.
- Repair leaks, dry thoroughly, then seal and prime against water damage.
Application Methods: Brush, Roller, and Sprayer
Though the right paint matters, your choice of application—brush, roller, or sprayer—largely determines the finish, speed, and cleanup.
So pick the method that fits the surface, your skill, and the job size. You’ll use Brush techniques for edges and detail, Roller application for flat areas, and Sprayer efficiency for large or intricate surfaces.
Prioritize Surface preparation to guarantee adhesion and uniform coverage.
Drying Times, Recoats, and Ventilation Tips
Because drying depends on temperature, humidity, and paint thickness, you should expect latex to feel dry to the touch in 30 minutes to an hour but need 2–4 hours before recoating under typical indoor conditions.
- Check drying conditions: warmer, low humidity speeds curing.
- Plan recoats accordingly; test a small patch first.
- Use ventilation strategies: open windows, fans, and avoid high humidity for best results.
Durability and Maintenance by Paint Type
After you’ve allowed proper drying and recoating, consider how different latex formulations hold up over time and what upkeep they need. You’ll evaluate paint longevity and surface compatibility: higher-gloss latex cleans easier and resists scuffs; flat finishes hide imperfections but need touch-ups. Use appropriate cleaners and gentle abrasion when needed.
| Finish | Maintenance |
|---|---|
| Gloss | Wipe, less touch-up |
| Satin | Mild cleaning |
| Flat | Frequent touch-ups |
Common Mistakes When Painting Over Latex
If you rush into repainting without proper prep, you’ll encounter common problems like poor adhesion, visible brush marks, and peeling.
You should avoid common misconceptions and improper preparation.
Follow these quick tips:
- Sand and clean surfaces thoroughly.
- Use a bonding primer when switching sheens or to oil-based.
- Allow full drying time between coats to prevent lifting and streaks.
Cost, VOCs, Cleanup, and Environmental Tradeoffs
Good prep saves you from many painting headaches, but you also need to weigh practical and environmental factors before choosing products.
Do a cost analysis: cheaper paints may increase coats and labor.
Consider VOCs and environmental impact; low-VOC or water-based options cost more but cut fumes and disposal issues.
Plan cleanup with biodegradable cleaners and recycle leftover cans to minimize harm.
Frequently Asked Questions
Can I Repaint Latex Cabinets Without Removing Hardware and Doors?
Yes — you can repaint without removing hardware and doors if you focus on cabinet preparation: clean, sand, and degrease surfaces. That’ll improve paint adhesion, and you’ll avoid drips by taping and working carefully.
Will Wallpapered Latex Walls Accept New Latex Paint Directly?
Yes—you can paint over some wallpaper, but you’ll want surface preparation techniques like cleaning, sanding, and priming; ideally follow wallpaper removal tips first, since loose seams or vinyl covers will prevent proper adhesion and finish.
How Do I Handle Lead Paint Under Old Latex Layers?
You should assume lead paint safety matters: test using EPA-approved testing methods or a certified lab, don’t sand or scrape dry, contain and wet-clean work, and hire certified abatement pros if tests confirm hazardous lead.
Can I Paint Over Latex With Specialty Paints (Chalk, Milk, Metallic)?
You can—just prep first. Don’t worry about extra sanding; a light scuff and quality primer usually fixes it. Chalk paint application works after priming, and milk paint adhesion improves with a bonding primer before finishing.
Is It Okay to Use Tinted Primers Over Colored Latex Without Test Patches?
You shouldn’t—tinted primer advantages include better coverage and fewer coats, but you’ll want test patches to confirm latex paint compatibility and color shift; otherwise you risk uneven tint response, adhesion surprises, or unexpected final hues.
Conclusion
In most cases, stick with latex over existing latex—it’s easy, fast-drying, and forgiving. If you’re switching to oil or a hybrid, prep carefully: confirm the current finish, sand or degloss, and use the right primer. For example, when Jess repainted her living room latex over latex, she skipped heavy sanding, spot-primed glossy trim, and finished in a weekend with minimal odor. That simple prep saved time and prevented adhesion problems down the road.