What Makes Acrylic Paint Dry Slower? Easy Methods
You can slow acrylic paint by controlling evaporation and film formation: add a small amount of retarder or a slow-drying gel medium, keep mixes on a stay-wet palette, mist lightly from 12–18 inches, and cover puddles between sessions. Raise indoor humidity a bit, lower temperature slightly, and avoid direct drafts or strong airflow. Use thicker layers sparingly and test mixes for archival safety. Keep these simple tweaks in mind and you’ll find more tips and setup ideas ahead.
Who This Guide Is For and What You’ll Learn
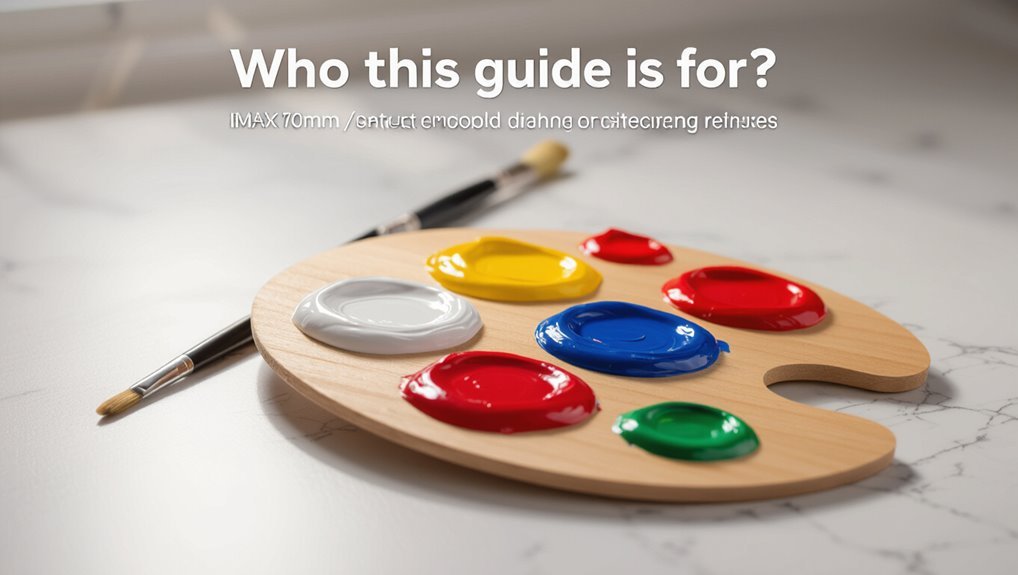
Whether you’re a hobbyist trying to speed up weekend projects or a professional aiming for consistent studio results, this guide walks you through practical acrylic paint drying methods and when to use each one.
You’ll learn to tackle drying challenges, apply artist techniques for paint layering, factor environmental factors into workflows, run drying experiments, refine color mixing, and adopt creative solutions that fit your process.
Quick Answer: Ways to Slow Acrylic Paint Drying
If you want acrylics to stay workable longer, try mixing in slower-drying mediums, raising the room’s humidity, or using an open palette to keep paint moist.
These simple changes let you blend and rework without the paint skinning over.
Pick the approach that fits your workflow and tools.
Use Slower-Drying Mediums
When you need more working time, slower-drying acrylic mediums are the simplest way to extend open time without changing your paint handling; they thin the paint slightly, reduce evaporation, and keep pigments workable longer so you can blend, glaze, or rework edges.
Use glazing medium, open medium, or retarders as practical slow drying techniques—measure carefully, mix gradually, and test on scrap before committing.
Increase Ambient Humidity
Although raising humidity might feel like an indirect trick, it’s one of the simplest ways to slow acrylics: higher moisture in the air reduces evaporation from the paint film, keeping your layers workable longer so you can blend or glaze without the paint skinning over.
You can use humidifiers, misting, or enclosed spaces as humidity techniques, but monitor moisture balance to avoid mold or sagging.
Work With Open Palettes
Open palettes let you keep paint exposed and accessible so you can slow drying by controlling surface area and airflow—leave larger puddles, mist lightly, or cover sections with damp paper to retain moisture while still mixing freely.
Use open palette techniques to stagger puddle sizes, rotate wet areas, and limit breeze. You’ll extend workable time for color mixing without additives.
How Acrylic Paint Dries: Evaporation and Film Formation
If you look closely at a drying acrylic layer, you’ll see two linked processes at work: water and co-solvent evaporation and the formation of a continuous polymer film from dispersed acrylic particles.
You’ll notice the evaporation process pulls solvents away while film formation bonds particles into a solid layer. You can influence drying by managing airflow, humidity, and surface thickness.
- Control airflow
- Adjust humidity
- Thin layers
Temperature Effects on Acrylic Drying
After you manage airflow, humidity, and layer thickness, temperature becomes the next key factor shaping how acrylics dry: it speeds up or slows evaporation and alters how polymer particles coalesce into a film. You’ll notice temperature variations change tack time and gloss; adjust room warmth to slow drying without affecting humidity levels.
| Warmth | Effect |
|---|---|
| High | Faster |
| Low | Slower |
Humidity’s Role in Slowing Acrylic Drying
When humidity rises, you’ll notice acrylics take much longer to set because moisture in the air slows water evaporation.
Thicker layers are especially affected, so you’ll want to adjust your layering or wait times accordingly.
Improving room ventilation can help pull moisture away and speed drying, so try increasing airflow if you need faster results.
High Humidity Effects
Because humidity slows the water evaporation that sets acrylic paint, you’ll notice your layers stay workable much longer in damp conditions.
You’ll face specific humidity effects and drying challenges that demand patience and minor adjustments.
Consider simple responses:
- Extend open time by misting or using retarder sparingly.
- Use a covered palette to reduce forced drying.
- Monitor mold risk and ventilate gently.
Drying Layer Thickness
Humidity not only lengthens your paint’s open time but also changes how different layer thicknesses dry: thicker applications retain moisture far longer than thin washes, so they stay soft and tacky well after the surface feels dry.
You should consider layer composition when planning drying techniques; dense, impasto strokes need more humid exposure and slower drying strategies, while thin layers cure quicker and require gentler handling.
Room Ventilation Impact
If you leave windows closed and vents off, stale air will trap moisture and slow acrylics’ evaporation.
So you’ll notice longer open times and tackier surfaces. You can manage humidity with targeted ventilation strategies to speed drying or prolong workability, using controlled air circulation to balance drying without cracking.
- Use cross-ventilation for gentle drying
- Add a fan for steady airflow
- Use a humidifier sparingly
How Airflow and Ventilation Change Drying Speed
Although you won’t see it, airflow plays a big role in how fast acrylic paint dries: moving air speeds evaporation by sweeping away solvent-laden vapors and replacing them with drier air at the surface.
You’ll notice airflow impact when you open windows or use fans; simple ventilation strategies like cross-ventilation or gentle directed fans speed drying without disturbing paint, so control airflow.
Paint Thickness: Why Fat Layers Stay Wet Longer
When you apply a thick, “fat” layer of acrylic, the solvent has farther to travel and the surface skin forms faster than the interior can dry.
So the core stays wet much longer; that trapped moisture slows polymer coalescence and keeps the paint tacky until evaporation and diffusion catch up.
- Use fat layering sparingly to control drying techniques.
- Thin in stages to let cores dry.
- Consider retarders or heat for safe acceleration.
Surface Absorbency: Canvas, Wood, and Paper Compared
Different supports pull water and binder from acrylics at very different rates, so you’ll get noticeably different drying behavior on canvas, wood, and paper.
You’ll notice canvas texture offers moderate absorbency levels and texture variation; wood grain soaks faster unless sealed, altering paint adhesion; paper type varies widely.
Proper surface preparation and mindful medium interaction help control drying and adhesion across supports.
Paint Formulation: Binders, Solvents, and Drying Rate
Now consider how the paint itself changes drying: the binder type controls film formation and flexibility, so it affects how quickly the surface sets and how the paint cures.
You’ll also want to watch solvent evaporation rate, because fast-evaporating solvents speed surface dry but can cause skinning or cracking, while slower solvents prolong open time.
Together, binder and solvent choices determine practical drying behavior and how you should work with the paint.
Binder Type Effects
Because binders form the film that holds pigment and solvent together, the type and concentration you choose directly shape how fast an acrylic paint dries and how it behaves as it cures.
You’ll notice binder properties affect tack, hardness, and gloss, influencing acrylic flexibility and finish.
- Higher polymer content = slower, tougher film
- Soft binders = more flexibility
- Crosslinkers = firmer, quicker set
Solvent Evaporation Rate
When you pick solvents for an acrylic formulation, their evaporation rates set the clock for tack time, open time, and how pigments settle, so choosing wisely matters.
You’ll balance solvent types—water, co-solvents, slow esters—to control film formation.
Evaluate evaporation factors like vapor pressure, temperature sensitivity, and airflow.
Adjust blends to lengthen open time without harming adhesion or gloss.
Student vs. Professional Acrylics: What Differs and Why
Two main categories divide acrylic paints—student and professional—and knowing their differences helps you pick the right paint for your goals.
You’ll notice student quality has more fillers, lower pigment load, and faster drying; professional paints suit fine detail, longer open time, and advanced professional techniques.
- Budget-friendly, forgiving
- Higher pigment, better flow
- Suited for gallery work
Pigments and Opacity: Effects on Drying Behavior
When you compare pigments, particle size matters because finer particles generally spread and bind faster than coarse ones.
You’ll also notice that transparent colors dry differently than opaque ones, often appearing tacky longer as the medium evaporates.
And when you load a brush with heavy pigment, drying slows and the surface can stay softer, so you’ll need to adjust layer thickness and drying time.
Pigment Particle Size
Particle size matters: finer pigment particles pack more densely and change how acrylic films form and dry, while coarser particles leave larger voids and alter water and polymer movement.
You’ll notice pigment dispersion and particle interaction affect drying rate and film strength.
- Finer particles slow evaporation by reducing pore size.
- Coarser particles speed water flow and drying.
- Mix sizes to modulate drying.
Color Transparency Levels
Although pigment transparency might seem purely visual, it directly changes how acrylic paints dry by altering light scattering, binder distribution, and moisture pathways.
You’ll notice transparent colors retain more binder near the surface, slowing evaporation compared with opaque pigments.
In color mixing and layering techniques, choose transparents to prolong open time, control gloss, and manage drying gradients for smoother blends and extended working time.
Heavy Pigment Load
If you push more pigment into your acrylics, the paint’s drying dynamics change noticeably: high pigment-to-binder ratios reduce the continuous film of acrylic emulsion, speed surface skinning, and can trap solvent deeper in the layer.
You’ll notice thicker, slower-to-cure passages when you use heavy pigment or dense color mixing.
- Reduced binder continuity
- Faster surface skin formation
- Entrapped solvent slows cure
Color Temperature and Drying Differences
When you mix or place paints of different color temperatures—warm reds and oranges next to cool blues and greens—you’ll notice they often dry and appear different even under identical conditions.
You’ll find color temperature influences drying characteristics: warm pigments often feel tackier and can seem faster visually, while cool pigments may retain gloss or dry slower.
Adjust layering and ventilation accordingly.
Retarders: What They Are and How They Work
Noticing how warm and cool pigments dry differently can make you want more control over drying times—that’s where retarders come in.
Noticing warm and cool pigments dry differently can make you crave control—enter retarders to slow and even drying.
You’ll learn retarder types, mixing ratios, application techniques, and product recommendations to slow curing without guesswork.
Consider artist experiences, compatibility issues with mediums, and basic safety precautions.
- Choose compatible retarder types.
- Measure mixing ratios.
- Note altered drying times.
Using Retarders Safely Without Weakening the Film
Because retarders change the chemistry of acrylic paint, you’ll want to add and use them in ways that slow drying without compromising film strength.
Start with small percentages, test on scraps, and avoid overuse that causes tacky, weak skins.
Balance retarder benefits against retarder risks by following manufacturer ratios, allow longer curing time, and layer thinly so the final film stays durable and flexible.
Acrylic Mediums That Extend Working Time
You can use retarder acrylic mediums to slow drying without over-thinning paint, keeping blends workable longer.
Slow-drying gel mediums also extend open time while adding body and texture, so you won’t lose impasto effects.
I’ll cover how to mix and use each one safely to maintain film strength.
Retarder Acrylic Mediums
When you need more time to blend, layer, or soften edges, retarder acrylic mediums slow the drying of water-based acrylics so pigments stay workable longer.
You’ll appreciate retarder benefits for drying control and painting techniques; choose medium types based on formulation differences and artist preferences.
- Mind mixing ratios and application methods for moisture management.
- Watch pigment interactions and adjust.
- Use sparingly.
Slow-Drying Gel Medium
Retarder mediums help you buy extra working time, but slow-drying gel mediums take that control further by thickening paint while keeping it workable for hours or even days. You can mix them to explore slow drying techniques and enjoy gel medium benefits: more texture, extended blending, and predictable open time.
| Benefit | Effect |
|---|---|
| Texture | Thicker body |
| Blending | Longer open time |
Choosing Heavy-Body vs. Fluid Acrylics for Slow Drying
Picking between heavy-body and fluid acrylics comes down to how you want paint to behave as it dries: heavy-body paints hold peaks and texture, slowing surface leveling, while fluid acrylics flow and level more readily, which can make them feel faster to set.
You’ll choose based on finish, handling, and drying needs.
- heavy body benefits: texture retention
- fluid acrylics: smoother leveling
- Control drying by layering choices
How to Thin Acrylic Paint Without Speeding Drying
When you need thinner acrylics without accelerating drying, use water sparingly to avoid breaking the binder.
Reach for acrylic mediums designed for flow and leveling instead of diluting too much.
Keep your workspace cooler to further slow evaporation and preserve working time.
Use Water Sparingly
Don’t drown your paint in water—too much thins the binder and makes acrylics dry faster and weaker, so use just enough to loosen consistency for brushing or glazing.
You should control water application to keep paint consistency stable and avoid patchy, brittle films.
- Add tiny drops, mix, test flow
- Work in thin layers, not puddles
- Keep a spray bottle for surface misting
Add Acrylic Mediums
Although water’s the easiest thinner, acrylic mediums give you control without speeding drying or weakening the film; use a flow improver, glazing medium, or extender to loosen paint consistency while preserving binder strength and working time.
You’ll choose medium selection based on desired texture effects and opacity variations, adapt application methods and working techniques for smoother paint layering, and manage drying times without compromising adhesion.
Maintain Cooler Environment
If you keep your studio cooler, thinned acrylics stay workable longer without the accelerated evaporation that heat brings. This allows you to dilute paint for smoother application without sacrificing open time or film strength.
Use cooling techniques to manage environmental factors and slow drying while maintaining finish quality.
- Lower room temperature modestly.
- Reduce direct sunlight and drafts.
- Use fans sparingly.
Mixing Techniques That Change Drying Behavior
How you mix acrylics has as much impact on drying as temperature or humidity, because additives, diluents, and blending methods change film thickness, evaporation rate, and polymer coalescence.
You’ll control paint viscosity and use viscosity adjustment to slow drying, choose color mixing and color harmony wisely, and apply layering techniques and blending methods in paint application to manage drying time and finish.
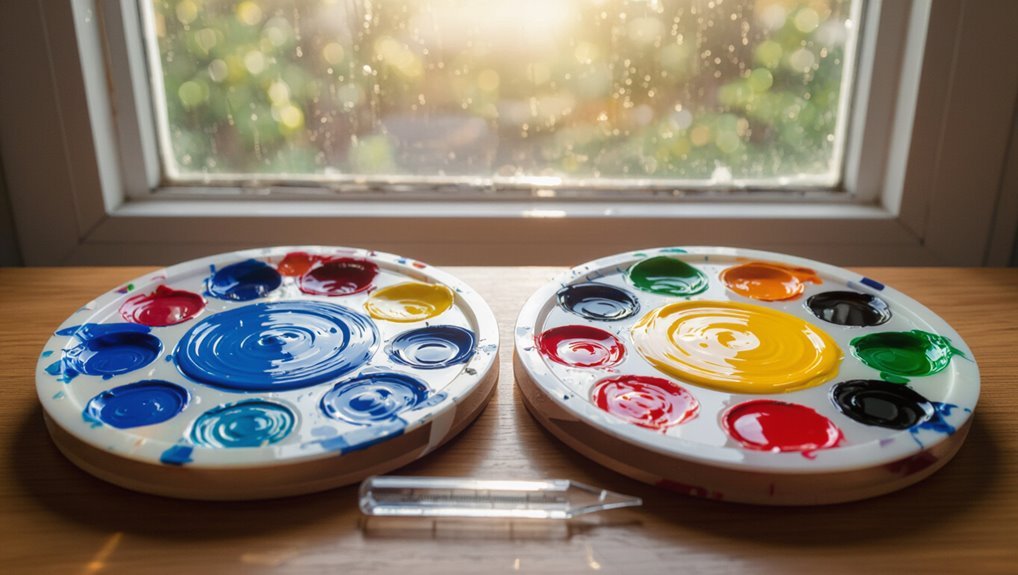
Palette Choices That Affect Drying Time
When you pick a palette, think beyond color—your choices change how fast paint dries because pigments, mediums, and mixing surfaces each affect evaporation and film formation.
You’ll notice palette types alter drying characteristics; color selection and medium effects shift tack and sheen, while texture variation guides layering techniques.
- Plastic vs glass: absorption differences
- Paper palettes: quick evaporation
- Ceramic/tray: slower film formation
Set Up a Stay-Wet Palette for Acrylics
To set up a stay-wet palette, choose the right tray, sponge, and palette paper so your acrylics stay workable longer.
Keep the sponge damp and the sealing lid closed between sessions to maintain steady moisture levels.
Check and mist the sponge as needed so paints don’t skin over or get overly diluted.
Choose The Right Materials
A stay-wet palette keeps your acrylics workable longer, so you’ll need just a few simple supplies: a shallow airtight container, an absorbent sponge or foam layer, palette paper or a nonstick sheet, and clean water.
Choose material types that match paint characteristics and avoid drying agents; consider artist preferences for portability and cleanup.
- Sponge or foam
- Palette paper
- Airtight lid
Maintain Moisture Levels
Now that you’ve picked the sponge, palette paper, and lid, set up a stay-wet palette so your acrylics stay workable longer.
Layer the damp sponge, place the special palette paper, and seal the lid to boost moisture retention and enable reliable humidity control.
Check and mist the sponge lightly between sessions so paints stay soft without pooling or contamination.
Misting Safely: When and How to Use a Spray Bottle
Ever wondered when a quick mist will help your acrylics instead of ruining them? You’ll use misting techniques for thin, wet edges and slow surface skinning, but practice safe application—light, even sprays from 12–18 inches and test first.
Wonder when a quick mist helps rather than harms your acrylics? Light, even sprays from 12–18″—test first, avoid pooling.
Don’t soak layers; mist between sessions.
- Light, even sprays
- Test on scrap
- Avoid pooling
Glazing and Layering: Timing and Extended Control
When you build color through thin, semi-transparent layers, glazing gives you precise control over depth and hue while keeping drying times manageable; time each glaze so the previous layer is tacky or fully dry depending on whether you want it to blend or sit distinct.
You’ll use glazing techniques and layering strategies with timing adjustments, medium selection for drying control, color blending, texture application, and deliberate artistic effects.
Prevent Skinning on Palettes and Mixed Paint
To prevent skinning on palettes and mixed paint, keep your paint covered when you’re not using it so air can’t form that dry film.
If you need more working time, mix in a retarder medium sparingly to slow drying without weakening the paint.
These simple steps let you preserve freshness and avoid wasted mixtures.
Keep Paint Covered
If you want your mixed acrylics and palette colors to stay usable between sessions, keep them covered to prevent a dry skin forming on the surface.
Use airtight containers, plastic wrap, or a damp paper towel under a lid to extend working time.
Consider paint storage, palette management, humidity control, surface preparation, drying techniques, paint additives, temperature regulation, airflow adjustments, acrylic mediums.
- Airtight jars for small mixes
- Cling film over palettes
- Moisture-trapped palette boxes
Use Retarder Medium
Keeping your palette covered helps, but adding a retarder medium is the most reliable way to prevent skinning in mixed acrylics. You’ll control drying time with careful retarder application and monitor paint interaction to avoid tackiness. Use small amounts, mix thoroughly, and test on a scrap.
| Tip | Action |
|---|---|
| Measure | Start small |
| Mix | Blend well |
| Test | Scrape sample |
| Store | Cover palette |
Store Mixed Paint to Preserve Working Time
Store mixed acrylics in airtight containers and you’ll extend their usable working time considerably.
You’ll slow skinning and keep batches consistent with simple paint preservation and storage techniques. Seal jars, label mixes with date and ratio, and refrigerate briefly if needed—avoid freezing.
These steps help you reclaim partially used mixes, maintain color accuracy, and reduce waste while preserving workability.
Priming and Gesso: Prime for Slower Drying
After sealing mixed paints, think about your support: priming with gesso slows how fast acrylics soak in and dry on the surface.
You can control open time by choosing heavier gesso applications and testing priming techniques—multiple thin coats or a single toothy layer.
Adjust texture and absorbency to retain moisture longer, letting you blend and rework without rushing.
Substrate Tips: Prepping Canvas, Wood, and Paper
When you prep your support carefully, you give acrylics the right balance of absorption and tooth to control drying and working time.
Tailor canvas preparation, wood treatment, and paper selection to your technique; do surface priming and absorbency testing to match medium viscosity and retarders.
- Check texture considerations on canvas and paper.
- Sand and seal wood.
- Perform absorbency testing before painting.
Studio Adjustments to Slow Acrylic Drying
You can slow acrylics by making a few simple studio adjustments that give you more working time.
Try raising humidity, using slow-drying mediums, and keeping the room slightly cooler to reduce evaporation.
Small changes in these areas will noticeably extend open time without altering your technique.
Increase Humidity Levels
If your studio air feels too dry, raise humidity to slow acrylics’ surface cure—higher moisture keeps paint workable longer and reduces crusting and rapid skin formation.
You should balance humidity effects with air circulation and environmental control to optimize moisture retention and drying conditions for your painting techniques.
Monitor levels per artist preferences and climate considerations; adjust workspace setup.
- Use humidifiers
- Group water trays
- Track humidity monitoring
Use Slow-Drying Mediums
Raising humidity can help, but changing your paint mix is often the most direct way to slow acrylics.
You can add slow-drying mediums or retarders to extend open time, combine glazing mediums, or use heavy-body gels sparingly.
These acrylic paint additives are key slow drying techniques; they’ll keep colors workable longer without thinning pigment, so you can blend and layer with greater control.
Adjust Studio Temperature
Lowering your studio temperature by a few degrees can noticeably slow acrylics’ drying time without changing your paint mix.
You can tweak temperature control in your studio environment to buy open time and keep edges workable.
- Set thermostat a few degrees lower during sessions.
- Use fans sparingly to avoid uneven drying.
- Monitor humidity alongside temperature for balanced results.
Use Humidifiers and Heaters the Right Way
When you control humidity and temperature deliberately, you can speed up acrylic drying without causing cracking or tackiness. Use correct humidifier settings to keep relative humidity around 40–50% and watch heater placement to avoid direct heat on paintings. Rotate pieces for even drying and monitor surfaces for tackiness.
| Device | Setting | Tip |
|---|---|---|
| Humidifier | 40–50% | Even airflow |
| Heater | Low | Indirect placement |
Build a Temporary Spray Tent or Enclosure
Controlling humidity and heat helps your layers dry properly, but you’ll also want a controlled workspace when spraying varnish or thin coats—building a simple spray tent or enclosure gives you that.
You’ll gain temporary enclosure benefits: cleaner finish, contained overspray, and faster curing control when used correctly.
Consider a quick spray tent setup with:
- Lightweight frame and plastic
- Zip access flap
- Removable shelving
Balance Ventilation and Humidity Safely
When you’re drying acrylics indoors, control airflow patterns so fumes and overspray are carried away without creating strong drafts that can deform wet paint.
Keep indoor humidity in check—too low speeds drying too fast and too high can prevent proper film formation.
If you need extra warmth, use gentle heat sources like low-wattage lamps or a fan-assisted heater placed safely away from artwork.
Control Airflow Patterns
Because acrylic needs steady, gentle air movement to dry evenly, set up ventilation that moves fresh air through the room without creating drafts over the painting surface.
You’ll use airflow control as part of practical drying techniques to avoid uneven drying and dust. Keep adjustments minimal and monitor results.
- Position fans indirectly
- Close door gaps
- Open windows slightly
Manage Indoor Humidity
A balanced humidity level helps acrylic paint cure smoothly without trapping moisture or drying so fast that it cracks.
So keep indoor relative humidity around 40–55% while you ventilate. You should monitor humidity control with a hygrometer, adjust with a humidifier or dehumidifier as needed, and aim for steady moisture balance.
Avoid sudden door or window openings that spike humidity or disturb curing layers.
Use Gentle Heat Sources
After you’ve stabilized humidity and ventilation, gently introducing low-level heat can speed curing without stressing the paint. You’ll use gentle heat as one safe drying technique, keeping temps steady and monitoring surface feel.
- Use a low-wattage space heater placed safely away from canvases.
- Aim for moderate room temperature shifts, not direct hot airflow.
- Combine with gentle ventilation and timed checks.
How Long Each Method Typically Adds to Working Time
Different techniques can extend acrylics’ working time by minutes to hours, and knowing typical ranges helps you pick the right method for your project. You’ll use drying techniques and painting strategies to gain control: retarders add 10–60 minutes, misting or mist spray adds 5–30 minutes, and glazing mediums can add 30–120 minutes depending on thickness.
| Method | Typical Added Time | Notes |
|---|---|---|
| Retarder | 10–60 min | Thin layers |
| Misting | 5–30 min | Light refresh |
| Glaze | 30–120 min | Thicker application |
Combine Methods for Maximum Control
Having looked at how individual techniques extend working time, you can combine them to fine-tune drying and handling for specific stages of a painting.
Use acrylic techniques and layering strategies with mindful surface preparation and humidity control to address drying challenges. Match art materials and paint properties to artist preferences within your studio environment.
Try mixing retarders, glazing, and misting.
- Mix retarders and mediums
- Glaze on prepared surfaces
- Control humidity and airflow
Common Mistakes When Trying to Slow Drying
When you try to slow acrylics, common missteps—like overloading with retarder, working on unprimed surfaces, or blocking airflow—can cause tacky layers, poor adhesion, and unpredictable drying rather than the control you want.
You should practice mistake avoidance: measure additives, prep surfaces, and test mixes.
Don’t fall for drying misconceptions like “more medium always equals slower” without trialing ratios.
Fix Tacky or Undercured Acrylic Layers
If your layers stay tacky despite careful measurements and surface prep, you’ll need targeted fixes rather than more additives.
Address undercured layers with repair techniques focused on paint consistency and acrylic adhesion. Use surface treatment and gentle paint reactivation to resolve texture issues and layering problems.
Try:
- Thin scumble to adjust paint consistency
- Light heat or airflow as drying solutions
- Isopropyl wipe for tacky paint
How to Test Drying Time Before a Big Painting
Want to avoid surprises on a large piece? Run small drying experiments on scrap canvas using the same paint, medium ratio, and environment.
Time tack-free and firm cure stages, note humidity and temperature, and photograph intervals.
Use simple testing techniques—thin versus thick strokes, sealed versus open—to predict results.
Test thin versus thick strokes, and sealed versus open areas, to anticipate drying and finish.
Record outcomes so you can adjust layering schedule and ventilation before committing to the main work.
Choose Additives That Preserve Color and Finish
After you’ve run tests and know how your paints behave, pick additives that guard color vibrancy and surface finish without altering drying predictability.
You’ll choose products focused on color preservation and subtle finish enhancement, mixing sparingly and testing swatches to confirm hue, gloss, and handling stay true.
- Use UV-stable retarders
- Try polymer-based flow improvers
- Test glossy or matte modifiers
Maintain Archival Quality While Slowing Drying
When you slow acrylic drying to gain open time, prioritize archival-grade materials so longevity isn’t sacrificed—choose UV-resistant retarders, neutral-pH extenders, and proven polymer stabilizers.
Test them in thin and thick layers, and document results so you can balance workability with long-term color and film integrity.
You’ll protect archival integrity and paint longevity by recording mixes, avoiding unknown additives, and aging samples before major works.
Plein Air vs. Studio: Adapting Techniques
Slowing acrylics for archival stability matters whether you work in the studio or outside, but plein air and studio settings force different choices in how you manage open time, layers, and varnishing.
You’ll adapt plein air techniques to heat, wind, and rapid color mixing; in the studio you’ll use studio strategies and controlled environmental factors for layering and gloss choices.
- Portable retarders and thin layers
- Controlled humidity and glazing
- Quick palettes, premixed values
Troubleshooting Unexpected Drying Problems
If your acrylics start behaving oddly—tacky in the center, cracking at the edges, or drying too dull—you can usually fix the issue before it’s ruined; diagnosing the cause fast is key.
Check humidity, airflow, and surface absorbency. Adjust mixing ratios, avoid over-thinning, and test mediums.
Use controlled acrylic painting techniques to isolate drying time challenges and repeat small trials until results stabilize.
Choose the Best Slow-Drying Approach for Your Workflow
Because different projects and studio conditions demand distinct drying windows, pick a slow-drying method that matches your working tempo, paint handling, and cleanup preferences.
Balance acrylic paint drying techniques with artist preferences and workflow efficiency by considering humidity control, environmental factors, palette management, medium selection, and paint properties to overcome drying challenges.
- Test methods on small studies.
- Prioritize workflow efficiency.
- Adjust humidity control.
Frequently Asked Questions
Can Slowing Drying Increase Risk of Mold on Artworks?
Yes — if you slow drying too much, you risk mold; you should monitor moisture control and pick proper substrate selection so you’re not trapping dampness, and you’ll reduce mold growth on your paintings.
Will Retarders Affect Long-Term Colorfastness or Yellowing?
Yes — retarders effects can be minimal if you use quality, lightfast additives and paints; you’ll retain color stability. Cheap or excessive retarders may slightly yellow or reduce long-term colorfastness, so test and follow manufacturer guidance.
How Do Slow-Drying Methods Impact Varnishing Schedule?
Using slow-drying methods, you should delay varnishing longer because varnishing techniques need fully cured paint; colder or humid drying environments extend cure times. Check tackiness, wait weeks to months, and test a small area first.
Can Extending Drying Time Weaken Paint Adhesion to Flexible Supports?
Yes — if you over-extend drying, you’ll face adhesion concerns and flexibility issues: the paint film can become brittle, crack on flexing supports, and peel more easily unless you use proper binders, flexible primers, or retarders sparingly.
Are There Safety Concerns Combining Retarders With Other Additives?
Like mixing potions, yes — you’ll face risks: retarder ingredients can alter additive interactions, causing film softness, poor adhesion, or skin irritation. Test mixes, follow manufacturer limits, ventilate, and wear gloves to stay safe.
Conclusion
You’ve learned easy, practical ways to slow acrylic drying—cool the room, raise humidity, use retarders, open mediums, or mist sparingly—so you can blend longer and finish more thoughtfully. You’ll pick a method that fits your palette, your weather, and your patience; you’ll test a few, keep what works, discard the rest. Practice brings a rhythm: a cooler brush, a wetter edge, a gentler hand, and paintings that breathe a little longer.