What Removes Dried Paint? Best Paint Removal Methods
To remove dried paint, first identify the paint type (latex, oil, enamel) and test a hidden spot so you don’t damage the surface. For small latex spots use warm soapy water, rubbing alcohol, or a plastic scraper; acetone or mineral spirits works on tougher acrylic or oil-based paint. Sanding or chemical strippers suit wood and metal; glass tolerates a razor blade. Wear goggles and ventilate. Keep going and you’ll find detailed surface-specific tips and safety steps.
Identify the Paint Type Before You Start
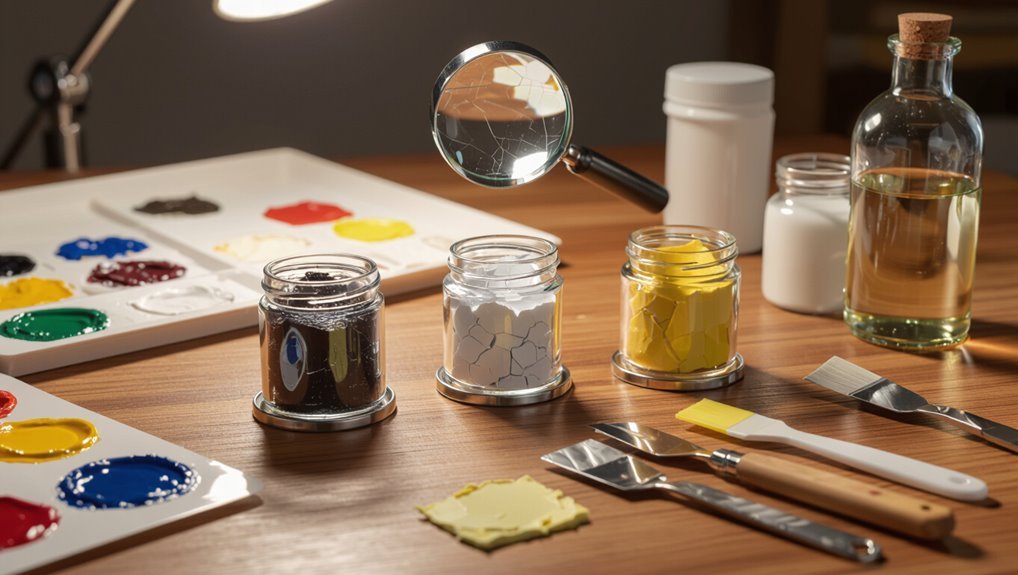
Why bother identifying the paint before you begin? You’ll use paint identification techniques to determine solvents, tools, and precautions.
Assess common paint types—latex, acrylic, oil-based, enamel—by texture, smell, and peel tests. That lets you choose safe, effective removal steps and avoid damage.
Take photos, label samples, and consult product data when unsure before proceeding.
Fast, Beginner-Friendly Ways to Remove Dried Paint
If you’re tackling dried paint for the first time, start with simple, low-risk methods that work on most surfaces: warm soapy water and a sponge for latex or acrylic, rubbing alcohol or acetone on small spots, and a plastic scraper to lift flaking areas. Try these easy solutions for quick paint removal.
| Method | Tool | Result |
|---|---|---|
| Soapy water | Sponge | Gentle clean |
| Alcohol/acetone | Cloth | Spot treat |
| Plastic scraper | Scraper | Lift flakes |
Which Surfaces Change How You Remove Paint (Wood, Metal, Plastic, Glass)
How you remove paint depends on the surface you’re working with, so match methods and solvents to the material to avoid damage.
You’ll consider paint adhesion, paint types, and paint finishes: wood tolerates sanding and gentle chemical strippers, metal accepts abrasive or solvent options, plastic needs mild cleaning solutions and testing for surface compatibility, and glass requires razor blades and nonabrasive removers with surface protection to guarantee damage prevention.
Safety Gear Checklist for Paint Removal
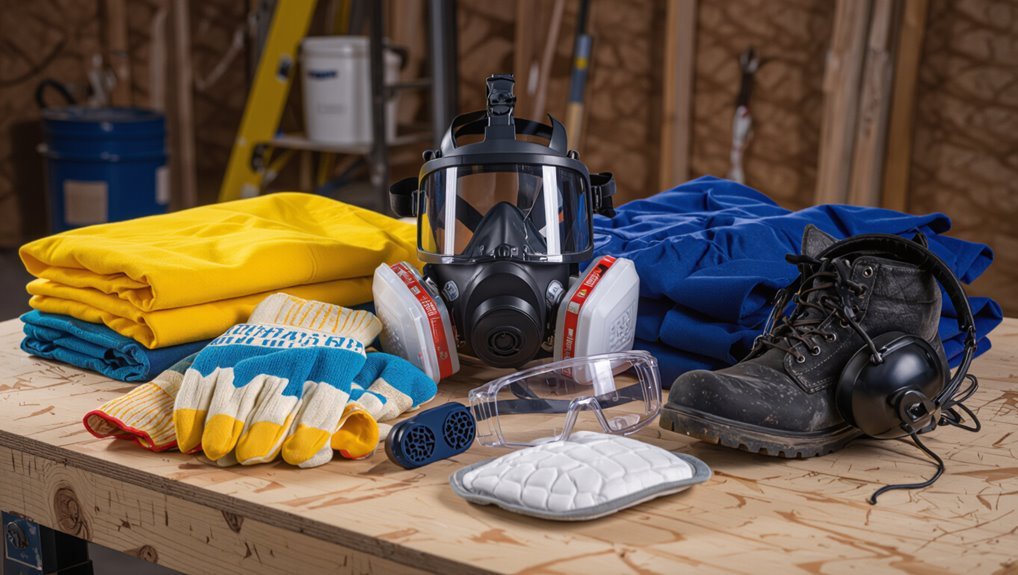
Matching removal methods to the surface is only one part of a safe paint-stripping plan; you also need the right protective gear before you start.
Match the removal method to the surface — then suit up with the right protective gear before you begin.
You’ll want safety goggles, a face shield, respirator mask, latex gloves, protective coveralls, chemical resistant boots, and strong workspace ventilation. Keep a first aid kit nearby.
- Fear off, safety on
- Confidence to strip
- Calm control
- Ready for spills
Non-Toxic Household Fixes for Small Paint Spots
When you spot a stray dab of paint on trim, countertops, or clothing, you don’t need harsh chemicals—simple household items can do the job quickly and safely.
Try rubbing with a damp cloth and mild dish soap, use baking soda paste for gentle abrasion, or dab rubbing alcohol on a cotton swab.
These eco friendly solutions and homemade remedies remove small spots without toxic fumes.
Use Vinegar and Water on Dried Latex Paint
One simple, non-toxic way to soften dried latex paint is to heat equal parts white vinegar and water.
Apply it to the spot with a cloth or spray bottle, and let it sit for a few minutes so the acetic acid can loosen the paint.
You’ll wipe gently, testing vinegar effectiveness; repeat as needed until the latex paint lifts.
- Relief
- Confidence
- Control
- Satisfaction
Lift Dried Paint With Rubbing Alcohol
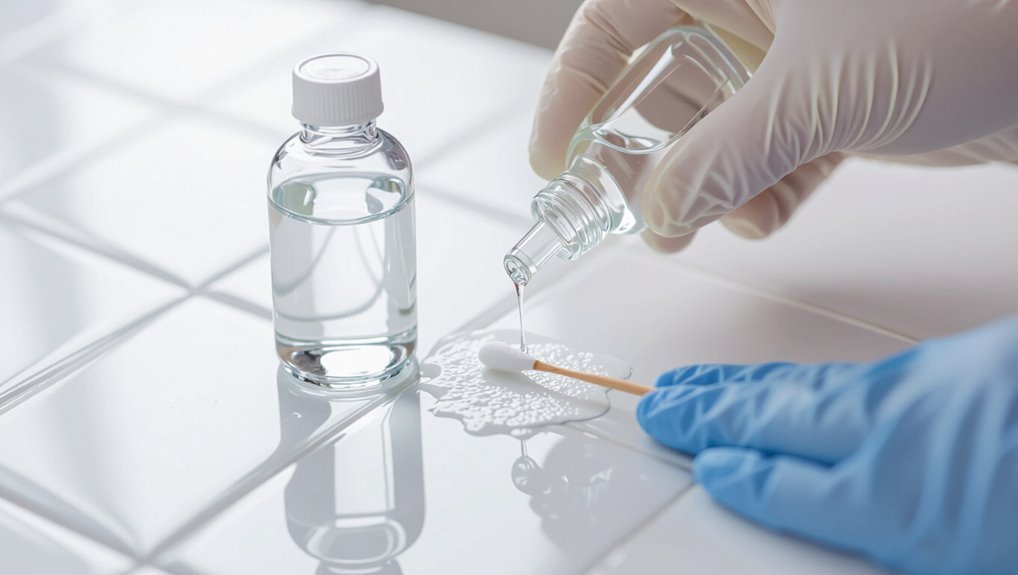
Before you start, test rubbing alcohol on a hidden spot to make sure it won’t damage the surface.
If the test’s fine, apply a small amount and gently rub the dried paint with a soft cloth or cotton swab.
Keep working lightly until the paint lifts, then wipe the area clean.
Test On Hidden Area
Want to make sure your surface can handle rubbing alcohol? Perform small hidden tests to avoid surprises and guide your paint assessments.
Pick an inconspicuous spot, apply a tiny amount, wait, and inspect for damage. If it’s safe, proceed confidently; if not, choose another method.
- Relief at a safe result
- Tension if damage appears
- Confidence to continue
- Calm planning
Gently Rub With Alcohol
If your hidden test showed no damage, you can gently rub dried paint with rubbing alcohol to lift it without scraping.
Dampen a cloth with isopropyl, noting alcohol concentration—70% is safer, 90% acts faster. Work small areas, blot and rub lightly as paint drying loosens binders.
Rinse with water, repeat briefly if needed, and always ventilate while you work.
When Baking Soda Paste Safely Removes Paint
You’ll want to use baking soda paste on small, water-based paint spots, on heat-tolerant surfaces, and when gentle abrasion is enough to lift the finish.
Mix baking soda with just enough water to make a thick paste, apply, let sit briefly, then scrub and rinse.
Wear gloves, work in a ventilated area, and wipe up residues thoroughly to protect the surface and your skin.
When To Use
Baking soda paste works best on paint that’s already flaking, chalking, or failing to adhere—so you can gently lift it without excessive scrubbing.
Know when to start by evaluating adhesion and surface type; use a methods comparison to pick gentlest option. You’ll protect underlying material and avoid harsh chemicals.
- Relief when old paint peels
- Satisfaction removing stubborn spots
- Calm knowing you’re cautious
- Pride in restoring surfaces
How To Make
When the old paint is already failing and the surface can take a mild abrasive, mix a paste that’s one part water to two parts baking soda (by volume) and stir until it’s spreadable but not runny.
Apply with a cloth or soft brush, let sit briefly, then rub gently to lift flakes.
This practical DIY paint removal technique fits eco friendly options and gentle projects.
Safety And Cleanup
If the baking soda paste is effective at lifting paint, take a moment to protect yourself and the workspace before you continue: wear gloves and goggles, ventilate the area, and cover nearby surfaces to prevent spread.
Follow paint safety and cleanup tips closely to avoid contamination.
- Breathe fresh air—don’t inhale dust
- Don gloves—protect skin
- Contain debris—tarp or tray
- Dispose properly—local rules
Dish Soap + Warm Water: Simple Cleanup for Small Drips
Grab a sponge, mix a few drops of dish soap into warm water, and you can quickly tackle fresh paint drips before they set.
You’ll blot gently, rinse frequently, and avoid rubbing to prevent spreading. This method uses simple solutions and effective techniques for small spills on nonporous surfaces.
Dry with a clean cloth and repeat until the stain’s gone.
Best Commercial Water-Based Paint Removers
For larger jobs where dish soap won’t cut it, you’ll want a commercial water-based remover that’s formulated to lift paint without harsh solvents.
You’ll find eco friendly options that clean effectively and leave less odor. Check product reviews, test a small area, and follow instructions carefully.
- Relief: clean results fast
- Confidence: safer chemistry
- Satisfaction: minimal scrubbing
- Peace: low fumes
When Chemical Paint Strippers Are Worth It
You should pick chemical strippers when other methods can’t reach complex profiles, thick multi-layer coatings, or delicate substrates that heat or abrasion would damage.
Consider the safety trade-offs: you’ll need proper PPE, ventilation, and a plan for handling and neutralizing residues.
Also weigh environmental impacts and disposal rules so you don’t create problems while solving paint removal.
When To Choose Strippers
When is a chemical stripper the smart choice? You’ll pick one when substrate sensitivity, paint age, and stripper effectiveness matter, and when chemical interactions won’t harm finishes.
Consider situations that demand speed or precision:
- You’re racing a deadline and need quick results.
- You want minimal sanding.
- The paint is stubborn and layered.
- You need fine detail restoration.
Safety And Environmental Concerns
Because chemical strippers can be fast and effective, weigh their safety and environmental trade-offs before you start.
You should assess ventilation, protective gear, and proper disposal to minimize health risks. Choose low-tox formulas when possible, contain runoff, and follow local hazardous-waste rules.
For long-term options, prefer sustainable practices like mechanical removal or biodegradable strippers to protect your health and the environment.
Solvent vs Caustic Strippers: Choose the Right Type
Although both strip paint, solvent and caustic removers work very differently, and choosing the right one depends on the coating, substrate, and safety needs.
You’ll weigh solvent effectiveness versus caustic safety, plus odor, cleanup, and material compatibility. Pick what matches the surface and your protective gear.
Consider feelings about risk and results:
- Relief at fast removal
- Frustration with strong smells
- Confidence using proper PPE
- Anxiety over substrate damage
Safer Methylene-Chloride Alternatives and How to Use Them
You can skip methylene chloride by choosing safer options like Citristrip and other gel strippers that work well on many surfaces.
For thicker coatings, a heat gun lets you soften paint for scraping, while steam is great for lifting old layers from trim without harsh chemicals.
Learn the right prep, temperature, and ventilation for each method to get clean results safely.
Citristrip And Other Gels
Citristrip and similar gel strippers give you a safer, user-friendly way to remove paint without resorting to methylene chloride.
You’ll appreciate Citristrip application ease and Gel stripper effectiveness on trim and furniture; apply, wait, and scrape gently.
They’re lower-odor and less toxic, but you should still use gloves and ventilation.
- Relief
- Confidence
- Control
- Satisfaction
Heat Guns And Steam
When you need faster paint removal on larger trim or exterior pieces without hazardous solvents, heat guns and steam offer dependable, safer alternatives to methylene chloride. Heat guns soften paint so it scrapes away, while steam loosens layers for gentle stripping.
You’ll balance heat application and steam effectiveness, adjust heat settings, choose proper tool selection, monitor surface safety, and weigh method comparison for efficient paint removal.
Apply Gel Strippers to Vertical Surfaces Without Drips
If you’re working on a wall or door, gel strippers can cling without running if you prep and apply them correctly.
Use vertical gel application and drip free techniques: clean, score, and tape edges; apply thick beads with a spatula; work top-down; cover with plastic to boost dwell time.
- Relief at smooth progress
- Confidence in control
- Pride in clean results
- Joy when paint peels free
Use a Heat Gun to Remove Dried Paint Safely
Aim the heat gun steadily and move it constantly to soften old paint without burning the surface beneath. You’ll use careful heat application and constant temperature control awareness, scraping softened paint with a flat tool and ventilating the area. Wear gloves, eye protection, and a respirator to avoid fumes.
| Step | Action | Tip |
|---|---|---|
| 1 | Heat | Keep moving |
| 2 | Scrape | Use flat tool |
| 3 | Vent | Open windows |
| 4 | Protect | Wear PPE |
Safe Temperature Ranges for Stripping Paint With Heat
When you strip paint with heat, keep the gun between about 500°F and 900°F depending on the coating so you soften without charring.
Check the substrate—soft woods, plastics, and some composites need much lower temperatures or gentle passes to avoid damage.
Always start low, test a small area, and raise the heat only as needed to stay within the material’s limits.
Safe Heat Temperature Ranges
Curious about how hot is too hot for paint stripping? You should control heat application, use temperature monitoring, and prioritize safe handling to avoid scorching or toxic fumes while ensuring surface protection.
- Respect limits to prevent damage
- Stay alert and cautious
- Use protective gear and barriers
- Stop if paint chars or smells strong
Materials And Temperature Limits
Different materials call for different maximum temperatures, so you should match your heat source to the substrate and paint type to avoid scorching or structural damage. Consider temperature impact and material compatibility: low heat for plastics, moderate for softwoods, higher for metals. Visualize limits:
| Material | Max Temp |
|---|---|
| Plastic | ~120°C |
| Wood | ~200°C |
| Metal | ~400°C |
Infrared Paint Removers for Delicate Trim and Moldings
If you’re working with delicate trim or intricate moldings, infrared paint removers give you gentle, controlled heat that softens old finishes without charring wood or damaging profiles.
You’ll appreciate infrared technology for precise heat and trim protection while avoiding harsh chemicals.
- Relief: no scraping stress
- Confidence: preserved details
- Ease: less cleanup
- Respect: original character maintained
Scraping Techniques That Protect the Underlying Surface
When you scrape paint, work with the grain and let the tool do the cutting so you avoid gouging the substrate; hold your scraper at a shallow angle, use steady, overlapping strokes, and switch to a softer blade or a putty knife when you reach delicate areas or corners.
Use proper scraping techniques, keep blades sharp, protect surfaces with tape or felt, and check progress frequently for surface protection.
Sanding to Remove Paint Without Damaging Wood
After scraping as much loose paint as possible, sanding lets you smooth remaining edges and bring the wood back to a uniform surface without cutting into the grain.
You’ll use gentle sanding techniques, choose grits progressively, and prioritize wood preservation to avoid gouges.
Feel confident as you work:
- Tactile control
- Quiet patience
- Respect for grain
- Careful progress
Abrasive Blasting Options for Extreme Paint Buildup
When you’re tackling extreme paint buildup, choosing the right blasting media—like crushed walnut, glass beads, or aluminum oxide—changes how aggressively the coating comes off and how much the substrate is affected.
Before you blast, you’ll need to secure the area, remove loose debris, mask nearby surfaces, and test a small patch to confirm settings and media.
With proper selection and preparation, abrasive blasting can strip heavy layers quickly without unexpected damage.
Media Type Selection
Which abrasive will cut through tough, multi-layer paint without damaging the substrate?
You need smart media type selection and safe removal techniques to restore surfaces. Choose based on substrate, paint hardness, and containment.
- Grity garnet — aggressive, hungry
- Glass beads — controlled, brightening
- Plastic media — gentle, forgiving
- Walnut shell — natural, kinder
Surface Preparation Steps
Start by evaluating the surface and surrounding area so you can pick the right blasting method, PPE, and containment strategy for extreme paint buildup.
You’ll perform a surface assessment to determine surface texture, paint compatibility, and paint adhesion issues.
Choose preparation tools and pre treatment methods to boost removal efficiency, plan surface cleaning and surface protection, and maintain strict workspace organization throughout the job.
Remove Dried Paint From Metal Without Causing Rust
Removing dried paint from metal without causing rust takes a careful approach: you’ll want to choose non-corrosive solvents or gentle mechanical methods, work in small sections, and immediately neutralize and protect bare metal.
You’ll treat metal surfaces gently, use rust prevention coatings, and dry thoroughly.
Consider feelings while working:
- Relief at progress
- Satisfaction of clean metal
- Anxiety about damage
- Pride in protection
Best Ways to Remove Paint From Plastic
Before you start, assess the type of paint and the plastic to avoid warping or discoloration.
For fresh or light spots, try soap and water with a soft cloth or brush first. If that doesn’t work, test a mild solvent or plastic-safe remover on an inconspicuous area before proceeding.
Assess Paint And Plastic
Plastic comes in many formulations, and you’ll need to identify the type and the paint before choosing a removal method.
Check paint characteristics and plastic compatibility: old enamel bonds differently than acrylic, and PVC resists solvents more than ABS.
Inspect finish, smell, and flexibility to guide your choice.
- Frustration with sticky spots
- Anxiety over damage
- Relief when tested
- Confidence to proceed
Use Soap And Water
Grab a bucket, warm water, and a mild dish soap—soap and water is often the safest first step for lifting fresh or water-based paint from plastic without risking damage.
You’ll scrub gently with a soft cloth or sponge, testing water temperature for ideal soap effectiveness.
Rinse frequently, repeat as needed, and dry the area. This preserves the plastic finish while removing surface paint.
Try Solvent Alternatives
If soap and water can’t lift the paint, you’ll need to try solvent alternatives that break the bond without gouging the plastic.
Test a small area, wear gloves, and prioritize solvent safety. Choose eco friendly options when possible.
Try:
- Citrus-based gel — gentle yet effective
- Isopropyl alcohol — for fresh spots
- Acetone sparingly — for stubborn bits
- Paint remover paste — controlled application
Get Dried Paint Off Glass Without Scratching
When dried paint mars your glass, you can remove it safely without scratching by using the right tools and a careful technique; start by softening the paint with warm, soapy water or a mild solvent.
Then gently lift it with a razor held at a low angle or a plastic scraper, keeping the blade flat and your strokes short and controlled.
Use glass cleaning spray, test paint solvents on a corner, and finish with microfiber.
Safely Removing Paint From Fabric and Upholstery
Because fabric and upholstery absorb paint differently, you’ll need to act quickly and choose methods based on the paint type and the material’s care label.
Act quickly and test first: match removal methods to paint type and your upholstery’s care label.
Test hidden spots, use appropriate paint removal solutions, and prioritize fabric care and upholstery protection. Gentle cleaning tools help.
- Panic subsides when you spot a recovery path
- Relief follows careful fabric testing
- Pride in upholstery maintenance
- Hope from effective stain prevention
Restore Furniture After Paint Stripping and Prep for Finish
Start by inspecting the stripped piece for damage, old glue, and surface irregularities so you know exactly what repairs and prep it needs before finishing.
Repair loose joints, fill gouges with matching wood filler, and sand progressively for an even substrate.
You’ll clean residue, degloss as needed, and prime or condition.
These steps guarantee successful furniture refinishing and lasting surface restoration.
Remove Dried Paint From Trim and Baseboards Cleanly
Before you start scraping, identify the paint type so you pick a remover that won’t damage the finish.
Use gentle tools and solvents first—like a soft scraper, nylon brush, or citrus-based stripper—to lift dried paint without gouging the trim.
If small chips or dents appear, sand lightly and fill gaps before repainting for a seamless result.
Assess Paint Type
Wondering how to tackle dried paint on trim and baseboards? You should assess paint properties and paint compatibility first to choose safe methods.
Identify oil vs. latex, sheen, age, and previous finishes. Consider substrate and VOC concerns before proceeding.
- Frustration at guessing
- Relief with clear ID
- Confidence in choice
- Avoiding costly mistakes
Gentle Removal Techniques
How will you remove dried paint from trim and baseboards without damaging the wood or finish?
Use gentle scraping with a plastic blade, then wipe with soft cloths dampened in warm water.
Apply mild solvents sparingly for stubborn spots, test first.
Employ natural abrasives for gentle exfoliation where needed.
These safe techniques respect delicate surfaces and minimize sanding or chemical exposure.
Surface Repair Tips
When dried paint mars your trim or baseboards, tackle it with patience and the right tools to avoid harming the wood or finish:
You’ll do surface preparation, test solvents, and scrape gently to preserve profiles and guarantee damage prevention. Follow steps and trust the process.
- Breathe, focus, slow hands
- Use soft scraper, small solvent
- Sand lightly, blend edges
- Clean, prime, repaint
Clean Brushes With Dried Bristles and Revive Them
Don’t toss that brush yet—you can often revive dried, stiff bristles with the right cleaners and a little patience.
For brush maintenance, try bristle rejuvenation using an appropriate paint solvent and gentle cleaning techniques.
Use brush soaking in solvent or warm soapy water, comb bristles, and follow restoration tips for tool care.
These DIY solutions restore flexibility and prolong brush life.
Remove Paint From Skin and Hands Safely
If you get paint on your skin, act quickly to prevent staining and irritation. Water-based paints usually wash off with soap and warm water, while oil-based paints need a solvent like mineral spirits or a commercial hand cleaner designed for painters.
Rinse, treat, moisturize—mind paint types and skin care.
- Stay calm
- Work gently
- Avoid harsh scrubbing
- Moisturize after cleaning
Lead Paint: Testing, Containment, and Removal Rules
Before you start scraping or sanding, test for lead paint so you know the risk and legal obligations you’re facing.
If results show contamination, follow lead paint testing protocols, set up lead paint containment with barriers, HEPA vacuums, and wet methods, and follow local lead paint regulations.
Hire certified abatement professionals for significant lead paint hazards to protect occupants and comply with law.
Eco-Friendly Paint Removers for Sensitive Areas
Looking for a gentler way to strip paint in bedrooms, nurseries, or other sensitive areas? You can choose eco friendly options that protect air quality.
Use natural solvents and low-VOC gels, work slowly, and ventilate gently.
- Feel relief using plant-based removers
- Trust safer, kinder formulations
- Protect children and pets nearby
- Preserve indoor comfort while restoring surfaces
Prep Your Workspace for Messy Paint Removal
Before you start, gear up with gloves, a respirator or mask, and old clothes you don’t mind ruining to keep skin and lungs safe.
Clear the area of furniture and valuables, then cover floors and nearby surfaces with drop cloths or plastic sheeting.
Take a moment to tape seams and secure coverings so dust and drips stay contained.
Protective Gear And Clothing
Safety gear keeps you working longer and prevents costly mistakes, so suit up before you start stripping paint.
You’ll choose gloves, goggles, respirator, and coveralls tailored to paint removal techniques and safety precautions. Protect skin and lungs, prevent spills, and stay focused.
- Thick nitrile gloves — confidence
- Sealed goggles — clarity
- NIOSH respirator — relief
- Disposable coveralls — peace of mind
Clear And Cover Surroundings
You’ve got your gear on, now clear and cover the area so paint chips, dust, and chemicals don’t spread.
Remove furniture, seal vents, and lay heavy-duty drop cloths or plastic sheeting.
Tape edges and use painter’s tape to protect trim.
Set up a garbage bin for debris and keep tools contained for workspace organization.
These steps guarantee paint splatter prevention and easier cleanup.
Dispose of Removed Paint and Solvents Responsibly
When you’re done stripping paint, don’t toss leftover paint, solvents, or contaminated rags in the regular trash or down the drain; they can harm people and the environment and may be illegal to discard improperly.
You should follow local paint disposal rules, use solvent recycling programs, and label containers.
Consider:
- Guilt for polluting waterways
- Relief when you recycle properly
- Fear of fines avoided
- Pride in safe cleanup
Speed Tips That Won’t Harm Surfaces or Finishes
1 quick habit can shave hours off a stripping job without damaging the surface: work in organized, focused sections and match your method to the finish—soft finishes need gentler strippers and low-grit sanding, harder surfaces tolerate stronger chemicals and power tools—so plan tasks, gather the right supplies, and tackle one small area at a time to keep speed from turning into costly mistakes.
Use appropriate paint solvents, test first, and maintain surface protection with tape, dropcloths, and gentle pressure to avoid gouges while working efficiently.
Troubleshooting: Paint Won’t Soften or Lift – Next Steps
If the paint won’t soften or lift, don’t panic — start by confirming you’ve matched the remover to the paint type and cured thickness: oil-based, latex, and enamel react differently and older, multiple-coat jobs often need stronger or repeated treatments.
Check for paint adhesion issues, consider drying conditions, and vary removal techniques.
- You’ll feel frustrated
- You might get hopeful
- You’ll want efficiency
- You’ll need patience
Hire a Pro: When to Call a Paint Removal Service
Wondering whether to tackle stripping yourself or call a pro?
If paint covers delicate surfaces, contains lead, or spans large areas, you should hire paint removal services.
You’ll benefit from professional expertise for safe containment, proper disposal, and efficient stripping techniques.
Call a licensed team when risks exceed your tools or experience to avoid damage, legal issues, or health hazards.
Cost Comparison: DIY vs Professional Paint Stripping
You can save on labor by doing paint stripping yourself, but you’ll still pay for chemicals, tools, and safety gear.
Get quotes from pros to compare their flat rates or hourly pricing against your estimated materials cost. That comparison helps you decide whether the time and risk are worth the savings.
DIY Materials Cost
Budget matters when deciding whether to strip paint yourself or hire a pro, and the numbers can shift a lot based on method and scale.
You’ll weigh DIY supplies budget against time and risk; homemade solutions save cash but need effort and safety gear.
Consider emotional stakes:
- Pride in doing it yourself
- Frustration with slow progress
- Relief at saved money
- Regret over mistakes
Professional Service Pricing
After weighing DIY tool costs and the emotional trade-offs, comparing professional service pricing gives a clearer picture of real expenses and outcomes.
You’ll consider cost factors like labor rates, surface size, paint type, removal method, disposal fees, and turnaround time.
Pros save you effort and risk, but expect higher upfront costs; weigh warranties and finish quality against DIY savings before deciding.
Tools Checklist for Every Paint Removal Job
Before you begin tearing into layers of old paint, gather a compact toolkit so the job stays safe, efficient, and tidy.
You’ll want a tools overview that lists a paint scraper, heat gun, solvent choices including eco friendly options, and varied brush types.
Note safety precautions, surface compatibility, removal efficiency, and clear preparation steps.
- Protective gloves
- Respirator
- Drop cloth
- Putty knives
Protect Surrounding Areas During Stripping
While you strip paint, protect floors, furniture, and nearby fixtures to prevent damage and make cleanup easier.
Use drop cloths and adhesive tarps for floor protection, and furniture covers to shield sofas and tables. Secure edges with painter’s tape and apply masking film or plastic sheeting over windows and trim.
Install wall shields where needed to catch debris and prevent stray solvent or heat damage.
Post-Removal Prep for Repainting or Staining
With the old finish removed and surrounding areas protected, you’ll want to inspect the bare surface for residue, damage, and moisture before you repaint or stain.
Clean, sand, and repair to guarantee paint surface preparation and reliable paint adhesion techniques. Then choose primer and product.
- Relief: satisfaction of a smooth base
- Confidence: ready for lasting finish
- Pride: craftsmanship visible
- Calm: job done right
Prevent Future Splatters and Accidental Paint Stains
If you want to keep your freshly prepped surfaces pristine, set up simple barriers and habits that catch drips and stray brush strokes before they land where they shouldn’t.
Use drop cloths, painter’s tape, and disposable shields; wear fitted clothing and gloves.
Clean tools frequently, work from top down, and keep a damp rag handy for immediate paint splatter prevention and accidental stain protection.
Common Mistakes That Damage Surfaces During Removal
Don’t reach for the harshest scraper or sandpaper just because it seems faster — using too-abrasive tools can gouge or roughen the underlying surface.
Also, if you skip proper surface preparation like cleaning and masking, the remover won’t work evenly and you’ll cause extra damage.
Follow the right prep steps and choose the correct tools to protect the material beneath the paint.
Using Too-Abrasive Tools
Although aggressive tools can speed up paint removal, they often gouge, scratch, or thin the underlying surface faster than you can refinish it.
You risk irreversible surface damage when you grab abrasive materials without testing. Choose gentler options, work progressively, and stop at the first sign of harm.
- Frustration
- Panic
- Regret
- Resolve
Skipping Surface Preparation
When you skip prepping the surface, you set yourself up for uneven removal, lingering residue, and extra sanding later on.
If you rush and skip preparation steps like cleaning, scoring, or masking, you’ll face paint adhesion problems and substrate damage.
Don’t underestimate consequences overlooked: trapped contaminants cause poor finish and increase repair time.
Prepare properly to protect the surface and streamline removal.
Pick the Right Removal Method for Each Paint Type
Because different paints bond and age differently, you should match the removal method to the paint type before you begin.
You’ll consider paint types, removal techniques, surface compatibility, environmental impact, cost effectiveness, DIY methods versus commercial options, safety measures, future prevention, and troubleshooting tips.
Choose wisely to save time and damage.
- Frustration
- Relief
- Confidence
- Caution
Decision Flow: Step-by-Step Plan to Remove Dried Paint
Now that you’ve matched paint types to removal methods, you can follow a clear step-by-step decision flow to remove dried paint efficiently and safely.
Assess the surface, choose appropriate paint removal techniques, test a small area, protect surrounding areas using surface protection tips, apply chosen method, remove residue, and sand or repaint as needed.
Dispose materials and clean up thoroughly.
Frequently Asked Questions
Can Paint Removal Methods Harm Underlying Antiques or Valuable Finishes?
Yes — you can damage antiques; you’ll harm antique preservation if you use harsh strippers or abrasives. You should test, use gentle solvents, and hire pros to guarantee finish protection while removing paint from valuable pieces.
How Long After Repainting Is It Safe to Perform Aggressive Stripping?
You should wait at least 2–4 weeks after repainting before safe stripping; timing considerations include full cure of paint, humidity, and temperature. If finish feels hard and no tack remains, you can proceed with aggressive stripping.
Can Dried Paint Removal Release Harmful Fumes Into Neighboring Units?
Yes — you can release harmful fumes into neighboring units. You should guarantee ventilation safety, contain work areas, and use respirators; otherwise chemical exposure from removers or old paint can drift, risking neighbors’ health and requiring precautions.
Will Paint Removal Affect Warranties on Appliances or Outdoor Equipment?
Yes — paint removal can affect warranties if it causes damage or voids seals; you’ll want to check warranty implications and follow appliance care guidelines, use approved methods, document work, and consider professional service to avoid disputes.
How Do Weather Conditions Alter Outdoor Paint-Stripping Effectiveness?
Weather alters stripping: temperature impact speeds or slows chemical action and curing, while humidity effects change solvent evaporation and adhesion; you’ll need to adjust timing, product choice, and drying time to guarantee effective, safe outdoor paint removal.
Conclusion
You’ve got the tools and the know-how now, but don’t start blasting away just yet—pause, identify the paint, and pick the gentlest method that matches the surface. Put on your safety gear, test a hidden spot, and work in small sections so you don’t accidentally make things worse. If a technique fails, step back and try the next gentler option rather than escalating. Follow the flowchart, and you’ll know exactly what to do next—just be careful.