How to Paint With Oil Paint: Beginner’s Complete Guide
You can start oil painting with just a few reliable supplies, a primed canvas, and basic colors like Titanium White, Cadmium Yellow, Alizarin Crimson, Ultramarine Blue, and Burnt Umber. Practice simple strokes, block in values with a grisaille underpainting, and follow fat-over-lean layering using glazing and scumbling for depth. Keep solvents sealed, ventilate, and work slowly to control color and texture. Try a small study to build confidence, and keep going to learn practical techniques and projects.
How to Use This Oil Painting Guide
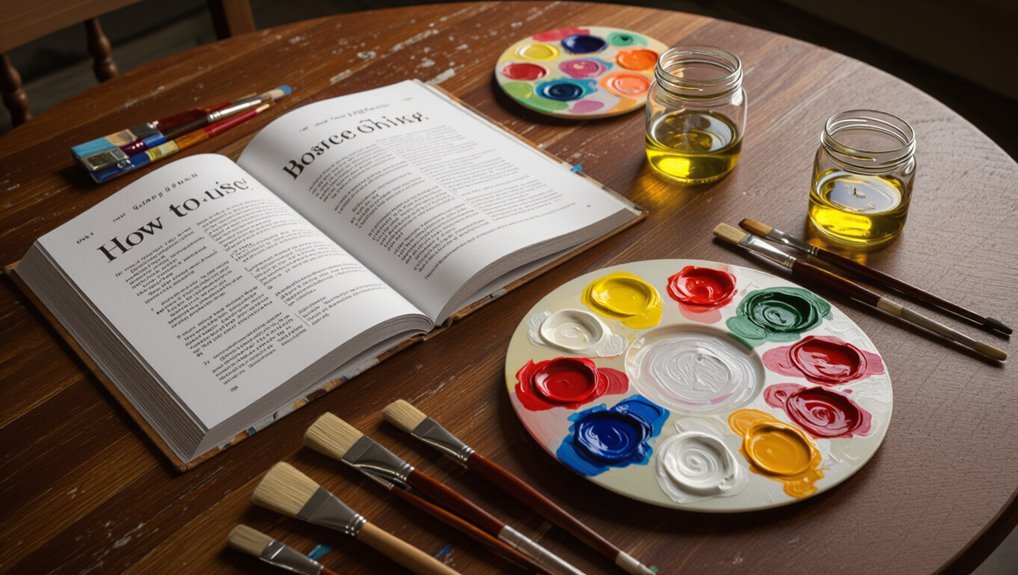
This guide walks you through oil painting step by step, so you can pick up techniques, avoid common mistakes, and plan projects with confidence.
Use chapters in order or skip to sections that match your goals. Practice core oil painting techniques, follow safety notes, and set short exercises.
Keep a beginner mindset: experiment, reflect on results, and iterate until skills solidify.
Why Try Oil Painting as a Beginner
A palette of oil paints opens up rich color, slow drying time, and forgiving blending that make it ideal for beginners who want to learn deliberate mark-making and color control.
You’ll enjoy a benefits exploration into depth, texture, and layering that supports patient learning.
Oil painting encourages creative expression, teaches color relationships, and builds technical confidence while letting you refine ideas before committing to a final piece.
Paint Your First Small Oil Study (Start-to-Finish)
Pick a simple subject—like a single apple or a small vase—to keep your focus on color and form rather than detail.
Start by blocking in the basic shapes and major values with a thin wash so you can map the composition quickly. As you work, adjust proportions and values before committing to thicker paint.
Choose A Simple Subject
When you’re ready to paint your first small oil study, choose a simple subject you can finish in a few sessions so you stay focused on technique rather than detail. For subject selection, pick objects with clear shapes and limited colors. Simple subjects speed learning and confidence.
| Object | Shape | Color |
|---|---|---|
| Apple | Round | Red |
| Mug | Cylinder | White |
| Leaf | Oval | Green |
Block In Basic Shapes
Start by laying in the largest shapes with a thin wash of paint so you can map proportions and placement quickly.
Then block in midtones and darks, focusing on value studies to establish contrast.
Use simple brushes to refine edges and practice shape recognition—simplify complex forms into basic masses.
Keep adjustments loose; this rough stage guides composition and tone before detailing.
What Supplies You Really Need for Oil Painting
Tools matter: you don’t need a mountain of gear to begin oil painting, just a few reliable supplies that let you learn technique and finish paintings safely.
Choose canvas types suited to painting styles, select a couple of trusted paint brands, learn basic mixing techniques and color blending, keep brush maintenance routine, set up palette organization, and guarantee good studio lighting so you work accurately and comfortably.
Choosing Affordable vs. Artist-Grade Oil Paints
When you’re choosing between affordable and artist-grade oil paints, you’ll notice differences in pigment strength and color purity that affect coverage and mixing.
Artist-grade tubes generally offer better longevity and durability, while student paints save money but may fade or require more layers.
We’ll weigh cost versus performance so you can pick what’s right for your goals and budget.
Pigment Quality Differences
Color performance depends largely on pigment quality, so knowing what differentiates student-grade from artist-grade oil paints will save you time and money.
You’ll weigh pigment types and color vibrancy against pigment stability and lightfast qualities.
Consider binder influence and texture variation for handling, test pigment mixing for hue accuracy, and do a price comparison to balance cost with the color fidelity you need.
Longevity And Durability
Although cheaper tubes can let you experiment without breaking the bank, you’ll sacrifice long-term stability and pigment integrity compared with artist-grade oils. You should weigh oil paint lifespan and paint preservation: choose artist-grade for archival work; student-grade for practice and studies.
| Feature | Choice |
|---|---|
| Pigment concentration | Higher vs lower |
| Durability | Greater vs reduced |
| Varnish response | Stable vs variable |
| Aging | Predictable vs inconsistent |
Cost Versus Performance
Having chosen between student- and artist-grade oils for longevity, you now face the practical question of budget versus performance.
Do a cost effectiveness analysis: compare pigment load, tinting strength, and lightfastness. A performance comparison helps you decide where savings are acceptable and where investment matters—primarily for key colors and final layers.
Balance costs by mixing grades strategically to stretch budget without compromising results.
Essential Mediums: Linseed, Solvents, and Alkyds
Because the medium you choose controls drying time, gloss, and handling, getting familiar with linseed oil, solvents, and alkyds is essential to painting with oils.
You’ll learn linseed benefits for gloss and flexibility, solvent types and safety precautions, alkyd advantages for faster drying times, and medium applications.
Use proper mixing techniques, mind environmental impact, and store materials responsibly to protect health and studio.
Which Brushes to Buy and What Each Does
Now you’ll learn which brush shapes and hairs suit different oil techniques so you can choose with confidence.
I’ll explain the common types — flats, filberts, rounds, and brights — and what each is best for.
You’ll see how natural and synthetic hairs perform so you can pick brushes that match your style and budget.
Brush Types Explained
Brush choice shapes how your paint behaves on the canvas, so pick brushes that match the marks and detail level you want. Know brush sizes and bristle types: synthetic brushes and natural fibers each suit techniques. Learn round brushes, flat brushes, fan brushes, filbert brushes and detail brushes. Prioritize brush maintenance to extend life.
| Type | Use |
|---|---|
| Synthetic | Durable |
| Natural | Soft |
Uses For Each Brush
You’ve got a feel for bristle types and shapes; next, learn which specific brushes to buy and what each will do for your oil work.
Start with flats for blocking, filberts for blending, rounds for detail, and fans for texture.
Your brush selection guides brush techniques and results; practice regularly and follow strict brush maintenance to prolong life of each shape and tip.
Choose a Support: Canvas, Panel, or Oil Paper
Choosing the right support — canvas, panel, or oil paper — shapes how your paint behaves and how long the work will last, so pick one that matches your goals and budget.
Choosing the right support—canvas, panel, or oil paper—determines paint behavior and the work’s longevity.
Use canvas textures for flexibility, compare panel types for rigidity, or try oil paper.
Consider surface preparation, priming techniques, durability factors, painting surfaces, and support choices.
- Canvas textures
- Panel types
- Oil paper
- Surface preparation
- Priming techniques
Set Up a Safe Small Oil-Painting Space
Before you start painting, set up a small workspace with good ventilation so fumes don’t build up.
Store solvents and rags in sealed, labeled containers and keep them away from heat or open flames.
Protect floors and surfaces with a waterproof drop cloth or disposable paper to catch spills and wipes.
Ventilate Your Workspace
Anyone working with oil paints should make ventilation your first priority: proper airflow removes solvent fumes and prevents buildup of hazardous vapors in a small space.
You’ll plan your workspace setup, use simple airflow techniques, and keep air moving while you paint. Follow practical steps below to reduce exposure and stay comfortable.
- open windows and doors
- use exhaust fan
- add a window fan
- position intake vents
- avoid stagnant corners
Store Solvents Safely
Because solvents are flammable and emit strong fumes, you’ll store them deliberately and keep them contained: use tightly sealed, clearly labeled metal or approved plastic containers, limit quantities to what you need, and keep them in a cool, well-ventilated area away from heat sources and direct sunlight.
Follow solvent storage safety precautions: secure lids, store upright, keep a spill kit nearby, and restrict access.
Protect Surfaces And Floors
Storing solvents safely helps reduce fire and fume risks, but you also need to protect your work surfaces and floors before you start painting.
Use drop cloths and durable surface protection, secure floor coverings, and set up spill management materials so you can work cleanly and safely.
- Lay canvas-friendly drop cloths
- Tape edges for surface protection
- Use absorbent floor coverings
- Keep spill management kit handy
- Clear walkways and vents
How to Prime and Tone a Canvas Quickly
Before you lay down color, prime and tone the canvas to create a reliable, even surface and save time later; a quick gesso coat followed by a thin, neutral wash gives you consistent absorbency and an immediate working ground for building form and color. Use quick priming techniques and efficient toning methods to speed prep.
| Step | Action |
|---|---|
| 1 | Sand, gesso |
| 2 | Thin wash |
| 3 | Dry, inspect |
Simple Color Theory for Oil Painting Beginners
Wondering how a few colors can create endless mixes? You’ll learn color wheel basics and how primary hues interact.
Use complementary colors for contrast and harmony, and practice simple color mixing to shift temperature and value.
Pair complements for vivid contrast and balanced harmony; practice mixing to subtly shift color temperature and value.
- Identify primary hues
- Explore secondary blends
- Test complementary contrasts
- Adjust value with mixing
- Keep notes for repeatable results
Build a Minimal Beginner Oil Palette
Now that you know basic color relationships, let’s build a minimal starter palette: a warm and cool primary set, plus white and a versatile earth tone.
You’ll learn how to mix and neutralize hues efficiently so you don’t need dozens of tubes.
We’ll also cover the essential mediums and brushes to control drying, gloss, and brushwork.
Essential Starter Colors
You don’t need a wall of tubes to start—just a handful of versatile colors will let you mix almost anything and learn how oil paint behaves.
Choose reliable pigments, practice color mixing, and keep tidy palette organization to save time.
Start with these essentials:
- Titanium White
- Cadmium Yellow Medium
- Alizarin Crimson (or Quinacridone)
- Ultramarine Blue
- Burnt Umber
Mixing And Neutralizing
Those five pigments give you a strong foundation, and learning to mix and neutralize them will let you stretch that limited palette into virtually any color you need. You’ll mix complements to mute hues for neutral grays, maintaining color harmony and tonal balance. Practice small studies, note ratios, and favor subtle shifts.
| Mix | Ratio | Result |
|---|---|---|
| Red+Green | 1:1 | Neutral |
| Blue+Orange | 2:1 | Cool gray |
Mediums And Brushes
When you start building a minimal beginner oil palette, pick just a few reliable mediums and brushes that let you learn technique without overwhelm.
Choose a fast-drying medium, solvent-free medium, and one blending medium. Buy a small set of filbert, round, flat brushes.
Prioritize proper brush maintenance to extend life.
- linseed medium
- odorless solvent
- solvent-free medium
- filbert brush
- brush maintenance routine
Mix Clean Colors and Avoid Muddy Mixes
Although it’s tempting to mix every tube on your palette, keeping colors clean means mixing thoughtfully and sparingly to prevent dull, muddy results. You’ll aim for color harmony by limiting mixes and maintaining palette organization. Use selective compliments, test mixes on scrap, and layer transparently to preserve vibrancy.
| Strategy | Tip |
|---|---|
| Limit mixes | Use fewer pigments |
| Test first | Try on scrap |
Basic Brushwork Exercises to Practice First
Start with simple strokes to build control and confidence: load a small amount of paint, hold the brush lightly, and practice straight lines, curves, and varying pressure to see how thickness and texture change.
Focus on brush techniques, stroke variation, blending practice, edge control, pressure application, mixing colors, palette knife and scumbling technique.
- Straight lines
- Curves
- Soft blends
- Crisp edges
- Scumbled textures
Block In a Composition: Step-by-Step
Now that you’ve practiced basic strokes and learned how pressure, edges, and blending behave, you’re ready to block in a composition.
Start by sketching main masses, focusing on shape proportions and simplifying forms. Use composition techniques like value placement and leading lines to arrange focal points.
Block broad color and tonal relationships quickly, keep edges varied, and adjust major shapes before refining details.
Underpainting Basics: Grisaille and Color Grounds
Start by doing a grisaille value study so you can see the lights and darks without color getting in the way.
Try warm and cool color grounds to influence mood and how subsequent layers read.
Then build transparent and opaque layers to create depth and unify the composition.
Grisaille Value Studies
When you begin a painting, laying in a grisaille value study helps you see and solve the picture’s structure before color complicates things.
You’ll map tones, test grisaille techniques, and use value scales to guide contrast and form. Work thin, dry slightly, and revise until values read clearly.
- Block shapes
- Establish midtones
- Push highlights
- Deepen shadows
- Refine edges
Warm And Cool Grounds
Although a grisaille sets values, choosing a warm or cool ground will subtly steer the painting’s mood, temperature, and how colors read over it. You’ll pick warm grounds to enliven flesh and glow, cool grounds to recede space and mute tones. Use them deliberately.
| Warm | Cool | Effect |
|---|---|---|
| Enliven | Recede | Mood |
| Glow | Mute | Readability |
Layering For Depth
Having chosen a warm or cool ground and laid a grisaille to set values, you’ll build depth by layering—using thin, controlled passages that let underlying tones show through.
Use glazing and scumbling as layering techniques to enhance depth perception while preserving value structure.
- Start thin, increase opacity gradually
- Preserve grisaille where needed
- Vary drying times
- Limit pigment load
- Test color harmony
Fat Over Lean: Safe Layering Rules
If you want durable oil paintings, follow the “fat over lean” rule: each successive layer should contain more oil (fat) than the one beneath it.
You’ll start with a lean application—thinner paint, faster drying—and build toward fat layering by adding medium or more oil.
This prevents cracking, guarantees proper adhesion, and helps your painting age more stably.
Glazing and Scumbling to Add Depth
When you want luminous depth without repainting forms, use glazing and scumbling to build subtle color and texture.
You’ll apply thin transparent layers for glazing techniques, and dry, broken strokes for scumbling effects, adjusting opacity to suggest atmosphere and form.
- thin oil glazes
- controlled medium ratios
- transparent color shifts
- dry-brush scumbles
- gradual build-up of depth
Capture Light and Form With Value Studies
Start by blocking in the basic values to map shadows and lights quickly.
Then work out a clear gradient of tones to model planes and shifts.
Keep checking and measuring light direction so your forms read convincingly.
Block In Values
Block in the major values first so you can see the painting’s light and form without getting lost in color or detail.
You’ll map value placement quickly, focusing on broad tonal relationships to establish structure. Work confidently with limited brushes and thinned paint, evaluating edges and contrasts before refining.
- Establish darkest darks
- Mark midtone masses
- Reserve light areas
- Check edge hardness
- Step back and compare
Gradient Of Tones
Having laid in the major values, refine them into a smooth gradient of tones to capture how light wraps the form.
You’ll study subtle tone shifts, softening edges where planes curve and preserving sharper edges where they turn.
Use controlled blending techniques—feathering with a dry brush or glazing thin layers—to unify values, maintain contrast, and suggest volume without losing the initial structure.
Measure Light Direction
How do you pinpoint the light’s direction so your values read convincingly? You study a single light source, squint, and map planes; then simplify tones into broad lights, midtones, and darks.
Note shadow effects and reflected light; adjust edges to show form.
- Squint to reduce detail
- Outline core shadow
- Mark cast shadow
- Paint reflected light
- Check highlight placement
Use Color Temperature to Create Atmosphere
When you shift the temperature of your palette—warm toward reds and yellows or cool toward blues and greens—you change the mood of the whole painting, guiding the viewer’s emotional response and sense of space.
Use color harmony and temperature contrast to steer light perception and emotional impact.
Control color relationships for atmosphere creation, mood enhancement, and subtle seasonal themes that read at a glance.
Alla Prima vs. Layered Painting: When to Use Each
You’ll choose alla prima when you want to work wet-on-wet to capture spontaneity and fresh color relationships in a single session.
Use the layered method when you need controlled drying, refined detail, and complex glazing to build depth over time.
Both approaches have distinct advantages, so think about your subject, schedule, and desired effects before you start.
Alla Prima Advantages
1 key strength of alla prima is speed: you mix and finish wet-on-wet, so you’ll capture fresh color relationships and impromptu brushwork in a single session rather than waiting days between layers.
You’ll explore alla prima techniques and styles, enjoy alla prima advantages, and face alla prima challenges with quick decisions.
- immediacy
- bold brushwork
- cohesive color
- expressive edges
- fast corrections
Layered Method Benefits
Alla prima’s immediacy is thrilling, but layered painting offers its own strengths you’ll want when planning complex work: by building paint in stages you can refine values, glazes, and subtle textures with greater control over drying and color depth.
Use layered techniques to boost depth perception and visual interest; you’ll enhance realism, correct mistakes between stages, and achieve deliberate texture enhancement for nuanced finishes.
Fix Mistakes Without Ruining the Painting
If a brushstroke goes wrong, don’t panic—oil’s slow drying time gives you plenty of options to correct it. You can lift, blend, or remove mistakes, using careful mistake correction and mindful paint layering to preserve edges and color.
Work thin over fat, test removal on edges, and glaze subtly to unify areas without overworking the surface.
- Lift with solvent
- Scrape gently
- Scumble small areas
- Feather edges
- Glaze to unify
How Long Oil Paintings Take to Dry (And Why)
Because oil paint dries through oxidation rather than evaporation, it won’t feel dry the same way acrylic does.
Drying times can range from a day for thin, fast-drying layers to months or even years for thick impasto.
You’ll manage oil paint drying by using thin layers, lean-to-fat sequencing, appropriate pigments, and patience—knowing drying times vary with thickness, temperature, humidity, and medium.
Solvent Safety, Ventilation, and Eco Alternatives
When you work with oil paints, you’re also working with solvents and mediums that can harm your health and the environment if you don’t handle them correctly.
You should prioritize ventilation, safe solvent handling, and eco friendly options to reduce fumes and waste.
- Open windows and use fans
- Wear nitrile gloves and a respirator
- Use low-VOC or odorless solvents
- Choose eco friendly options like citrus or soy-based cleaners
- Dispose of rags and liquids responsibly
Clean Brushes and Store Wet Paintings Properly
Clean your brushes promptly after each session to keep bristles springy and colors true. Use solvent then soap and water, reshape bristles, and store brushes upright. Keep wet paintings flat or angled in dust-free racks, separated to avoid tack. Prioritize proper brush cleaning and painting storage to protect work and tools.
| Item | Tip |
|---|---|
| Brushes | Soap after solvent |
| Drying | Upright |
| Paintings | Dust-free rack |
| Spacing | Separate canvases |
Varnishing and Final Finishes: When to Varnish
Although you might be keen to seal your work, wait until the paint is fully dry to the touch and through the layers — for most oil paintings that means several months to a year depending on thickness and additives.
Hold off sealing your painting until it’s fully dry—often months to a year—until every layer cures.
Choose varnishing techniques and final finishes carefully to protect and unify gloss.
- Test varnish on a scrap
- Consider removable varnish
- Pick gloss or matte
- Apply even coats
- Clean surface first
Photograph and Archive Your Paintings
Anyone can lose track of a painting’s history, so photograph and archive your work as soon as it’s fully dry and before you varnish or frame it. Use consistent lighting, include notes on materials, date, and condition for painting photography and artwork preservation.
| Photo | Notes |
|---|---|
| Front | Date, camera settings |
| Detail | Materials, condition |
| Back | Labels, signatures |
| Frame | Dimensions, provenance |
Common Beginner Mistakes and How to Avoid Them
When you’re starting with oils, the most common mistakes come from rushing—using too much paint, skipping proper drying times, or ignoring support and surface prep—and each one’s easy to avoid by slowing down and following a few simple habits.
- Accept common misconceptions and keep experimenting
- Pace yourself: learning patience
- Clean and prep supports properly
- Embrace mistakes; use them for developing style
- Seek feedback for overcoming frustration and finding inspiration
Practice Exercises to Improve Quickly
Start small and paint daily: short, focused exercises build muscle memory and sharpen your eye faster than occasional marathon sessions.
Do value studies and observational drawing, practice composition practice and color mixing, refine brush techniques and palette organization, explore texture exploration and layering exercises, and test color harmony.
Schedule quick drills, follow tidy clean up methods, and review results to improve steadily.
How to Progress: Projects, Critique, and Learning
Progressing with oil painting means moving from isolated drills to meaningful projects that challenge your decisions and reveal gaps in skill.
You’ll use project selection and goal setting to structure practice, seek artistic feedback and peer reviews, apply critique methods, and tap learning resources for focused study.
Embrace creative exploration to guarantee steady skill progression.
Let curiosity lead your brush — playful experimentation ensures steady, meaningful growth in your painting skills.
- Choose clear projects
- Set measurable goals
- Request peer reviews
- Use critique methods
- Find learning resources
Where Beginners Can Buy Supplies and Find Classes
Where can you pick up reliable oil-paint supplies and a good beginner class? You can visit local art stores for supply discounts, browse online retailers, join community colleges or art workshops for beginner classes, and follow instructional videos and painting tutorials online to reinforce lessons.
| Place | Benefit | Tip |
|---|---|---|
| Local art stores | Hands-on supplies | Ask staff |
| Online retailers | Wide selection | Read reviews |
| Community colleges | Structured classes | Check schedules |
| Art workshops | Intensive practice | Bring materials |
| Websites | Tutorials/videos | Follow series |
Frequently Asked Questions
How Do I Transport Finished Oil Paintings Safely Across Long Distances?
You protect finished oil paintings by using archival canvas protection, padding edges, and rigid backing; secure with corner protectors, climate-controlled storage solutions, and sturdy crates; label fragile, insure shipments, and avoid stacking to prevent damage.
Can Oil Paint Be Used on Textiles Like Clothing or Upholstery?
Yes — you can, but oil paint application on clothing or upholstery’s tricky: you’ll need thorough fabric preparation, priming with a flexible ground, expect stiffness, slow drying, and use sealers to protect fabric and prevent cracking or staining.
What Legal or Copyright Issues Arise From Painting Commission Requests?
You’ll face copyright ownership questions: clients may expect rights, but without clear commission agreements you’ll retain copyright by default. You should draft agreements specifying usage, reproduction, and resale to avoid disputes and protect creative control and income.
How Do I Insure My Oil Paintings for Exhibitions or Sales?
Promptly protect paintings: pick policies providing protection. You’ll compare insurance options, confirm exhibition requirements, document artworks with photos and receipts, secure transit coverage, get written loan agreements, and update valuations to keep coverage current and clear.
Are There Travel-Friendly Oil Painting Kits Allowed on Airplanes?
Yes — you can bring travel-friendly oil painting kits, but you’ll need to check travel restrictions: pack oil painting essentials like water-mixable oils, small brushes, primed panels, and sealed solvents or solvent alternatives in checked baggage when required.
Conclusion
You’ve got the tools and the roadmap—now take the brush and begin. Start small, expect missteps, and treat each painting like a conversation with the canvas; you’ll learn more listening than rushing. Practice the exercises, seek feedback, and upgrade supplies as your skills grow. Keep exploring techniques, stay patient, and remember: progress is a staircase, not a sprint. Enjoy the process, celebrate the little victories, and keep painting.