How to Fix a Peeling Ceiling Paint: Step-By-Step Repair Guide
You can fix peeling ceiling paint yourself by first diagnosing the cause—check for water stains, leaks, or poor adhesion—then protect the room, scrape loose paint, treat stains or mold, and patch and sand the surface. Prime with a stain-blocking, adhesion-promoting primer, then repaint in thin, blended coats to match texture. Control humidity and fix leaks to prevent recurrence. Keep going and you’ll find step-by-step prep, product choices, and troubleshooting tips to finish the job right.
Can You Fix Peeling Ceiling Paint Yourself?
Curious whether you can tackle peeling ceiling paint yourself? Yes — with basic tools and proper repair techniques you can handle small to moderate areas.
You’ll scrape loose flakes, sand edges, prime exposed surfaces, and repaint. Choose compatible paint types and a quality primer to guarantee adhesion.
Bigger jobs or structural issues call for a pro to avoid repeated failures.
How to Diagnose Why Ceiling Paint Is Peeling (Moisture vs. Adhesion)
Start by looking for brown or gray water stains—those usually point to a leak or high humidity.
Then do a simple adhesion test by pressing and lifting paint with a fingernail or putty knife to see if it flakes easily.
Finally, check nearby exhaust fans, vents, and attic ventilation to confirm whether poor airflow or moisture is to blame.
Check For Water Stains
Wondering whether moisture is causing your ceiling paint to peel? Do a quick ceiling inspection: look for brown or yellow discoloration, soft spots, or spreading rings. Use stain identification to distinguish leaks from age. Note location, size, and odor.
| Location | Clues |
|---|---|
| Center | Dark ring |
| Edge | Crusty |
| Near vent | Damp |
| Above bath | Active |
Test Paint Adhesion
If your ceiling shows no obvious water stains, the next step is to test whether the paint’s adhesion is failing rather than moisture causing the peel.
Gently press tape over a small area, pull sharply, and watch for flakes—simple paint adhesion testing.
If adhesion’s poor, scrape loose paint, sand, clean, prime with a bonding primer, and apply adhesion improvement techniques before repainting.
Inspect Ventilation Sources
How well is your home moving humid air out of the rooms where paint’s peeling?
Check exhaust fans, dryer vents, and window use as part of a quick ventilation assessment.
Run fans while showering and cooking, feel for drafts, and guarantee vents terminate outside.
Improved air circulation reduces moisture-driven peeling; note blocked or weak systems so you can repair or upgrade them promptly.
Should You DIY or Call a Pro?
Facing peeling ceiling paint, you’ll want to decide quickly whether to tackle it yourself or call a pro.
You’ll weigh DIY advantages against Professional expertise: cost, time, and confidence matter.
Choose based on damage, safety, and skill.
Consider:
- Save money, feel proud.
- Risk mistakes, frustration.
- Hire pros for complex or risky jobs.
Tools & Materials for Ceiling Paint Repair
Before you start scraping or patching, gather the right tools and materials so the repair goes smoothly.
You’ll need a putty knife, sanding block, primer, patching compound, and paint matched to existing paint types and sheen.
Include brushes, rollers, drop cloths, a ladder, and safety gear.
For textured ceilings, get texture repair spray or a texture knife to match ceiling textures precisely.
Prepare the Room and Protect Surfaces Safely
Start by clearing the work area of people, pets, and anything you can move to another room.
Cover floors and remaining furniture with drop cloths or plastic sheeting and tape edges to prevent slips.
Keep a small trash bin nearby for paint chips and used sandpaper so debris doesn’t spread.
Clear The Work Area
Clear the room and give yourself easy access to the ceiling by moving furniture out or to the center and covering remaining items with drop cloths or plastic sheeting; tape edges to baseboards to keep dust and paint chips from slipping underneath.
Keep workspace organization and safety precautions top of mind as you:
- Secure lighting and clear pathways.
- Wear goggles and a mask.
- Label and isolate tools.
Protect Floors And Furniture
Now that the room’s cleared, protect floors and furniture thoroughly to catch dust, paint chips, and spills—lay heavy-duty drop cloths or contractor plastic over the entire floor, overlap seams, and tape edges to baseboards so nothing slips underneath; cover remaining furniture with fitted plastic or painter’s drop cloths and weigh corners down to keep coverings from shifting while you work.
| Item | Purpose |
|---|---|
| Drop cloths | floor coverings |
| Plastic sheeting | furniture protection |
| Tape & weights | secure coverings |
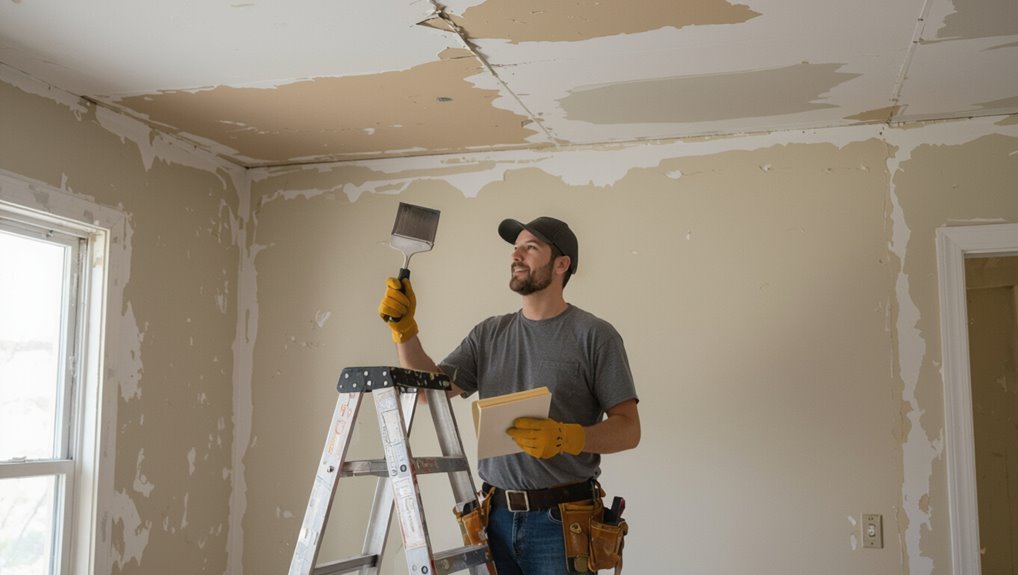
Remove Loose Paint Without Damaging the Ceiling
Loosen paint chips gently with a wide putty knife or paint scraper held at a low angle so you lift flakes without gouging the ceiling surface.
Keep tools flat, work outward from edges, and dust as you go for effective paint scraping and ceiling prep.
Use gentle pressure, avoid over-scraping, and stop at sound substrate.
- Relief
- Confidence
- Pride
Treat Damage: Stains, Mold, and Drywall Repair
Before you repaint, identify where stains are coming from—leaks, smoke, or water buildup—and fix the source.
If you spot mold, treat it safely with proper cleaners and protective gear to prevent spread.
Patch any damaged drywall, sand smooth, and prime before you paint.
Identify Stain Sources
When you see a stain on the ceiling, don’t assume it came from the same spot—trace its edges and check above for leaks, condensation, or previous repairs that might be failing.
Identify causes of peeling by locating moisture sources: roof, plumbing, HVAC.
Then decide if repair or contractor help fits the severity.
- Frustration
- Urgency
- Relief
Treat Mold Safely
If you find mold on your ceiling, act quickly and safely: contain the area, wear protective gear (gloves, N95 or better mask, and goggles), and ventilate the room to limit spore spread. Use mold removal techniques with safe products, scrub gently, and dry thoroughly. Replace porous materials if contaminated.
| Step | Action | Note |
|---|---|---|
| 1 | Isolate | Close vents |
| 2 | Protect | Wear PPE |
| 3 | Clean | Use safe products |
| 4 | Dry | Dehumidify |
| 5 | Inspect | Recheck after 48 hrs |
Patch And Sand Drywall
After you’ve removed mold and let the area dry, you’ll need to repair any damaged drywall so new paint will adhere and look smooth.
Patch holes, skim with joint compound, and sand flush for seamless ceiling finishing. Follow these steps to restore confidence:
- Remove loose paper and cut damaged drywall.
- Apply patch and compound; feather edges.
- Sand, prime, and inspect before painting.
Skim Coating and Sanding for a Smooth Surface
Start by applying a thin, even layer of joint compound to the repaired ceiling area so you can level out seams, texture differences, and any remaining imperfections.
Use proven skim coat techniques: feather edges, work in thin passes, and allow full drying.
Then follow practical sanding tips—use a pole sander with fine grit, sand lightly, and wipe dust away before repainting for a seamless finish.
Which Primer to Use (And Why It Matters)
When you’re ready to prime, choose a product formulated for adhesion and stain-blocking so the new paint bonds well and won’t show bleed-through from water stains or repairs.
You’ll pick based on primer types and primer benefits. Consider feelings as you decide:
- Relief — oil-based for stubborn stains.
- Confidence — shellac for strong blocking.
- Ease — latex for general adhesion.
Repaint and Blend Repairs Like a Pro
With primer set and stains sealed, you’ll repaint and blend repairs so the ceiling looks seamless.
Feather paint from the repair into surrounding areas, use thin coats, and let each dry.
Check color matching under the room’s light and adjust with small tint additions.
Check paint color under the room’s light and fine-tune with tiny tint adjustments for a seamless match
For texture blending, apply matching stipple or knockdown techniques, then inspect and touch up sparingly.
Prevent Peeling: Moisture Control and Surface Prep Tips
Because moisture and poor adhesion are the main culprits, you’ll prevent future peeling by controlling humidity and prepping the surface thoroughly before painting.
Use dehumidifiers, fix leaks, and install moisture barriers.
Clean, sand, and apply primer for surface sealing.
Follow these emotional prompts:
- Feel confident.
- Breathe easier.
- Enjoy a lasting ceiling.
Troubleshooting Common Problems and When to Call a Pro
Now that you’ve controlled humidity and prepped surfaces, you’ll still run into stubborn issues that need troubleshooting before repainting.
Check for hidden peeling causes: persistent leaks, old oil paint, or poor adhesion.
Patch and sand, then test with primer.
If stains return, structural damage appears, or mold persists, get a professional assessment—call a pro to diagnose and fix underlying problems safely.
Frequently Asked Questions
Can Ceiling Paint Peeling Cause Health Problems?
Yes — peeling ceiling paint can cause health problems. You’re risking mold growth in damp areas, which worsens air quality and can trigger allergies, asthma, and respiratory irritation, so you should address peeling promptly.
How Long Until Repaired Ceiling Paint Fully Cures?
Typically, your repaired ceiling paint fully cures in 2 to 4 weeks, though full paint adhesion stabilizes over 30 days; humidity and temperature matter, so you’ll avoid heavy cleaning or touching for a month to guarantee proper curing time.
Will Ceiling Texture Patterns Match After Repair?
Yes — you can usually match patterns, but it’s like tuning an instrument: your skill and materials matter. Use proper texture matching and repair techniques, feather edges, practice on scrap, and blend seamlessly for best results.
Can I Use Ceiling Repair Techniques on Popcorn Ceilings?
Yes — you can. You’ll use texture application adapted for popcorn, matching pattern with repair tools like trowels, spray cans, or hopper guns, and sand, prime, and paint carefully to blend repairs into the surrounding ceiling.
How Much Will a Professional Ceiling Repair Cost?
Expect $200–$800 for small patches, $800–$2,500 for larger jobs, and $2,500+ for full ceilings; you’ll compare DIY alternatives, choose paint types wisely, and weigh cost versus skill, time, and cleanup.
Conclusion
You can fix peeling ceiling paint yourself, but it’s not magic — it’s method. With the right tools, primer, and a bit of elbow grease, you’ll stitch up chips, seal out moisture, and repaint so the ceiling looks seamless. Think of the repair as mending a faded sky: scrape, clean, prime, smooth, and paint until the patch breathes with the rest of the room. Keep humidity low and prep well, and the ceiling will stay calm, not cracked.