How to Paint Fresh Drywall for a Smooth Professional Finish
You’ll get a smooth, professional finish on fresh drywall by starting with a careful inspection and fixing nail pops, tape issues, and dents, then sanding joints lightly to feather edges without gouging. Remove all dust, apply a quality drywall primer, and use the right nap roller and tip-in brush for edges. Work in consistent W-patterns, apply two even topcoats, and address seam flashing or texture mismatches as needed — keep going and you’ll pick up the pro techniques that follow.
Quick Step-by-Step: Paint Fresh Drywall in 6 Moves
Start by prepping the room and gathering supplies so you can move through these six steps without interruptions: clean and sand joints, apply primer, cut in edges, roll the field, touch up any thin spots, and do a final inspection.
You’ll follow drywall preparation, then control primer soak and drying, cut precise edges, use even paint application, spot-correct thin areas, and confirm uniform coverage.
Inspect New Drywall and Spot Problem Areas
Before you grab paint, carefully inspect the new drywall for issues that will show through finish coats: look for nail or screw pops, ridges at taped joints, surface dents, and any areas where tape isn’t fully embedded.
Perform a drywall inspection under raking light, mark imperfections, and prioritize problem identification so you can sand, fill, or re-tape only where necessary before priming.
Gather Tools and Materials for Painting Fresh Drywall
Before you start painting, gather the essential tools and equipment like rollers, brushes, drop cloths, and a sanding block so you won’t have to stop mid-job.
Pick the right paints and materials—primer, drywall compound, and a quality interior latex paint—to match the surface and finish you want.
Having everything organized and on hand speeds the process and helps you get a professional result.
Tools And Equipment
Painting fresh drywall goes smoother when you have the right tools and materials on hand, so gather everything before you begin: quality latex primer, interior paint, a good roller (3/8″–1/2″ nap depending on texture), angled and sash brushes for corners and trim, a paint tray, drop cloths, painter’s tape, a sanding block or pole sander with 220-grit sandpaper, joint compound for touch-ups, a putty knife, and a sturdy ladder or step stool.
| Item | Purpose | Tip |
|---|---|---|
| Roller covers | Apply paint evenly | Match nap to texture |
| Primer brushes | Cut edges | Keep clean |
| Paint sprayers | Fast coverage | Use safety gear |
Paints And Materials
Paint selection and materials make the biggest difference in how fresh drywall looks and holds up, so choose products that match the surface and your finish goals.
You’ll gather primer, joint compound, brushes, rollers, and tapes. Focus on paint finishes and color selection that suit room use.
- Primer
- Quality paint
- Tools and tape
Sand and Feather Joints Without Overdoing It
You’ll want to sand lightly with a fine-grit pad so you don’t gouge the joint compound.
Feather the edges until they blend smoothly with the wall surface.
Wipe or vacuum thoroughly to remove dust before priming or painting.
Sand Lightly With Fine-Grit
Lightly sand the taped and mudded seams with fine-grit sandpaper so joints blend into the drywall without gouging the paper.
You’ll use sanding techniques that reduce dust and preserve paper; fine grit benefits include smoothness and control.
Follow steps:
- Sand gently along seams.
- Check edges for low spots.
- Wipe dust before priming.
Feather Edges Smoothly
After sanding the seams, feather the joint compound so the repair fades into the surrounding drywall—this keeps the finished wall from showing ridges under paint.
Use wide, light strokes with a clean drywall knife, gradually thinning compound outward. Practice feathering techniques to avoid raised seams, checking changes visually.
Focus on blending edges smoothly; don’t overwork the area or add extra compound unnecessarily.
Remove Dust Thoroughly
Start by wiping down the entire wall with a dry microfiber cloth or a soft brush to lift sanding dust before it settles into the paint.
You’ll use gentle sand-and-feather moves, then apply dust removal techniques and proper cleaning tools.
Follow this sequence:
- Vacuum seams with brush attachment.
- Tack-rag for final wipe.
- Inspect under bright light and repeat if needed.
Apply Joint Compound and Do Seam Touch-Ups
Mix a smooth batch of joint compound to a creamy, spreadable consistency and you’ll be ready to fill seams and touch up fasteners; this step seals changes so tape lays flat and paint goes on evenly.
Use proven joint compound techniques: apply thin coats, feather edges, and let each dry.
For seam repair tips, sand lightly, recoat sparingly, and wipe dust before priming.
Choose the Best Primer for New Drywall
Now you’ll pick the right primer by comparing types like PVA, acrylic, and shellac for new drywall.
Consider coverage and sealing power so joint compound and paper are blocked and you use fewer coats.
Also check dry time and compatibility with your topcoat to keep your schedule and finish on track.
Primer Types Overview
Before you pick a primer, know that new drywall needs a product that seals paper and joint compound, evens porosity, and creates a uniform base for paint.
Choosing the wrong type will show flaws and waste paint. You’ll choose among bonding primers, stain blocking primers, water based primers, oil based primers, eco friendly primers, specialty primers, tinted primers, and quick dry primers.
- Sealers
- Blockers
- Specialty
Coverage And Sealing
Because new drywall soaks up paint unevenly, pick a primer that guarantees full coverage and strong sealing to avoid patchy finish and wasted coats.
You’ll choose a high-hide drywall primer formulated for sealing techniques that lock gypsum and joint compound.
Apply evenly with a roller and tip-off brush for coverage consistency. One well-applied coat usually creates a uniform base ready for topcoat.
Dry Time And Compatibility
When you’re picking a primer for new drywall, check both dry time and compatibility so your schedule and topcoat choice line up smoothly.
You’ll want to confirm paint compatibility, expected dry time, and surface conditions.
- Water- vs oil-based: adhesion and cure.
- Fast-dry for quick recoats; slower for heavy repairs.
- Manufacturer notes: always match primer to your paint.
How to Apply Primer for Full Coverage and Even Sheen
Although primer might feel like an extra step, it’s what guarantees full coverage and a consistent sheen across fresh drywall; apply it evenly with a loaded roller and tip in the edges so you don’t get lap marks or patchy gloss. Use primer application techniques and respect ideal drying conditions.
| Step | Tool | Goal |
|---|---|---|
| Roll | 9” roller | Even coat |
| Tip | Brush | Seamless edges |
| Dry | Ventilation | Uniform sheen |
Best Paint Types and Sheens for Newly Finished Drywall
Choosing the right paint and sheen matters for how your newly finished drywall looks and wears, so pick products that balance hide, durability, and washability.
Choosing the right paint and sheen affects how finished drywall looks and withstands wear—balance hide, durability, and washability.
You’ll consider paint color options, sheen recommendations, and room function. Choose latex eggshell or satin for living areas; semi-gloss for trim and high-traffic spots.
- Eggshell/satin
- Semi-gloss
- Flat for low-traffic areas
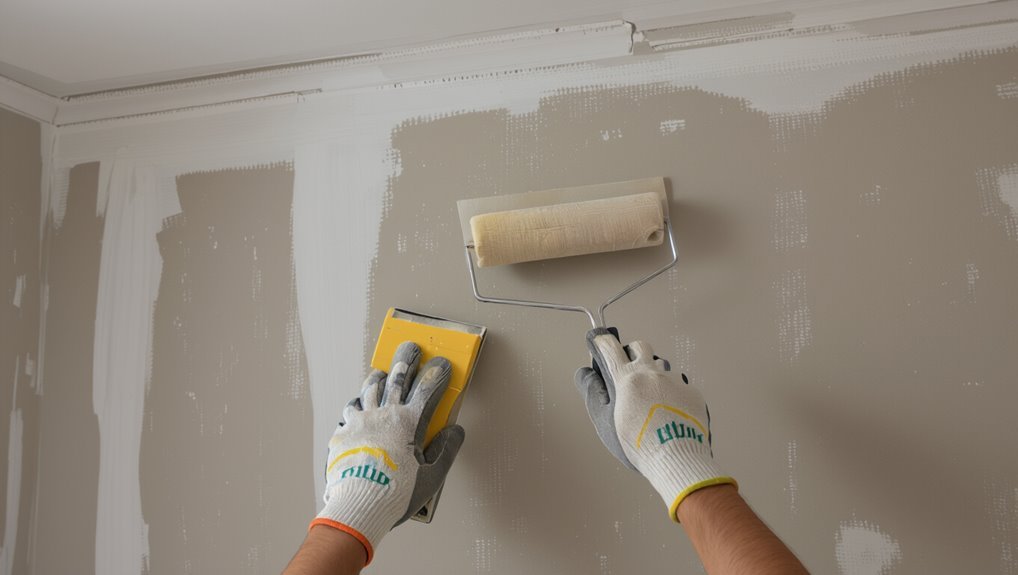
Roller and Brush Techniques for Painting Fresh Drywall
Start by loading your roller and brush correctly so the paint goes on smoothly and the drywall’s texture stays even; dip the roller into the tray well, roll it on the ridged area to remove excess, and load your brush with just enough paint to avoid drips. Use consistent roller patterns and precise brush techniques to blend edges and avoid lap marks.
| Tool | Tip |
|---|---|
| Roller | W-pattern |
| Brush | Feather edges |
| Cut-in | Tight lines |
| Blend | Light pressure |
How Many Coats to Apply and Correct Drying Times
Most fresh drywall needs two coats of paint to achieve full, even coverage and hide joint compound; you’ll apply a thin primer or sealer first (if not using a primer-plus-paint) and then two finish coats, allowing proper drying between each.
- Check manufacturer drying times.
- Adjust for humidity and temperature; drying conditions affect recoating.
- Use thin paint layering; wait recommended times before sanding or second coat.
Fix Common Issues: Seams, Flashing, and Texture
When seams, flashing, or uneven texture show through after your first coat, address them before the next—sand high ridges, re-tape or add a thin skim of joint compound where gaps or depressions remain, and feather the edges so the repair blends with surrounding drywall. Use seam sealing, texture matching, and moisture control to reduce joint visibility and improve paint adhesion for finish uniformity.
| Issue | Fix | Benefit |
|---|---|---|
| Flashing | Re-skim, sand | Flashing prevention |
| Visible joints | Seam sealing | Reduced joint visibility |
| Texture mismatch | Texture matching | Better finish uniformity |
Final Check and Maintenance for a Lasting Finish
Before you call the job done, do a careful final inspection and plan routine maintenance so the finish stays fresh—check for missed thin spots, sheen inconsistencies, nail pops, and scuffs, and note areas that may need touch-ups or additional sealing.
Follow these maintenance tips and act promptly:
- Touch up thin or uneven spots.
- Repair nail pops and caulk gaps.
- Clean scuffs with mild detergent.
Frequently Asked Questions
Can I Paint Over Drywall Compound That’s Still Slightly Damp?
No, you shouldn’t paint over drywall compound that’s still slightly damp. You’ll impede drywall drying, trap moisture, and cause adhesion or finish issues. Wait until the compound fully dries; you’ll get better results and avoid moisture effects like bubbling.
How Long Should I Wait After Priming Before Painting in Humid Climates?
Like a slow sunrise, you should wait 24–48 hours after priming before painting in humid climates. You’ll account for longer drying times and humidity effects; use fans and dehumidifiers so paint bonds evenly and won’t fail.
Can I Use Leftover Paint From Another Room for Matching New Drywall?
You can, but you’ll need to test it first: paint matching from leftover paint can fail due to fading, sheen differences, or different batches. Blend, stir thoroughly, and apply test patches to verify color consistency before committing.
Are There Health Risks From Sanding Drywall Without a Mask?
Dust dances dangerously; you shouldn’t skimp. You’ll inhale drywall dust, which can trigger respiratory issues, coughing, or irritation. Wear an N95 or respirator, ventilate the space, and clean thoroughly to protect your lungs and health.
Can Textured Drywall Be Smoothed Later Without Full Replastering?
Yes—you can smooth textured drywall later without full replastering by using smoothing techniques like skim coating or sanding. You’ll focus on surface preparation, proper drywall finishing, joint compound application, and feathering for a seamless result.
Conclusion
You’ve practically become a drywall whisperer — in six smart moves you’ll turn raw sheets into walls so smooth they’ll make people swear you hired a pro (and maybe even accuse you of witchcraft). Keep sanding light, feather and blend like an artist, prime and roll with steady, patient strokes, and respect drying times. Patch quick, touch up seams, and do one final inspection. Do that, and your finish will outshine most remodeling miracles.