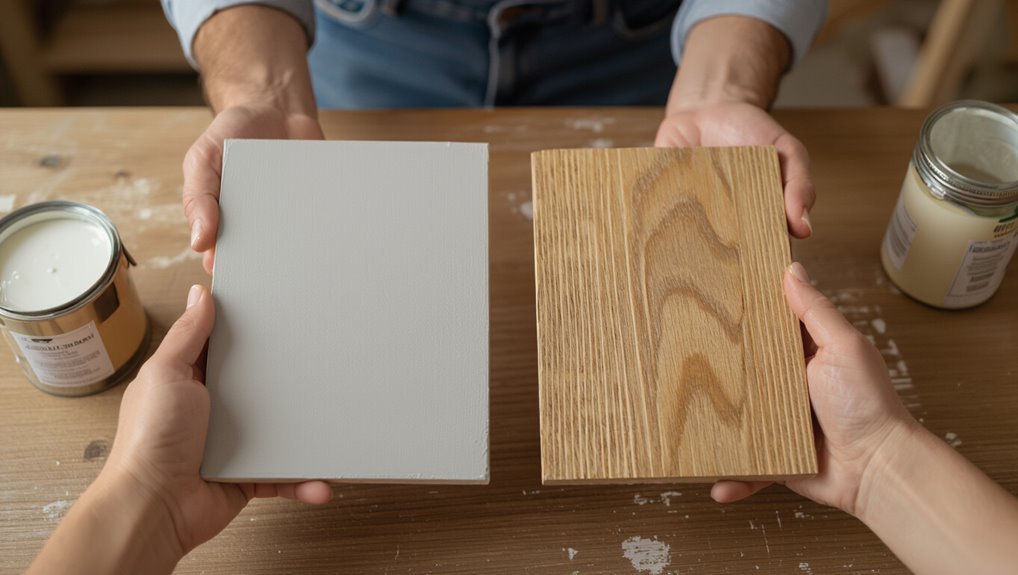
Why Prime Before Painting? Benefits You Should Know
You should prime before painting because it locks down stains, evens out porous surfaces, and gives your topcoat a stronger, longer-lasting bond. Primer improves adhesion so paint won’t peel or flake, helps cover imperfections for a smoother finish, and lets you recoat faster with fewer touch-ups. Different primers tackle specific issues—stains, glossy surfaces, or raw wood—so picking the right one matters. Keep going to learn the best primers and prep tips for your project.
Do You Need Primer? Quick Answer and Exceptions
Wondering whether you really need primer? You usually do unless you’re repainting similar color on smooth, clean walls.
Consider primer types for stain-blocking, adhesion, or sealing porous surfaces. You’ll save time and money by matching primer to surface preparation—sanding, cleaning, and patching—so paint adheres evenly.
Exceptions include freshly painted latex in good condition or specialized paint-and-primer products.
Why Priming Prevents Peeling and Cuts Recoats
When you prime, you create a stable layer that stops paint film from lifting off the surface.
That bond also lets your topcoat adhere more evenly, which cuts down on peeling later.
Plus, a uniform primer often lets you recoat sooner because the surface accepts paint faster.
Prevents Paint Film Lift
Prime first to stop future headaches: a proper primer bonds to the substrate and creates a stable surface for your topcoat, preventing the paint film from lifting, peeling, or separating.
You’ll get improved paint adhesion and moisture resistance, so coatings stay put.
Consider these quick benefits:
- Stronger bond
- Fewer blisters
- Less flaking
- Longer durability
Speeds Up Recoat Times
Along with preventing peeling and film lift, a good primer speeds up recoat times by giving paint a consistent, absorbent surface so topcoats cure predictably.
You’ll notice quick drying between coats, so projects finish faster and with fewer interruptions.
Primer evens porosity, reduces touch-ups, and promotes enhanced durability, so you’ll apply fewer recoats and get a longer-lasting, professional-looking finish.
How Primer Improves Adhesion and Finish
You’ll find that primer creates a uniform surface that helps paint stick evenly across different materials.
That stronger bond reduces flaking and makes your topcoat last longer.
It also fills minor imperfections so the final finish looks smoother and more professional.
Better Paint Bonding
Because primer creates a consistent, slightly porous base, your paint can grip the surface more securely and lay down more evenly, reducing peeling, blistering, and visible streaks.
You’ll boost paint adhesion and simplify surface preparation, so coatings last longer and resist moisture.
Consider these benefits:
- Stronger bond to substrates
- Fewer touch-ups
- Improved durability
- Better color uniformity
Smoother Final Surface
Think of primer as the smoothing agent that evens out tiny imperfections and creates a uniform surface for paint to cling to. You’ll use primer to improve adhesion, reduce absorbency, and make smoothing techniques work better during surface preparation. The result is a consistent, durable finish that needs fewer coats and less sanding.
| Step | Benefit | Tip |
|---|---|---|
| Prime | Better grip | Use thin coats |
| Sand | Even texture | 120–220 grit |
| Paint | Uniform finish | One or two coats |
| Seal | Durability | Use compatible products |
Best Paint Primers for Wood, Drywall, and Plaster
When prepping wood, drywall, or plaster, picking the right primer makes your finish last and look professional.
When prepping wood, drywall or plaster, the right primer helps your finish last and look truly professional.
You’ll want primers that seal, block stains, and match substrate needs; consider eco friendly options and compare drying times before buying.
- Oil-based: great for knots and stains.
- Latex: versatile for drywall.
- Shellac: fast stain blocker.
- Bonding: for slick plaster.
Priming Over Glossy or Previously Painted Surfaces
If your walls or trim have a glossy finish or old paint, you’ll need to knock down that sheen and guarantee the primer bonds properly before topcoating.
You’ll scuff or degloss, clean thoroughly, and choose a high-adhesion primer.
Use proper glossy surface preparation and adhesion improvement techniques like sanding, solvent wiping, or a bonding primer so your new paint sticks uniformly and resists peeling.
When to Use Tinted Primer for Big Color Changes
When you’re switching from a dark or saturated color to a much lighter one, tinting the primer can save coats and help the new color read truer.
Decide how much tint you need based on the original color and the paint’s opacity, since stronger contrasts require deeper tinting for full coverage.
That upfront step cuts down on visible bleed-through and gives you a more uniform base for the finish coats.
When To Tint
Wondering whether to tint your primer for a big color change? You should tint when underlying stains, strong previous colors, or bright new hues demand better coverage and color matching; use proper tinting techniques to reduce coats and speed up finishing.
- Dark to light shifts
- Bold accent walls
- Stain or smoke remediation
- Limited topcoat coats planned
Coverage And Color
Several situations call for tinted primer because it helps you get true color faster and with fewer topcoats.
When shifting from dark to light or vice versa, tinted primer improves coverage options and boosts color depth so your topcoat performs better.
You’ll save time and paint, achieve more consistent results, and reduce the number of coats required for full, even coverage.
Primer Options for Stains, Smoke, and Odors
If you’re tackling walls stained by water, smoke, or lingering odors, choosing the right primer matters more than the paint itself—you’ll want a product that seals stains and locks in smells so the topcoat can perform.
Use stain blocking, odor sealing primers designed for containment.
Consider options:
- Shellac-based blocker
- Oil-based stain sealer
- Water-based stain blocker
- Kilz or Zinsser specialty formulations
How Primer Boosts Durability and Cleanability
Beyond sealing stains and odors, primer also strengthens the surface and makes it easier to keep clean.
When you prime, you get durability enhancement that resists chipping and wear, so paint lasts longer under daily use.
Primer creates a smoother, less porous finish for cleanability improvement, letting you wipe away dirt and stains without damaging the topcoat or needing aggressive cleaners.
Quick Prep and Application Checklist Before Priming
Before you prime, run through a short, focused checklist to make sure the surface, environment, and tools are ready; this saves time and prevents common problems like poor adhesion, visible seams, or contamination.
Use appropriate prep materials, clean and sand surfaces, and review application techniques.
Then follow this quick numeric list:
- Clean and degrease
- Sand and repair
- Choose correct primer and tools
- Check temperature and ventilation
Common Priming Mistakes and How to Avoid Them
When you skip steps or rush the job, common priming mistakes show up as peeling, blotchy coverage, or trapped debris—problems you can avoid by following a few precise habits.
Check surfaces for dust, grease, and dampness, sand glossy areas, and choose the right primer for substrate.
Learn proper priming techniques and dismiss common misconceptions that shortcut curing times or skip surface prep.
Is Primer Worth the Cost and Time?
Wonder whether priming is worth the extra cost and time? You’ll find a clear cost analysis shows primer reduces total paint needed, touch-ups, and long-term repairs.
For time efficiency, priming speeds coverage and avoids rework.
Consider these benefits:
Consider these benefits: better adhesion, fewer coats, improved durability, and easier maintenance—saving time and money.
- Better adhesion
- Fewer coats needed
- Improved durability
- Easier maintenance
You’ll save money and time overall.
Frequently Asked Questions
Can I Prime Over Wallpaper Without Removing It?
Yes—you can prime over wallpaper without removing it if the wallpaper’s firmly adhered and undamaged. Choose primer types like bonding or shellac-based to improve wallpaper adhesion, block stains, and guarantee paint sticks evenly for a durable finish.
Will Primer Affect VOC Levels/Indoor Air Quality Long-Term?
Think of primer as a filter: if you pick low-VOC or water-based options, it won’t raise VOC emissions long-term, and you won’t worsen indoor pollutants or air quality; that lowers health concerns and keeps your home safer.
Can I Use Primer in High-Humidity Bathrooms Without Ventilation?
You can, but high humidity challenges mean primer may dry slowly, peel, or trap moisture. You should choose a moisture-resistant primer and improve ventilation solutions—use exhaust fans, dehumidifiers, or portable venting to guarantee proper adhesion and longevity.
Does Primer Prevent Mold or Mildew on Exterior Surfaces?
Yes — you’ll get improved mold resistance and mildew prevention when you prime exterior surfaces; like laying a fortress’ foundation, primer blocks moisture pathways and helps paint adhere, though proper ventilation and mildew-resistant products still matter.
Are Spray Primers Safe for Use Around Pets and Plants?
They can be risky—spray primer safety depends on ventilation, containment, and product choice; you’ll want pet friendly options labeled low‑VOC or water‑based, keep pets and plants away until fumes clear, and follow all precautions.
Conclusion
Think of primer as the soil you’ll plant your paint in—you’ll give your walls a deeper root so color won’t fade or flake. You’ll save time and money by preventing peel, hiding stains, and helping paint stick smoothly. When you prep, sand, and choose the right primer, you’re tending a garden that resists weather and wear. So don’t skip that foundational layer; you’re investing in a finish that will bloom longer and cleaner.