How to Clean Dried Acrylic Paint Brushes Step by Step
You can rescue dried acrylic brushes by softening the paint, working it out, and reshaping the bristles. Start by soaking the bristles in warm, soapy water to loosen fresh clumps; use a brush comb or pins to tease out stubborn bits. For tougher buildup, apply isopropyl alcohol or a commercial restorer, then rinse thoroughly. Reshape and let the brush dry flat. Keep tools handy and adopt quick-clean habits to avoid repeat fixes—keep going to learn full step-by-step methods.
Quick Rescue: Remove Dried Acrylic From a Brush
Don’t panic if acrylic has dried in your brush—you can often save it with a few simple steps.
Wet bristles in warm water, gently work a mild soap through to loosen dried paint, and use a brush comb for stubborn clumps.
Rinse thoroughly, reshape the tip, and let it dry flat.
These quick actions support brush maintenance and guarantee long-term paint preservation.
How to Tell If a Brush Can Be Saved
How can you tell whether a brush is worth rescuing? Check brush condition with quick inspection methods: flexible bristles, intact ferrule, and minimal splaying.
Consider paint types and drying times—acrylic cured long-term may be irreversible.
Match bristle types to restoration techniques; natural hairs tolerate some methods better.
Factor cleaning frequency and follow maintenance tips to decide salvageability before committing effort.
Gather Tools & Safe Solvents (Soap, IPA, Restorers)
Before you start, gather the basic tools: a jar for rinsing, a brush comb or old toothbrush, paper towels, and a gentle brush soap.
Pick safe solvents like mild dish soap for wet paint, isopropyl alcohol for stubborn spots, and commercial restorers if the bristles are gummy.
Put on gloves and work in a well-ventilated area to protect your skin and lungs.
Essential Cleaning Tools
You’ll want a small, dedicated kit of tools and safe solvents to clean acrylic brushes effectively: a gentle dish soap or brush soap, isopropyl alcohol (70–91%) for stubborn dried spots, a commercial brush restorer if needed, plus basic implements like a jar for soaking, a brush comb or old toothbrush, and lint-free cloths.
Include a rubber jar grip, disposable gloves, and a drainage tray for cleaning techniques and maintenance tips.
Safe Solvent Options
When tackling stubborn acrylic on your brushes, pick solvents and cleaners that dissolve paint without damaging bristles or ferrishes.
Use mild dish soap, isopropyl alcohol for spot treatment, or commercial restorers sparingly.
Consider eco-friendly alternatives like biodegradable brush cleaners or vinegar-based mixes.
Always follow solvent safety: ventilate, avoid skin contact, and test on a cheap brush before full use.
Protective Gear Needed
Gather your protective gear before you handle solvents and cleaners so you’ll keep skin, eyes, and lungs safe while restoring brushes.
Wear chemical-resistant protective gloves and safety goggles, and choose breathable clothing.
Set up in a well-ventilated work area; open windows, run a fan, or use local exhaust.
Follow ventilation tips for IPA and restorers, and keep soap and rinse water contained.
Prep Your Workspace & Protect Ferrules
Set up in a clear, well-lit area so you can see dried paint and rinse water clearly.
Lay down a towel or tray to catch drips and arrange your soap, IPA, and restorers within reach.
Before rinsing, wrap the ferrules with foil or tape to keep water from seeping into the handle joint.
Clear, Well-Lit Area
Because good light and an uncluttered surface make the job easier, clear a well-lit area before you start cleaning acrylic brushes.
Arrange supplies within reach, use a tray or absorbent pad, and remove clutter to focus on cleaning techniques.
Keep rags, jars, and solvent containers organized for safety and efficiency.
Good workspace organization prevents spills and speeds the process.
Ferrule Protection Steps
Now that your workspace is ready, protect the metal ferrules before you introduce water or solvent.
Tape the ferrule bases with painter’s tape or plastic wrap to prevent swelling, rust, or solvent seepage.
Match protection to ferrule types—crimped, seamless, or glued.
This small step preserves bristle alignment and improves overall brush maintenance, extending brush life and simplifying cleaning.
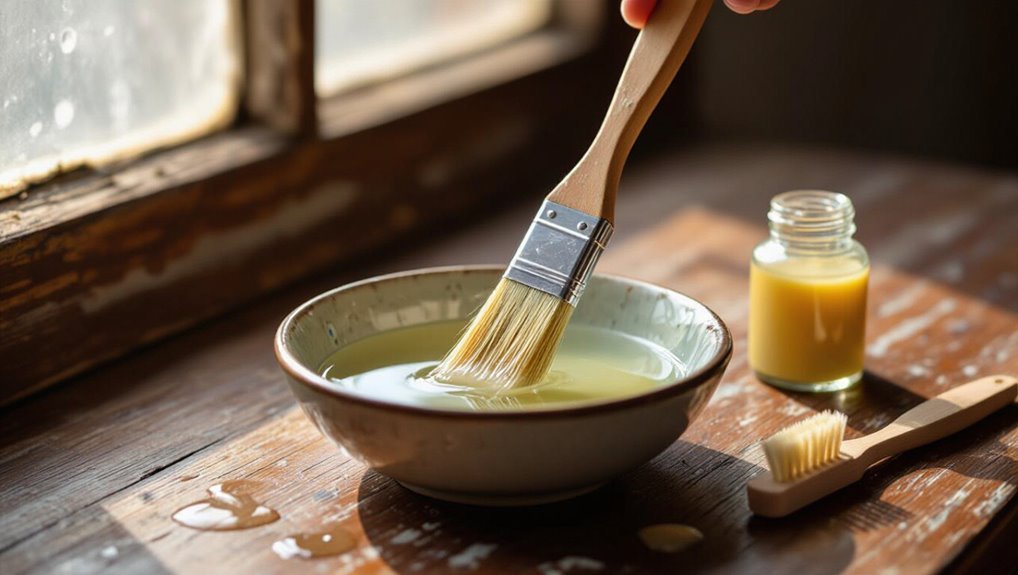
Soften Lightly Dried Acrylic With Soap and Warm Water
If the acrylic on your brushes has only begun to dry, you can usually soften and remove it by working the bristles in warm, soapy water until the paint loosens.
Gently swirl and squeeze the ferrule area, repeating with fresh water.
Use mild dish soap or soap alternatives like gentle hand soap or baby shampoo.
Rinse thoroughly, reshape bristles, and let them dry flat.
Remove Heavily Dried Acrylic With IPA or Commercial Restorer
Reach for isopropyl alcohol (IPA) or a commercial brush restorer when soap and water won’t budge dried acrylic; these solvents break down the polymer film so you can gently work the bristles free without shredding them.
Apply IPA effectiveness by dabbing, combing bristles, and rinsing.
Use recommended commercial restorers sparingly to preserve brush longevity and follow safe paint removal techniques for best results.
Soak Stubborn Caked Paint: Solutions & Timings
When paint’s caked on, you’ll want to pick the right solvent—water for fresh acrylics, rubbing alcohol or an acrylic brush restorer for stubborn build-up, and acetone only as a last resort.
Soak times vary: minutes for water, 30–60 minutes for alcohol, and several hours (checked frequently) for restorers.
After soaking, rinse and reshape bristles, then condition and let brushes dry flat to preserve their tip.
Solvent Options Explained
Although acrylic is water-based, you’ll need stronger solvents for brushes with dried, caked paint; choosing the right one depends on the paint’s age and how long you can soak.
You’ll weigh solvent types (isopropyl, mineral spirits, commercial removers), cleaning methods, and safety precautions.
Pick eco friendly options when possible, follow brush maintenance steps, and focus on effective paint removal without damaging bristles.
Soaking Times Guide
1 simple rule will save you time and ruined brushes: match soak length to paint age, thickness, and solvent strength.
You’ll choose soaking methods—water for fresh, mild solvent for semi-cured, stronger solvent for stubborn cake—and adjust timing considerations accordingly.
Short soaks loosen soft paint; extended soaks break down cured layers.
Check progress every 10–30 minutes to avoid overexposure and repeat if necessary.
Bristle Care Afterward
Now that you’ve matched soak length to paint age and solvent strength, focus on what comes after: tending the bristles. Rinse, gently comb with a brush comb, then apply mild soap and a brief conditioner for bristle conditioning. Reshape tips, air dry flat. Follow simple maintenance tips to prevent future crusting.
| Action | Time |
|---|---|
| Rinse/combing | 2–5 min |
| Soap/condition | 1–2 min |
| Reshape/dry | Overnight |
If Soak Fails: Use Combs, Pins, and Gentle Scrapers
When soaking doesn’t loosen dried acrylic, reach for small tools like a brush comb, a sewing pin, or a plastic scraper to gently tease paint from the bristles.
Use comb techniques: run the comb from ferrule to tip, dislodging flakes. Slide a pin along clumps, lifting paint away.
Work slowly to avoid damage; this careful brush maintenance restores performance without harsh force.
Reshape & Condition Bristles After Cleaning
After you’ve removed all paint and loosened stubborn clumps, reshape the bristles while they’re still damp so they dry in the proper form; gently squeeze out excess water, align the hairs with your fingers, and restore the original tip or edge by rolling round brushes between your thumb and forefinger or flattening flat brushes against a ruler.
| Brush type | Motion | Tip result |
|---|---|---|
| Round | Roll | Pointed |
| Flat | Flatten | Sharp edge |
| Filbert | Tuck | Rounded tip |
Use bristle maintenance and conditioning techniques to keep shape and softness.
Commercial Soaks or DIY : Which to Choose?
Curious which is better for your brushes—store-bought soaks or a do-it-yourself solution? You’ll weigh commercial options’ convenience against DIY solutions’ cost and control.
Choose based on paint hardness, frequency, and safety. Consider:
- Ready formulas remove cured acrylic faster.
- Vinegar or dish soap is gentle and cheap.
- Solvents work but need ventilation and caution.
Prevent Dried Paint: Cleaning Habits & Storage Tips
Because dried acrylic is much harder to remove than wet paint, develop quick-clean habits and smart storage so you won’t face stubborn clogs or ruined bristles. You should set cleaning frequency, practice brush maintenance, use storage solutions, apply drying techniques, and keep workspace organization. Small routines prevent paint prevention issues and extend brush life.
| Rinse | Dry | Store |
|---|---|---|
| After use | Shape bristles | Upright jars |
| Weekly check | Air dry | Caps or sleeves |
Frequently Asked Questions
Can Dried Acrylic Ruin Synthetic Brush Ferrules or Handles?
Yes — dried acrylic can damage synthetic brush ferrules or handles if neglected; you’ll harm finish and loosen ferrules. Prioritize brush maintenance and thorough paint removal to preserve hardware, appearance, and long-term function.
Can Brushes Used With Mediums Be Cleaned the Same Way?
Yes — you can, though mediums can stubbornly glue bristles like dried mud; you’ll adapt brush care and cleaning techniques, soaking in appropriate solvent, gently working bristles, then rinsing and reshaping to preserve spring and lifespan.
Is It Safe to Use Acetone on Metal Ferrules?
You shouldn’t use acetone on most metal ferrules; it can damage finishes and loosen glue. For ferrule maintenance, try isopropyl alcohol, warm soapy water, or specialized brush cleaners as safer acetone alternatives for preserving integrity.
How Often Should Deep-Cleaning Be Done for Professional Brushes?
You should deep-clean professional brushes every 1–2 months, or monthly with heavy use; coincidentally, consistent brush maintenance and cleaning frequency both extend life, so you’ll protect ferrules, preserve shape, and maintain peak performance.
Can Cleaned Brushes Be Used for Oil Paints Afterward?
Yes, you can reuse cleaned brushes for oil paints if you fully remove acrylic residue; you’ll maintain brush maintenance standards and check paint compatibility, conditioning bristles with solvent and oil before switching to prevent contamination and damage.
Conclusion
You’ve got this—rescuing a dried acrylic brush isn’t rocket science, but it does need patience. If the bristles still flex, soak gently, comb, and condition until they behave. For hardened clumps, use safer solvents or restorers sparingly and protect the ferrule. Once cleaned, reshape and air-dry horizontally to keep the tip perfect. Adopt quick rinses and proper storage to prevent future disasters—your brushes will thank you forever.