How to Paint on Plaster Walls: Easy Preparation and Application Tips
You can paint plaster now if it’s dry, clean and sound; fresh plaster needs curing and damp or hollow areas need repair first. Clean, sand glossy spots, patch cracks, then apply a stain‑blocking bonding primer to improve adhesion and uniform absorbency. Use the right roller nap, cut in with an angled brush, and apply two thin finish coats for even coverage. Follow simple prep and application steps below to get long‑lasting, professional results.
Quick Answer: Can and Should You Paint Plaster Now?
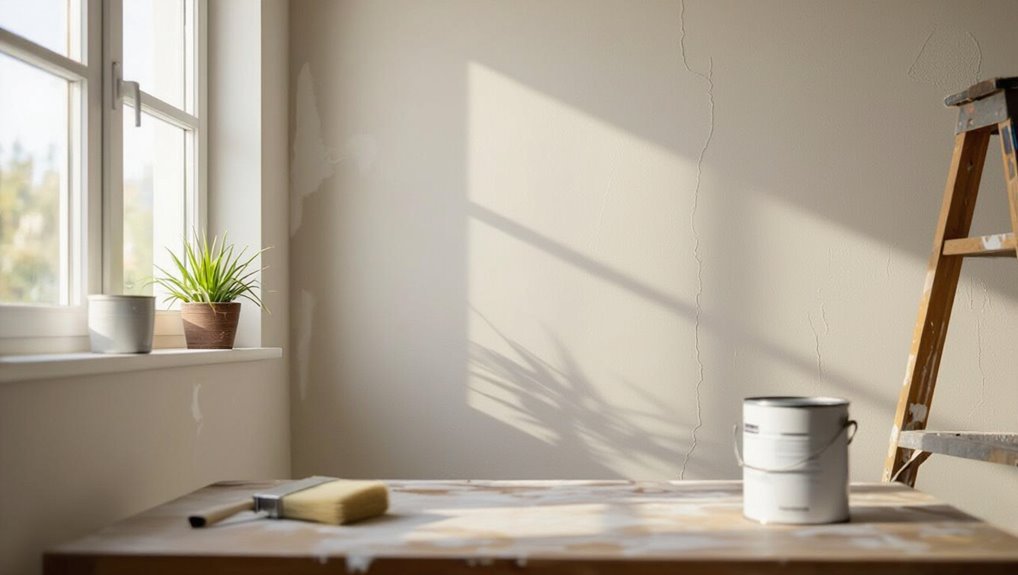
Wondering if you can paint plaster right now? You can, provided the surface is dry and clean; fresh plaster needs proper cure time to avoid trapping moisture.
Consider plaster aging—older surfaces may accept paint immediately if sound.
Use a suitable primer to improve adhesion and guarantee paint longevity.
If unsure about moisture or integrity, delay painting until conditions are stable.
How to Tell If Plaster Is Sound or Failing
If the plaster looks questionable after you’ve checked drying and priming needs, next you’ll want to determine whether it’s sound or failing before you paint.
Inspect for cracks, bulges, hollows and loose powdery areas. Tap sections to detect hollow sounds, press for flex, and note moisture stains.
Your surface evaluation focuses on plaster integrity; document issues so you can plan repairs.
When To Repaint, Skim-Coat, or Replace Plaster
When should you repaint, skim-coat, or replace plaster?
If plaster condition is good and paint just ages, follow a regular repainting frequency of every 5–10 years.
Use skim-coating for localized cracks, hairlines, or minor unevenness.
Replace plaster when there’s widespread detachment, large cracks, bulging, or moisture damage that compromises structure rather than cosmetic finish.
Tools & Supplies for Painting Plaster
Gathering the right tools and supplies upfront makes painting plaster faster and gives you a smoother, longer-lasting finish. You’ll want quality items that suit plaster’s quirks and use adhesive primers where needed.
Gather the right tools and adhesive primers up front to speed plaster painting and achieve a smoother, longer-lasting finish
Essential gear:
- angled and sash brush types for corners
- rollers with nap suited to plaster
- adhesive primers and quality wall paint
- sanding block and sponges
- putty knife and patching compound
Protect Floors, Trim, and Fixtures When Painting Plaster
Protection comes first: cover floors with drop cloths or rosin paper, tape off trim and fixtures, and wrap or remove anything that could catch paint.
Use secure floor protection—weighted cloths or taped rosin—to prevent slips.
Apply precise fixture masking for switches, outlets, and hardware.
Remove loose items, label taped areas, and check edges before painting so you won’t touch up smeared surfaces afterward.
Cleaning Plaster for Good Paint Adhesion
Start by removing dust, grease, and loose paint so your new finish will stick and look smooth.
Remove dust, grease, and loose paint first so the new finish adheres and looks smooth.
Use plaster cleaning techniques that address contaminants and surface texture to improve paint adhesion factors.
Then:
- Vacuum and dust with a brush
- Degrease with mild detergent
- Rinse and let dry thoroughly
- Sand glossy spots lightly
- Wipe with tack cloth before priming
Find and Prep Hairline Cracks and Shrinkage Lines
Walk each wall slowly and inspect for hairline cracks and shrinkage lines so you don’t miss any trouble spots.
Use a brush or vacuum to clean out dust and loose material from the cracks before you patch.
Fill and smooth lines with a suitable filler, let it dry, then sand for a seamless surface ready for primer.
Inspect Walls Carefully
Before you prime or paint, take a close look at every wall for hairline cracks and shrinkage lines—these small defects will telegraph through paint if you don’t address them first.
You’ll note plaster types and assess wall conditions to plan repairs.
Check for:
- vertical hairlines
- horizontal shrinkage
- loose plaster
- textured seams
- moisture stains
Clean Cracks Thoroughly
Now that you’ve inspected the walls and marked hairline cracks and shrinkage lines, clean them thoroughly so repairs will bond and remain invisible. Use a soft brush, vacuum, and solvent for dust and loose plaster. Conduct a quick crack assessment to spot active movement before cleanup. Choose appropriate repair techniques after cleaning.
| Tool | Purpose |
|---|---|
| Brush | Remove dust |
| Solvent | Dissolve oils |
| Vacuum | Extract debris |
Fill And Smooth Lines
Start by widening each hairline crack slightly with a utility knife or a small V-gouge so filler can key into the gap.
Then brush or vacuum away the dust you loosened.
Use fine filler for crack filling, press firmly, and level for smooth application.
Allow to dry fully, sand flush, and prime.
Markdown list:
- Inspect
- Widen
- Fill
- Sand
- Prime
Repair Larger Plaster Cracks and Holes
Tackle larger plaster cracks and holes by first removing loose material and evaluating any underlying damage so you know whether a simple patch will do or if you need to reinforce the area.
Perform a crack assessment, widen hairline cracks slightly, then choose repair methods like backing with mesh, applying bonding agent, and packing with patching compound.
Sand, prime, and inspect before painting.
Remove Loose or Flaking Plaster Safely
Use a putty knife or a stiff brush to remove any loose or flaking plaster, working gently so you don’t widen cracks or damage sound surrounding material.
You’ll follow safe removal methods and basic plaster repair techniques to prep the area.
- Wear gloves and eye protection
- Pry loose bits carefully
- Clean dust away
- Bag debris immediately
- Inspect for deeper damage
Sand Plaster Without Damaging It
Take a light touch when sanding plaster so you smooth rough edges without gouging the surface; you’ll use gentle sanding techniques, a fine-grit block, and even strokes. Protect yourself—plaster safety matters: wear a mask, eye protection, and ventilate. Move slowly, check progress, and stop when surfaces feel uniform.
| Calm | Confidence |
|---|---|
| Breathe | Steady |
| Care | Pride |
Fix Lath Gaps, Nail Pops, and Uneven Seams
Before you paint, check for lath gaps by running your hand along the wall and looking for hollows or hairline cracks.
If you find nail pops, drive the nail back in or replace it and countersink, then fill and sand the spot.
Smooth any uneven seams with joint compound, feathering the edges so the surface reads flat.
Identify Lath Gaps
When you’re prepping plaster walls, the first step is spotting lath gaps, nail pops, and uneven seams so you can plan repairs that stop cracks and bulges from showing through paint.
Do a careful lath inspection, mark gaps, and schedule lath repairs. Check for moisture, loose plaster, and shadow lines.
- Visible gaps
- Loose lath
- Hairline cracks
- Shadowing
- Surface bulges
Repair Nail Pops
Tackle nail pops and uneven seams by pulling loose nails, resetting or replacing them, and filling gaps so the wall sits flat and won’t telegraph through your finish.
For effective nail pop repair, drive new screws into studs or dabs, countersink, and patch with setting compound.
Sand smooth, prime patched areas, and include these steps in routine plaster wall maintenance to prevent recurring movement.
Smooth Uneven Seams
1 simple fix you can do to improve plaster seams is to locate and smooth every gap where lath meets plaster or adjacent plasterboards, since these voids and misaligned fasteners will show through paint.
Use proper smoothing techniques and seam concealment to blend joints before priming.
- Remove loose plaster
- Countersink nail pops
- Fill gaps with joint compound
- Sand flush
- Feather edges
Which Primers Work Best on Plaster
Which primer should you choose for plaster? Use an alkali-resistant primer for fresh plaster and a high-adhesion PVA or acrylic primer for sealed or painted surfaces.
Consider stain-blocking primers for repairs.
Understand primer types and primer benefits: adhesion, moisture control, and uniform absorbency.
Apply per manufacturer instructions, sanding between coats when needed, to guarantee a stable base before painting.
Choosing Paint Type and Sheen for Plaster Walls
Now that you’ve prepared the surface with the right primer, pick a paint formula and sheen that match plaster’s texture and the room’s needs.
Choose breathable, durable paints and compare paint finishes and sheen options for the space. Consider:
- Flat for hiding imperfections
- Eggshell for low sheen and washability
- Satin for durability
- Semi-gloss for trim
- Acrylic for flexibility
Estimate Paint and Primer Quantities for a Plaster Room
Start by measuring the room’s square footage — multiply wall length by height and subtract areas for doors and windows — so you know the surface area to cover.
Check the paint and primer labels for coverage per gallon and factor in how many coats you’ll apply; plaster often needs a coat of primer plus one or two finish coats.
With those numbers you can calculate gallons needed and add a 10–15% buffer for touch-ups and waste.
Room Size Calculation
Calculating room size is the first practical step toward estimating how much primer and paint you’ll need for plaster walls. Measure length, width, and height to get accurate room dimensions and plan for space optimization.
Then:
- Measure wall lengths
- Subtract windows/doors
- Calculate wall area
- Add ceiling if needed
- Round up for waste
Use totals to pick primer and paint quantities.
Coats And Coverage
With your room measurements in hand, you’ll next figure how many coats of primer and paint you’ll need and how much surface each can cover.
Estimate primer coverage (usually 200–400 sq ft/gal) and paint coverage (350–450 sq ft/gal).
Account for plaster porosity, desired paint finish, and color selection—darker or bold hues and glossy finishes often need extra coats.
Purchase slightly more than calculated.
How to Apply Primer to Plaster Correctly
Before you roll or brush, make sure the plaster is clean, dry, and sound—repair any cracks or loose areas and sand away dust so the primer can bond properly.
Before rolling or brushing, ensure plaster is clean, dry, and repaired so primer can bond properly.
Choose primer types for porous plaster, test adhesion, and note primer benefits like sealing and uniform sheen. Avoid common primer mistakes.
Follow these steps:
- Stir thoroughly
- Use nap-appropriate roller
- Cut edges first
- Apply even coats
- Let dry fully
Cut In and Roll Paint on Plaster for Even Coverage
Start by cutting in around trim, corners, and any textured edges with a steady hand and a quality angled brush.
Then roll the main wall area with a nap that matches your plaster’s texture so you get even coverage without lap marks.
Use a controlled cutting technique, keep a wet edge, load the roller evenly, and use a consistent rolling method in overlapping W patterns for smooth, uniform results.
How Many Coats Will Plaster Walls Need?
How many coats you’ll need depends largely on the condition of the plaster — smooth, well-sealed surfaces often take fewer coats than patched or highly porous ones.
The type of paint matters too: high-coverage primers and quality eggshell or satin finishes can cut down on additional layers.
Start with a good primer and assess coverage after the first topcoat to decide if another is necessary.
Surface Condition Matters
Plaster’s condition determines how many paint coats you’ll need: smooth, well-sealed plaster often takes two coats (a primer and a topcoat), while porous, repaired, or smoke-stained surfaces may need a primer plus two or more finish coats to get even coverage and hide imperfections.
- Inspect plaster types
- Check wall texture
- Spot-prime repairs
- Test for stains
- Sand glossy areas
Paint Type Counts
Because the type of paint you choose directly affects coverage and durability, you’ll often need different numbers of coats for different formulations: latex and acrylic usually cover well with a primer plus one topcoat on sound plaster, while oil-based paints or heavy-texture finishes may require an additional coat for uniformity and sheen.
Consider paint finish and color selection—darker or glossier choices often need extra coats for full, even coverage.
Avoid Lap Marks and Uneven Sheen on Plaster
When you paint plaster, keep a wet edge and work quickly so each new stroke blends into the last; otherwise you’ll get visible lap marks and patches of different sheen.
You should control color consistency and minimize texture variation by using consistent pressure and overlap.
Tips:
- Maintain wet edge
- Use even roller nap
- Match paint mix
- Feather edges
- Work in sections
Painting Textured or Decorative Plaster Finishes
Textured or decorative plaster demands a different approach than smooth walls, so you’ll want to adjust tools and techniques to preserve the finish while getting even coverage.
Use a brush and nap roller combination, work with the texture direction, and apply thinner coats.
Test decorative techniques on a scrap area, keep edges feathered, and avoid overworking to retain depth and shadow.
Speed Up Drying and Curing Safely
1 simple set of steps can help you speed drying and curing on plaster walls without risking cracks or poor adhesion.
Use gentle airflow, low heat, and humidity control; don’t rush coats.
Try these drying techniques and curing methods:
- Increase ventilation with fans
- Use dehumidifiers
- Keep temperatures steady
- Apply thin coats
- Wait full cure times before heavy use
Troubleshooting: Flaking, Efflorescence, and Stains
If paint is flaking, you’ll need to scrape and sand back to a sound surface before repainting with a proper primer.
For efflorescence, you’ll neutralize salts, fix the moisture source, then use a masonry primer to prevent recurrence.
Tough stains often require targeted cleaners or a stain-sealing primer so they don’t bleed through your new finish.
Fixing Flaking Paint
When paint flakes off plaster, you’ll want to identify the cause before you start patching so the repair lasts—common culprits are poor adhesion, moisture, or salts coming through the wall.
You’ll address flaking issues by removing loose paint, sanding, and cleaning. Then prime and use proper paint adhesion techniques.
Quick steps:
- Scrape loose paint
- Sand feather edges
- Clean dust
- Apply primer
- Repaint
Treating Efflorescence Spots
Along with loose paint and surface dust, you may also see powdery white stains—efflorescence—on plaster, which signals salts and moisture migrating through the wall.
Scrub with a stiff brush and mild vinegar solution, then let dry.
Identify efflorescence causes like leaks or rising damp and fix moisture sources.
Use breathable sealers and proper ventilation as prevention methods before repainting with suitable masonry primer.
Removing Tough Stains
Stains on plaster can be stubborn, but with the right approach you can usually remove them without damaging the surface.
Use gentle stain removal techniques matched to common stain types; test first.
Try:
- Dry brushing loose debris
- Mild detergent and water
- Poultice for oil or grease
- Dilute bleach for mold
- Sand and spot-prime before repainting
When To Skim-Coat vs Hire a Pro
If your plaster shows only small cracks, minor gouges, or a little texture inconsistency, you can probably skim-coat it yourself with the right prep and materials; call in a pro when damage is widespread, structural, or you lack the time or confidence to get a smooth, paint-ready finish.
Learn basic skim coat techniques, practice on a scrap, and seek professional advice for hairline-to-large repairs or suspect moisture.
Maintenance to Keep Painted Plaster Looking Good
Once your plaster is repaired and painted, routine care will keep it looking fresh for years—what you do now matters as much as the initial work.
You should inspect, clean, and touch up using appropriate finishing techniques and mindful color selection. Follow simple steps:
- Dust gently with a microfiber cloth
- Spot-clean stains with mild soap
- Repaint scuffs promptly
- Check for moisture
- Refresh trim annually
Cost- and Time-Saving Tips for Painting Plaster
A few smart choices will shave time and money off your plaster painting project: pick paint and primers designed for plaster, prep only what’s necessary, and use efficient tools like a quality roller and an angled brush for corners. Use cost effective techniques and time saving strategies: plan coats, buy correct quantities, patch smartly, and work systematically.
| Task | Tool | Benefit |
|---|---|---|
| Priming | Roller | Faster coverage |
| Cutting in | Angled brush | Neater edges |
| Patching | Putty knife | Lasting fix |
| Ordering | Calculator | Avoid waste |
| Scheduling | Timer | Efficient workflow |
Frequently Asked Questions
Can You Paint Over Wallpapered Plaster Without Removing the Paper First?
You can, but you shouldn’t usually—wallpaper durability varies, and poor surfaces’ll hurt paint adhesion. If paper’s firmly attached and sealed with a primer or bonding agent, you can paint; otherwise remove it for best results.
Will Painted Plaster Affect Indoor Humidity or Breathability of Old Walls?
Painting plaster won’t dramatically change indoor humidity, but heavy coatings can increase moisture retention; you should do proper surface preparation, use breathable primers and paints, and avoid sealed, non-permeable finishes to maintain wall breathability.
Are There VOC- or Allergy-Friendly Paint Options for Plastered Rooms?
Yes — you can choose eco friendly options and low VOC paints for plastered rooms; you’ll prefer natural mineral, water-based acrylic, or breathable lime paints that reduce allergens and odors while preserving plaster’s moisture balance and indoor air quality.
Can Exterior-Grade Plaster Be Painted the Same as Interior Plaster?
Yes — but you shouldn’t treat them identically: exterior-grade plaster demands tougher primers and paints for weather resistance, considering plaster durability and exterior finishes, so you’ll use specialized coatings and prep to guarantee lasting protection.
How Long Before Rehanging Art or Mirrors After Painting Plaster?
Wait at least 24–48 hours for touch-dry paint, though full curing can take up to 2 weeks; you’ll plan art placement after about 48–72 hours for safer hanging, considering drying time and adhesive or hook recommendations.
Conclusion
You can definitely paint plaster now—don’t let age or a few hairline cracks stop you. If it’s mostly sound, a good clean, light sanding, primer, and quality paint will revive it quickly. Worried about hidden damage? Start with a small test area; if you see loose plaster or persistent damp stains, skim-coat or call a pro. With basic prep and the right tools, you’ll save time and get a durable, beautiful finish.