How to Fix Peeled Paint on Drywall Step-By-Step
You can fix peeled paint on drywall yourself by scraping loose paint, sanding and feathering the edges, then filling gouges or holes with joint compound and sanding smooth. Prime patched areas with a stain-blocking primer, match paint color, and blend new paint into the old with light brush strokes and rolling. Check for moisture or adhesion problems first to prevent repeats. Keep going to learn diagnosis, texture matching, and when to call a pro.
Step-by-Step: Fix Peeling Paint on Drywall
Start by evaluating the damage so you know how much work is ahead: you’ll remove loose paint, sand edges, patch with joint compound, sand smooth, prime, and match paint color.
Follow repair techniques like feathering and spot-priming. Work systematically across affected areas, let each layer dry, then apply finish coats.
You’ll inspect and touch up for seamless blending.
When to DIY and When to Call a Pro
If the peeling is limited to a small patch, the drywall itself is sound, and you’re comfortable with basic sanding, patching, and painting, you can tackle the repair yourself; call a pro if the damage covers large areas, repeats after repairs, involves water damage or mold, or if you’re unsure about matching textures or paint so the fix looks seamless.
For DIY Considerations, assess tools, time, and skill.
Seek a Professional Assessment when structural issues or persistent problems exist.
Common Causes of Paint Peeling on Drywall
Several things can make paint peel from drywall, and most trace back to poor adhesion or moisture problems.
You’ll often see causes like poor surface preparation, low paint quality, incorrect application technique, and insufficient drying time.
Environmental factors — temperature fluctuations and humidity levels — plus material compatibility, wall condition, and sloppy previous repairs all reduce adhesion and cause peeling over time.
Diagnose Moisture-Related Peeling
Because moisture is such a common culprit, you’ll want to confirm whether humidity or leaks are behind peeling before doing any repairs.
Check for visible stains, musty smells, bulging drywall, and condensation. Use a moisture meter and inspect plumbing and roof lines.
Document findings for a moisture diagnosis and address sources first—this is essential peeling prevention before repainting.
Diagnose Adhesion or Substrate Issues
Before blaming the paint, check for hidden moisture that can keep coatings from sticking.
Then inspect for surface contamination like dust, grease, or old chalky primer that prevents adhesion.
If you find any of these issues, clean and dry the drywall before repairing and repainting.
Check For Moisture
If paint’s peeling, check for moisture first since damp conditions are the most common cause of adhesion failure.
Assess moisture impact by feeling for dampness, smelling mustiness, and inspecting discoloration or blistering.
Use detection methods like a moisture meter, cup test, or infrared camera to locate wet spots.
Fix leaks, dry the area thoroughly, and only then repair and repaint for lasting adhesion.
Inspect Surface Contamination
Once moisture’s been ruled out and the surface is dry, inspect for contamination that can prevent paint from sticking.
Check for dirt, grease, wallpaper paste, chalking, silicone, or previous glossy finish.
Test adhesion with tape or a poke.
Remove contamination using cleaner, sanding, or solvent as appropriate.
Proper surface preparation guarantees new paint bonds and prevents future peeling.
Distinguish Old Paint Failure From Recent Damage
You’ll first look for signs of long-term failure like widespread crazing, multiple peeling layers, or yellowing that indicate age-related breakdown.
Fresh damage usually shows sharp chips, localized impact marks, or clean edges where paint just lifted.
Then you’ll examine the paint layers—scraping a small spot will tell you if multiple old coats are failing or if a recent event caused the loss.
Signs Of Long-Term Failure
Age and neglect show differently than a single impact or a recent spill.
You’ll spot long term damage by widespread cracking, faded color, and compromised surface integrity.
Check paint durability and underlying issues like moisture or poor prep.
Consider aesthetic considerations and repair longevity before fixing.
Note environmental factors and adopt preventative measures to avoid recurring failure and guarantee lasting results.
Fresh Damage Indicators
How can you tell if peeled paint is a recent mishap rather than long-term failure?
Do a quick visual inspection for clues and note fresh damage indicators:
- Sharp edges and clean breaks suggest recent impact or scraping.
- Exposed, moist drywall or drips point to recent water intrusion.
- Nearby scuff marks, tool marks, or new debris indicate recent disturbance you can address immediately.
Paint Layer Examination
Now that you’ve checked for fresh damage clues, inspect the paint layers to tell recent harm from long-standing failure.
Peel back loose flakes and note layer count, adhesion, and cracking patterns. Use a flashlight for surface assessment and a gentle scrape to test paint durability.
If multiple brittle layers separate easily, you’re dealing with chronic failure; treat with full prep and primer.
Tools You Need for Drywall Paint Repairs
Tools and the right supplies make drywall paint repairs quick and durable, so gather them before you start.
Tools and the right supplies make drywall paint repairs quick and durable—gather everything before you begin.
You’ll need basic tools for common paint repair techniques and to match drywall texture options.
Essential tools:
- Putty knife, sanding block, utility knife.
- Paintbrush/roller, drop cloth.
- Vacuum, tack cloth, mixing tray.
Materials and Supplies for a Durable Repair
Before you start patching, gather essential repair tools like putty knives, sandpaper, and a good drywall compound so you won’t stop mid-job.
Choose a durable paint—preferably a high-quality latex or acrylic that resists peeling and stains—for a long-lasting finish.
Don’t forget surface prep supplies such as primer, tack cloths, and painter’s tape to guarantee proper adhesion and a smooth result.
Essential Repair Tools
You’ll need a compact set of quality materials to get a durable, professional-looking repair: a putty knife or two (one flexible, one stiff), a lightweight joint compound or spackling, 120–220 grit sandpaper, a sanding block, painter’s tape, a priming-sealing primer, and matching interior paint.
Focus on repair techniques and smart tool selection.
- Putty knives
- Sanding kit
- Primer & paint
Best Paint Choices
When choosing paint for a repaired patch, pick products that promote adhesion and durability so the fix blends in and lasts.
Use a high-quality acrylic latex primer and a matching latex or enamel topcoat.
Consider eco-friendly paints for low VOCs and safer indoor air.
Evaluate durability factors like scrubbability, sheen level, and pigment concentration to guarantee long-term resistance and color retention.
Surface Prep Supplies
Tools and the right materials make the difference between a temporary touch-up and a durable repair.
You’ll need proper surface preparation and the right tools to execute repair techniques cleanly. Gather:
- Sandpaper, scraper, and patching knife
- Joint compound, primer, and quality paint
- Clean rags, tack cloth, and painter’s tape
Use them methodically to guarantee long-lasting results.
Safety Gear and Precautions
Because you’ll be working with dust, potential lead paint, and chemical primers, wear protective gear to keep yourself safe: a NIOSH-rated respirator (or P100 for heavy sanding), safety goggles, disposable gloves, and a long-sleeve shirt.
Use safety gear consistently: protective eyewear and gloves usage are mandatory.
Follow ventilation tips, choose proper respirator masks, practice dust control, observe ladder safety, and follow safe handling solvents procedures.
Prepare the Room: Cover, Ventilate, Protect Surfaces
Now that you’re protected with the right gear, get the room ready so dust and spills don’t spread.
With protective gear on, prep the room to prevent dust and spills from spreading.
Move furniture, cover floors and trim, and open windows for ventilation.
Keep room organization simple and follow basic painting techniques for clean edges.
- Drop cloths
- Tape seams
- Fan for airflow
Remove Loose and Flaking Paint Correctly
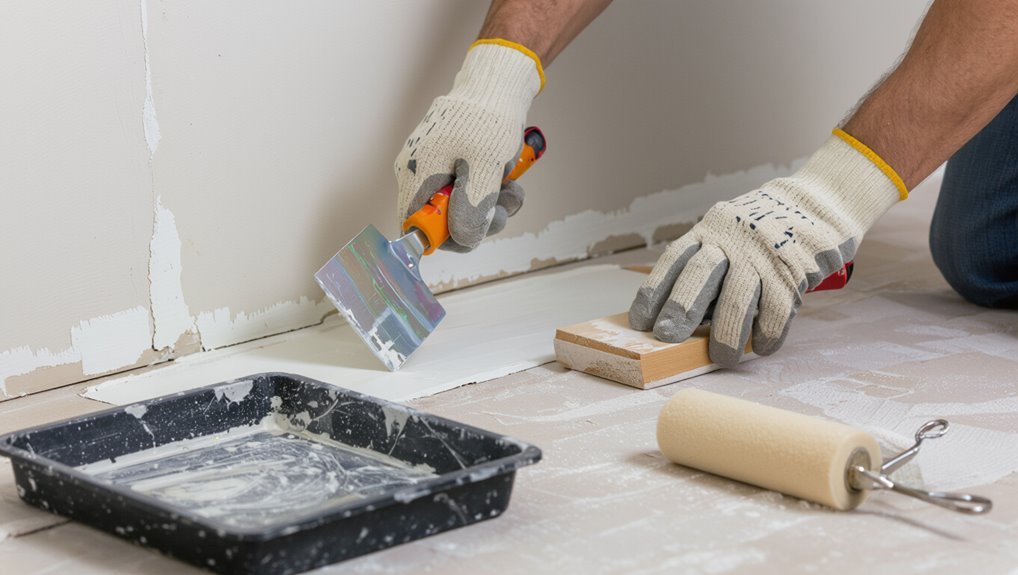
Start by scraping away all loose, flaking paint with a putty knife or paint scraper, working from the edges toward the center so you don’t tear intact surrounding paint.
Then sand remaining rough spots with medium grit, vacuum dust, and wipe with a damp cloth.
Use gentle paint removal techniques and targeted surface preparation methods to guarantee a clean, stable base before patching and priming.
Test for Hidden Mold or Mildew Before Repair
Before you patch or prime, check for hidden mold or mildew behind the peeled paint—moisture often lurks where paint has failed, and sealing over it will trap spores and cause the problem to return.
Before patching or priming, inspect for hidden mold—moisture under failed paint can trap spores and cause recurrence.
You should:
- Inspect and smell for dampness; use a flashlight.
- Perform simple mold testing with swabs or kits.
- Address moisture sources for mildew prevention before repairs.
Sand and Feather Edges for a Smooth Transition
Grab a medium-grit sanding block and gently sand the peeled area, feathering the edges so the damaged paint slopes smoothly into the intact surface.
Use controlled, even strokes and alternate sanding methods—circular for texture, straight for edges—to blend gradations.
Check progress frequently, wipe dust, and refine feathering techniques until the repair area is indistinguishable from surrounding drywall before priming and repainting.
Fill Small Gouges and Holes With Joint Compound
With the edges smoothed, it’s time to fill any small gouges or nail holes with joint compound so the surface reads as one.
You’ll use proper joint compound application and basic drywall repair techniques:
- Apply thin pass with a taping knife.
- Let dry, sand light.
- Repeat if needed, then prime before repainting.
Patch Large Peeled Areas: Step-by-Step
Start by cutting away loose or flaking paint and damaged drywall until you reach firm, clean edges; you’ll need a stable surface to bond the patch.
Cut a neat rectangular opening, fit a replacement drywall piece, and secure it.
Apply joint compound in thin layers, sand between coats, and finish with primer.
Use appropriate patch techniques for smooth repair finishes before painting.
Mesh Tape vs. Patch Kits: When to Use Each
While you can use either method to repair peeled drywall, choosing mesh tape or a patch kit depends on the size and shape of the damage and how much finish work you want to do.
- Use mesh tape for cracks and seams — mesh tape benefits include strength and easy embedding.
- Use patch kits for round holes — patch kits advantages are speed and minimal finishing.
- Match repair to damage.
Wet-Sanding Without Damaging Drywall Paper
If you need a smooth finish without tearing the paper, wet-sand gently using a fine-grit sponge or very light grit sandpaper and keep the surface barely damp so the paper fibers stay pliable.
Work in small circles, rinse the sponge often, and avoid heavy pressure.
These wet sanding techniques protect texture and help you maintain proper drywall care before priming and repainting.
Prime Repaired Drywall for Best Adhesion
After wet-sanding and ensuring the surface is smooth and dry, prime the repaired drywall to promote proper paint adhesion and uniform sheen.
Pick primer types suited to drywall, apply thin even coats, and let each dry fully.
Use these adhesion techniques to prevent peeling:
- Clean surface before priming.
- Roll thin coats; avoid drips.
- Lightly sand between coats for grip.
Choose a Primer for Moisture or Stain Blocking
First, identify and stop any moisture source so the problem won’t return.
Next, pick a stain-blocking primer formulated for water or smoke stains to seal discoloration.
Finally, make sure the primer is compatible with the paint you’ll use so adhesion and finish are handled correctly.
Assess Moisture Source
Wondering whether the peel came from moisture or just old paint failure? You’ll assess the source before priming.
Use moisture detection tools, inspect plumbing and exterior seals, then apply prevention strategies.
- Check with a moisture meter.
- Look for leaks, condensation, or roof issues.
- Mark affected areas, dry fully, then decide on a moisture-blocking primer.
Choose Stain-Blocking Primer
Primer choice matters: pick a stain-blocking or moisture-resistant primer that matches the problem you found.
You’ll match primer benefits to the stain types—water, smoke, rust, or mold—choosing a formula labeled for that issue.
Apply to cleaned, dry drywall, sealing stains and preventing bleed-through.
Let proper dry time and coverage guarantee the repaired area won’t reappear after you repaint.
Check Compatibility With Paint
Before you buy, confirm the primer will bond with your paint—oil-based primers can resist stains and moisture but won’t always accept latex topcoats without a compatible product, while water-based primers work well under most latex paints but may not block severe stains.
Use primer selection that guarantees paint compatibility:
- Match primer base to topcoat.
- Choose stain/moisture blocker if needed.
- Test a small area first.
Select Paint Type and Finish for Repaired Walls
Although choosing paint might seem minor, picking the right type and finish will determine how well your repaired drywall blends with the rest of the room and how it holds up over time. You’ll consider paint durability and finish sheen to match wear and light. Use this emotional guide:
| Feeling | Practical | Result |
|---|---|---|
| Calm | Durable | Lasting |
| Pride | Satin | Subtle |
| Relief | Matte | Hidden |
| Confidence | Gloss | Bold |
Match Existing Color to Hide Repairs
Color-matching is key to making your repair disappear, so start by comparing the patched area to the surrounding wall in natural light and at different times of day.
Use these quick color matching techniques to blend:
- Sample nearby paint and test small patches.
- Adjust tint gradually until it matches.
- Feather edges for seamless blending paint that hides the repair.
How to Cut In and Roll So Repairs Disappear
Now that you’ve matched the paint, focus on cutting in and rolling so the patched area fades into the rest of the wall.
Use precise cutting techniques: load a quality angled brush, paint a thin edge, and feather into surrounding paint.
For rolling methods, choose a short-nap roller, apply light even pressure, and blend outward from the patch until texture and sheen match perfectly.
How Many Coats After Priming?
How many coats you’ll need after priming depends on the primer quality, the paint’s opacity, and how well the repaired surface accepts color.
How many topcoats you need after priming depends on primer hide, paint opacity, and the repaired surface’s color acceptance.
You’ll usually follow priming techniques with targeted paint layering. Consider:
- One coat if primer is high-hide and paint is rich.
- Two coats for standard coverage.
- Three for pale or problem areas.
Let the first coat dry fully before adding more.
Edge-Blending Tricks to Avoid Touch-Up Lines
Once your patched area’s primers and base coats are set, you’ll want to blend edges so touch-ups vanish into the surrounding wall. Use feathered sanding, thin glaze coats, and matched sheen to achieve edge blending techniques for a seamless repair. Work outward, cross-hatch lightly, and check in natural light.
| Tool | Action | Tip |
|---|---|---|
| Sandpaper | Feather edges | 220 grit |
| Brush | Light strokes | Match direction |
| Glaze | Thin coats | Blend outward |
| Light | Inspect | Natural light |
| Roller | Smooth roll | Overlap edges |
Repair Textured Drywall Surfaces
Although matching a textured surface can feel fiddly, you can recreate or blend textures with the right tools and technique.
Matching textured surfaces can feel fiddly, but with the right tools and technique you can recreate or blend them.
For textured surface repair and drywall texture matching, follow steps:
- Prep: remove loose paint, sand, and apply joint compound.
- Texture: use brush, sponge, or spray to match pattern.
- Finish: feather edges, let dry, sand lightly, then prime and paint.
Fix Peeled Paint Near Trim, Windows, and Doors
Start by evaluating how far the peeling extends around the trim, windows, and doors so you know whether it’s a small touch-up or a larger patch.
Tape and mask the trim, and sand or scrape edges clean to create a smooth shift.
Feather the repaired area into the surrounding paint, prime if needed, and repaint for an invisible finish.
Assess Damage Extent
Before you reach for sandpaper or paint, take a close look at the area around trim, windows, and doors to determine how far the peeling extends and what’s causing it.
Perform a focused damage assessment and plan repair techniques:
- Map peeled areas and note substrate exposure.
- Check for moisture, gaps, or failing caulk.
- Test adhesion by gently probing edges.
Prep Trim And Edges
1. You’ll protect trim during trim installation and perform careful edge sealing before painting. Mask edges with tape, remove loose caulk, and sand bare drywall to a firm feather. Use painter’s tape along windows and doors, press seams tight, and apply caulk where trim meets wall. Clean dust, let sealant cure fully, and keep surfaces ready for the next step.
| Tool | Action |
|---|---|
| Tape | Protect |
| Caulk | Seal |
| Sandpaper | Smooth |
| Brush | Clean |
| Rag | Wipe |
Feather And Repaint
With trim protected and seams sealed, you can move on to feathering and repainting the peeled areas around windows and doors.
Use proper feathering techniques and blending strategies to match texture and sheen.
- Sand edges smooth.
- Apply thin coats of primer.
- Paint feathered edges into existing finish.
You’ll blend repairs invisibly and protect trim from overlap.
Fix Peeled Paint in High-Humidity Rooms (Bath, Kitchen)
If you’ve got peeling paint in a bathroom or kitchen, the underlying issue is usually moisture or poor ventilation rather than just a bad paint job, so you’ll need to address both the surface damage and the humidity source to keep the repair from coming back. Sand, prime with a moisture-resistant primer to restore paint adhesion, and improve humidity control.
| Fear | Relief |
|---|---|
| Frustration | Confidence |
| Dampness | Dryness |
| Repeat damage | Lasting finish |
| Costly repairs | Savings |
Prevent Future Peeling: Moisture-Control Strategies
To stop paint from peeling again, you’ll want to control indoor humidity with dehumidifiers, exhaust fans, and proper ventilation.
Check for and repair any water intrusion—leaky roofs, pipes, or flashing can undermine even the best paint job.
Tackling both humidity and leaks keeps drywall dry and paint firmly bonded.
Control Indoor Humidity
Because excess moisture is the main culprit behind paint peeling, you’ll need to keep indoor humidity in check to prevent future problems.
Use humidity control and moisture management tactics so paint bonds well.
- Run dehumidifiers in damp rooms.
- Ventilate bathrooms and kitchens during use.
- Keep HVAC filters clean and monitor levels with a hygrometer.
Fix Water Intrusion
Along with controlling indoor humidity, you’ll need to stop the sources of water that actually reach your drywall—otherwise paint will keep peeling no matter how steady your dehumidifier is.
Inspect for leaks, roof issues, and plumbing faults; seal gaps, repair flashing, and reroute runoff.
Fixing water intrusion prevents water damage and supports long-term moisture control so your repaint lasts.
Improve Adhesion: Scuff, Sand, or Use Adhesion Primer
When paint peels because the surface was slick or dusty, you’ll need to scuff, sand, or apply an adhesion primer so new paint will stick.
Use these adhesion techniques and primer options:
- Scuff with a scotch-brite pad for light prep.
- Sand with 120–150 grit for feathered edges.
- Apply a bonding primer, let it cure, then repaint.
Prep for Oil-Based or Glossy Old Paint
If the existing coat is oil-based or glossy, you’ll need to identify it first—use a solvent test or check the original paint records.
Once confirmed, sand the gloss to dull the surface and clean off any grease or dust so new paint can bond.
Finish with a compatible primer made for oil or glossy surfaces before patching and repainting.
Identify Paint Type
Because older or oil-based paints behave differently than modern latex, you’ll want to identify the existing finish before you start repairs.
Use simple tests to confirm paint type, which affects paint compatibility and future surface preparation.
- Rub with denatured alcohol — if it softens, it’s latex.
- Score and smell — oil has distinct odor.
- Ask previous owner or tester kit.
Prepare Surface Properly
1. You’ll prep oil-based or glossy old paint by sanding glossy sheen, then degrease—surface cleaning matters to guarantee adhesion.
Remove loose flakes, vacuum dust, and wipe with a TSP substitute. For stubborn gloss, scuff with a medium-grit pad.
Match primer to paint types: use a bonding primer for oil or glossy surfaces before applying new drywall paint.
What to Do If Peeling Returns After Repair
When peeling comes back after you’ve repaired drywall, don’t assume the fix failed—treat it as a clue to an underlying problem.
Check causes and improve repair techniques quickly:
- Inspect for moisture, leaks, or poor ventilation.
- Remove loose material fully; reseal and prime with proper primer.
- Evaluate surface prep and adhesion; consider stronger bonding primer or addressing structural issues before repainting.
Quick Cosmetic Fixes for Small Flaking Spots
If you’ve got small flakes, start by wiping the area clean and removing any loose paint so the patch will stick.
Lightly sand and dust, then apply a thin spot patch or lightweight spackling to level the surface.
Once it’s dry and smooth, prime and touch up with matching paint for a nearly invisible repair.
Prep And Clean
Start by removing any loose flakes with a putty knife or a stiff brush so you’re left with a stable edge; then wipe the area with a damp cloth to lift dust and grease before it interferes with adhesion.
Use proper cleaning techniques and surface preparation to guarantee paint sticks.
- Degrease with mild detergent
- Rinse and dry thoroughly
- Sand edges lightly
Spot Patch Touch-Up
For small areas of flaking, patching the spot yourself is quick and effective: scrape back loose paint to a firm edge, sand the perimeter smooth, then apply a thin layer of spackling or lightweight joint compound to fill gaps. Let dry, sand, prime, then paint using spot repair techniques and paint matching tips to blend.
| Tool | Purpose |
|---|---|
| Spackle | Fill gaps |
| Sandpaper | Smooth edges |
| Primer | Seal patch |
| Paint | Finish |
| Brush | Blend edges |
Time and Cost Estimates for Common Repairs
Most small drywall paint repairs take between 30 minutes and a few hours, and knowing typical timeframes helps you plan and budget.
Most small drywall paint fixes take 30 minutes to a few hours—knowing timing helps plan and budget.
You’ll use time estimates and project timelines for repair budgeting, comparing DIY expenses versus professional rates. Consider labor costs and material pricing in a simple cost analysis:
- Tiny patch: 30–60 min, low materials.
- Medium: 1–3 hrs, moderate costs.
- Large: 3+ hrs, higher labor.
Pro Tips for a Professional-Looking Finish
When you want a seamless, professional finish on repaired drywall, pay equal attention to prep, materials, and technique—skipping any of these will make the repair obvious. Use pro tips: feather edges, match texture, and sand between coats. Choose quality primer and paint. Practice blending strokes.
| Step | Action | Result |
|---|---|---|
| Prep | Clean & sand | Adhesion |
| Fill | Feather joint | Seamless |
| Paint | Match sheen | Professional finish |
Tools and Techniques for Overhead and High Walls
You’ll want the right safety gear—hard hat, goggles, and a respirator—before you start working overhead.
Set up scaffolding or a sturdy platform correctly and check anchors and planks for stability.
Use long-handled sanders, rollers, and patching tools to reach high areas without overextending.
Safety Gear Essentials
Because working overhead and on tall walls raises the risk of falls and debris, you’ll want the right safety gear before you start scraping or sanding—hard hat, safety glasses, a dust mask or respirator rated for particulates, and hearing protection if you’re using power tools.
Wear safety equipment and protective clothing. Follow this quick checklist:
- Gloves and knee pads
- Respirator fit test
- Safety glasses with side shields
Proper Scaffolding Setup
After gearing up with the right protective kit, set up a stable scaffold before you start scraping or sanding overhead.
Position it on level ground, lock all casters, and extend outriggers if needed.
Check guardrails, planks, and ties for scaffolding stability.
Inspect connections and load limits for scaffolding safety, and never work alone—have a spotter while you access high walls to prevent falls.
Long-Handled Tools
One or two long-handled tools can save you hours and a lot of strain when repairing peeled paint on high walls and ceilings.
Use long handled brushes and extension poles to reach safely.
Follow this quick checklist:
- Sand with pole sander for even prep.
- Brush with long handled brushes for cutting in.
- Paint using extension poles and roller for smooth coverage.
Document Damage for Insurance or Renter Issues
Start by taking clear, dated photos and videos of the peeled paint and any related damage, making sure to capture wide shots for context and close-ups for detail.
Begin with clear, dated photos and videos—wide shots for context and close-ups of peeled paint and damage.
Include measurements, affected room names, and a timestamped note so you can show when and where the damage occurred.
Save receipts, record repair estimates, and log communications.
This supports insurance claims and protects renter rights during disputes.
Eco-Friendly Materials and Disposal Tips for Repairs
When you repair peeled paint, choose low-VOC or zero-VOC primers and paints, recycled or FSC-certified drywall patches, and natural fiber spackles to reduce indoor pollutants and landfill waste.
Use eco friendly paints and biodegradable fillers, and follow local disposal rules.
Consider:
- Donate usable paint.
- Compost biodegradable fillers where allowed.
- Recycle scrap drywall and packaging.
Mistakes That Make Touch-Ups Visible
You’ll make touch-ups stand out if you pick the wrong paint finish, skip proper surface prep, or pile on too many paint layers.
Match the finish to the surrounding wall, clean and prime the repair area, and apply thin, even coats.
Follow those steps and your patch will blend in instead of shouting.
Using Wrong Paint Finish
Although the color may match, using the wrong paint finish will make touch-ups stand out like a sore thumb; glossy and matte sheens reflect light differently, so a small patched area will catch your eye even if the tint is perfect.
Check finishes and paint compatibility before you start:
- Match sheen level.
- Verify paint compatibility.
- Feather edges for blend.
Skipping Proper Surface Prep
If you skip proper surface prep, your patch will never blend—the paint will sit unevenly, flake, or soak in where the surrounding wall didn’t, making the repair obvious.
You must clean, sand, and prime to guarantee surface adhesion and check paint compatibility with the existing finish.
Do the prep steps methodically; shortcuts leave texture and sheen mismatches that scream “repair.”
Overapplying Paint Layers
Avoid piling on coats when a single, well-applied layer will do—overpainting creates a ridge of texture and a glossy buildup that catches the light and highlights the repair.
You should master overapplying techniques and control paint thickness. Follow these steps:
- Sand feathered edge smooth.
- Apply thin, even coat.
- Wait full drying time before considering another.
When a Full Repaint Is Better Than Patching
When peeling affects multiple walls, spans large areas, or the existing finish is uneven, a full repaint usually makes more sense than spot repairs; you’ll get a uniform finish, better adhesion, and fewer callbacks than trying to match patchwork to old paint.
Assess full repaint scenarios, compare labor and material costs, and run a quick cost analysis so you decide between patching and a complete refresh.
Printable Step-by-Step Repair Checklist
Grab this printable checklist so you’ve got every material and tool ready before you start.
It lists exact supplies—sandpaper, joint compound, primer, paint, putty knife, and more—and lets you tick them off.
Then follow the step-by-step checklist to prep, repair, prime, and paint the peeled area without missing a stage.
Materials And Tools
Before you start the repair, gather every tool and material on this checklist so you won’t interrupt the job to hunt for supplies.
Inspect for drywall assessment and document damage. Pack items for surface preparation, paint adhesion, moisture prevention, repair techniques, color matching, and long term maintenance.
- Sandpaper, putty, primer
- Joint compound, knives, sponge
- Paint, brushes, humidity meter
Step-By-Step Checklist
You’ve got your materials lined up and the damage documented, so let’s move into a clear, printable step-by-step checklist you can follow without stopping to figure out what comes next.
Inspect and perform moisture testing, note wall textures and adhesive properties, remove loose paint, execute surface preparation, choose primer options and paint types, apply repair techniques and repair methods, finish with color matching and humidity control.
Check for Hidden Structural or Plumbing Causes
If paint is peeling in isolated spots or repeatedly returns after repairs, check for hidden structural or plumbing causes that let moisture or movement undermine the finish.
You should confirm structural integrity and schedule a plumbing inspection if needed.
Actions:
- Scan for leaks, stains, soft spots.
- Probe for framing movement or rot.
- Hire pros for persistent or unclear issues.
Maintenance Tips to Keep Repaired Walls Looking New
When you finish repairs, keep the surface looking fresh by adopting a few simple maintenance habits that prevent damage and hide wear before it becomes obvious.
Wipe walls gently with a damp cloth, address spills or scuffs immediately, control humidity, and avoid abrasive cleaners.
Touch up chips promptly and use felt pads on furniture.
These practices improve wall care and extend paint longevity.
Frequently Asked Questions
Can Peeled Paint Indicate Lead-Based Paint Hazards in Older Homes?
Yes — peeled paint in older homes can signal lead paint and health risks. You should assume potential danger, avoid sanding or scraping, and get testing or professional abatement to protect children and pregnant occupants.
How Long Should I Wait Before Rehanging Pictures After Repair?
You’ll want to let things “settle” — wait at least 24–48 hours for paint drying to feel fully cured, and up to a week for stubborn spots; only then start rehanging pictures to avoid marks or slips.
Can Wallpaper Nearby Cause Paint to Peel on Drywall?
Yes — wallpaper nearby can cause paint to peel on drywall if poor wallpaper adhesion traps moisture or encourages moisture issues, and if adhesive or removal damages paint. You should address adhesion and moisture before repainting or replacing wallpaper.
Will a Dehumidifier Permanently Fix Recurring Peeling?
No — a dehumidifier helps humidity control, improves paint adhesion, reduces moisture, and prevents recurrence temporarily, but won’t fix leaks, poor prep, or structural issues; you’ll need repairs, ventilation, and proper surface prep for permanence.
How Should Landlords Document Tenant-Caused Peeling for Deductions?
You should document tenant responsibility with dated photos, repair costs estimates, inspection reports, signed move‑in/out forms, and written notices; keep receipts and itemized invoices, and clearly communicate deductions to the tenant to support deductions legally.
Conclusion
So you’ve conquered the drywall apocalypse and patched peeling paint like a champ — or a slightly stressed DIY comedian. Don’t let pride (or a damp pipe) undo your masterpiece: keep humidity in check, prime like it’s sacred, and touch up chips before they mutiny. If walls start staging a revolt, call a pro — unless you enjoy playing detective with mold and plumbing. Congratulations: you’ve earned a paintbrush and limited bragging rights.