How to Clean Bathroom Walls Before Painting for Best Adhesion
You’ll get the best paint adhesion by thoroughly cleaning, degreasing, treating mildew, sanding, and priming your bathroom walls. Start by removing soap scum, grease, and dust with a TSP substitute or degreaser, scrub mildew with a bleach solution or fungicide, then rinse well and let walls dry 24–48 hours. Sand glossy spots, vacuum dust, and apply a mildew-resistant primer suited for high-moisture areas. Follow these steps and you’ll be ready to proceed for longer-lasting results.
Goal: Make Bathroom Walls Paint-Ready
Start by removing all surface contaminants so your paint will stick and look smooth. You’ll clear soap scum, mildew, grease, and dust, then assess damage.
Learn how to clean bathroom walls before painting by using mild detergent, a mildew cleaner, and a soft scrub. Rinse thoroughly, dry completely, and repair imperfections so primer and paint bond evenly for lasting results.
Quick Answer: Clean for Best Paint Adhesion
To get paint to stick, you’ll first wipe away surface grease with a degreaser or trisodium phosphate solution.
Treat any mold or mildew with a mildew-killing cleaner or diluted bleach, then scrub the spots until they’re gone.
Finish with a thorough rinse and let the walls dry completely before you prime or paint.
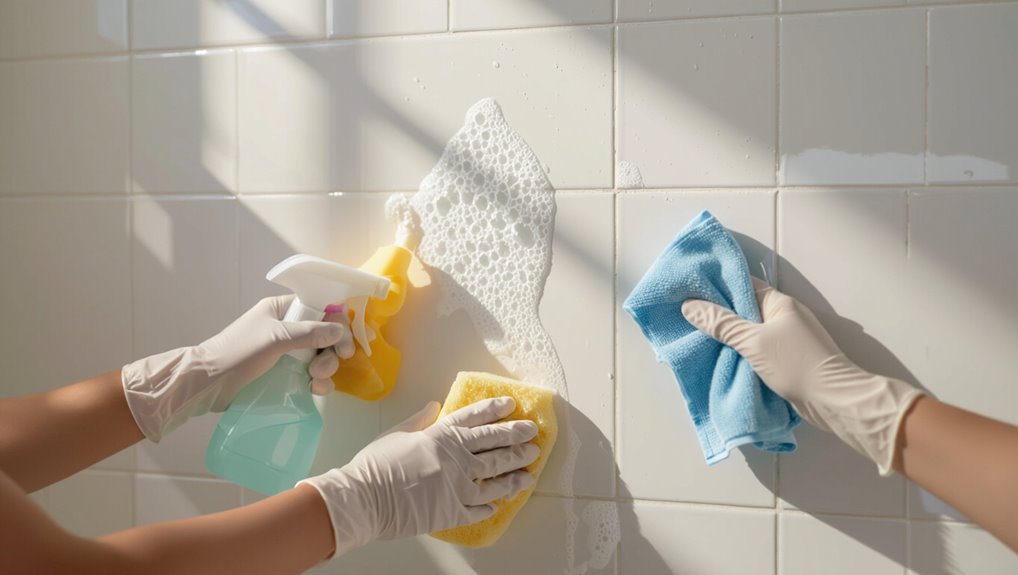
Surface Grease Removal
Scrub away grease before you paint so the new finish will stick and look even.
Use a degreasing cleaner or a mix of warm water and trisodium phosphate substitute, apply with a sponge, and work in small sections.
Rinse thoroughly, dry, and repeat stubborn spots.
Remove soap scum buildup around fixtures.
Allow the wall to fully dry before sanding or priming to guarantee proper adhesion.
Mold And Mildew Treatment
Although mold and mildew may look like surface stains, you need to remove them thoroughly so paint will adhere and won’t trap spores beneath a fresh coat.
Wear gloves and a mask, scrub affected areas with a fungicidal cleaner or diluted bleach solution, rinse any residue, and treat persistent growth with a commercial mold remover.
Let treated areas stop active growth before painting.
Final Rinse And Dry
Rinse the walls thoroughly with clean water to remove any cleaner or bleach residue—leftover chemicals can interfere with primer and paint adhesion.
After rinsing, blot excess moisture with clean microfiber cloths and squeegees, then ventilate the room.
Let walls dry fully (24–48 hours depending on humidity) before sanding or priming; paint won’t stick to damp surfaces, so patience guarantees proper adhesion.
What Affects Paint Adhesion on Bathroom Walls
Because bathrooms stay humid and see frequent splashes, different surface conditions can make paint stick poorly or peel off. You need to know what influences adhesion before you start painting.
You should remove soap scum, oils, mildew, and loose or chalky paint; sand glossy finishes; repair cracks; guarantee surfaces are dry; and use proper primer for porous or previously painted areas to promote lasting adhesion.
How to Tell If a Wall Needs Cleaning Before Painting
Before you paint, check for visible stains or discoloration that show through or unevenly absorb paint.
Feel the surface for grease or grime—if it’s tacky or slick, it needs cleaning.
Tap or rub areas with loose paint or flaking; any that come off must be scraped and prepped first.
Visible Stains Or Discoloration
If your bathroom walls show any patches of discoloration, streaks, or dark spots, they need cleaning before you paint; these marks can be mildew, soap scum, hard water deposits, or old stains that will telegraph through new paint if left untreated. Inspect lighting, touch for texture, and test with a damp cloth to see what lifts.
| Stain Type | Appearance | Test |
|---|---|---|
| Mildew | Black/gray spots | Wipes off with cleaner |
| Hard water | Chalky rings | Scrapes slightly |
| Soap scum | Filmy streaks | Smears when wet |
Surface Grease Or Grime
When cooking steam, hand oils, or cleaning products leave a dull sheen or sticky feel on your bathroom walls, they need degreasing before you paint; run your palm across suspect areas—if it feels slick or picks up residue, that’s grease or grime that will block paint adhesion and cause poor finish.
Use a degreaser or TSP substitute, rinse thoroughly, and let fully dry before priming.
Loose Paint Or Flaking
Scrape a small patch with a putty knife to check for loose paint or flaking—you’ll know the wall needs cleaning and prep if chips lift away, edges curl, or powdery residue comes off onto the blade.
Remove all loose material, sand feathered edges smooth, vacuum or wipe away dust, and treat any underlying mildew or moisture issues before priming to guarantee proper adhesion and a durable finish.
Tools and Supplies to Prep for Cleaning
Gathering the right tools before you start will save time and prevent damage to walls; you’ll need a sturdy ladder or step stool, rubber gloves, safety goggles, a bucket, scrub brushes or a sponge, microfiber cloths, a putty knife for any loose paint, and cleaning solutions like mild detergent, trisodium phosphate (TSP) substitute, and white vinegar.
| Tool | Use |
|---|---|
| Ladder | Reach high areas |
| Gloves | Protect hands |
| Bucket | Mix solutions |
| Sponge | Scrub gently |
Safety Gear and Bathroom Ventilation Tips
Before you start scrubbing, put on proper safety gear and make sure the room is ventilated: gloves and safety goggles will protect your skin and eyes from cleaners, and a mask (N95 or a respirator rated for chemical vapors) will keep you from breathing dust or fumes from TSP substitutes and paint residues.
Open windows, run an exhaust fan, and use a portable fan to direct airflow away from you.
Protect Fixtures, Trim, and Floors Before Cleaning
Cover fixtures, trim, and floors with painter’s tape, plastic sheeting, or drop cloths so you don’t splash cleaners or wet scrubbers onto them.
Remove or loosen lightweight items, seal seams with tape, and wrap faucets or vents. Keep towels handy for drips.
Protect grout and baseboards near standing water. Secure coverings so they won’t shift while you scrub.
Remove Dust and Loose Debris Quickly
Start by quickly removing loose dust so your cleaning solutions can work on the real grime.
Run a vacuum with a crevice tool along corners, trim, and vents to pull out settled particles.
Finish with a tack cloth or microfiber to pick up the fine dust before you wet-clean.
Quick Dry Dusting
Once you’ve removed any large debris, grab a microfiber duster or a soft-bristled broom and sweep the walls from top to bottom to catch dust and spiderwebs quickly.
Work in overlapping strokes, paying attention to corners, light fixtures, and trim.
Shake the duster outdoors periodically to keep it effective.
Finish by wiping any visible streaks with a dry microfiber cloth.
Vacuum Crevice Cleaning
Grab your vacuum with a crevice tool and work the nozzle along baseboards, tile grout lines, light fixture edges, and around trim to pull out dust, hair, and loose debris.
You’ll speed prep, prevent grit under paint, and reach tight gaps before wiping. Be systematic and empty the canister promptly.
- Slow, overlapping passes
- Angle tool for corners
- Check and repeat as needed
Tack Cloth Wiping
After vacuuming the nooks and crevices, wipe the walls with a tack cloth to pick up the fine dust the vacuum missed. You’ll glide the cloth in one direction, replacing it when saturated, so paint bonds evenly. Use gentle pressure and inspect corners.
| Action | Benefit |
|---|---|
| Single-direction wipe | Fewer streaks |
| Replace cloth often | Maintains tackiness |
| Light pressure | Prevents residue |
| Corner check | Guarantees coverage |
Break Down Soap Scum on Bathroom Walls
Soap scum’s filmy residue can block paint from adhering properly, so you’ll want to dissolve it before priming or painting.
Soap scum’s film prevents paint adhesion—dissolve it first to ensure primer and paint bond properly.
Use a gentle degreaser or vinegar solution, scrub with a nonabrasive sponge, then rinse thoroughly and dry. Repeat stubborn areas.
- White vinegar + warm water (1:1)
- Baking soda paste for gentle abrasion
- Rinse and towel-dry completely
Remove Mildew and Mold Spots Safely
If you spot mildew or mold on your bathroom walls, act quickly to stop it from spreading and affecting your paint job.
Wear gloves, goggles, and a mask.
Mix one part bleach to three parts water or use a commercial mold remover.
Test a hidden spot, scrub gently with a soft brush, rinse thoroughly, and let the area dry completely before priming and painting.
Degrease Walls With Heavy Grime
Scrub away heavy grime with a degreaser so paint will adhere properly and won’t show stains through the finish.
Use a commercial bathroom degreaser or a baking soda paste, work small sections, rinse thoroughly, and let dry.
Test a hidden spot first to verify no damage.
- Wear gloves and ventilate.
- Use a scrub brush or sponge.
- Rinse and dry completely.
Clean Glossy or Semi-Gloss Paint Without Damage
After you’ve removed heavy grime, focus on glossy or semi-gloss walls, which show marks and can resist cleaners if handled roughly. Use mild detergent, diluted vinegar, or specialty cleaner; test a hidden spot first. Wipe gently with microfiber, rinse, and dry. Avoid abrasive pads or harsh solvents that dull finish.
| Cleaner | Method | Tip |
|---|---|---|
| Mild detergent | Soft cloth | Test first |
| Vinegar solution | Microfiber | Rinse well |
| Commercial cleaner | Follow label | Spot test |
Prep Flat or Porous Drywall Before Priming
Before you prime flat or porous drywall, wipe away surface dust with a microfiber cloth or vacuum to guarantee the primer bonds properly.
If you spot mold stains, clean them with a diluted bleach solution or a commercial mildew remover and let the wall dry completely.
Tackling dust and mold now prevents adhesion problems and stains from bleeding through the primer.
Remove Surface Dust
Start by wiping the drywall with a dry microfiber cloth or a soft-bristled brush to lift dust and loose particles from the flat or porous surface.
You’ll work top to bottom, paying corners and trim. Then vacuum lightly and spot-wipe remaining grit before priming.
- Use overlapping strokes.
- Replace or clean the cloth often.
- Vacuum with a soft brush attachment.
Clean Mold Stains
Scrub visible mold stains with a solution of one part household bleach to three parts water (or a commercial mold cleaner), working gently so you don’t damage the drywall paper; wear gloves and eye protection, ventilate the room, and keep children and pets out while you clean.
Rinse thoroughly, let the wall dry completely, then inspect for staining or damage; sand lightly and spot-prime before full priming.
Clean Tile and Grout Before Painting Trim or Accents
Tackle tile and grout cleaning thoroughly so paint on adjacent trim or accents will stick and look professional; you’ll remove dirt, soap scum, and mildew that can cause peeling or uneven coverage.
Scrub grout with a brush and cleaner, rinse well, and let dry. Mask edges before painting.
- Use a grout cleaner or diluted bleach.
- Scrub with a nylon brush.
- Dry fully, then tape edges.
Handle Textured and Popcorn Bathroom Walls
When you’re dealing with textured or popcorn bathroom walls, be gentle and deliberate: these surfaces trap dirt and can crumble if cleaned too aggressively, so use low-pressure methods like vacuuming with a brush attachment and light brushing with a soft nylon broom to remove loose debris before any wet cleaning.
Then spot-clean with a mild detergent and sponge, rinse gently, and let fully air-dry before priming.
Remove Hard Water Stains From Walls
Hard water stains are mineral deposits that can leave chalky, rust-colored streaks on bathroom walls.
You’ll want to dissolve them before painting so primer and paint adhere properly.
- Mix white vinegar and water 1:1, spray, let sit 10 minutes, then wipe.
- For tough spots, use a paste of vinegar and baking soda, scrub gently.
- Rinse, dry, and inspect; repeat until the surface is clean and smooth.
Remove Nicotine, Smoke, and Heavy Stains
Because nicotine and smoke leave oily, porous residues that paint won’t stick to, you’ll need to remove them thoroughly before priming.
Use trisodium phosphate (TSP) or a heavy-duty degreaser, work from bottom up, rinse well, and repeat stubborn areas.
For yellowed spots, apply a bleach solution briefly, rinse, and let walls dry completely before priming with a stain-blocking primer.
When and How to Sand After Cleaning
Once the wall is dry and free of residue, you’ll want to sand to smooth any rough patches and feather edges where repairs were made.
Use a light-touch sanding block or fine-grit paper, working in even strokes and wiping away dust as you go.
After sanding, inspect the surface under good light for scratches, bumps, or remaining imperfections before priming.
When To Sand
After cleaning and letting the walls dry completely, you should sand any glossy spots, remaining paint drips, or rough areas so primer and paint will adhere evenly.
Sand lightly where finish is smooth, feather edges of peeled paint, and remove high buildup from trim junctions.
Follow with a tack cloth before priming.
- Inspect for gloss and drips
- Sand feathered edges
- Clean dust thoroughly
Sanding Techniques
Start with medium-grit sandpaper (120–150) on a sanding block to smooth glossy finishes, high spots, and any peeling edges you couldn’t remove during cleaning; use lighter pressure and finer grit (180–220) for feathering and final smoothing so you don’t scar the drywall or plaster.
| Task | Grit |
|---|---|
| Remove gloss | 120–150 |
| Feather edges | 180–220 |
| Light touch | 220 |
Surface Inspection After Sanding
Inspect the walls carefully to catch any missed imperfections before priming or repainting.
You’ll want to run your hand, use good light, and mark dents or rough spots. Sand lightly where needed, then recheck for smoothness and dust. Follow with a clean wipe before priming.
- Feel and sight-check under angled light.
- Sand low spots with fine grit.
- Vacuum and tack cloth.
Primers That Bond to Cleaned Bathroom Surfaces
Usually you’ll want a primer designed for high-moisture rooms so it bonds to cleaned bathroom surfaces and blocks stains. These primers contain mildew-resistant resins and strong adhesion promoters that grip previously cleaned tile, drywall, or plaster so your paint won’t peel or blister.
Choose a water-based acrylic or alkali-resistant bonding primer for porous areas, and shellac or oil-based primers for stubborn stains or glossy surfaces.
Test Adhesion Before Painting the Whole Wall
Before you commit to painting the whole bathroom, pick a small, inconspicuous test patch in a high-moisture area to check adhesion.
Use the primer you plan to apply so the test reflects the final system. After the primer dries, paint the patch and evaluate how well the paint bonds before proceeding.
Test Patch Location
Pick a small, inconspicuous area—about the size of a postcard—to do a quick adhesion test before painting the whole wall.
Choose a spot near corners, high-traffic zones, or at junctions with trim so you see real conditions.
Wait for full dry time, then check for peeling or lifting.
- Corner near shower
- Behind towel rack
- Edge by baseboard
Use Appropriate Primer
Because bathroom surfaces vary so much, you should test a primer’s adhesion on that same small patch before painting the whole wall.
Choose a primer formulated for moisture and the substrate—mildew-resistant for drywall, bonding primer for glossy tiles, or oil-based for problematic surfaces.
Apply per directions, let cure, then check for peeling, blistering, or poor grip before proceeding with full paint application.
Evaluate Paint Bonding
After your primer has cured and passed the small patch check, you’ll want to verify how well paint will stick to the entire surface by doing an adhesion test.
Pick an inconspicuous spot, apply paint, let it dry, then test.
- Cut a small X with a utility blade.
- Press and peel tape over the X.
- Inspect for lifting or flakes.
How Long to Wait After Cleaning Before Priming
Once the walls are clean and dry to the touch, you’ll usually wait no more than 24 hours before priming, though the exact time depends on the cleaning method and humidity.
If you used water-heavy washing or solvent cleaners, allow full evaporation and recheck for tackiness.
In high humidity, use fans or dehumidifiers; don’t prime until surfaces feel completely dry and residue-free.
Cleaning Strategies for Small, Low-Vent Bathrooms
If your walls are dry and residue-free but you’re working in a small bathroom with poor ventilation, adjust your cleaning approach to minimize moisture and fumes while still getting surfaces ready for priming.
Use quick-dry, low-odor solutions and ventilate briefly after cleaning.
- Wipe with microfiber and diluted vinegar, then dry immediately.
- Use a damp sponge, not soaking.
- Open door and fan for 10–15 minutes.
Troubleshoot Persistent Mold After Cleaning
When mold keeps returning despite cleaning, don’t assume the job’s done—it’s a sign you need to dig deeper into moisture sources, surface damage, or improper removal.
Inspect for leaks, condensation, or poor ventilation; fix them. Scrape and dry damaged paint or drywall, treat with a fungicide, and allow full drying.
Test a small repaint area only after mold-free, thoroughly cured surfaces.
How to Clean Without Stripping Existing Paint
Before you start scrubbing, pick cleaners and tools that remove grime without attacking the paint’s binder or finish; gentle, pH-neutral cleaners, diluted trisodium phosphate alternatives, soft sponges, and microfiber cloths will let you lift dirt and mildew while preserving the existing coat.
Work gently, test a hidden spot, and rinse well to avoid residue.
- Test small area
- Use light pressure
- Rinse and dry thoroughly
Budget Cleaners That Prep Walls for Painting
A few inexpensive cleaners will get your bathroom walls paint-ready without stripping the old finish.
Use diluted dish soap for light grime, white vinegar solution for mildew and soap scum, or TSP substitute for greasy buildup.
Diluted dish soap, white vinegar, or a TSP substitute tackle grime, mildew, soap scum, and grease affordably.
Test a small area first, rinse thoroughly, and let walls dry.
These options clean effectively on a budget while preserving existing paint for proper primer and topcoat adhesion.
When to Call a Pro for Wall Remediation
If you spot widespread mold or stubborn black mildew that keeps returning after cleaning, call a pro — it could be hiding in the wall cavity.
Likewise, if walls feel soft, bulge, or show stains from leaks, you may have structural water damage that needs professional repair.
Don’t try to cover these problems with paint; get an expert assessment first.
Severe Mold Or Mildew
When mold patches keep coming back, or you spot large, fuzzy colonies covering more than a few square feet, it’s time to call a professional—these cases often signal hidden moisture problems or compromised wall materials that DIY methods won’t fix.
You should let pros assess spread, remove contaminated drywall, and guarantee safe remediation.
- Assessment and testing
- Containment and removal
- Post-remediation verification
Structural Water Damage
Because structural water damage can quietly undermine studs, insulation, and drywall, you should call a professional as soon as you suspect deep or recurring moisture problems rather than trying to patch or paint over them yourself.
A pro will assess framing, check for hidden rot, test for mold, and recommend drying, replacement, or remediation.
Don’t risk health or future collapse—get expert repair before painting.
Common Cleaning Mistakes That Hurt Adhesion
Although you might think a quick wipe is enough, several common cleaning mistakes actually prevent primer and paint from sticking properly. You should avoid shortcuts that leave residues, damage surfaces, or trap moisture.
Common errors include:
- Skipping degreasing—soap scum and oils block adhesion.
- Rinsing poorly—detergent residue repels primer.
- Painting over damp spots—moisture causes peeling and blistering.
Step-by-Step Cleaning and Prep Checklist
Start by gathering supplies and inspecting the walls so you can work efficiently: you’ll need a degreasing cleaner, trisodium phosphate or an alternative heavy-duty cleaner, scrub brushes or sponges, a bucket, clean rinse water, a putty knife, patching compound, sandpaper, painter’s tape, and drop cloths.
You should note stains, mold, cracks, and glossy areas that need extra attention before priming.
Clean, rinse, dry, patch, sand, tape, and wipe again; prime glossy or repaired spots.
Quick Maintenance to Keep New Paint Sticking
After painting, wipe down walls regularly with a damp cloth to remove soap scum and grime that can prevent adhesion.
If you spot any mold, treat it immediately with an appropriate cleaner and let the area dry completely before repainting or touching up.
These quick steps help your new paint stick and look fresh longer.
Wipe Down Surfaces
Wipe down the walls with a damp microfiber cloth to remove dust, soap scum, and loose particles that can prevent paint from adhering properly.
Work top to bottom, rinsing the cloth often and letting surfaces dry completely before priming.
- Use mild detergent for oily residue.
- Rinse with clear water to remove soap film.
- Dry with a clean, lint-free towel.
Address Mold Spots
Once the walls are free of dust and soap film, tackle any mold spots so new paint will stick and look smooth.
Wear gloves and a mask, scrub affected areas with a bleach solution or commercial mold remover, rinse thoroughly, and dry completely.
For stubborn growth, repeat or use a mildew-resistant primer before painting to prevent recurrence and guarantee long-lasting adhesion.
Final Quick-Read Checklist Before You Prime
Before you reach for the primer, run a quick checklist to confirm the walls are totally clean, dry, and free of loose paint or mildew so your primer bonds properly.
Make sure you’ve repaired chips, wiped residue, and allowed full drying time.
Then verify ventilation and masking before starting.
- Check for dust, soap scum, and loose paint.
- Confirm full dryness.
- Ascertain repairs and ventilation are set.
Frequently Asked Questions
Will Wallpaper Adhesive Residue Affect Paint Adhesion?
Yes—wallpaper adhesive residue will reduce paint adhesion if you don’t remove it. You’ll want to scrub, degrease, and rinse thoroughly, then sand and prime any tacky spots before painting to guarantee proper bonding and durability.
Can Water-Soluble Stains Reappear After Priming and Painting?
Absolutely — water-soluble stains can dramatically reappear if you don’t block them; you’ll need a proper stain-blocking primer, possibly multiple coats, to prevent bleed-through, otherwise those pesky marks will haunt your fresh paint.
Are Steam-Cleaners Safe for Painted Bathroom Walls?
Yes, steam-cleaners can be safe for painted bathroom walls if you use low pressure, keep a few inches distance, avoid prolonged steaming on one spot, test a hidden area first, and dry surfaces promptly to prevent damage.
Do Humidity Meters Help Decide When to Paint?
Yes — humidity meters help you decide when to paint by showing moisture levels; you’ll wait until relative humidity’s lower (ideally under 50–60%) and the walls feel dry, ensuring better adhesion and quicker curing.
Can Painted Plastic Fixtures Be Left on During Wall Cleaning?
Absolutely—you can usually leave painted plastic fixtures on, but protect them thoroughly with painter’s tape and plastic; they’ll survive unless paint peeling or heat-sensitive, so avoid harsh solvents and scrub gently to prevent damage.
Conclusion
You’ve prepped the walls like a pro—cleaned, deglossed, and repaired—so paint will grip like a barnacle on a ship’s hull. Take one last look for soap scum, mildew, grease, or loose texture, wipe dusty spots, and let surfaces fully dry. Prime where needed, mask trim, and handle ventilation. Do these few final checks and you’ll create a durable, smooth finish that resists bathroom humidity and stays looking fresh for years.