How to Get Crayon Off Painted Wall Quickly and Safely
You can remove crayon from painted walls quickly and safely with gentle household items and simple steps. Dampen a soft cloth with warm soapy water to blot fresh marks, or try a baking soda paste or white vinegar wipe for stubborn areas. Test on a hidden spot first, use light pressure, rinse and dry to protect the finish. Avoid harsh solvents or abrasive scrubbing that strip paint, and keep going for tips on tougher stains and prevention.
What This Guide Covers
This guide shows you safe, effective ways to remove crayon from painted walls, wallpaper, and baseboards.
It explains which cleaners and tools to use for each surface and warns you about methods that can damage finishes.
You’ll get clear crayon removal techniques, step-by-step actions, and paint protection tips so you can act confidently, avoid common mistakes, and restore surfaces without harming finishes.
Who This Guide Is For and What It Answers
This guide is for parents, renters, and anyone facing crayon marks who wants practical, low-risk cleaning options.
It covers the types of marks and surfaces you’ll encounter and the methods that work best for each.
You’ll learn what results to expect and how to avoid damaging paint or wallpaper.
Intended Readers
Who’s this guide for and what’ll it actually solve for you?
You’re a caregiver, renter, or crafty parent dealing with crayon on painted walls.
You’ll get practical parenting tips, quick cleanup steps, and safe techniques that preserve paint.
If you run creative activities with kids, this helps you prevent and fix marks without harsh chemicals or repainting, saving time and stress.
Problem Scope
You know the basics and who benefits from these tips; now let’s clarify exactly what problems this guide will help you solve.
You’ll learn safe, quick methods for removing crayon marks across common crayon types and varied wall finishes without damaging paint. It answers when to test, which tools to use, and when to stop and seek pro help.
- identifying mark severity
- choosing cleaners
- safe techniques
- avoiding damage
Expected Outcomes
Expect clear, practical results: you’ll be able to judge how hard a crayon stain is, pick the right cleaner for common wall finishes, and use safe techniques that remove marks without harming paint. This guide tells you who benefits, sets expected outcomes, and shows cleaning effectiveness so you act confidently.
| Relief | Pride |
|---|---|
| Fast | Clean |
| Low risk | Satisfied |
Quick Answer: Fastest Safe Methods to Remove Crayon
Although it’s tempting to grab the strongest cleaner you can find, the fastest safe ways to remove crayon rely on gentle household items and a little elbow grease; with vinegar, baking soda, or a hairdryer plus a soft cloth, you can lift crayon without damaging paint.
Use these quick, safe approaches for crayon removal and wall safety:
- Warm vinegar wipe with soft cloth
- Baking soda paste, gentle rub
- Hairdryer to soften, wipe away
- Mild dish soap, circular motion
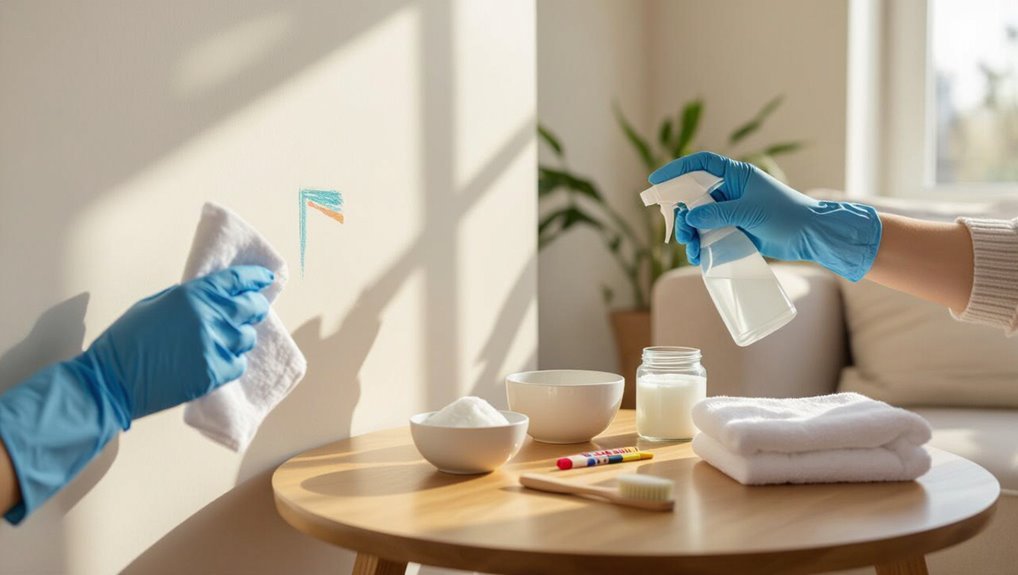
Supplies to Have on Hand Before You Start
Before you start, grab a few soft cleaning cloths so you can blot and wipe without scratching the paint.
Pick gentle, wall-safe cleaning solutions—like mild dish soap or a magic eraser used lightly—so you don’t strip the finish.
Lay down a drop cloth or old towels to protect floors and nearby surfaces from drips or residue.
Gather Soft Cleaning Cloths
Soft, lint-free cloths are your best tool for removing crayon without scratching paint, so grab a few microfiber or cotton rags before you start.
Use suitable soft cloth types and check cleaning cloth materials for lint-free quality. Keep extras for drying and blotting.
- microfiber cloth
- cotton rags
- old t-shirt pieces
- soft sponge cloth
Choose Safe Cleaning Solutions
Now that you’ve got soft cloths ready, gather the cleaning solutions you’ll actually use so you won’t be scrambling mid-clean.
Keep mild dish soap, baking soda paste, and white vinegar handy; they’re effective and gentle.
Consider natural cleaners and eco-friendly options like plant-based sprays or castile soap.
Avoid harsh abrasives or strong solvents that can damage paint—test a small spot first.
Protect Surrounding Surfaces
Gather a few protective supplies so you don’t spread crayon or cleaning solution onto floors, furniture, or trim.
You’ll prep for paint protection and proper surface coverage before you start cleaning. Lay drop cloths and tape edges, then keep cleaning tools handy to avoid drips.
- Drop cloth or old sheet
- Painter’s tape
- Plastic sheeting
- Microfiber cloths
When You Should Test First (Paint Types to Check)
Because different paints react differently to cleaning, you should always test a removal method on an inconspicuous spot before tackling the whole mark.
Check finishes like flat, eggshell, satin, semi-gloss, and high-gloss for paint durability and surface compatibility.
Older or lacquered paints and textured surfaces need extra care. If you see discoloration, stop and choose a gentler option.
How to Do a Hidden Spot Test
Before you try any cleaning method on the visible mark, pick a small, out-of-the-way area—behind a door, inside a closet, or near baseboard trim—and apply the cleaner exactly as you plan to on the crayon.
Before tackling the visible crayon, test your cleaner in a hidden spot—apply exactly as planned and wait.
Use hidden spot techniques and simple test surface methods to confirm no damage.
- Wait recommended dwell time
- Blot, don’t rub
- Check color match
- Rinse residue away
How to Remove Fresh Crayon With a Soft Cloth and Warm Water
Dampen a soft, lint-free cloth with warm water and gently blot the fresh crayon marks—don’t scrub—to lift wax before it sets into the paint.
Work from the outer edge inward, re-dampening as needed and using light pressure.
This simple approach is one of the safest crayon removal techniques and practical wall cleaning tips to prevent spreading or damaging painted finishes.
How to Use Mild Dish Soap to Lift Crayon Marks
Start by mixing a few drops of mild dish soap into a bowl of warm water to create gentle soapy water.
Dip a soft cloth or sponge, wring it out so it’s damp not dripping, and test a small hidden spot first.
Gently scrub the crayon marks in circular motions until they lift, rinsing and reapplying as needed.
Prepare Soapy Water
Mix a few drops of mild dish soap into a bowl of warm water to create gentle suds that’ll lift crayon without harming paint or wallpaper.
You’ll use this soapy water as a safe base for simple cleaning techniques. Wet a soft cloth, wring well, and test a hidden spot first.
- Use lukewarm water
- Choose mild soap
- Wring cloth thoroughly
- Test discreet area
Gently Scrub Stains
Grab your soft cloth wrung from the soapy water and work on a small section of the crayon mark, rubbing gently in a circular motion to lift the wax without damaging the paint or wallpaper; if the stain resists, apply a little more soap to the cloth and repeat until the mark fades.
Use gentle abrasives sparingly for stubborn bits, and favor eco friendly solutions to protect finishes.
How to Dissolve Crayon With a Baking Soda Paste Safely
If you’re dealing with crayon marks on painted walls, a baking soda paste offers a gentle, non-toxic way to dissolve wax without harming most finishes.
Mix baking soda benefits into a paste with water, apply gently, and wipe. Test first in an inconspicuous spot.
- Use soft cloth
- Apply light pressure
- Rinse residue
- Repeat if needed for crayon removal
How to Remove Crayon Using White Vinegar Without Harming Paint
Before you try vinegar, test it on a hidden patch of painted wall to make sure the color and finish don’t react.
Mix equal parts white vinegar and water, dampen a soft cloth, and gently blot the crayon mark—don’t scrub hard.
If the paint looks fine after drying, repeat as needed until the crayon lifts.
Test Paint First
Because vinegar’s acidity can dull or remove paint finishes, you’ll want to test it in an inconspicuous spot first to make sure it won’t harm the wall.
You should always test paint reaction before broader use. Check compatibility with different paint types and note any softening, discoloration, or texture change.
- Pick a hidden area
- Apply diluted vinegar
- Wait 10 minutes
- Inspect for damage
Gentle Vinegar Method
Start with one part white vinegar mixed with one part warm water to create a mild, paint-safe solution you can use on crayon marks.
Dip a soft cloth, wring it well, and gently rub the scribble in circular motions. Rinse and pat dry.
Vinegar benefits include non-toxic stain lifting; try this before harsher cleaning alternatives to protect paint.
How to Use Rubbing Alcohol (Isopropyl) Without Dulling the Finish
You can remove crayon marks with isopropyl alcohol without harming the paint by testing first and using gentle, controlled applications; start with a hidden spot, dab—don’t rub—and wipe away residue quickly to avoid prolonged contact.
- Use 70% rubbing alcohol on a soft cloth
- Dab gently, blotting lift
- Rinse with damp cloth
- Dry and inspect paint finish
Using a Magic Eraser Safely
Before you use a Magic Eraser, test a small hidden spot to make sure it won’t remove paint or finish.
If the test looks good, work gently—use light, even pressure rather than scrubbing hard. That way you’ll remove crayon without damaging the wall.
Test Spot First
Although a Magic Eraser can work wonders, test it on an inconspicuous spot first to avoid damaging paint or finishes.
You should try simple test methods, note test results, and proceed only if there’s no dulling or abrasion.
Follow these quick checks:
- Use a damp corner of the eraser
- Try a hidden edge near trim
- Wait a few minutes, inspect
- Compare sheen to nearby paint
Gentle Pressure Only
If your test spot showed no damage, move on to cleaning with a Magic Eraser using only gentle pressure.
You should dampen the pad lightly, then erase with short strokes, watching the paint. Use gentle techniques and controlled pressure application to lift crayon without scuffing.
Pause often to check progress; stop immediately if paint dulls or fibers abrade, then rinse the area.
Use Oil (WD‑40 or Baby Oil) : Then Clean
Spray a small amount of WD‑40 or dab a little baby oil onto a clean cloth, then gently rub the crayon mark in a circular motion until the wax loosens.
Spritz WD‑40 or apply baby oil to a cloth, then gently rub in circles until the crayon loosens.
You’ll use oil application with careful cleaning techniques, then wipe residue with mild soap and water to avoid staining.
- Test on hidden area first
- Use light pressure
- Blot, don’t spread
- Dry thoroughly
How to Remove Crayon From Glossy and Semi-Gloss Paint
When you’re dealing with glossy or semi‑gloss paint, act gently—these finishes show smudges and shine differences more easily, so start with the mildest method and work up only if needed.
Test a discreet spot, then use a soft damp cloth and gentle detergent.
For stubborn marks, try a magic eraser lightly.
Consider crayon types and avoid harsh scrubbing that alters paint finishes.
How to Treat Crayon on Flat or Matte-Painted Walls
Because flat and matte paints hide imperfections and texture differently than glossy finishes, you’ll need a gentler, less abrasive approach to remove crayon without damaging the paint.
Because flat and matte paints conceal flaws differently than glossy ones, remove crayon with gentler, less abrasive methods.
Test first on an inconspicuous spot. Consider crayon types and paint finishes when choosing solvents.
- Use mild dish soap and water
- Try a magic eraser gently
- Apply rubbing alcohol sparingly
- Repaint if staining persists
How to Handle Crayon on Textured or Plastered Walls
With textured or plastered walls, you’ll want to test any cleaning method on an inconspicuous spot first to make sure it won’t damage the finish.
Start with the mildest cleaner and a soft brush to loosen crayon from crevices without rubbing the texture flat. If that works, continue gently; if not, try a slightly stronger option and re-test.
Test Cleaning Method First
Before you tackle the whole mark, try your cleaning method on an inconspicuous patch of the textured or plastered wall to make sure it won’t strip paint, dull the finish, or push pigment deeper into crevices.
You’ll test cleaning for paint compatibility and stain reaction before wider use.
- Choose a small hidden spot
- Wait for full drying
- Compare finish and color
- Note any texture change
Use Gentle Brushing
1 simple tool—like a soft-bristled brush or an old toothbrush—can lift most crayon residue from textured or plastered walls without damaging the surface.
You’ll use gentle tools and steady, small circular motions, brushing lightly along texture lines. Work from edges inward, blot away loosened wax with a clean cloth, and repeat with effective techniques until the mark’s gone, avoiding harsh scrubbing.
Fix Heavy or Layered Crayon Without Sanding
When crayon marks are thick or layered, you can remove them without sanding by softening the wax first and lifting it gently—this protects paint and avoids roughening the wall.
Use safe crayon removal techniques and check paint compatibility considerations before testing.
Try these steps:
- Warm gently with a hair dryer on low.
- Blot softened wax with paper towel.
- Lift residue with a plastic scraper.
- Clean with mild detergent.
How to Tackle Crayon Near Trim, Outlets, or Delicate Fixtures
When you’re working near trim, outlets, or delicate fixtures, protect adjacent surfaces with painter’s tape before you start cleaning.
Create a simple protective barrier by covering outlets with tape or a cut piece of plastic to keep moisture and cleaner off the hardware.
That way you can focus on the crayon without risking damage to finishings or electrical components.
Use Painter’s Tape
Painter’s tape creates a clean barrier that protects trim, outlets, and delicate fixtures while you remove crayon marks, so stick strips tightly along edges before you start cleaning.
Use painter’s tape for precise wall protection and to prevent cleaner contact. Then remove tape slowly.
- Mask trim edges
- Cover outlet plates
- Shield light fixtures
- Protect neighboring paint
Protective Barrier Setup
If you’re working near trim, outlets, or delicate fixtures, set up a protective barrier before you start cleaning to avoid damaging surfaces or getting cleaning solutions where they shouldn’t be.
Use painter’s tape and removable wall coverings to mask trim and switches. Lay thin cardboard or cloth below fixtures.
Secure protective barriers firmly, unplug outlets if possible, and keep tools localized to prevent drips or scratches.
How to Rinse and Remove Residue After Cleaning
Although you’ve removed the visible crayon, you’ll still want to rinse the area to lift any lingering residue and cleaning solution. Use a clean, damp microfiber cloth or sponge and wipe in gentle circular motions until the surface feels clean.
Even after removing crayon, gently rinse the area with a damp microfiber cloth to lift residue and cleaning solution.
Use rinse techniques and residue solutions carefully:
- Rinse with plain water
- Blot, don’t rub
- Dry with a soft towel
- Inspect for leftover marks
When to Touch Up Paint Versus Continuing Cleaning Attempts
Once the wall’s dry and you’ve inspected for lingering stains, decide whether more cleaning will help or if paint touch-up is the faster fix.
If cleaning effectiveness drops—ghost marks remain, texture’s altered, or repeated attempts risk finish damage—opt for touch up timing sooner to prevent overworking the surface.
If stains lift cleanly with minimal effort, continue cleaning until satisfied.
How to Choose a Touch-Up Technique and Match Paint Color
How do you pick the right touch-up method and make the paint match? You’ll assess surface texture, sheen, and damage extent, then choose touch up techniques that blend.
Use color matching tips—sample swatches, paint codes, and small test patches—before committing.
Try swatches, check the original paint code, and test tiny patches before committing.
- Match sheen and texture
- Test small patches
- Use original paint code
- Feather edges carefully
Best Commercial Cleaners for Crayon on Painted Walls (When to Use Each)
When you’re dealing with crayon marks, choosing the right commercial cleaner depends on paint type, finish, and how long the wax and pigment have sat on the wall.
Mild all-purpose cleaners or magic erasers work well for fresh marks on flat or eggshell finishes, while stronger solvent-based or citrus cleaners may be needed for older, stubborn stains on semi-gloss or satin surfaces.
Always test a small, inconspicuous area first to avoid stripping sheen or damaging paint.
Use commercial products sparingly, follow label instructions, and pair them with gentle cleaning techniques: blot, rub lightly, rinse, then dry to protect finish and prevent residue.
Household Products to Avoid Because They Damage Paint
Because some common household products strip paint or leave stubborn residue, you should avoid using them on walls—even if they seem effective on other surfaces.
You’ll protect paint preservation by steering clear of harsh, damaging cleaners and abrasive mixes that dull or etch finishes.
- Bleach solutions
- Oven cleaners
- Abrasive powders
- Acetone/nail polish remover
Troubleshooting: What to Do If Paint Dulls or Sticky Residue Remains
Even careful cleaning can sometimes leave paint looking dull or feeling tacky, especially if a harsh product or residue was used.
If that happens, rinse gently with a damp microfiber cloth and mild soap, then dry.
For stubborn tackiness, try a diluted vinegar rinse or a light rub with a melamine sponge.
Consider professional paint restoration if damage is severe; use crayon alternatives next time.
Safety Tips for Crayon Cleanup
If you’re cleaning crayon off walls, prioritize safety by wearing gloves and working in a well-ventilated area to avoid skin irritation and inhaling fumes from cleaners.
Follow safety precautions, test cleaners on scrap paint, and consider nonchemical crayon alternatives for kids’ art stations.
- Wear gloves and eye protection
- Ventilate the room
- Spot-test cleaning solution
- Keep children and pets away
Quick Prevention Strategies to Keep Crayons Off Walls
Now that you’ve taken safety precautions for cleanup, focus on preventing marks in the first place so you avoid repairs later.
Put crayons in labeled crayon storage bins out of reach, use washable crayons at supervised stations, and keep drawing supplies in one area.
Offer paper pads, easels, or tablet apps as creative alternatives.
Provide paper pads, easels, or tablet apps so kids create on approved surfaces instead of walls.
Praise drawing in approved spaces to reinforce habits.
Kid-Friendly Alternatives and Rules to Encourage Drawing Elsewhere
When you give kids clear, fun alternatives and simple rules, they’ll be much more likely to draw on paper instead of walls.
Offer consistent boundaries, praise good choices, and provide plenty of creative outlets and drawing alternatives so they can express themselves without damage.
- Set a dedicated art zone
- Keep accessible paper and washable supplies
- Use easels or clipboards
- Offer sticker rewards
Frequently Asked Questions
Can Crayon Wax Bleed Through Primer or New Paint Layers?
Yes — crayon wax can bleed through primer or new paint layers, especially with oily crayon types and porous wall finishes; you’ll need a stain-blocking primer and proper surface prep to prevent ghosting and future bleed-through.
Will Heat (Hairdryer/Iron) Spread Wax Deeper Into Paint?
Yes — heat can cause heat transfer that increases wax penetration into paint layers, so you shouldn’t blast crayon with a hairdryer or iron; instead, you’ll risk spreading and embedding wax deeper, complicating removal.
How Long After Cleaning Should I Wait Before Repainting?
You should wait 24–48 hours after cleaning so surfaces fully dry before repainting; proper wall preparation and repainting techniques need dry, residue-free walls so primer and paint adhere well, and you’ll avoid blistering or poor coverage.
Can Crayon Removal Products Harm Adjacent Wallpaper or Decals?
Yes — some crayon removal products can harm adjacent wallpaper or decals, so you should test first. For crayon removal safety, protect wallpaper protection with painter’s tape and a small patch test to avoid stains or adhesive damage.
Are There Eco-Friendly Commercial Cleaners for Crayon Removal?
Yes — you can buy eco friendly alternatives for crayon removal; you’ll find natural solutions like plant-based cleaners, citrus enzyme sprays, and biodegradable degreasers that’re gentle, effective, and safer for painted walls and nearby decals.
Conclusion
You’ve learned fast, safe ways to lift crayon without wrecking paint, and it’s funny—just when you think a scribble will ruin the wall, a damp cloth or gentle eraser fixes it in minutes. Keep the right supplies handy, test on hidden spots, and teach kids where drawing’s welcome so messes become rare. When a stubborn mark lingers, troubleshoot calmly; coincidence often shows you that prevention and quick action make cleanup almost effortless.