How to Paint a Design on Wall: Creative Diy Ideas
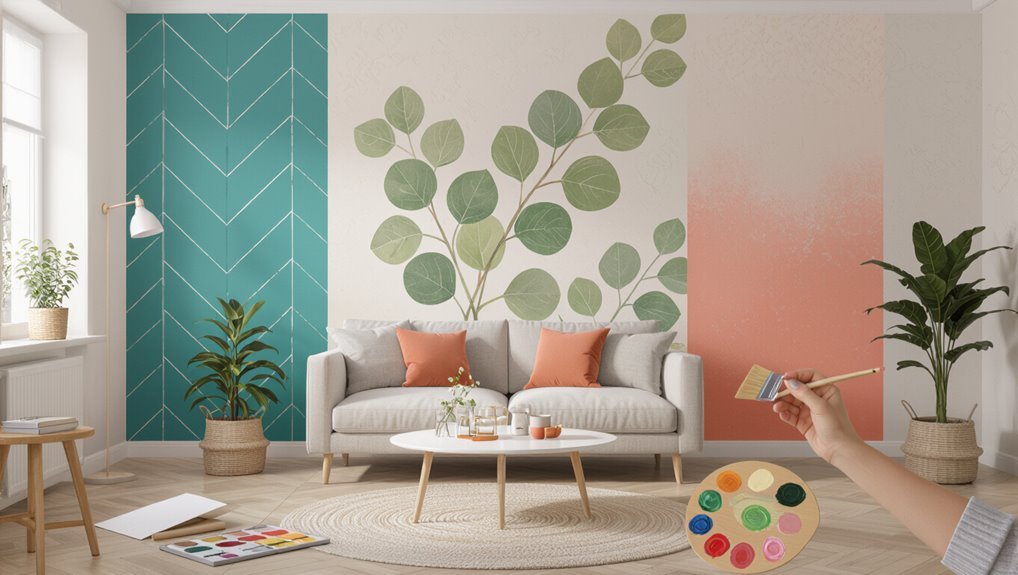
You can turn any wall into a focal point using simple tools, smart color choices, and clear planning. Start by picking an accent wall with good sightlines and light, then choose latex or acrylic paint and a finish that suits traffic. Measure, sketch, and tape for crisp shapes; use stencils, rollers, or a projector for murals; practice ombré and blending on a sample board. Fix drips with sanding and thin coats, seal for durability, and keep going to learn step‑by‑step techniques.
Who This Guide Is For : What You’ll Be Able to Paint
This guide is for anyone who wants to transform a plain wall into a focal point, whether you’re painting a simple geometric pattern, a large-scale mural, or a stenciled accent.
You’ll learn techniques suited to beginners through confident DIYers, pick design inspiration, balance scale and texture, and apply color psychology to set mood.
You’ll finish projects that feel intentional and achievable.
Picking the Right Wall and Design for Your Room
Now that you know what kinds of designs you can tackle and your skill level, pick a wall that complements the room’s function, traffic flow, and natural light.
Consider wall color selection and your chosen design style to guarantee harmony.
Let wall color and your chosen design style work together to create a cohesive, harmonious space.
Choose a focal or accent wall, measure sightlines, and match scale to furniture.
- focal point
- traffic pattern
- light exposure
- scale proportion
- color harmony
Best Paints and Finishes for Wall Designs
You’ll want to know which paint types—latex, acrylic, or enamel—work best for your design and surface.
Consider how finishes like matte, eggshell, satin, and gloss affect color depth, durability, and cleanability.
We’ll compare their pros and cons so you can pick the right combo for look and longevity.
Paint Types Explained
Choosing the right paint and finish will make your wall design look crisp, last longer, and be easier to maintain.
You’ll pick latex for ease, acrylic for vibrancy, enamel for durability, and specialty paints for texture.
Consider paint finishes and color theory to balance sheen and mood.
Quick choices:
- Matte for hides
- Eggshell for subtle sheen
- Satin for washability
- Semi-gloss for trims
- Gloss for accents
Finish Options Compared
Although the right finish might seem like a small detail, it drastically affects how your design reads, holds up, and cleans over time.
Do finish comparisons between matte, eggshell, satin, and semi-gloss: matte hides flaws, satin balances sheen and durability, semi-gloss cleans easily.
Consider gloss levels for contrast or subtlety, durability in high-traffic areas, and easy maintenance when choosing your final coat.
Essential Tools and Cheap Extras That Help
You don’t need a pro kit to get a clean, sharp wall design—basic brushes, rollers, painter’s tape, and a level will cover most jobs.
Add cheap extras like stencils, foam rollers, and a small trim brush to speed up details and textures.
Don’t forget safety and cleanup gear—drop cloths, gloves, goggles, and a good scrub brush will protect your space and make finishing easier.
Essential Painting Tools
Gather the right tools before you touch a brush—having quality basics and a few cheap extras will save time and keep your design crisp.
You’ll need proper paintbrush selection and basic roller techniques plus tape, trays, and drop cloths to work neatly. Keep edges sharp and cleanup easy.
- angled sash brush
- foam roller
- painter’s tape
- plastic tray
- drop cloth
Affordable Decoration Extras
A few inexpensive extras can make a big difference—think stencils, inexpensive foam brushes, a small level, and reusable adhesive hooks for hanging templates—so you’ll get cleaner shapes, consistent spacing, and easier setup without spending much.
Add painter’s tape, a cheap paint tray, craft sponges, and a measuring tape; these budget friendly accessories let you create polished DIY wall embellishments while keeping costs low and results sharp.
Safety And Cleanup Gear
Start with the basics: gloves, goggles, and a respirator or dust mask will keep you safe from fumes, splatters, and sanding dust.
You’ll follow safety precautions and use simple cleanup methods to finish tidy. Don’t skip these essentials; they’re cheap and effective.
- Disposable gloves
- Safety goggles
- Dust mask/respirator
- Drop cloths
- Painter’s tape
Measure and Sketch Your Design So Painting Goes Smoothly
Measure the wall and sketch your design full-size on paper or directly with light pencil lines so you can spot proportion issues before you paint.
Then, measure carefully, mark reference points, and use grid, projector, or tracing sketch techniques to transfer proportions accurately.
Check design proportions against furniture and sightlines, adjust as needed, and tape off borders so your painted layout stays true to the plan.
Simple Wall-Painting Patterns You Can Do in an Afternoon
When you want a quick weekend refresh, choose simple patterns—stripes, chevrons, ombre fades, or a stencil motif—that you can finish in an afternoon with basic tools; they add graphic interest without requiring advanced skills or costly materials.
- Stripes: crisp, scalable bands
- Chevron: dynamic, easy tape technique
- Ombre fades: blend two tones
- Repeated stencil: precise motifs
- Geometric accents: easy geometric patterns, nature inspired designs
Easy Freehand Florals and Organic Shapes for Beginners
Flowers and flowing shapes are forgiving for beginners, and you can sketch them freehand with a pencil and paintbrush you probably already own.
Start with simple floral motifs—circles for blooms, curved lines for petals—and vary size for interest. Use loose, organic patterns to fill corners or a focal wall.
Work in layers, let paint dry between strokes, and embrace imperfect, charming results.
Stencil and Template Techniques for Crisp, Repeatable Motifs
Choose a stencil material and size that suit your design and wall texture so the edges stay sharp.
Secure and align templates with painter’s tape and a level to keep repeating motifs consistent.
Use light, even paint application—dab or stipple with a stencil brush or sponge—to prevent bleed and buildup.
Choosing The Right Stencil
Although stencils look simple, picking the right one makes the difference between a crisp, repeatable motif and a frustrating mess; you’ll want a material, size, and edge style that match your design, wall texture, and painting method.
Consider stencil materials and stencil types for your project, then choose edges and thickness for clean lines.
- Mylar for durability
- Cardstock for single use
- Adhesive vinyl
- Flexible rubber
- Laser-cut brass
Securing And Aligning Templates
Now that you’ve picked the right stencil material and style, get the layout right before you paint: secure each template firmly and align it to your guide marks so every repeat sits in the exact same spot.
Use tape, low-tack adhesive, or pins for stable template placement.
Check alignment techniques with a level and ruler, marking horizontal and vertical reference lines to maintain consistent spacing and orientation.
Paint Application Techniques
Start with the right amount of paint on your tool—too much and it will bleed under the stencil, too little and coverage will be uneven.
Use light, tapping motions, lock templates in place, and combine spray painting with sponge techniques for blended edges. Practice on scrap material first.
- Tap don’t smear
- Use low-pressure spray
- Dab with a sponge
- Secure edges
- Test repeats
Taping Tips for Clean Stripes, Chevrons, and Color Blocks
Taping well is the difference between a crisp, professional-looking stripe, chevron, or color block and a messy, touch-up-heavy finish.
So take your time planning layout, pressure, and sequence before you unroll the tape. Use precise tape application techniques: press edges firmly, seal with a thin base coat, remove tape at a 45° angle while paint’s tacky.
Choose quality tape for clean edge solutions.
Ombre and Color-Blending Techniques That Look Professional
Start by prepping the wall for a smooth gradient—sand any rough spots, prime if needed, and plan your color shifts.
Use layered blending methods like working wet-on-wet with a large brush or foam roller, then soften seams with light cross-strokes or a dry brush.
Practice the layers on a scrap board first so you can control opacity and color flow before tackling the wall.
Smooth Gradient Prep
Before you blend colors, prep the wall and your tools so the gradient looks seamless: clean and prime the surface, choose paints with similar sheens, and gather quality brushes, foam rollers, and a soft blending brush or sponge.
You’ll nail gradient techniques and smooth color shifts by controlling moisture, testing swatches, and working quickly.
- Tape edges
- Sand lightly
- Mix enough paint
- Use practice board
- Keep clean rags
Layered Blending Methods
Now that your wall and tools are prepped, you can build depth and movement by layering colors deliberately: ombré uses gradual value shifts while color-blending mixes hues for painterly effects. You’ll use layered techniques, feathered brushes, and soft sponges to fuse color combinations smoothly. Practice blends on scrap board, work wet-on-wet, and step back often to judge shifts.
| Tool | Purpose |
|---|---|
| Brush | Feather edges |
| Sponge | Soften blends |
| Rag | Lift excess |
| Sample board | Test mixes |
Accent Borders, Panels, and Faux Trim to Frame a Space
Use accent borders, painted panels, or faux trim to give a room instant structure and visual interest without the cost of real molding.
You’ll pick accent colors, sketch panels, and maintain design continuity to tie zones together.
Paint crisp lines with painter’s tape, add shadowing for depth, and repeat motifs for cohesion.
- Narrow chair rail
- Floor-to-ceiling panels
- Ceiling border
- Faux wainscoting
- Framed feature wall
Small Mural Ideas and How to Scale a Sketch to a Wall
When you want to add personality without overwhelming a room, small murals let you create a focal point that feels intentional and approachable.
Choose mural inspiration from nature, geometric patterns, or simple scenes. Transfer your sketch with a grid, projector, or proportional divider—scaling techniques guarantee accurate placement.
Paint in layers, keep colors limited, and step back often to maintain balance and scale.
How to Fix Drips, Patchy Coverage, and Bleed-Through
Mistakes happen—drips, patchy coverage, and paint bleed-through are common, but you can correct them quickly with the right steps.
Sand and scrape drips, feather edges, thin coats for even coverage, and use sealant primers for bleed through solutions. For drip prevention, keep brushes light and wipe excess paint.
Sand or scrape drips, feather edges, apply thin coats, and use stain-blocking primer—wipe excess paint to prevent drips.
- Sand or scrape
- Feather edges
- Thin multiple coats
- Use stain-blocking primer
- Wipe excess paint
Protecting Your Painted Design So It Stays Fresh
Although the paint may look perfect once it dries, you’ll want to protect your design with the right clear coat and care routine so it stays crisp and vibrant for years.
Seal with a compatible clear acrylic or polyurethane for design preservation, avoid harsh cleaners, dust gently, and use felt pads near furniture.
Regular light inspections help maintain wall protection and catch wear early.
Budget Timelines and Supplies Checklist
Start by mapping a realistic timeline and budget so you know what to buy, when to work, and where you can trim costs.
Plan tasks, buy budget friendly supplies, and set milestones for timeline management so you finish efficiently. Track receipts and adjust scope if needed.
- Paints (tester + main)
- Brushes/rollers
- Drop cloths/tape
- Primer/sealant
- Cleaning/storage supplies
Frequently Asked Questions
Can Painted Designs Be Removed Without Damaging the Wall Later?
Yes — you can remove painted designs without damaging the wall if you use proper removal techniques and thorough wall prep. You’ll gently strip paint, sand lightly, patch imperfections, then prime so repainting won’t reveal flaws.
Will Humidity or Temperature Affect Drying and Adhesion Long-Term?
Yes — humidity effects and temperature considerations matter: you’ll see slower drying, poor adhesion, or blistering in high humidity or extreme temperatures, so you’ll need controlled conditions, proper paint, and adequate curing time for durable results.
Can Children or Pets Safely Be in the Room While Painting?
You shouldn’t keep kids or pets nearby during painting; you’ll want to arrange a safer space. Use child safety measures, follow pet precautions, ventilate well, choose low-VOC paints, and supervise re-entry until fully dry and aired.
How Do I Transfer a Copyrighted Image Legally for a Mural?
You need image licensing and mural permissions: contact the copyright owner for a license, negotiate terms and fees, get written mural permissions, or use public domain/creative commons images with complying attribution to legally transfer a copyrighted image.
Are There Eco-Friendly or Low-Voc Alternatives for All Materials Used?
Yes — you can choose eco friendly paints and low voc options for primers, paints, sealers, brushes, and adhesives; you’ll also use natural thinners, water-based finishes, recycled drop cloths, and sustainably sourced brushes to minimize toxins and waste.
Conclusion
You’ve got everything you need to turn a blank wall into your own masterpiece. With the right paint, tools, and a little planning, you’ll avoid common pitfalls and finish with a design you’re proud to show off. Start small, practice your sketching and scaling, and protect your work so it lasts. Painting a wall is like planting a garden—tend it carefully and it’ll reward you for years. Now grab a brush and get creative.