How to Fix Paint Bubbles on Wall Quickly and Easily
You can fix small paint bubbles fast: pop each bubble with a pin, press out trapped air, then sand the spot smooth and remove dust. Fill or touch up with matching filler or paint, prime if the surface needs sealing, and feather the edges for a seamless finish. For larger or recurring bubbles, check for moisture or adhesion problems and address leaks or poor prep. Keep going to learn step‑by‑step fixes and prevention tips.
Quick Fix: Repair Paint Bubbles Fast
If you need to stop paint bubbles fast, act quickly to prevent more lifting: pop the bubble with a pin, press out trapped air, and squeeze in a small amount of matching paint or filler to seal the spot.
After a neat bubble burst, sand lightly, clean residue, and apply primer if needed to restore paint adhesion.
Work steady, avoid overworking the area.
Diagnose: Surface Bubble or Structural Problem?
Start by checking whether the bubbles are just surface blisters you can scrape away or if there’s something more serious underneath.
Inspect for signs of moisture damage like staining, soft spots, or peeling beyond the bubbled area.
Tap the paint—hollow sounds often mean a structural problem rather than a simple cosmetic one.
Check For Surface Blisters
Before you repair any bubbles, check whether they’re just surface blisters or signs of a deeper structural problem by probing the area gently and inspecting surrounding paint, substrate, and any moisture or rust.
If blisters stay intact and substrate looks sound, scrape, sand, and clean for proper surface preparation to restore paint adhesion.
If unstable, don’t ignore structural issues.
Inspect For Moisture Damage
When you see paint bubbles, check for moisture that could signal a deeper problem rather than just a surface blemish.
You should look for leaks, condensation, or plumbing issues as likely moisture sources.
Perform a quick damage assessment: probe edges, smell for mildew, and note soft drywall.
If structural dampness appears, stop DIY patching and address the source before repainting.
Tap For Hollow Sounds
After ruling out moisture, tap the painted area with your knuckle or a screwdriver handle to listen for hollow sounds—you’ll quickly tell if the paint’s merely detached from the substrate or if there’s underlying structural damage.
If it thuds solidly, mark and repair the surface bubble; if it rings hollow sounds persist, investigate framing, plaster or drywall for structural issues as part of accurate bubble detection.
Tools & Materials for Bubble Repairs
Before you start fixing paint bubbles, gather the essential tools—scrapers, sandpaper, putty knife, and a wire brush—to make the job efficient.
Pick recommended paint materials like a compatible primer, quality filler or epoxy for structural spots, and matching topcoat paint.
Don’t forget safety gear and prep items: gloves, goggles, a respirator, drop cloths, and proper cleaning solvents.
Essential Tools For Repair
Tools make the job faster and give you cleaner results, so gather them before you start fixing paint bubbles.
You’ll need a scraper, putty knife, sanding block, vacuum or brush, filler, primer, and quality brushes or rollers.
These support bubble removal techniques and address paint adhesion factors by ensuring surfaces are clean, smooth, and properly prepped before repainting.
Recommended Paint Materials
You’ll want a short list of reliable paints and materials to get durable, bubble-free results: choose a high-quality interior or exterior latex (or oil-based where specified), a stain-blocking primer, a flexible patching compound, and corrosion-resistant brushes or a lint-free roller.
Pick compatible paint types, quality caulk, and sanding tools. Follow proper application techniques for thin, even coats and adequate drying between layers.
Safety Gear And Prep
Start by gearing up with the right safety equipment and prep supplies so you can work confidently and avoid hazards.
Put on gloves, a mask, and safety glasses. Lay drop cloths, tape, and a scraper nearby.
Use a vacuum or brush to remove dust. Keep sandpaper, patching compound, primer, and paint within reach.
These safety gear and prep materials streamline the repair.
Prep Area: Safety, Masking & Protection
Before you touch the paint, make sure the work area is well-ventilated and free of dust or debris so fumes don’t build up and contaminants won’t stick to the surface.
Wear gloves, goggles, and a mask as safety precautions.
Use drop cloths, painter’s tape, and plastic sheeting for masking techniques.
Secure edges, protect floors and furniture, and keep a clear exit route.
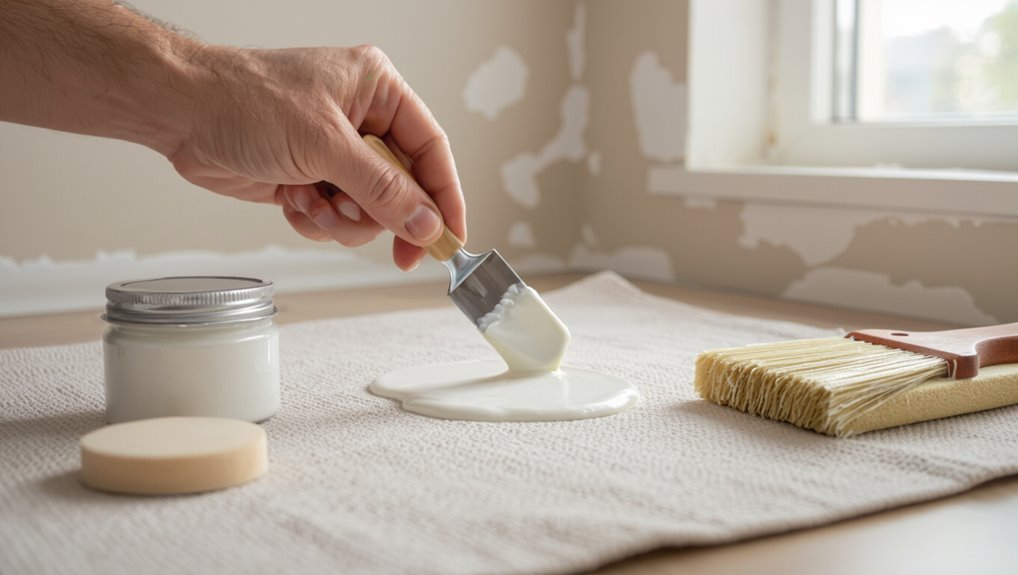
How to Pop and Remove Small Bubbles
Once the area’s prepped and protected, you can tackle small paint bubbles without risking surrounding surfaces.
Use fine-point knife to puncture, squeeze out trapped air, and sand smooth. Employ proper bubble popping techniques and bubble removal tools to avoid larger damage.
Follow with spot primer and touch-up paint for seamless finish.
- Puncture gently
- Sand lightly
- Prime then paint
Repairing Large or Multiple Paint Bubbles
Tackle large or multiple paint bubbles by removing unstable paint and addressing the underlying cause before you patch — you’ll avoid repeated failures if you don’t just skim the surface.
Cut out loose areas, treat any moisture or adhesion problems, then apply appropriate bubble removal techniques.
Use a compatible primer and paint surface treatment to seal and restore adhesion before refinishing for a lasting result.
Sanding & Smoothing the Repair Spot
After you’ve removed loose paint and treated any moisture or adhesion issues, smooth the repair spot so new coatings will bond evenly.
After removing loose paint and fixing moisture or adhesion, smooth the spot so new coatings bond evenly.
You’ll use proper sanding techniques and smoothing methods to feather edges, level filler, and create a uniform surface. Work progressively with finer grit, wipe dust, and inspect for hollows before repainting.
- Sand with light, even strokes
- Blend edges smoothly
- Clean dust thoroughly
Prime the Patch to Prevent Re-Bubbling
Pick a primer suited to your surface and the paint you’ll use so the patch bonds properly.
Apply thin, even coats to avoid trapping moisture or creating ridges.
Let each coat dry fully before the next so the finish won’t re-bubble.
Choose the Right Primer
Because the right primer locks out moisture and creates a stable surface, you’ll prevent new bubbles from forming around your repair.
Choose primer types that match substrate and paint (oil, latex, shellac) and follow proper application techniques for adhesion. Seal edges and feather into surrounding wall.
- Match primer to surface
- Use recommended drying times
- Avoid high-VOC or incompatible primers
Apply Thin, Even Coats
Start by applying thin, even coats of primer so each layer bonds well and dries quickly—this reduces trapped moisture and prevents the patch from re-bubbling.
Use a brush or roller suited to the surface for consistent paint application, keeping coat thickness minimal. Light, overlapping passes avoid ridges and pooling.
Sand lightly between coats for a smooth, uniform base before final finishing.
Allow Proper Drying Time
While you’re priming the patch, let each coat dry fully before adding the next so solvent and moisture can escape and won’t get trapped under the paint.
You’ll use proper drying techniques to avoid re-bubbling and guarantee even paint application. Wait recommended times, control humidity, and feel for tackiness before recoating.
- Follow manufacturer dry times
- Lower room humidity
- Check tack test
Match Paint and Repaint Seamlessly
A few careful steps will help you match paint and repaint seams so the repair disappears into the surrounding wall.
You’ll do color matching by comparing swatches under the room’s light, tinting small test samples, and sanding edges feather-thin.
Use blending techniques: roll outward from the patch, stipple blends, and apply thin coats until the texture and hue merge seamlessly with the original finish.
Causes of Paint Bubbles and Prevention
When you see paint bubbles, the cause usually traces back to moisture in the walls, poor surface preparation, or low-quality paint.
You’ll want to check for leaks or humidity, strip or sand loose coating, and use a durable primer and paint.
Addressing these issues early prevents bubbles from returning.
Moisture In Walls
If moisture’s getting into your walls, paint will bubble because the trapped water pushes the coating away from the substrate as it tries to escape.
You should identify moisture sources, improve wall insulation, and stop leaks to prevent bubbles.
Act fast: dry the area, fix leaks, and replace damp insulation to keep paint adhered and walls healthy.
- Check plumbing
- Improve ventilation
- Replace wet insulation
Poor Surface Preparation
After you’ve addressed moisture issues, poor surface preparation becomes the next common cause of paint bubbles because paint won’t bond to dirty, chalky, or glossy surfaces. You should perform a surface assessment, clean, sand, and use correct preparation techniques so paint adheres.
| Step | Action |
|---|---|
| 1 | Inspect surface |
| 2 | Clean residues |
| 3 | Sand glossy areas |
| 4 | Prime porous spots |
| 5 | Dry fully before painting |
Low-Quality Paint
Because low-quality paint often contains fewer binders and more fillers, it can’t form a strong film and is much more prone to bubbling and peeling once applied.
You should choose better formulas to improve paint durability and surface adhesion, prep properly, and test a small area.
- Choose quality brands
- Prep and prime thoroughly
- Test adhesion before full application
How Humidity and Moisture Cause Bubbles
While you’re painting, excess humidity and trapped moisture work against the coating, causing it to lift and form bubbles as it dries.
You’ll notice humidity effects most in poorly ventilated rooms; moisture sources like damp walls, leaks, or recent washing force paint to lose adhesion.
Dry surfaces and good airflow prevent bubbling, so wait for proper conditions before repainting.
Check for Water Damage or Mold
Excess humidity and trapped moisture often come from leaks or persistent dampness, so check nearby plumbing, the roofline, and exterior walls for signs of water intrusion before you strip and repaint.
You should do a quick mold assessment, dry the area, and fix leaks. Don’t paint over active moisture.
- Inspect pipes and joints
- Look for roof or wall stains
- Use a moisture meter
When to Repaint Whole Wall vs Spot
Decide whether to spot-repair or repaint the whole wall by evaluating the extent and cause of the bubbling: if bubbles are isolated, surface-level, and you can remove the damaged spots without disturbing surrounding paint, spot repairs will save time and materials.
But if bubbling is widespread, recurring, or caused by underlying moisture or adhesion issues, you should strip and repaint the entire wall to guarantee a uniform finish and prevent future failure.
Assess wall textures and choose appropriate repainting techniques to match finish, ensuring adhesion and consistent appearance.
Paint Types (Latex vs Oil) and Bubbles
If you determine that bubbling affects only parts of the wall, the next thing to check is what type of paint you’re working with—latex or oil—because they behave differently and need different fixes.
You’ll choose approaches based on latex advantages like flexibility and faster drying versus oil durability and adhesion.
- Latex: quick repairs, sand and spot-prime
- Oil: tougher adhesion, longer cure
- Match primer to type
Preventing Bubbles During Future Paint Jobs
When you prep surfaces properly and control environmental conditions, you’ll greatly reduce the chances of bubbles forming during future paint jobs.
Use surface preparation tips: clean, sand, repair, and prime.
Apply paint at recommended temperatures, thin coats, and allow full drying between layers.
Choose quality paint and proper tools.
These bubble prevention techniques will keep finishes smooth and durable without recurring blisters.
Troubleshooting: Why Bubbles Came Back
Although you followed prevention steps, bubbles can still reappear for a few common reasons, and you’ll need to diagnose the root cause before refinishing.
Check causes of bubble formation and paint adhesion failure so you don’t repeat work.
- Moisture behind paint reducing adhesion
- Poor surface prep or contaminants
- Incompatible primer/topcoat causing delamination
When to Call a Pro for Widespread Bubbling
Because widespread bubbling usually signals a systemic issue—like roof leaks, extensive moisture intrusion, or major adhesion failure,you’ll want a pro involved once bubbles cover large areas, reappear after patching, or coincide with soft, crumbling substrate. You should seek professional assessment for bubble repair when damage is extensive, persistent, or linked to structural moisture; a pro finds root causes and prevents recurrence.
| Sign | Action |
|---|---|
| Large areas | Call pro |
| Recurrence | Professional assessment |
| Soft substrate | Immediate repair |
| Visible leaks | Fix moisture |
| Structural concern | Full inspection |
Frequently Asked Questions
Can Paint Bubbles Harm Indoor Air Quality or Cause Odors?
Yes — bubbling can harm indoor air quality and cause odors. You’ll notice smells from trapped solvents or mold growth; causes of bubbling include moisture, poor prep, and incompatible paint types, so address sources promptly to prevent risks.
Will Removing Bubbles Void My Home Insurance Claim?
About 60% of claims get reduced for undisclosed damage, and no, removing bubbles can risk your insurance claim if it conceals evidence; check your policy, document damage first, and understand insurance coverage and homeowner responsibilities before acting.
Can Wallpaper Over Bubbled Paint Hide or Worsen the Issue?
You can wallpaper over bubbled paint, but it can worsen wallpaper adhesion and reduce paint longevity if bubbles aren’t fixed first; you’ll trap moisture, cause peeling later, and shorten wallpaper life unless you properly repair and prime the surface.
Are Paint Bubbles Contagious to Adjacent Rooms Through HVAC?
No — paint bubbles won’t spread through HVAC like a disease; they’re a flag of failing paint adhesion and moisture control. You’ll need to address the source, not vents, to prevent nearby walls from deteriorating.
Can Pets or Children Trigger Paint Bubbling After Repairs?
Yes — pets and children can trigger bubbling after repairs. If pet behaviors like scratching or damp fur, or child activities such as leaning, rubbing, or moisture from hands disturb fresh paint, it’ll lift or blister before fully cured.
Conclusion
Like patching a paper cut, fixing paint bubbles is small work that keeps your walls healthy. If you follow the steps—diagnose, prep, pop and sand, prime, and repaint—you’ll seal out moisture and stop the issue from spreading. Remember paint type matters, and persistent bubbling can signal deeper problems. With care and the right tools, your wall will breathe easy again; call a pro only when the damage looks like a storm, not a sprinkle.