How to Paint Exterior Walls: Step-By-Step Guide
You’ll start by inspecting and repairing surfaces—note peeling, rot, and moisture sources—then clean, sand, and prime where needed. Pick weather-appropriate days and the right paint (latex for quick drying, oil for durability, or a hybrid). Use brushes for trim, rollers for walls, and sprayers for large areas. Follow a roofline-to-trim sequence, allow full dry times, and plan touch-ups. Keep going to get detailed checklists, timing, and materials so you can finish confidently.
What This Guide Covers: Scope, Time, and Outcomes
Before you pick up a brush, know exactly what this guide covers so you can plan time and expect results.
You’ll get scope: surface prep, materials, and finish expectations.
You’ll learn realistic timelines and outcomes, how exterior paint trends influence color choices, and key seasonal considerations for curing and durability.
You won’t find step-by-step timing here—that’s in the checklist.
Quick Exterior Painting Checklist: Timeline and Steps
Use this checklist to move from prep to finish without skipping critical steps: assess and repair surfaces, choose and order materials, schedule weather-appropriate days, prime where needed, apply topcoats in the right sequence, and allow proper cure time before reattaching trim or hardware.
Then plan timeline: prep day, priming, two topcoat days, drying windows.
Pick paints by testing color trends and reliable paint brands for durability and finish.
Inspecting Exterior Walls: Checklist, Photos, and Notes
Before you paint, walk every wall and note the surface condition—look for peeling, chalking, or uneven texture.
Photograph and tag any damage like cracks, rot, or loose trim, and mark areas with stains or blistering that suggest moisture.
Use those photos and notes to prioritize repairs and decide if a moisture source must be fixed before painting.
Wall Surface Condition
A quick, thorough inspection of the wall surface lets you spot issues that will affect paint adhesion, appearance, and longevity.
You’ll note texture, flaking, chalking, dirt, and previous coatings to guide surface preparation and guarantee paint adhesion.
Record photos and brief notes per area.
- Flaking or peeling
- Chalking or powdering
- Dirt and stains
- Uneven texture
- Old coatings
Damage And Moisture
When you inspect for damage and moisture, focus on signs that let you pinpoint leaks, rot, and water entry points so you can target repairs before repainting.
Check flashing, caulking, and siding seams; probe soft spots and note staining. Photograph issues, record locations, and plan fixes that restore moisture barriers.
Timely action prevents spread and supports long-term damage prevention.
Estimate Paint Quantity & Cost From Your Inspection
Start by converting your inspection notes into measurable items: list each exterior surface (walls, trim, doors, eaves), record their dimensions or estimated square footage, and note surface condition and number of coats needed.
Use a paint calculator for coverage and a cost estimation for materials and labor.
- Total square footage
- Number of coats
- Primer needs
- Trim linear feet
- Labor hours
Best Exterior Paint Types: Latex, Oil, and Hybrids
Now that you’ve estimated materials, you’ll want to pick the right paint type for your climate and surface.
Latex gives easy cleanup and good flexibility. Oil-based paints offer superior hardness and stain resistance, and hybrids combine the best traits of both for balanced performance.
We’ll compare when each option makes the most sense for your exterior project.
Latex Paint Advantages
Although it dries faster than oil, latex paint still gives you durable, weather-resistant coverage that’s easy to apply and clean up with soap and water.
You’ll get excellent latex paint longevity and strong latex paint adhesion when you prep surfaces and use quality acrylic-latex formulas.
Benefits include:
- Quick drying
- Low VOCs
- Flexible finish
- Fade resistance
- Easy maintenance
Oil-Based Durability
If you need maximum toughness for trim, doors, or siding in harsh climates, oil-based paints deliver a hard, long-wearing finish that resists chipping and stands up to repeated cleaning better than most latex formulas.
You’ll appreciate oil based longevity for high-traffic areas and the smooth oil based sheen that hides minor imperfections, though drying times and cleanup require solvents and extra care.
Hybrid Blend Benefits
Hybrid exterior paints combine the ease of water cleanup and flexibility of latex with the toughness and smooth finish of oil, giving you a middle ground that handles weather and wear better than either alone.
You’ll get hybrid durability and improved hybrid aesthetics, plus easier application and cleanup.
Benefits:
- Longer lifespan
- Fade resistance
- Smooth finish
- Easier maintenance
- Versatile adhesion
Choosing Exterior Paint Finish and Color for Curb Appeal
When you’re choosing an exterior paint finish and color, think about how light, texture, and architectural style will affect curb appeal.
Consider color psychology to evoke warmth or calm, and pick tones that complement landscaping.
Balance sheen choices for finish durability and ease of maintenance—satin hides imperfections, gloss resists stains.
Test samples on different walls and view them at morning and evening light.
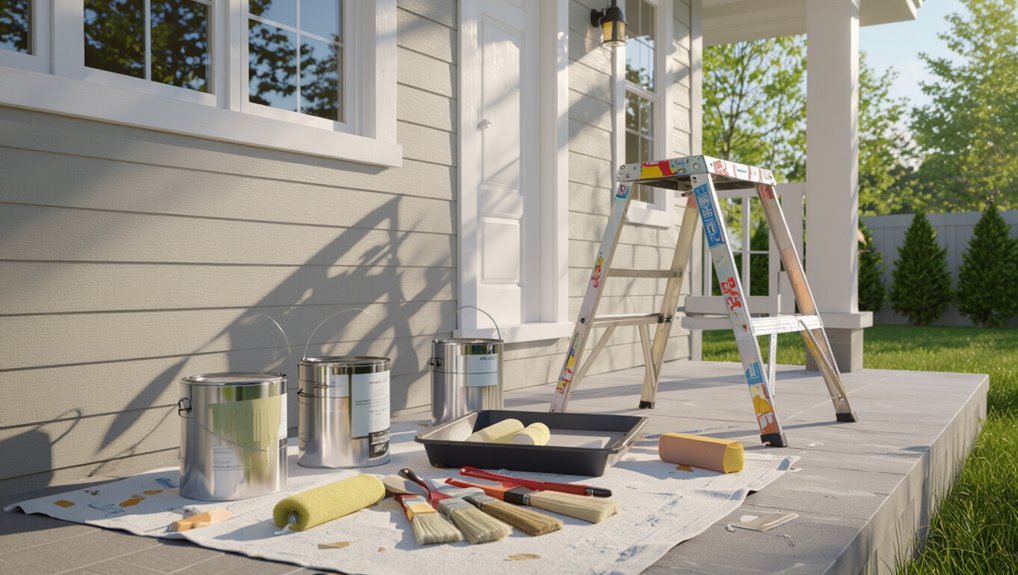
Tools & Supplies for Professional Exterior Painting
Before you start, make sure you’ve got the right tools: quality brushes, rollers, extension poles, ladders, and a sprayer if you’re covering large areas.
You’ll also need surface-prep supplies like pressure-washers, scrapers, sandpaper, caulk, and a good primer to guarantee the paint adheres and lasts.
Having these essentials ready will save time and prevent costly rework.
Essential Painting Tools
A handful of reliable tools will make exterior painting faster, cleaner, and more professional, so you should assemble a kit that covers surface prep, application, and cleanup.
Choose brushes and rollers suited to paint types, a durable ladder, and quality tapes. You’ll want efficient tools that match materials and streamline surface preparation.
- Angled sash brush
- 9″ roller frame
- Extension pole
- Drop cloths
- Painter’s tape
Surface Preparation Supplies
Although good paint is important, you’ll get professional results only if the substrate’s prepped properly, so gather the right surface-prep supplies: a pressure washer or stiff brushes for surface cleaning, scraper and wire brush for loose paint, sandpaper, patching compound, exterior primer, caulk, respirator and gloves, drop cloths and tarps for weather protection, plus sturdy ladders and disposable rags.
Fixing Common Problems: Cracks, Rot, and Mold
When you spot cracks, rot, or mold on exterior walls, deal with them promptly to prevent bigger repairs later; small issues are usually easier and cheaper to fix than widespread damage.
- Assess cracks for crack repair: clean, fill, sand.
- Remove mold, scrub, apply mold prevention solutions.
- Excise rotted wood, apply rot treatment and replace as needed.
- Prime exposed areas.
- Finish with surface sealing to protect.
Prep Trim, Windows, and Fixtures for Painting
Start by removing or protecting every trim piece, window, and fixture you’ll paint around so you get clean lines and avoid drips.
Tape edges, apply trim protection to moldings and corners, and use secure window coverings to keep glass and seals paint-free.
Unscrew light fixtures where practical, label hardware, and cover remaining items with breathable drop cloths for neat, efficient work.
Safe Ladders, Scaffolds, and PPE for Exterior Work
Before you start painting, pick the right ladder for your height and ground conditions and inspect it for damage.
If you need more reach or stability, set up a scaffold on level ground, follow manufacturer guidelines, and secure guardrails.
Wear proper PPE—gloves, eye protection, a dust mask or respirator, and non-slip footwear—to protect yourself while working.
Proper Ladder Selection
Choosing the right ladder, scaffold, and personal protective equipment (PPE) keeps you safe and speeds the job, so don’t guess—plan.
Pick an appropriate ladder type, check ladder height for reach, inspect locks and feet, wear non-slip boots and a harness when needed, and avoid overreaching.
Follow ladder safety rules and match ladder height to task for stable, efficient work.
- Choose type
- Check height
- Inspect locks
- Wear PPE
- Don’t overreach
Scaffolding Setup Tips
After you’ve picked the right ladder and checked its condition, raise your attention to scaffold setup so you can work higher with steadier footing. Inspect base, lock frames, and guardrails. Match Scaffolding safety to Scaffolding height limits, level the platform, and secure to the structure. Use a competent helper and follow manufacturer load ratings.
| Check | Action |
|---|---|
| Base | Level |
| Rails | Secure |
Personal Protective Equipment
Safety gear matters—so get the right PPE and make sure your ladder and scaffold setup works with it.
You follow safety standards, inspect anchors, and wear certified protective gear. Secure platforms, keep three points of contact, and avoid improvised fixes.
- Hard hat
- Safety glasses
- Respirator or mask
- Non-slip boots
- Harness and lanyard
Cleaning and Sanding Exterior Surfaces Correctly
Before you pick up a brush, remove dirt, mildew, and loose paint so the new finish will stick and look even. For proper surface preparation, use gentle cleaning techniques, a pressure washer on low, and scrubbers for stains. Sand glossy or rough spots, then blow off dust so paint adheres.
| Task | Purpose |
|---|---|
| Clean | Remove contaminants |
| Sand | Create keying surface |
When and How to Prime Exterior Walls
When your cleaned and sanded surface is dry and free of loose particles, prime it to seal porous areas, improve adhesion, and hide stains so the topcoat covers evenly.
You’ll choose primers based on substrate and weather; follow priming techniques for thin, even coats and note priming benefits like durability and color uniformity.
- Check surface moisture
- Use compatible primer
- Apply even coat
- Let cure fully
- Inspect for coverage
Brush vs. Roller vs. Spray: Choose the Right Method
Which application method will give you the best finish and fastest job?
You’ll weigh brush techniques for trim and detail, roller advantages for broad, even coverage, and spray efficiency for speed on large surfaces.
Consider finish options, surface texture, access, and weather.
Choose the tool that matches the area and your skill so you get a durable, attractive exterior without rework.
Step-by-Step Exterior Painting Order and Technique
Now that you’ve picked the right tool for each surface, follow a consistent painting sequence to get a professional result without rework.
Start high, work toward trim, and finish with details. Use proper paint order and technique tips to maintain wet edges and even coverage.
- Roofline to eaves
- Walls in sections
- Trim and accents
- Windows and doors
- Final touch-up strokes
Dry Times, Touch-Ups, Cleanup, Disposal, and Upkeep
Although paint feels dry to the touch in a couple of hours, you’ll need to follow manufacturer dry-time and recoat guidelines and factor in temperature, humidity, and sunlight to know when you can safely do touch-ups, remove tape, and rehang fixtures.
Use proper drying techniques like airflow and shade, clean brushes immediately, handle paint disposal per local rules, and schedule regular upkeep to extend the finish.
Frequently Asked Questions
Can I Paint Exterior Walls in Freezing Temperatures?
You shouldn’t paint exterior walls in freezing temperatures; it harms paint adhesion and curing. If you must, pick cold-weather formulations, warm the surface, and follow manufacturer guidelines so the paint can dry and bond properly despite cold conditions.
How Long Before Rain Is Paint Safe After Application?
You should wait at least 24–48 hours before rain, depending on drying time and weather conditions; if humidity or temperature are poor, you’ll need longer, while warm, dry weather can shorten curing to about a day.
Will Painting Exterior Walls Increase My Home Insurance Value?
Probably not directly — you’ll improve curb appeal and may aid an insurance assessment, but insurers rarely increase coverage solely for fresh paint; value appreciation is more about overall upgrades, so document improvements for better evaluation.
Can I Use Leftover Interior Paint on Exterior Walls?
No — you shouldn’t. Think of interior paint as a flimsy umbrella in a storm; it lacks exterior paint’s paint durability and weather resistance. You’ll need proper surface preparation and exterior-grade paint for lasting protection.
Are There Eco-Friendly Exterior Paint Disposal Options?
Yes — you can choose eco friendly options: drop leftover paint at community hazardous waste centers, use paint recycling programs or retailers’ take-back services, donate usable cans to shelters or art groups, and follow local disposal regulations.
Conclusion
You’ve got a clear plan now—inspection, prep, paint choice, and the right tools—so you can tackle your exterior with confidence and get durable results. Start small if you’re nervous: one homeowner I know painted their weathered porch walls over two weekends, following these steps; the fresh paint transformed curb appeal and lasted years with minimal touch-ups. Stick to the checklist, respect dry times, and you’ll enjoy a professional-looking finish.