How Do I Clean Walls Before Painting: Essential Prep Guide
You’ll start by inspecting walls for dirt, stains, peeling paint, and moisture, then gather mild detergent or a TSP substitute, soft brushes, sponges, and PPE. Wash from bottom to top, spot-treat smoke, grease, ink, mold, or crayon stains with the appropriate cleaner, rinse thoroughly, and let walls dry completely. Patch holes, sand glossy areas, and prime repaired spots for even adhesion. Keep going to get time-saving tips, safety notes, and repair tricks.
Quick Prep Checklist for Painting
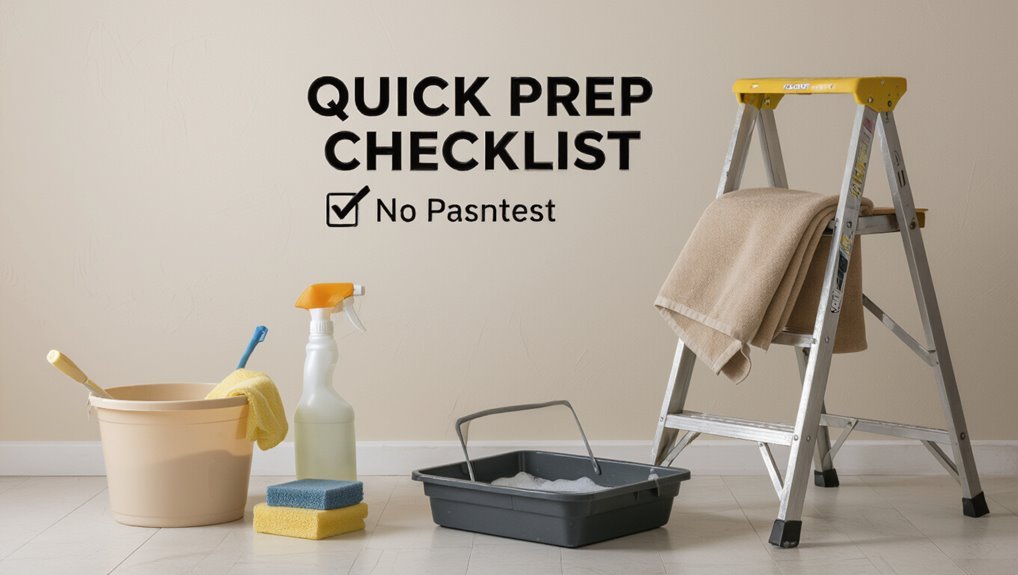
Start with a quick walk-through of the room so you know exactly what needs to be done before painting: note stains, holes, and fixtures.
Decide paint type for each surface and assess wall texture to pick sanding and cleaning methods.
Remove outlet covers, dust crown molding, patch imperfections, and mop or degrease glossy areas.
Tape trim and protect floors.
Who This Guide Helps and What You’ll Learn
Now that you’ve surveyed the room and done basic prep, this guide is aimed at homeowners, renters, and DIYers who want clean, paint-ready walls without surprises. You’ll learn practical wall cleaning steps and simple preparation techniques to remove grime, grease, and stains so paint adheres evenly.
| Who | Benefit |
|---|---|
| Homeowners | Durable finish |
| Renters | Damage-free move |
Assess Wall Condition in 5 Minutes
Start with a quick surface scan from corner to corner to spot dirt, peeling paint, or stains.
Tap and press on suspicious areas to find cracks, holes, or loose plaster that need repair.
Finally, check for moisture by feeling for damp spots and looking for discoloration or mold so you can address leaks before cleaning and painting.
Quick Surface Scan
Give yourself five minutes to walk a few paces back and visually scan the wall from different angles, looking for peeling paint, cracks, stains, mold, or uneven texture that’ll affect adhesion or finish.
Note variations in wall texture and areas needing more frequent cleaning. Mark spots needing repair, judge overall cleanliness, and decide cleaning frequency before deeper inspection or targeted repairs.
Spot Damage Areas
Spend five focused minutes circling the room and pinpoint small trouble spots—peeling paint, hairline cracks, water stains, mold patches, and dents—that’ll demand patching or special treatment before you paint.
Note each location on a checklist during your quick damage assessment.
Decide which need simple spot repair with filler and sanding, which require primer, and which warrant deeper attention or professional help.
Check For Moisture
After you’ve marked visible damage, take five minutes to check for moisture—it’s often the hidden cause behind peeling paint, stains, and mold you just spotted. Use a moisture detection meter or touch tests, inspect for leaks, and note humidity assessment results to decide drying or repairs.
| Sign | Action |
|---|---|
| Damp spots | Dry/repair |
| Efflorescence | Seal |
| Mold | Clean/kill |
| Peeling | Strip |
| Soft plaster | Replace |
When You Can Skip Deep Cleaning
If your walls look clean, feel smooth, and haven’t been painted in a home with low humidity or smoke, you can usually skip deep cleaning and just wipe down surfaces with a damp cloth.
For minor marks, you can skip cleaning beyond quick touch ups using a magic eraser or mild detergent.
Spot-prime stains and proceed with paint when surfaces are dry and dust-free.
Safety: PPE, Ventilation, and Precautions
Before you start cleaning, put on basic PPE — gloves, goggles, and a mask — to protect your skin, eyes, and lungs.
Make sure the room is well ventilated by opening windows or using fans to move fumes out.
Handle cleaners and solvents carefully: read labels, measure and mix outdoors or near ventilation, and store chemicals safely.
Personal Protective Equipment
Cleaning walls kicks up dust, old paint flakes, and chemical residues, so you should wear proper PPE and guarantee good ventilation while you work.
Use safety gear: cleaning gloves, respirator mask, protective eyewear, disposable coveralls, and rubber boots to prevent contamination.
Prioritize skin protection, change contaminated items, and follow product labels.
Dispose of single-use PPE safely and wash reusable gear promptly.
Proper Room Ventilation
Because dust and fumes can build up quickly, make ventilation your first safety step when prepping a room for painting. Use fans, window opening techniques, and door spacing to create steady air movement. Follow simple air circulation methods and keep people and pets out.
| Tool | Purpose | Position |
|---|---|---|
| Box fan | Exhaust fumes | Near window |
| Window | Intake | Opposite fan |
| Door | Flow path | Slightly ajar |
Chemical Handling Precautions
When you handle paints, solvents, and cleaners, wear appropriate PPE—gloves, goggles, and a respirator when indicated—and keep the area well ventilated so vapors don’t accumulate.
- Store chemicals in labeled, secure chemical storage away from heat.
- Use respirators for strong solvents; avoid open flames.
- Keep spill kits handy and know spill response steps.
- Dispose of rags and containers per local regulations.
Gather the Right Cleaning Tools
Before you scrub, gather the right tools so the job goes faster and cleaner: a soft-bristle brush or microfiber cloths, a mild detergent or trisodium phosphate (TSP) substitute, sponges, a bucket, a ladder or step stool, and protective gloves. Choose cleaning supplies suited to your wall materials and test a small area.
| Tool | Purpose | Tip |
|---|---|---|
| Brush | Dirt removal | Soft bristles |
| Cloth | Wiping | Microfiber |
| Sponge | Stains | Rinse often |
| Bucket | Solution | Warm water |
| Gloves | Protect hands | Durable, fit well |
Household Cleaners vs. Commercial Products
Now that you’ve got the right tools, you’ll need to choose a cleaner — household solutions or commercial products — and each has pros and cons.
- Use mild household cleaners for light dirt; they’re cheap and gentle.
- Try vinegar or baking soda for grease spots.
- Pick commercial products for heavy stains; they’re stronger and faster.
- Always follow label instructions to protect paint and surfaces.
Test a Small Area First
Because cleaners and wall finishes react differently, test a small, inconspicuous spot first to make sure the solution won’t damage the surface or strip existing paint.
Try test methods like dab, wait, and inspect with the cleaner you plan to use.
Note surface compatibility—porous, glossy, and textured finishes may react differently—then choose the safest cleaner and proceed.
Remove Dust, Cobwebs, and Surface Grit
Before you start wet cleaning, clear loose dust, cobwebs, and gritty particles with a dry duster or a vacuum’s brush attachment so the surface’s texture is true.
After that, use a tack cloth to pick up fine dust and particles you might miss with dry tools.
These quick steps help paint adhere evenly and prevent finish flaws.
Dry Dusting Techniques
When you start prepping walls, dry dusting removes loose dirt, cobwebs, and surface grit so your paint will stick and look smooth.
Use these quick dry dusting technique benefits to speed prep and avoid trapped debris:
- Start top-down with a microfiber broom.
- Use an extendable duster for high corners.
- Brush trim and switch plates gently.
- Vacuum baseboards and floors after dusting.
Tack Cloth Wiping
After dry dusting, grab a tack cloth to pick up the fine dust and cobweb remnants that brooms leave behind.
Wipe walls in overlapping strokes, folding the cloth as it fills to expose fresh tack.
You’ll appreciate tack cloth benefits: it removes surface grit and improves paint adhesion.
For ideal usage, replace contaminated cloths and avoid pressing the cloth into textured surfaces.
Degreasers for Kitchen Wall Cleaning
Tackle kitchen wall grease with a purpose-built degreaser so paint will stick and look even.
You’ll remove oily film, follow safety directions, and rinse thoroughly for proper adhesion.
Use these kitchen tips and targeted grease removal products for best results:
- Citrus-based spray for light splatters
- Alkaline degreaser for heavy buildup
- DIY vinegar mix for mild jobs
- Rinse and dry completely before painting
Remove Smoke and Nicotine Residue
Kitchen grease can mask smoke stains and odors, so once you’ve degreased, focus on nicotine and soot that can bleed through paint and smell persistent.
Use targeted smoke removal techniques: wash walls with a trisodium phosphate (TSP) alternative or vinegar solution, rinse thoroughly, and dry.
For stubborn yellowing, apply commercial nicotine cleaning solutions or a bonding primer before painting to seal stains and odor.
Remove Ink, Crayon, and Marker Stains
If kids, pens, or markers have left marks on your walls, you can often lift them without sanding or repainting by choosing the right solvent and working gently from the outside in.
Start with a mild cleaner (warm soapy water or a magic eraser) and only move to stronger options (rubbing alcohol, nail polish remover, or a dedicated ink remover) if the stain resists, testing first in an inconspicuous spot to protect the finish.
- Try warm soapy water for light crayon cleaning methods.
- Use a magic eraser gently for marker smudges.
- Apply rubbing alcohol for ink removal techniques.
- Finish with a dedicated ink remover for stubborn stains.
Clean Mold and Mildew Safely
Before you start painting, learn how to tell mold from mildew so you know how aggressive treatment should be.
Use gentle, safe cleaners first—like diluted bleach or vinegar solutions—and wear gloves and a mask to protect yourself.
If stains persist or cover a large area, get professional help to avoid spreading spores.
Identify Mold vs. Mildew
While mold and mildew often look similar at a glance, you can tell them apart by their color, texture, and growth pattern so you know how to clean them safely.
- Black/green fuzzy spots = mold; note mold identification.
- White/yellow powdery patches = mildew.
- Press test: fuzzy vs. powdery.
- Address moisture to enable mildew prevention and stop mold recurrence.
Safe Cleaning Solutions
Anyone can clean mold and mildew safely by choosing the right solution and following simple precautions: wear gloves and a mask, guarantee good ventilation, and test a small area first.
Use diluted bleach for stubborn stains or vinegar and baking soda as natural alternatives.
For delicate surfaces, try gentle DIY solutions like hydrogen peroxide or soap and water, then dry thoroughly to prevent regrowth.
Treat Water Stains and Tannin Bleed-Through
If water stains or tannin bleed-through have discolored your walls, you’ll need to remove the contaminants and block them from seeping through new paint.
Use these steps:
- Clean stains with a mild detergent for basic water stain removal.
- Apply a stain-killing primer for tannin bleed-through.
- Sand glossy spots lightly.
- Reprime any repaired areas before painting.
Prep Popcorn and Textured Walls
Before you touch popcorn or textured walls, test for asbestos if the home was built before the 1980s — don’t assume it’s safe.
If tests come back clear, gently remove any loose popcorn and clean the surface with a soft brush and mild detergent.
Finish by priming repaired or porous areas to guarantee even paint adhesion.
Test For Asbestos
When you’re dealing with popcorn or other textured ceilings, test for asbestos before you scrape or sand, because disturbing the material can release dangerous fibers.
You should hire a certified lab for asbestos testing and follow strict safety procedures. Don’t DIY sampling unless trained.
- Hire pros
- Seal the room
- Avoid agitation
- Follow lab advice
Remove Loose Popcorn
Start by knocking loose any crumbling popcorn or textured material with a wide putty knife or drywall taping knife held at a shallow angle, working in small sections so you don’t gouge the underlying drywall or plaster.
Then gently scrape remaining bits, vacuum debris, and sand edges smooth.
For effective popcorn texture removal, take care during wall surface preparation to leave a stable, even substrate ready for the next step.
Clean And Prime
Clean the wall surface thoroughly to remove dust, grease, and any lingering popcorn residue so primer can bond properly.
Use gentle cleaning techniques, rinse, and let dry. Choose priming methods suited for texture and stain blocking.
Then apply primer evenly with a brush for crevices and a roller for flats.
- Vacuum texture
- Degrease spots
- Spot-sand loose bits
- Apply appropriate primer
Clean Wallpaper Without Damage
If you’re dealing with wallpaper, take a gentle, methodical approach to avoid peeling or staining the paper—test your cleaner on a hidden strip first.
Then work from bottom to top with a soft sponge and light pressure to lift dirt without soaking the adhesive.
Use mild soap solution, dab stains, rinse sparingly, and pat dry.
Follow wall care tips for ongoing wallpaper maintenance.
Choose Cleaners by Paint Finish
Different paint finishes need different cleaners, so match your cleaner to whether the wall is flat, eggshell, satin, or semi-gloss.
Test your chosen cleaner on a small, hidden spot first to check for discoloration or surface damage. If the test shows no harm, proceed to clean the rest of the wall.
Match Cleaner To Finish
Because paint finishes react differently to solvents and scrubbing, pick a cleaner that’s safe for the finish you’ll be working with.
Match cleaning agents to surface compatibility so you don’t dull or damage paint.
Consider these choices:
- Flat/matte: mild detergent, gentle cloth
- Eggshell: diluted all-purpose cleaner
- Satin/semi-gloss: degreaser for scuffs
- High-gloss: non-abrasive cleaner only
Test Cleaner On Surface
Want to be sure your cleaner won’t harm the paint? Always test surface first: apply a small amount in an inconspicuous spot, wait, then check for discoloration or softening to confirm cleaner compatibility.
| Finish | Spot | Result |
|---|---|---|
| Matte | Corner | No sheen |
| Eggshell | Behind switch | No tack |
| Semi-gloss | Baseboard | No lift |
Rinse and Dry Walls Properly
Once you’ve scrubbed away dirt and cleaner residue, rinse the walls thoroughly with clean water so no film or soap remains to interfere with paint adhesion.
You’ll use proper wall drying techniques and choose cleaning products that rinse clear. Then dry surfaces completely to prevent mildew and guarantee paint bonds.
- Open windows and use fans.
- Wipe with microfiber towels.
- Use a wet vacuum if needed.
- Allow 24 hours to dry.
When to Sand and What Grit to Use
After the walls are clean and dry, decide whether sanding is necessary by inspecting for glossy finishes, rough patches, paint drips, or loose edges that will prevent new paint from adhering smoothly.
Use light sanding for scuffing glossy surfaces and coarser touch for uneven spots.
Choose sanding techniques and grit selection carefully: start with 120–150 for prep, 180–220 for smoothing before primer.
Repair Cracks, Holes, and Flaking Paint
Before you paint, check how deep and widespread cracks, holes, and flaking paint are so you know what fixes you’ll need.
Clean and roughen the damaged areas, remove loose paint, and fill gaps with the appropriate patching compound.
Once repairs are dry and sanded, seal and prime them to guarantee a uniform finish and proper paint adhesion.
Assess Damage Extent
Although you may be enthusiastic to paint, you should first evaluate every wall for cracks, holes, and flaking paint so you know what repairs are needed and how much prep time to allow.
- Walk every wall, noting damage signs and severity.
- Tap areas to find hollow spots.
- Measure hole sizes to choose repair methods.
- Prioritize extensive flaking or structural cracks before minor fixes.
Proper Surface Preparation
Now that you’ve inspected the walls, address every crack, hole, and flaking patch so the paint will adhere and look smooth. Remove loose paint, widen hairline cracks, and fill holes; sand to match surface texture. Wipe dust based on cleaning frequency. Let repairs cure before priming.
| Issue | Fix |
|---|---|
| Crack | V‑groove & fill |
| Hole | Patch & sand |
| Flake | Scrape & prime |
| Dust | Wipe & repeat |
Seal And Prime Repairs
Once repairs are dry, seal and prime them so the patch blends with the surrounding wall and the finish holds up.
You’ll choose sealant types for gaps, use caulk for trim, and pick primer based on surface. Apply priming techniques for adhesion and stain blocking.
Follow these steps:
- Clean patch area.
- Apply appropriate sealant.
- Sand smooth.
- Prime and let cure.
When to Prime and Which Primer to Use
If your wall has stains, patched areas, drastic color changes, or bare drywall, prime it before painting to confirm even coverage and adhesion.
Choose primer selection based on surface: stain-blocking for tannin or water stains, high-build for patched areas, and drywall primer for new gypsum.
Use proper priming techniques—thin, even coats with a roller or brush—to guarantee adhesion and uniform finish.
How Long to Wait Between Steps
Let paint and primer dry fully before you move on—following the manufacturer’s recommended drying times guarantees proper adhesion and a smooth finish.
- Check product labels for exact drying times and stick to them.
- Wait recommended cleaning intervals before re-wiping patched areas.
- Allow primer to cure fully before sanding or topcoating.
- If humidity’s high, extend drying times to avoid tacky finishes.
Eco-Friendly Cleaning Alternatives
Anyone can switch to greener cleaners without sacrificing cleaning power—simple, non-toxic solutions like white vinegar, baking soda, and castile soap remove grease and grime on walls safely. You’ll use green cleaning recipes, test a small area, and rinse well to avoid residue. Natural alternatives protect paint and indoor air while tackling stains effectively.
| Solution | Use |
|---|---|
| Vinegar mix | Degrease |
| Baking soda paste | Scuff removal |
Exterior Wall Cleaning Essentials
When preparing exterior walls for painting, start by evaluating the surface and choosing the right cleaning method—pressure washing, soft washing, or hand-scrubbing—based on material, mildew presence, and paint condition.
- Use appropriate exterior cleaning techniques for siding, brick, or stucco.
- Follow pressure washing tips: correct PSI and nozzle distance.
- Treat mildew with a bleach solution safely.
- Rinse thoroughly and let dry before painting.
Common Mistakes That Ruin Adhesion
Although you might be in a rush to get paint on the walls, skipping proper surface prep is the quickest way to ruin adhesion. You’ll compromise adhesion factors by leaving dirt, grease, or flaking paint.
Don’t over-saturate drywall or scrub away primer. Follow correct cleaning techniques, remove contaminants, sand glossy spots, and let surfaces fully dry so new paint can bond reliably.
What to Do if Cleaning Damages Walls
If cleaning pulls paint, tears paper, or softens drywall, don’t panic—you can repair most damage without starting over.
- Assess damage, choose proper wall repair materials.
- Remove loose paint/paper, dry area, follow gentle cleaning techniques afterward.
- Patch gouges with joint compound, sand smooth when dry.
- Prime repaired spots before repainting to guarantee uniform adhesion and finish.
Time-Saving Checklist for Multiple Rooms
Tackle multiple rooms efficiently by grouping tasks and preparing supplies once so you move from room to room without backtracking; you’ll save time and stress. Use efficient cleaning techniques, note wall surface considerations, and follow a simple checklist.
| Mood | Task | Result |
|---|---|---|
| Calm | Wipe dust | Smooth surface |
| Ready | Degrease | Paint adheres |
| Confident | Inspect | Spot repairs |
Cost and Time Estimate for Typical Room Prep
Now that you’ve grouped tasks and prepped supplies to move efficiently between rooms, estimate how much time and money you’ll need for a typical room prep so you can plan work sessions and budget accurately.
- Cleaning supplies: cost breakdown — $10–30; 30–45 minutes.
- Patch/prime: $15–50; 30–60 minutes.
- Masking/taping: $5–15; 20–40 minutes.
- Final wipe and inspection: $0–5; 10–20 minutes for time savings.
Frequently Asked Questions
Can I Use a Power Washer Indoors to Speed up Wall Cleaning?
You shouldn’t use a power washer indoors; it’ll damage surfaces and create dangerous moisture. For power washer safety and effective indoor cleaning, use milder pressure tools, vacuum, degreaser, and controlled rinsing with towels or a wet vacuum instead.
How Do I Remove Lead Paint Hazards Before Cleaning?
You shouldn’t remove lead paint yourself; you’ll hire a certified abatement contractor who follows safety precautions, uses containment, HEPA vacuums, and proper PPE, or you’ll use approved encapsulation methods if abatement isn’t required.
Will Cleaning Walls Remove Underlying Odors Permanently?
Not always — cleaning walls can reduce smells but won’t always remove underlying odors permanently. You’ll need odor removal techniques plus appropriate wall cleaning products, sealing, and addressing sources like mold or smoke for lasting results.
Can I Paint Over Nicotine-Stained Ceilings Without Cleaning?
No, you shouldn’t paint over nicotine-stained ceilings without cleaning; you’ll need nicotine removal techniques and ceiling preparation tips first. Clean, degrease, spot-treat stains, and use a stain-blocking primer so paint adheres and discoloration won’t bleed through.
How Should I Clean Baseboards and Trim Differently Than Walls?
You should treat baseboards and trim differently: use gentler baseboard techniques, a soft brush, and mild detergent for trim cleaning; scrub crevices, rinse, dry thoroughly, sand lightly if needed, and tape off before painting for crisp edges.
Conclusion
You’ve prepped like a pro, turning grimy walls into a clean canvas ready for paint. With a quick assessment, the right cleaners, and simple repairs, you’ll avoid adhesion disasters and keep your project on track. Think of prep as the foundation of a house—hidden work that makes everything stand strong and beautiful. Follow the checklist, take sensible safety steps, and your finished walls will reward you with a flawless, lasting coat.