How to Spray Paint Walls for a Smooth Professional Finish
You’ll get a smooth, professional wall finish by prepping and protecting the area, fixing and priming any defects, and choosing the right sprayer and paint for the job. Thin and strain paint, test your spray pattern, then hold the gun 8–12 inches away and use steady, overlapping passes with 30–50% overlap. Apply several thin coats, follow dry times, and clean equipment thoroughly. Keep safety gear and ventilation on—continue for tips on troubleshooting and pro shortcuts.
Quick: How to Spray-Paint Interior Walls (Overview)
When you’re ready to spray-paint interior walls, set up carefully, work systematically, and keep safety in mind. You’ll mask trim, cover floors, and ventilate the space.
Practice spray paint techniques on scrapboard, maintain consistent distance and overlap, and move fluidly.
Focus on thorough wall preparation—cleaning, patching, and priming—so your coats lay down smoothly and you avoid runs or texture issues.
What a Salon-Smooth Wall Finish Looks Like
Move from prepping and technique to the look you’re aiming for: a salon-smooth wall finish reads like glass—uniform color, no visible spray texture, and an ultra-fine, barely perceptible surface.
Aim for a salon-smooth wall: glass-like uniform color, ultra-fine surface, and no visible spray texture.
You’ll know you’ve nailed the salon finish when light skims evenly, flaws disappear, and wall texture feels consistent.
- Even sheen
- Invisible spray marks
- Seamless shifts
When to Choose Spray Painting vs. Rollers and Brushes
Although brushes and rollers still handle small repairs and textured ceilings well, you’ll reach a salon-smooth result fastest with a sprayer on large, flat surfaces.
Spray painting gives even coverage and hides tool marks, while rollers and brushes work better for trim, corners, and tight spots where control matters.
Balance spray painting benefits against roller brush limitations, surface preparation techniques, paint application methods, choosing finishes, project timeframes, budget considerations, and wall texture effects.
Safety Gear You Must Have Before Spraying
You’ll need a few essential pieces of safety gear before you fire up a paint sprayer: a properly rated respirator, eye protection, disposable coveralls, gloves, and hearing protection.
Use safety equipment that includes a respiratory mask or ventilation mask, safety goggles, long gloves and coveralls for skin protection against paint fumes.
Checklist:
- Respiratory mask
- Safety goggles
- Long gloves and coveralls
Ventilation and Controlling Overspray
Because paint mist and solvent vapors can build up quickly, set up good ventilation before you spray so fumes don’t concentrate in the room. Open windows, run exhaust fans, and use a box fan to pull air out.
Seal doorways with plastic, hang drop cloths, and employ ventilation techniques like cross-venting.
For controlling overspray, mask off surfaces and use shields to catch stray mist.
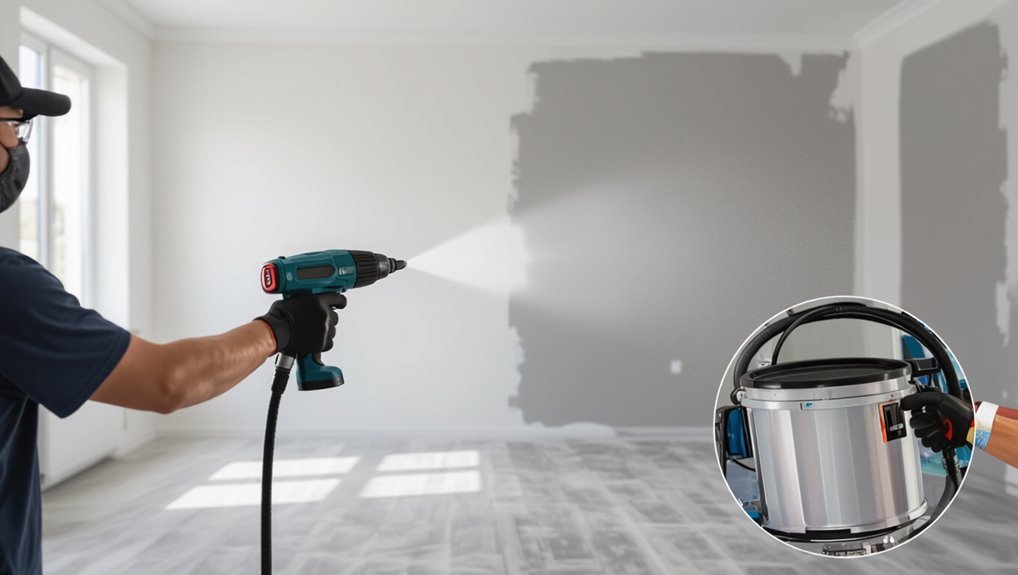
Sprayer Types for Interior Walls: HVLP, LVLP, Airless, Handheld
You’ll want to pick the right sprayer for the room size and finish you’re after, so compare HVLP and LVLP for their atomization and transfer efficiency.
Consider an airless sprayer if speed and heavy coverage matter, since it handles thicker paints and large walls well.
For small touch-ups, trim, or tight spots, a handheld sprayer gives control and convenience.
HVLP Vs. LVLP
When deciding between HVLP and LVLP sprayers for interior walls, think about transfer efficiency and the size of your compressor.
You’ll weigh HVLP benefits like softer spray patterns and finish quality against LVLP efficiency with faster application speed and better handling of higher paint viscosity.
Consider setup time, user experience, cost comparison, and maintenance tips.
- Match compressor to sprayer.
- Test spray patterns.
- Thin for viscosity.
Airless Sprayer Advantages
1 clear advantage of airless sprayers is their speed: they deliver high volumes of undiluted paint at very high pressure, letting you cover large interior walls far faster than HVLP or handheld units.
You’ll get airless efficiency and consistent atomization for a smooth application, reducing passes and lap marks.
You’ll handle tougher primers and thicker coatings without thinning, saving time and effort.
Handheld Sprayer Uses
While airless sprayers speed up large jobs and handle thick coatings, handheld sprayers shine for smaller spaces, touch-ups, and jobs where control matters more than speed.
You’ll appreciate handheld advantages: portability, precision, and quick setup.
Practice spray techniques to avoid runs and guarantee even coverage.
- Tight corners
- Trim and edges
- Spot repairs
Which Sprayer Is Best for Walls (Pros and Cons)
When you pick a sprayer, weigh HVLP’s fine finish against airless’s speed and thicker-coat ability.
Consider electric mini sprayers for small rooms and touch-ups, but remember they’re less durable than compressor-based systems.
Compressor setups give power and versatility, though they’re bulkier and need more skill to master.
HVLP vs. Airless
Although both HVLP and airless sprayers can cover a wall fast, they work very differently and suit different jobs, so you’ll want to weigh spray quality, speed, and cleanup before choosing.
Consider this sprayer comparison:
- HVLP benefits: superior finish quality, gentler user experience, higher initial cost.
- Airless efficiency: faster coverage, lower labor, more overspray.
- Cost analysis: long-term vs. project needs.
Electric Mini Sprayers
If you want a balance between convenience and control, electric mini sprayers are a strong choice for many wall projects.
You’ll get portable, easy setup and consistent coverage for small to medium rooms. They suit latex and thinner primers, cut painting time, and reduce overspray versus compressed systems.
For ideal usage, choose correct tip size, thin paint per instructions, and keep steady speed and distance.
Compressor-Based Pros/Cons
Because compressor-based sprayers deliver continuous high pressure, they’re the go-to for large jobs where speed and heavy coatings matter.
You’ll weigh compressor efficiency, air pressure and paint viscosity against noise levels and maintenance requirements.
Consider compressor size, setup time and mobility issues or portability concerns before choosing.
- High finish quality
- Faster coverage
- More complex upkeep
Paint Types for Spraying Walls: Latex, Acrylic, Enamel
Choosing the right paint for spraying matters because each type—latex, acrylic, and enamel—behaves differently through a sprayer and on your walls.
You’ll find latex vs acrylic debates focus on flexibility, drying time, and adhesion: acrylic grips glossy surfaces better, latex cleans up easily.
Enamel finishes deliver durable, hardwearing coats ideal for trim or high-traffic walls, but they require proper thinning for smooth spray application.
Calculate Paint and Material Quantities for a Room
Start by measuring the room surface area—walls and any areas you’ll paint—so you know how much square footage you’re covering.
Check the paint’s coverage rate on the can to calculate how many gallons or liters you’ll need for the number of coats you plan to apply.
Add a small allowance for waste and touch-ups to avoid running short.
Room Surface Area
Calculating the room’s surface area tells you exactly how much paint and supplies you’ll need, so you won’t buy too much or run short mid-job.
Measure wall dimensions, note surface types, and deduct doors/windows. Then use these figures to estimate materials accurately.
- Measure length × height for each wall.
- Subtract openings.
- Sum areas and record finishes.
Paint Coverage Needed
Now that you’ve totaled wall areas and accounted for doors and windows, you can work out how much paint and supplies you’ll actually need.
Check the paint’s listed coverage per litre, factor in paint opacity and required coverage layers for color change or stains.
Include primer, roller covers, masking tape, and a 10–15% waste allowance to guarantee you won’t run short mid-job.
Thinners, Primers, and Additives You’ll Need
One key to a smooth, even spray finish is choosing the right thinners, primers, and additives for your paint and surface—these products control flow, adhesion, drying time, and durability.
You’ll match thinner types to paint, use primer benefits for grip and hide, and learn additive purposes to tweak open time.
Follow spray techniques and surface preparation.
- Select compatible thinner
- Pick proper primer
- Add performance additives
Inspecting and Repairing Walls Before Spraying
Before you spray, thoroughly inspect and repair the wall so paint adheres and looks professional.
Do a careful wall assessment: check for cracks, holes, mold, loose texture, and flaking paint. Remove debris, treat mold, and fill defects with appropriate filler. Confirm repairs cure fully.
Good surface preparation includes cleaning and priming patched areas so your spray finish stays even and durable.
Sand and Feather Patched Edges So They Disappear
With repairs cured and primed, sand the patched edges so they blend seamlessly with the surrounding wall.
Once primed and cured, sand patched edges smoothly, feathering outward until they disappear into the surrounding wall.
You’ll use gentle sanding techniques and precise feathering methods to avoid ridges and visible shifts. Work progressively finer, clean dust, and inspect under angled light.
- Start coarse, then refine.
- Feather outward in overlapping strokes.
- Wipe, recheck, touch up.
Choosing Primers for Stains, Gloss Differences, and Adhesion
If you’ve got stains, start with a stain-blocking primer so they don’t bleed through new paint.
Remember that higher gloss paints show imperfections but clean easier, while flatter sheens hide flaws but aren’t as washable.
To improve adhesion, abrade glossy surfaces lightly and use a bonding primer when coating slick or previously painted areas.
Primer For Stained Surfaces
When stains from water, smoke, or tannins show through old paint, choose a primer that blocks them so your new finish looks clean and lasts.
Stain-blocking primers—oil-based, shellac, or stain-sealing acrylics—are formulated to seal pigments and prevent bleed-through, while adhesion-promoting primers help paint stick to glossy or slick surfaces.
- Use shellac for severe stains.
- Choose oil-based for broad stain blocking.
- Pick adhesion primers for slick substrates.
Gloss Level Impacts
Gloss level affects how stains show through and how well both primers and topcoats adhere, so you’ll want to match primer type and sheen to the surface and the problem you’re solving.
Consider gloss levels and sheen variations when choosing paint selection; higher gloss boosts finish durability, color depth, light reflection, and eases wall maintenance.
Combine proper surface preparation with spray technique for ideal aesthetic appeal.
Enhancing Paint Adhesion
1 key step to strong paint adhesion is picking the right primer for both the stain issues you’re tackling and the sheen you plan to topcoat with.
Use surface preparation techniques, then select adhesion promoting primers suited to stains and gloss differences.
Consider:
- Stain-blocking primer for tannin/ water marks.
- Bonding primer on glossy surfaces.
- Sand and clean for mechanical grip.
Masking and Protecting Floors, Trim, and Fixtures
Before you load the sprayer, cover every surface you don’t want painted: lay out drop cloths or rosin paper on floors, tape plastic over vents and light fixtures, and mask trim with painter’s tape and thin plastic sheeting so you can spray freely without worrying about overspray or drips.
Use masking tape for edge sealing, guarantee floor protection and trim coverage, prioritize fixture safeguarding, plan wall preparation, then perform careful tape removal.
Preparing Doors, Windows, and Outlets for Spraying
When you get ready to spray, treat doors, windows, and outlets as zones that need complete isolation: remove switch plates and outlet covers, shut and lock doors or secure them open, and seal window sashes and glass with painter’s plastic and tape so no overspray or paint seepage reaches hardware or panes.
- Door frame preparation and trim covering: clean and tape.
- Outlet masking: remove covers, mask openings.
- Window protection and surface cleaning: wipe frames, seal glass.
Thin and Strain Paint for Your Sprayer
Thin your paint to the viscosity recommended for your specific sprayer and strain every batch to catch clumps, dried skin, or debris that could clog the nozzle; doing this guarantees an even, smooth spray pattern and saves time troubleshooting mid-job.
Check manufacturer charts, use a cup or viscometer, and filter into the sprayer. Regular paint viscosity checks are key to proper sprayer maintenance and consistent results.
Set Nozzle, Fan Width, and Pressure
After you’ve thinned and strained the paint, set the sprayer’s nozzle size, fan width, and pressure to match the job and material; these three settings determine droplet size, coverage, and how the paint lays on the wall.
- Adjust nozzle adjustment to suit paint viscosity and desired finish quality, balancing spray consistency and atomization.
- Tune fan pattern for overlap and even application technique.
- Set pressure settings and follow equipment maintenance for reliable results.
Test Spraying: Dial In Pattern and Atomization
Before you coat the wall, do a few test sprays on a piece of cardboard or scrap board so you can dial in the pattern and atomization without wasting paint.
Use sprayer calibration and atomization testing to check nozzle selection, pressure settings, fan width, spray distance and paint viscosity.
Make pattern adjustment, note technique refinement, and confirm application consistency before you proceed.
Ideal Spray Distance and Travel Speed for Walls
Once your pattern and atomization are set, hold the gun at a consistent distance—typically 8 to 12 inches from a flat wall—and move at a steady, overlapping pace so each pass covers about 50% of the previous one.
Maintain consistent spray distance and monitor travel speed to avoid runs or thin spots.
Maintain an even spray distance and steady travel speed to prevent runs and thin, uneven coverage.
- Keep distance steady.
- Match speed to flow.
- Adjust for surfaces.
Overlap Technique: Percent and Stroke Rhythm
You should aim for about 50% overlap on each pass to guarantee even coverage without buildup.
Keep a steady stroke rhythm so each pass mirrors the last and avoids striping.
With consistent overlap and tempo you’ll get a smooth, uniform finish.
Optimal Overlap Percentage
A consistent 30–50% overlap is the sweet spot for most wall paint jobs: it keeps coverage even without causing heavy buildup or visible lines.
You’ll pair this with proper spray technique and paint selection to control film thickness and avoid runs. Practice steady passes, maintain distance, and adjust pressure for your material.
- Plan passes
- Monitor buildup
- Adjust overlap
Consistent Stroke Rhythm
Consistently rhythmical strokes—keeping each pass at the same speed and spacing—make it easy to hold that 30–50% overlap so your coverage stays even and you don’t build up ridges or thin spots. You should practice consistent speed and a steady stroke technique to keep edges seamless and finish uniform.
| Tip | Focus |
|---|---|
| Pace | consistent speed |
| Motion | stroke technique |
| Aim | 30–50% overlap |
Start and Stop Passes Without Ridges or Drips
When you start or stop a spray pass, trigger control and smooth motion matter more than speed—squeeze the trigger before the gun reaches the edge, move steadily across the wall, and release after you’ve passed the end point so the spray tapers off beyond the covered area.
Start the trigger before the edge, move steadily across, and release after the end so the spray tapers smoothly.
You’ll avoid ridges and drips by practicing:
- Maintain spray technique and overlap.
- Keep consistency importance in rhythm.
- Inspect and feather edges as needed.
Spraying Vertical vs. Horizontal Surfaces: Best Practice
Having clean start-and-stop technique under your belt, you now need to adjust how you hold and move the gun for vertical walls versus horizontal surfaces like ceilings or trim.
For vertical techniques, keep steady, overlap passes by 50% and move top-to-bottom to control runs.
For horizontal strategies, maintain consistent speed side-to-side, use shorter strokes, and pause at edges to avoid buildup.
Working Ceilings, Corners, and Trim Transitions
Because ceilings, corners, and trim demand different angles and control, you’ll adjust your grip, distance, and stroke to prevent overspray and runs.
Focus on ceiling preparation and trim protection before spraying. Use precise corner techniques and overlap strategies to blend edges.
Prepare ceilings and shield trim first; use careful corner technique and overlapping sprays to seamlessly blend edges.
- Mask and back-roll edges.
- Feather at corners.
- Maintain consistent distance.
Coat Timing: Dry Times and Recommended Coats
Plan for two to three thin coats for full, even coverage, with an extra touch-up coat if you’re covering a bold color or repaired area.
Wait the manufacturer’s recommended between-coat dry time—usually 10–30 minutes for tack-free and 1–2 hours before recoating with most sprayers—and adjust for humidity and temperature.
Also note the touch-up recoat window (often within 24 hours for best blending); if you wait longer, you’ll need a light scuff before applying more paint.
Suggested Coat Counts
Most rooms need two to three coats of spray paint for even coverage, but exact timing between coats depends on the paint type and conditions.
You’ll aim for ideal coat counts to avoid runs while achieving recommended layers.
- Start with a light mist coat to seal.
- Apply a build coat for color depth.
- Finish with a skim coat for uniformity.
Between-Coat Drying Times
After you’ve laid down the mist, build, and skim coats, allow each layer the proper time to dry before spraying the next to prevent runs and poor adhesion.
You’ll monitor drying conditions—humidity effects and temperature influence—to set recoat timing and promote paint curing.
Use drying techniques like airflow and quick drying tools for ideal drying, but don’t rush layers; let each cure sufficiently.
Touch-Up Recoat Window
1 hour to several hours is your sweet spot for many touch-up recoats, depending on paint type and conditions, so check the manufacturer’s stated tack-free and recoat windows before you start.
You’ll plan recoat frequency around temperature and humidity, and use precise touch up techniques to blend edges.
Consider:
- Light mist coats
- Feathered overlap
- Final uniform pass
Avoid and Fix Runs, Sags, and Orange Peel
When runs, sags, or orange peel show up, you’ll want to address them immediately so they don’t ruin the finish; understanding what causes each defect makes them easier to prevent and fix.
For run prevention, adjust spray technique and pressure; do finish inspection, sand sags lightly and perform sag repair, blend edges, and correct orange peel by light sanding and careful respray, matching texture and edge blending.
Managing Texture Differences on Patched vs. Original Drywall
When you’re spraying over patched drywall, match the surface texture to the surrounding wall so the finish looks uniform.
Feather and blend the patch edges before you spray, and prime then sand patched areas to create an even base.
Taking those steps lets your spray coat sit consistently and hide repairs.
Match Surface Texture
Match the texture of patched drywall to the surrounding surface before you prime or paint so the repair disappears instead of standing out.
You’ll focus on texture matching during surface preparation to guarantee spray paint lays evenly. Use these steps:
- Sand and clean the patch for a flat base.
- Apply matching texture compound with a tool.
- Check in natural light, adjust as needed.
Feather And Blend Edges
Start by feathering the edges of the repair so the texture shifts smoothly into the surrounding drywall; you’ll blend material outward in thin layers, tapering each pass to erase any hard lines.
Use feathering techniques that thin compound at the perimeter and blending methods like light cross-hatching and skim passes to harmonize peaks and valleys until the patch reads uniform with the original surface.
Prime And Sand Patched Areas
Because patched drywall absorbs paint and texture differently, you’ll prime and sand those areas before painting to guarantee a consistent finish; you’ll do Patch preparation, Surface inspection, Primer application, then apply Sanding techniques to match texture and sheen.
Follow this concise checklist:
- Inspect patch edges and smooth high spots.
- Apply bonding primer evenly.
- Sand feathered area with fine grit and recheck surface.
Clean Sprayer Mid-Job and Between Coats
While you’re mid-job or waiting between coats, clean the sprayer regularly to prevent clogs, uneven spray, and ruined work — a quick rinse and wipe every 15–30 minutes can save you from a full breakdown later.
Use clean sprayer techniques: flush with appropriate solvent, blow out passages, and wipe nozzle faces.
These mid job maintenance steps keep spray patterns consistent and cuts rework.
When and How to Sand Between Coats for Ultra-Smoothness
Keeping the sprayer clean between passes helps, but to achieve an ultra-smooth finish you’ll usually need to sand between coats once the previous layer is dry to the touch and no longer tacky—typically 1–4 hours for latex and 6–24 hours for oil-based paints, depending on temperature and humidity.
You’ll use proper sanding techniques and fine sanding grit. Follow:
- Lightly scuff with 220–320 grit.
- Wipe dust with tack cloth.
- Inspect, then apply next coat.
Final Coat Tips for Even Sheen and Durability
For the final coat, you’ll want to spray in even, overlapping passes to achieve a consistent sheen across the whole wall.
Use the recommended finish and maintain the proper distance and speed so the film builds evenly and resists wear.
Proper curing and a light final inspection will maximize long-term durability and keep the sheen uniform.
Achieve Consistent Sheen
Although the last coat is often the quickest to apply, it’s the one that defines your wall’s final sheen and durability, so take a few extra minutes to get it right.
You want sheen consistency and finish uniformity. Follow these focused steps:
- Keep spray distance steady.
- Overlap passes evenly.
- Light, multiple passes prevent pooling and gloss variation.
Maximize Long-Term Durability
You’ve already set a steady spray rhythm to get an even sheen; now focus on steps that lock in long-term durability. Use quality primers, thin final coats, and let proper drying time for durable finishes and long lasting paint. Consider environmental factors, surface protection, wall maintenance, and proper storage to guarantee finish longevity.
| Tip | Action |
|---|---|
| Primer | Use quality primers |
| Coats | Thin, even layers |
| Care | Wall maintenance |
| Storage | Proper storage |
Remove Masking and Cut In Edges Cleanly
Once the paint’s dry to the touch, remove masking tape and protective coverings carefully so you don’t peel off fresh paint or catch drips. Pull tape back on itself at a shallow angle and go slowly, especially where two colors meet.
Remove tape and coverings slowly at a shallow angle to avoid peeling fresh paint or catching drips.
Use tape removal techniques and edge blending methods to cut in cleanly.
- Feather edges with a brush.
- Smooth seams with a roller.
- Touch up thin spots.
Post-Job Cleanup, Disposal, and Storing Leftover Paint
After you finish painting, tackle cleanup methodically so tools last longer, waste is minimized, and you avoid hazards.
Wipe sprayer parts, strain leftover paint, and seal cans tightly for proper paint storage. Label containers with color and date.
Follow local rules for waste disposal—don’t pour solvents down drains.
Store reusable gear dry and ventilated, and recycle or safely discard unusable materials.
Troubleshooting Common Problems and Quick Fixes
Cleaning up properly makes it easier to spot and fix problems later, so once tools are dry and paint is stored, check the wall for common issues like runs, orange peel, uneven coverage, or overspray.
After cleanup, inspect walls for runs, orange peel, uneven coverage, or overspray before recoating.
Then act fast:
- Sand and recoat problem areas to address paint imperfections, fixing drips and texture matching.
- Review surface preparation to improve paint adhesion.
- Inspect equipment issues and adjust spraying techniques to avoid common mistakes.
Pro Tips to Save Time and Get a Salon-Smooth Finish
If you want a salon-smooth finish without wasting time, focus on three things: the right thinning and tip size for your sprayer, consistent arm movement and distance, and a light, feathered final pass to level the finish.
Use proven spray techniques, test on scrap, and compare finish comparisons between thin, multiple coats versus heavy single coats.
Clean tip often and keep steady overlap.
Frequently Asked Questions
Can I Spray Paint Over Wallpaper Safely?
Yes — you can spray paint over wallpaper sometimes, but you’ll check wallpaper types first; vinyl handles paint better than paper-backed varieties. Test spray for spray paint compatibility, prep seams, and use a suitable primer for durability.
How Do I Handle Lead Paint During Spraying?
If you suspect lead paint, you’ll test using certified testing methods, avoid sanding, follow strict safety precautions, wet-strip or hire licensed paint removal pros, seal and ventilate the area, and wear PPE to prevent toxic dust exposure.
Will Spraying Affect Smoke or Nicotine Stains Differently?
Think of cleansing a tarnished mirror: yes, spraying treats smoke and nicotine stains differently. You’ll need stronger stain removal and more thorough surface preparation for nicotine’s oils; smoke’s residue often needs sealing before you spray.
Can I Spray Textured Plaster or Limewash Surfaces?
Yes — you can, but textured plaster or limewash need careful surface preparation; you’ll adjust spray techniques, use low pressure and wide passes, fill deep texture, prime if porous, and test to guarantee even coverage and adhesion.
How to Match Sheen Between Sprayed New Paint and Existing Walls?
Imagine repainting a living room where you matched sheen perfectly using a sample panel. You’ll use sheen comparison techniques, test small patches, adjust paint sheen, and follow spray paint tips to blend new and existing walls seamlessly.
Conclusion
You’ve learned the steps to spray-paint walls like a pro — from prep and safety to cleanup and touch-ups — so you’re ready to tackle the job with confidence. Keep your mask, ventilation, and masking tape handy, practice on cardboard first, and work in even, overlapping passes for that salon-smooth result. Want a flawless wall faster and cleaner than using rollers? With patience and the right technique, you’ll get professional results every time.