Do You Have to Prime Drywall Before Painting? Expert Advice
Yes—you should prime new or repaired drywall before paint to guarantee even coverage, hide seams, and stop joint compound or stains from showing through. Primer seals porous areas so paint goes on smoothly and uses fewer coats, and it blocks water or smoke staining. You can skip priming on well-sealed, similar-tone surfaces after testing adhesion, but that’s the exception. Keep going to learn when to skip, what primers to use, and how to test readiness.
Do You Have to Prime Drywall Before Painting? Quick Decision Guide
Wondering whether you have to prime drywall before painting? You’ll assess surface type, previous finish, and repairs to decide.
For new or patched drywall, primer aids drywall preparation and improves paint adhesion, so you should apply it.
If the surface’s already sealed and uniform, you might skip priming.
Make a quick test spot to confirm coverage and finish before committing.
When Priming Drywall Is Essential
When should you always prime drywall? You should prime when fresh joint compound, stains, or changes in drywall texture demand sealing. Proper primer application evens porosity and prevents flashing.
- After sanding new joints — dusty, uneven drywall texture.
- Over water or smoke stains — blotchy absorption.
- Switching from dark to light — primer application blocks bleed-through.
When You Can Skip Priming Drywall Safely
Can you skip primer on drywall in some cases? You can when surface is spotless, previously painted with similar sheen, and you use quality paint or drywall alternatives like smooth veneer. Know basic priming techniques to compare results.
| Condition | When to Skip | Notes |
|---|---|---|
| Clean | Yes | No stains |
| Same sheen | Yes | Similar paint |
| Veneer | Sometimes | Use suitable product |
Risks of Skipping Primer on Drywall
If you skip primer to save time or money, you risk uneven coverage, visible seams, and poor paint adhesion that shows up within months.
You might buy into primer misconceptions, but skipping it invites staining, peeling, and accelerated wear.
Consider these images:
- Patchy walls with streaks and dull spots.
- Seams bleeding through fresh paint.
- Peeling corners from long term effects.
How Drywall Condition Determines Primer Need
If your drywall has new seams, you’ll need primer to seal joint compound and prevent uneven sheen.
On previously painted surfaces, a primer helps the new coat adhere and evens out texture differences.
For stained or damaged areas, spot-priming blocks discoloration and guarantees a consistent finish.
New Drywall Seams
When you’ve just taped and mudded new drywall seams, they’ll always absorb primer differently than the surrounding paper faces.
So you should prime those areas to guarantee even sheen and color when you paint.
In new drywall preparation, note joint compound application differences and prime seams to match texture and porosity.
- Feathered mud edge
- Slightly dull tape
- Smooth paper face
Painted Previously Surfaces
Wondering whether you need to prime drywall that’s already been painted? If the existing coat is sound, clean, and firmly bonded, you can often skip primer.
Still, you should assess surface preparation: wash, sand gloss, and fix imperfections to secure paint adhesion.
Use a bonding primer only if the old finish is glossy, patched, or poorly adhered to guarantee uniform coverage and durability.
Stained Or Damaged Areas
You can often skip primer over sound paint, but stained or damaged drywall demands a different approach.
You should perform a damage assessment, tackle stain removal, and decide whether sealing or skim-coating is needed before painting.
- Burn marks, water rings, peeling edges.
- Gouges, dents, crumbling paper.
- Mold spots, nicotine haze, rust bleed-through.
New Drywall: Sealing Joint Compound Before Priming
On new drywall, you should seal the joint compound before priming to stop it from soaking up paint unevenly.
If you don’t, you’ll risk flashing where the compound shows through the finish.
A proper sealer gives you a uniform surface so your paint looks consistent.
Seal Joint Compound
Before you prime new drywall, seal the joint compound to prevent uneven absorption and visible tape lines once paint goes on.
You’ll want a proper joint compound sealing coat for moisture resistance and uniform sheen. Apply thin, even sealer, sand lightly when dry, then spot-check for porosity.
- Feathered edges blending
- Smooth tape line finish
- Even surface sheen
Prevent Flashing Through
After sealing the joint compound, take steps to prevent flashing through so paint lays down uniformly instead of revealing darker seams or spots.
You should sand smooth, tack off dust, and apply an even coat of quality primer because primer importance can’t be overstated for flashing prevention.
Use a high-build drywall primer or sealer and inspect under varied light before topcoating to guarantee consistent coverage.
Prepping Repaired or Patched Drywall for Primer
When you’ve patched holes or smoothed joint compound, you need to prep the repaired areas so primer bonds evenly; that means sanding feathered edges, removing dust with a tack cloth or vacuum, and wiping the surface with a damp sponge if necessary to lift fine particles.
After patching, sand feathered edges, remove dust with a vacuum or tack cloth, and wipe with a damp sponge for even primer adhesion.
Use proper drywall patching techniques and primer application tips to guarantee uniform coverage.
- Sand to blend seams.
- Vacuum dust.
- Tack cloth wipe.
Do Skim-Coated Walls Need Primer?
Wondering whether skim-coated walls need primer? You’ll often still prime: skim coat benefits include a smooth, uniform surface, but porosity can vary.
If finish is flawless and you’re using high-quality paint, you might skip primer, yet primer alternatives like bonding primers or tinted sealers offer better adhesion and color hold.
Test a small area to confirm coverage and adhesion before skipping primer.
How Textured Drywall Affects Primer Choice
Skim-coated walls and textured drywall demand different primer choices because texture changes how paint soaks in and what kind of finish you’ll get.
Skim-coated and textured drywall need different primers — texture alters absorption and the final paint finish.
You should match primer compatibility to textured finishes to prevent blotchy coverage and guarantee adhesion.
Picture these scenarios:
- Stippled ceiling trapping primer in pockets.
- Orange-peel wall needing thicker coat.
- Knockdown surface where high-build primer evens sheen.
Which Paint Types Require a Drywall Primer
Which paint types actually need a drywall primer before you roll them on?
You’ll want primer for deep colors, high-gloss or semi-gloss paint finishes, and when switching from oil to water-based paints.
Also prime stained, patched, or porous drywall.
If you consider primer alternatives, test bonding primers or tinted undercoats—but don’t skip priming when coverage, adhesion, or stain blocking matters.
Drywall Primer vs. All-Purpose: Which to Choose
Curious about whether you need a dedicated drywall primer or an all-purpose primer will do? You’ll pick based on drywall characteristics and expected primer application performance.
If seams, repairs, or raw gypsum show, use a drywall-specific primer; for lightly sanded, intact walls, an all-purpose primer can suffice.
- Fresh drywall: sealed, smooth.
- Patched areas: higher absorption.
- Previously painted: uniform surface.
Oil-Based vs. Latex Primer for Drywall
When you’re choosing a primer for drywall, oil-based options give strong stain blocking and sealing for repaired or porous areas.
Latex primers dry faster, have less odor, and clean up with water, making them easier for most DIY jobs.
We’ll compare their benefits and help you pick the right type for your project.
Oil Primer Benefits
Oil-based primers bring strong adhesion and stain-blocking power, while latex primers offer easier cleanup and faster drying—so your choice depends on the job.
You’ll want oil primer advantages when sealing knots, blocking water stains, or priming glossy surfaces.
Consider oil primer applications for high-traffic rooms or trim.
- Dark knot sealer
- Water stain barrier
- Tough trim base
Latex Primer Advantages
1 clear advantage of latex primer is that it dries fast and gets your project moving sooner—you can usually sand and recoat within a few hours instead of waiting overnight.
You’ll appreciate latex primer benefits like low odor, easy cleanup, and good adhesion on drywall.
For many rooms, latex primer durability resists peeling and holds finish coats well, letting you finish faster with reliable results.
Choosing Between Types
Wondering which primer to pick for your drywall? You’ll weigh oil-based durability against latex ease—match primer types to drywall finishes and room needs.
Consider these visuals:
- Oil sealing stains, glossy sheen on a trim.
- Latex drying fast, matte wall ready for paint.
- Hybrid options bridging durability and easy cleanup for varied drywall finishes.
When to Use a Stain-Blocking Primer on Drywall
If you’ve got water stains, smoke residue, or heavy marker and crayon marks on your drywall, reach for a stain-blocking primer before you paint; it’ll seal those blemishes so they don’t bleed through your topcoat.
You should use stain-blocking primer for persistent stain types like tannin, ink, or nicotine.
The primer benefits include sealing, adhesion, and preventing reappearance, saving time and paint.
Best Primers for High-Moisture Drywall Rooms
Stain-blocking primers handle blemishes, but rooms with high humidity bring a different set of challenges that call for primers formulated to resist moisture and mildew.
You’ll want moisture resistant primers and mildew inhibiting options to protect drywall surfaces.
Picture choices like:
- A glossy, water-shedding surface for steam-heavy baths.
- A breathable, mold-guard formula for laundry areas.
- A durable primer for coastal homes.
Priming Drywall to Cover Dark or Bold Paint
How do you reliably block out a previous coat of dark or bold paint? Use a high-hide primer formulated for stain-blocking and tint it toward your new shade; that prevents bleed-through from dark paint and mutes bold colors.
Sand glossy spots, clean dust, and apply even coats. Let primer dry fully before topcoating to guarantee true color coverage and fewer finish surprises.
How Many Coats of Primer Do You Need?
Wondering how many primer coats you’ll need? You’ll usually use one, but factors alter that:
Primer types, Coverage concerns, Application techniques, Drying times, Surface preparation, Texture variation, and Finish compatibility all matter.
Consider Cost analysis and Environmental impact when adding coats.
Plan paint layering to control opacity.
Visualize:
- Thin first coat
- Spot second coat
- Full extra coat for stubborn areas
How Primer Choice Changes With Paint Finish
After you’ve figured out how many coats to apply, pick a primer that matches the paint finish you plan to use—flat, eggshell, satin, semi-gloss, or gloss all interact differently with primer.
You’ll choose primer types based on sheen and surface porosity to guarantee proper paint compatibility. For high-sheen paints pick a smoother, bonding primer; for flat finishes use a higher-absorption primer to reduce lap marks.
Sealing vs. Tinting Primer: When Tinting Pays Off
Curious whether you should seal with a clear primer or spring for a tinted one? You’ll weigh primer types: clear for sealing, tinted to boost coverage and shade matching.
Tinting benefits appear when covering bold colors or saving coats. Picture results:
Tinted primer shines when blocking bold colors and reducing extra topcoats, making coverage faster and smoother
- Fresh white wall becoming uniform.
- Deep color blocked undercoat.
- Subtle tone matched to topcoat.
Choose tinted for efficiency.
How Long to Wait Between Primer and Paint
After you prime, check the label for dry time guidelines so you know when the surface is ready for paint.
Remember that temperature and humidity affect drying—warmer, drier conditions speed things up while cold or humid ones slow them down.
Also decide whether you just need a recoat after the primer dries or if you should wait for a full cure before applying the finish.
Dry Time Guidelines
Because primer needs time to set and cure, you should wait the manufacturer’s recommended dry time—typically 1 to 24 hours—before applying paint.
Follow dry time tips and monitor moisture impact so paint adheres properly.
Visualize stages:
- Slightly tacky primer ready for topcoat.
- Fully dry, matte finish with sealed pores.
- Deep cure after 24+ hours for heavy traffic areas.
Temperature And Humidity
How does temperature and humidity affect how long you should wait between primer and paint?
You’ll see temperature impact drying: warmer, well-ventilated rooms speed cure; cold slows it.
Humidity effects are essential too — high moisture prolongs tackiness and raises recoat time.
Follow primer instructions, check for a dry, non-tacky surface, and err on extra wait in cool or humid conditions to guarantee proper adhesion.
Recoat Vs. Full Cure
Wondering whether you can recoat as soon as the primer feels dry or if you need to wait for a full cure? You’ll usually recoat after touch-dry for recoat advantages like faster completion, but wait for full cure to guarantee adhesion and stain blocking on problem areas.
Visualize timing:
- Light sanding after tack-free.
- Full cure on joins and repairs.
- Final coat after manufacturer window.
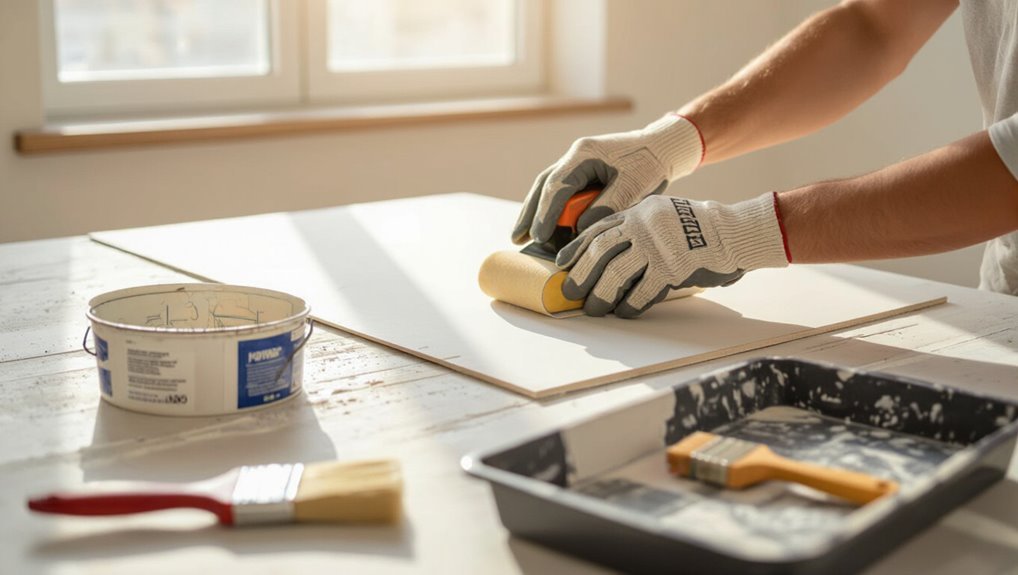
Tools and Materials to Prime Drywall Like a Pro
Before you start, gather the right tools and materials so you won’t stop mid-job: a quality drywall primer, a roller with a 3/8″–1/2″ nap, a brush for edges, a tray, painter’s tape, sandpaper or a sanding block, a vacuum or tack cloth, and drop cloths.
For proper drywall preparation and efficient primer application, add a stir stick, bucket for thinning, ladder, gloves, and safety goggles.
Step-by-Step: Priming Drywall (Roller + Brush Method)
Follow these steps to prime drywall efficiently using a roller and brush:
- Wipe dust, repair imperfections, and sand—drywall preparation guarantees a clean surface.
- Cut edges with a brush, then roll primer in W-patterns for even coverage.
- Allow recommended dry time before a second coat to maximize paint adhesion and a smooth final finish.
Priming Over Glossy or Previously Painted Drywall
If your drywall already has a glossy finish or an existing coat of paint, you’ll need to take extra steps to assure primer and new paint adhere properly.
Scuff sand glossy surfaces, clean off dust and grease, and use a bonding primer formulated for slick substrates.
That prep boosts paint adhesion, prevents peeling, and assures a uniform topcoat without excessive coats or visible defects.
Fix Blotchy Coverage After Priming
Notice patchy or streaky spots after priming? You can fix uneven tone with targeted blotchy coverage solutions and improved primer application techniques.
Recoat lightly where needed, feathering edges until uniform. Sand only glossy ridges, then apply a thin touch-up coat.
Visualize repair:
- Soft feathered roller strokes
- Light cross-hatch touch-ups
- Even pressure and overlap
Common Mistakes When Priming Drywall: And How to Avoid Them
Don’t skip sealing joint compound seams, because unprimed seams will show through your paint.
Make sure you’re using a primer designed for drywall rather than a general-purpose product.
Also, don’t apply primer too thickly—thin, even coats dry better and prevent drips or long dry times.
Skipping Joint Compound Seams
When you skip priming over joint compound seams, the patched areas will absorb paint differently and stand out as dull, rough stripes.
You must seal fresh joint compound application and finish seam treatment before painting to guarantee uniform sheen and texture.
Visualize problems:
- Pale, chalky strip along a corner
- Rough band catching light
- Uneven color where compound met paper
Using Wrong Primer Type
Anyone can grab the wrong primer and think it’s close enough, but using an incompatible type will undermine adhesion, hide-stain blocking, or finish uniformity—sometimes all three.
You should match primer types to drywall conditions: use a PVA for new drywall, stain-blocking for discoloration, and oil or shellac where moisture or tannins exist.
Check primer compatibility with your topcoat to avoid peeling or uneven sheen.
Applying Too Thickly
Apply primer in even, thin coats—thick globs might seem like they’ll save time, but they cause dripping, long dry times, and a blotchy finish.
You’ll harm paint adhesion and invite sanding. Avoid thick application by spreading evenly and waiting between coats.
Visualize common problems:
- Heavy drips pooling on edges.
- Uneven matte and gloss patches.
- Ripples after drying.
Cost and Time: Is Priming Worth It for Your Project?
Thinking about cost and time, you might wonder whether priming drywall is really worth the extra step; in most cases it is, because primer prevents extra paint coats, hides joint compound and seam tape, and improves long-term durability—saving you money and effort over the life of the finish.
Do a quick cost analysis: priming boosts time efficiency, reduces touch-ups, and cuts overall project expense.
Budget Primer Recommendations for Drywall Projects
If you’re trying to keep costs down without sacrificing results, choosing the right budget primer matters more than you might think.
You’ll want budget friendly options that still hide seams and stains and provide a good base for paint.
Consider these cost effective primers to guide your choice:
- High-coverage latex primer for general use.
- Fast-dry multipurpose primer for quick jobs.
- Adhesion primer for tricky surfaces.
Low-VOC and Eco-Friendly Primer Options for Drywall
Want a healthier indoor finish that still performs? You can choose eco friendly options like water-based primers with recycled content and plant-derived additives.
They offer low VOC benefits—less odor, quicker return to normal air quality, and safer use around kids and pets.
Pick a primer labeled low-VOC or zero-VOC, check adhesion and sealing ratings, and test a small area before full application.
DIY vs. Hire a Pro for Drywall Priming
Curious whether you should tackle drywall priming yourself or bring in a pro?
You can save money with DIY techniques if you’re careful; pros offer speed and consistent finish per Professional recommendations.
Consider skill, time, and surface condition before deciding.
- Roller and brush practice
- Edge cutting mastery
- Fast, uniform spraying by pros
How to Test Whether Drywall Is Properly Primed
How can you tell whether your drywall is truly primed and ready for paint?
Check adhesion by rubbing a pencil eraser gently—no powder should lift.
Do a tape test: press low-tack tape, pull; primer should stay intact.
Inspect for uniform sheen and sealing of joints.
These straightforward drywall testing and primer assessment steps confirm readiness before you paint.
Quick Checklist: Should You Prime This Drywall Project?
Ask yourself three quick checks before you paint: do you have new drywall seams, previously painted surfaces, or any stain or damage spots?
If you’ve got new seams or bare drywall, you’ll need primer to seal and level the surface.
For old paint, stains, or repairs, prime those areas so the finish goes on evenly and lasts.
New Drywall Seams
When you’ve just taped and mudded new drywall seams, you should prime them before painting to seal the joint compound and create an even surface; unprimed seams often absorb paint differently, leaving visible lines and a patchy finish.
You’ll protect seam treatment and match drywall texture for a uniform coat.
- Feathered mud edge
- Sanded smooth band
- Visible tape line
Previously Painted Surfaces
Before you decide on primer for a room that’s already been painted, check the existing paint’s condition and type.
If the old finish is glossy, chalky, or peeling, you’ll need sanding and proper surface preparation to guarantee paint adhesion.
If the coat’s sound and clean, a high-quality topcoat may suffice.
Always test a small area before skipping primer.
Stain Or Damage Spots
If you spot stains, water marks, or patched areas on your drywall, prime them first so the finish coat won’t soak unevenly or show through.
You’ll prep for stain removal and damage repair, ensuring consistent sheen and adhesion.
- Yellowed water ring over repaired drywall.
- Soot or nicotine ghosting near vents.
- Small patched holes with joint compound.
Frequently Asked Questions
Can Primer Prevent Drywall Nail Pops From Reappearing?
No — primer alone won’t stop nail pops; you need proper drywall preparation and fastening repairs first. You’ll secure loose screws or nails, apply joint compound, sand, then prime to aid nail pop prevention and durable paint adhesion.
Will Primer Hide Drywall Tape Seams on Textured Walls?
No — primer won’t hide tape seam visibility on textured walls; you’ll need proper textured wall techniques like feathered joint compound, sanding, and matching texture before priming and painting so seams blend and stay invisible under finish coats.
Can You Use Tinted Primer to Match a Wall Repair Spot?
Yes — you can. Contrasting expectation vs. result shows tinted primer benefits: it speeds coverage and blends repairs. You’ll use common wall repair techniques, match tones faster, reduce topcoat coats, and avoid obvious patch outlines.
Does Primer Impact Indoor Air Quality After Painting?
Yes — primer can reduce paint fumes and improve air quality by sealing porous surfaces, letting you use less topcoat and lower-VOC paints; choose low-VOC or zero-VOC primers, ventilate well, and let surfaces cure fully.
Can Primer Improve Paint Adhesion on Metal Corner Beads?
Yes — you should prime metal corner beads because a suitable primer boosts paint adhesion, prevents flaking, and promotes durability; you’ll choose a metal-compatible primer (etching or bonding type) to guarantee consistent paint adhesion on metal corner surfaces.
Conclusion
Think of fresh drywall like a thirsty field: primer is the irrigation that helps paint take root. If you want even color, fewer touch-ups, and longer life, don’t skip it; if the sheet’s already sealed and you’re using paint with built‑in primer, you might irrigate less. Choose what the soil (surface) needs—absorbent, patched, or stained—and water accordingly. A little prep grows a steadier, more beautiful finish that lasts.