How to Cut in a Wall When Painting Like a Pro
You’ll get pro-looking cut-ins by using the right brush, loading it sparingly, and guiding steady angled strokes along trim and corners. Start with a 2–2.5 inch angled sash brush, wipe excess on the can, and let the brush heel kiss the trim for crisp lines. Use tape for long straight runs and freehand for curves or textured walls. Keep strokes deliberate, feather into wet paint, and touch up thin layers as needed to perfect the finish if you want more tips.
Get a Professional-Looking Cut-In in One Step
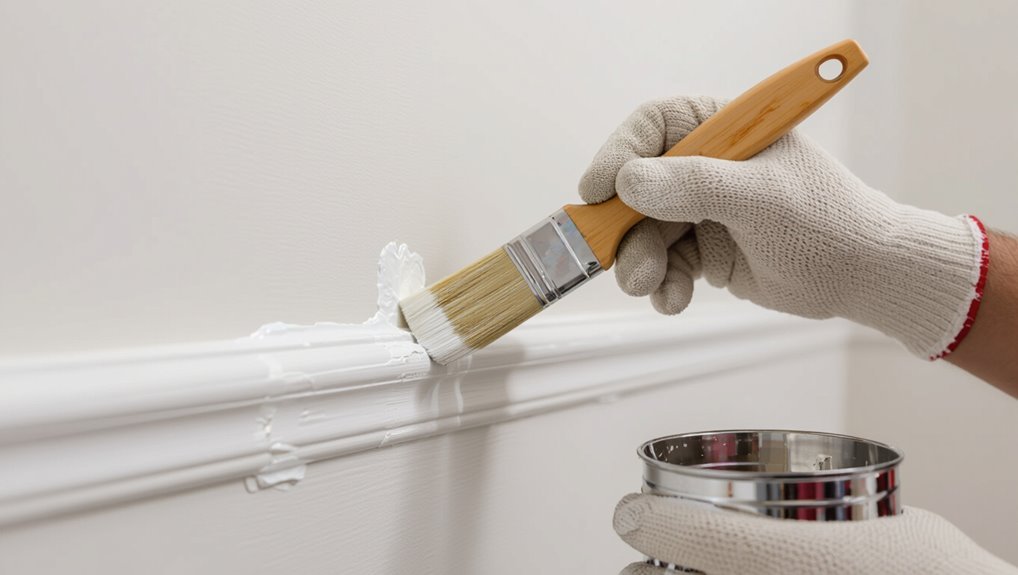
If you want a clean, professional-looking cut-in in one pass, load a 2–2.5 inch angled sash brush with paint, wipe off the excess on the side of the can, and guide the brush steadily along the edge with the brush’s heel touching the trim; this lets you lay down a sharp line without multiple strokes.
You’ll use efficient cut in techniques and controlled paint application to finish quickly.
Why This Guide Helps You Cut In Like a Pro
Confidence comes from technique: this guide breaks down the cut-in process into simple, repeatable steps so you can create crisp lines without guesswork.
You’ll learn proven cut in techniques, timing, and positioning so each stroke stays controlled.
It also covers brush maintenance to keep edges sharp and paint flow consistent.
Follow the steps, practice deliberately, and your results will look professional every time.
Grab These Pro Tools for Cutting-In
When you’re ready to cut in, the right tools make the job predictable and clean: a good angled sash brush, a quality synthetic-bristle brush for water-based paints, a sturdy edging tool, and a roller with a trim guard will keep lines crisp and speed your work.
The right tools—angled sash brush, synthetic bristles, edging tool, and trim-guard roller—make cutting in clean and predictable.
Use these essential supplies and proven cutting techniques to work efficiently:
- Painter’s tape
- Paint pan with grid
- Edging tool
- Trim-guard roller
Choose the Right Brush for Walls, Trim, and Ceilings
You’ll want different brushes for walls, trim, and ceilings to get clean lines and even coverage.
For large wall areas grab a wide-angle brush, while narrow sash or trim brushes give precise control on moldings and edges.
For ceilings use a slightly stiffer, angled brush or a dedicated ceiling cutting brush to reach overhead without drips.
Best Brush For Walls
Picking the right paintbrush makes cutting in faster and neater, so don’t assume any brush will do.
You’ll want a versatile wall brush that handles various brush types and wall textures without shedding. Choose nylon/poly for latex, natural for oil. Match width to area and keep bristles firm but flexible.
- 2–3″ angled sash
- 3–4″ wall
- Stiff bristle for rough
- Soft for smooth
Trim And Edge Brushes
Moving from a good wall brush, focus now on trim and edge brushes that give you crisp lines along moldings, door frames, and ceilings.
Choose angled sash brushes for trim techniques that demand control, synthetic bristles for waterborne paints, and slim profile edgers for tight gaps.
Hold steady, load sparingly, and use short, confident strokes to maintain edge precision without bleed or ragged lines.
Ceiling Cutting Brushes
Start by choosing a ceiling cutting brush that matches the job: long, tapered bristles for smooth ceilings and stiffer, angled tips for textured surfaces so you can hold a crisp line where wall meets ceiling.
Use the right brush types for varying ceiling angles and profiles.
Tips:
- Match bristle length to reach
- Pick angle for control
- Use synthetic for latex
- Keep clean between coats
Tape vs Freehand: When Masking Actually Helps
When you need crisp, straight edges—especially along trim, ceilings, or sharp color breaks—masking tape can be a real time-saver; but if you’re working around curves, textured surfaces, or narrow inside corners, freehand cutting often yields a cleaner result with less prep.
Use tape benefits for long straight runs and protect surfaces; rely on freehand skills where control and speed matter most.
Choose Paint & Sheen for Easier Cut-Ins
Whether you tape or cut freehand, the paint and sheen you choose will make the actual edging much easier or harder.
Pick a paint color and sheen types that hide mistakes and match your room’s light.
Choose colors and sheens that disguise imperfections and flatter your room’s lighting for easier, cleaner edging.
Consider:
- Flat for forgiving edges
- Eggshell for subtle durability
- Satin for easy cleaning
- Semi-gloss for trim contrast
Match sheen to surface and your skill level.
How Much Paint to Load on the Brush
Load only a modest amount of paint—about one-third to one-half of the bristle length—so you keep control at the edge and avoid drips.
Dip, then wipe excess on the can rim. Match load to paint viscosity: thinner paints need less, thicker allow slightly more.
Use a steady brush technique, feeding short, confident strokes and reloading before the brush puddles for clean, even cut-ins.
Hold Your Brush Like a Pro for Steady Control
Grip the brush like you mean it: hold it near the ferrule with your thumb and index finger, letting the handle rest against your middle finger for support so you get precise control without tensing your wrist.
You’ll rely on a solid brush grip for steady strokes. Practice this routine:
- Relaxed wrist alignment
- Light, even pressure
- Short controlled passes
- Reposition for comfort
Steady Your Hand for Cutting-In
Pick a high-quality angled brush that matches the trim size so you don’t fight the paint.
Keep your wrist loose and move from the elbow for smoother, more controlled strokes.
With the right brush and wrist control, your cut lines will stay straight and clean.
Choose The Right Brush
A quality angled sash brush makes cutting-in much easier, so choose one with firm, tapered synthetic bristles and a comfortable handle that lets you steady your wrist.
You’ll want the right brush for crisp edges and easy control.
- Compare brush types for edge work
- Pick a size matching trim width
- Check ferrule and handle balance
- Perform regular brush maintenance
Control Your Wrist Motion
Steady your wrist by anchoring your pinky or side of your hand against the wall so your brush moves smoothly along edges without jerking.
Practice wrist flexibility with small controlled strokes, keeping elbow relaxed and shoulders steady.
Focus on consistent hand positioning and light pressure to maintain a straight line.
Pause, reset your grip, and repeat until your cut-in edge is clean and even.
Two Cutting-In Strokes You Need to Master
When you’re cutting in, you’ll rely on just two strokes—the angled load and the sweeping finish—to get crisp edges quickly and consistently.
You’ll master cutting techniques and brush angles by practicing these moves.
- Load the brush at an angle for control.
- Start with a thin guiding line.
- Sweep outward to feather paint.
- Reload lightly and repeat until even.
Cut Along Ceilings and Crown Molding Freehand
When cutting in along ceilings and crown molding freehand, you’ll rely on a steady hand technique to keep your line straight.
Use paint-edge tricks like angling the brush, loading it properly, and using the tip to guide the stroke.
With practice you’ll get crisp edges without tape.
Steady Hand Technique
Start by anchoring your wrist against the wall or molding so your brush moves smoothly along the edge; this gives you control without a guide.
Practice steady hand exercises for improving hand eye coordination, breathe steady, and move deliberately.
- Use short strokes
- Keep light pressure
- Rest between sections
- Practice on scrap trim
Paint-Edge Tricks
Once you’ve built a steady wrist from the previous practice, you can tackle cutting along ceilings and crown molding freehand by using a few simple tricks to keep your edge sharp and consistent.
You’ll angle the brush, load minimal paint for controlled paint application, use short confident strokes, and feather the last pass for subtle edge blending so touchups vanish and lines stay crisp.
Cut Along Baseboards and Floor Trim Cleanly
Before you tape or roll, grab an angled sash brush and steady your hand so you can paint a clean line where the wall meets the baseboard and floor trim.
Use baseboard techniques and trim finishing tips to prevent drips and overlap. Work slowly, load the brush sparingly, and feather the edge.
- Steady wrist
- Thin paint load
- Short strokes
- Wipe excess
Cut Inside Corners and Seams Neatly
When you approach inside corners and seams, angle your sash brush so the bristles kiss the wall and follow the corner line with steady, short strokes to lay down a smooth, even bead of paint.
Keep a light touch, feathering edges into previously painted surfaces. Use corner techniques to control buildup, and apply seam strategies to prevent lap marks and guarantee crisp, invisible joins.
Cut Around Outlets, Switches, and Fixtures
If you’re painting around outlets, switches, and light fixtures, shut off power and remove cover plates so you can cut clean edges without masking obstacles; use a sharp sash brush or angled trim brush and steady, short strokes to paint right up to the box, feathering slightly to blend with the surrounding wall.
- Check outlet positioning before painting
- Note switch placement for neat edges
- Verify fixture alignment to avoid gaps
- Use precise cutting technique for crisp results
When to Back-Brush and When to Leave the Roll
After you’ve carefully cut around outlets and fixtures, decide whether to back-brush or leave the roll based on the surface and finish you want.
For textured or porous walls, use the back brushing technique to work paint into crevices and guarantee adhesion.
For smooth walls or when you want a consistent rolling finish, leave the roll and maintain even pressure and overlapping strokes.
Feather Edges to Blend With Rolled Paint
Feather the cut-in edges by dragging a nearly dry brush or a light, diagonal stroke with your brush outward from the hard line so the paint thins toward the roll area; this creates a soft shift that lets your roller blend the two without leaving lap marks.
Use feather blending and edge smoothing to:
- lighten paint at the seam
- reduce visible ridges
- guide the roller
- finish evenly
Maintain a Wet Edge to Avoid Lap Marks
Work fast and even so each stroke stays wet.
Blend new paint into the wet edge and lightly overlap previous strokes to hide seams.
If you keep that wet edge, you’ll avoid lap marks and get a smooth finish.
Work Fast And Even
Move steadily along the wall and keep the paint’s leading edge wet so your new strokes blend seamlessly into the last ones; if paint skins over before you overlap it, you’ll get visible lap marks.
You’ll use cutting techniques and maintain edge precision by working briskly and evenly.
- Load brush moderately
- Pace your strokes
- Keep a consistent angle
- Re-wet edges as needed
Blend New Into Wet
Anyone cutting in should blend each new stroke into the still-wet edge of the previous one so the paint merges seamlessly and you avoid visible lap marks. Use steady pressure, short strokes, and proper blending techniques to keep a consistent wet edge. Imagine rhythm and overlap like this table:
| Stroke | Pressure | Speed |
|---|---|---|
| Start | Light | Slow |
| Middle | Even | Steady |
| End | Feather | Quick |
Overlap Edges Lightly
Keep a wet edge by overlapping each new cut-in only slightly onto the previous wet paint; this small, controlled overlap lets the two strokes merge so you won’t see lap marks when the paint dries.
Use the overlap technique and focus on edge blending.
- Work briskly
- Use light pressure
- Feather the brush
- Check for wetness
Fix Drips, Blobs, and Feathering Gaps
Don’t panic if you spot drips, blobs, or feathering gaps while cutting in—most are fixable with a few simple moves.
Quickly catch drips with a damp brush or cloth, then smooth blobs by lightly dragging a loaded brush outward.
Use gentle drip control and blending techniques to feather edges into the surrounding paint.
Let thin repairs dry before evaluating; repeat sparingly for a seamless finish.
Touch Up Without Visible Overlap
1 simple rule will keep your touch-ups invisible: feather each new stroke into the existing paint while matching sheen and thickness.
Use precise touch up techniques and subtle blending methods so overlaps vanish. Practice these steps:
- Load minimal paint on a small brush
- Work from edges toward center
- Lightly feather strokes outward
- Match sheen, thin layers, and dry between coats
Work a Whole Wall Fast Without Sacrificing Edges
Before you start, clear furniture and tape trim so you can move smoothly across the room.
Keep a steady pace—work in manageable sections and reload your brush or roller methodically to avoid drips.
That way you’ll cover the whole wall quickly without losing crisp edges.
Prep The Work Area
When you’re getting ready to cut in a whole wall, clear the area and set up a simple workflow so you can move quickly without wrecking your clean lines:
- Arrange tools for easy reach to support workspace organization.
- Lay protective coverings over floors and furniture.
- Tape edges and trim before you start.
- Keep a damp cloth and small bucket nearby for quick touchups and drips.
Maintain A Steady Pace
With your area prepped and tools at hand, keep a steady, practiced rhythm so you can cover an entire wall quickly without sloppy edges.
You’ll maintain a steady technique by loading the brush properly, cutting thin lines, then filling with confident strokes.
Focus on pace consistency—move deliberately, not rushed—so edges stay sharp and touchups are minimal, saving time and improving finish.
Move Between Walls for Consistent Results
Start by planning a route that lets you cut one wall, then move directly to the next so your wet edges meet and you keep a consistent line.
You’ll manage color shifts and different wall textures by working methodically. Use these steps:
- Cut from corner to corner
- Keep a wet edge
- Blend seams immediately
- Check for texture mismatches and adjust pressure
How Temperature & Humidity Affect Cutting-In
After you’ve worked wall-to-wall keeping wet edges, pay attention to temperature and humidity because they change how paint flows and dries while you cut in.
You’ll want good temperature control to avoid runs or slow drying. High humidity levels slow drying and cause dragging; low humidity speeds skinning and can show brush marks.
Adjust pace, thin paint slightly, and test a small area.
Clean and Care for Brushes to Keep Performance
Keep your brushes in top shape so they cut clean lines every time you paint—clean them promptly after use, reshape the bristles, and store them properly to prevent splaying.
Use proper brush maintenance and cleaning techniques to extend brush longevity. Follow these performance tips:
- Rinse until clear, use appropriate solvent.
- Comb bristles, remove paint.
- Drying methods: hang or lay flat.
- Storage solutions: cover and rest upright.
Practice Drills to Improve Cutting-In Quickly
With well-maintained brushes ready, you’ll get more benefit from short, focused practice drills that sharpen your cutting-in speed and accuracy.
Set up tape lines on scrap board, time yourself, and repeat straight strokes and corners.
Focus on cutting in techniques: steady wrist, consistent pressure, and deliberate starts.
Focus on cutting-in: keep a steady wrist, maintain consistent pressure, and start each stroke deliberately.
Build brush control by varying angles and practicing stops until your lines stay crisp and confident.
Tools Pros Use for Hard-to-Reach Areas
Pros reach tricky spots with a handful of specialized tools that save time and keep your lines clean.
You’ll use extension poles with roller frames, angled brushes and paint edgers for tight corners, and cutting guides plus painter’s tape for crisp lines.
Remember ladder safety.
Useful extras:
- Brush holders
- Cutting guides
- Extension poles
- Painter’s tape
Common Beginner Mistakes That Ruin Cut-Ins
Don’t rush the cut-in—it’s where most beginners make avoidable mistakes that show up immediately on finished walls.
You’ll drip, overwork edges, or load your brush incorrectly if you ignore proper cut in techniques.
Avoid uneven lines, paint buildup, and skipping prep.
Practice steady wrist motion, use the right brush angle, and pause to wipe excess—these steps prevent the common pitfalls.
When DIY Cut-Ins Aren’t Worth It
If you’re on a tight schedule, cutting in by hand can eat up hours you don’t have.
You can also end up with a ragged edge or visible brush marks that make the whole job look amateur. In those cases, hiring a pro or using masking tools might save time and give a cleaner finish.
Too Time-Consuming
When you’re painting a room, cutting in by hand can eat hours from your schedule—especially on large walls, textured surfaces, or around lots of trim—so it’s worth weighing the time investment against hiring a pro or using tools like an edger or painter’s tape.
You should consider time management and efficient painting techniques:
- Use an edger for speed
- Rent a paint sprayer
- Tape selectively
- Hire a pro for large jobs
Poor Finish Risk
Expect uneven lines, drips, and visible brush marks if your cut-ins aren’t done right—those small flaws can make a fresh paint job look amateurish. You’ll risk a poor technique showing through, with uneven application and patchy edges. Decide whether to practice more or hire pro help.
| Issue | Result |
|---|---|
| Poor technique | Visible strokes |
| Uneven application | Patchy edges |
| Drips | Runs |
Print-Ready Cut-In Checklist
Start with a clear checklist you can tape to the wall or keep on your phone so you won’t skip any steps during cut-ins.
You’ll follow proven cut in techniques and control paint application for sharp edges.
Checklist:
- Clean and tape edges
- Load brush properly
- Use steady, angled strokes
- Feather and blend into wet paint
Follow it and you’ll finish like a pro.
Frequently Asked Questions
How Do I Protect Newly Painted Trim From Furniture Bumps?
You’ll protect newly painted trim by installing trim bumpers and thick furniture pads on legs, keeping furniture slightly off the wall, using felt strips and rubber stoppers, and regularly checking pads for wear to avoid scuffs and dents.
Can I Use Painter’s Tape on Textured Popcorn Ceilings?
Yes — you can, but treat it like dressing a prickly hedgehog: press gently, test adhesion, and remove slowly. For rough popcorn use tape alternatives and careful ceiling preparation to avoid damage and flaky paint.
What’s the Best Way to Cut in Around Wallpapered Edges?
You’ll score neat edges by using steady cutting techniques and the right wallpaper tools: a sharp angled brush, a trim pad or edger, and a utility knife to carefully slice along seams, keeping tape gentle to protect paper.
How Long Should I Wait Before Rehanging Hardware or Decor?
You’ll wait—surprisingly patiently—about 48 to 72 hours before rehanging hardware or decor; that lets drying time finish and guarantees paint adhesion, so you won’t peel your fresh work off the wall the moment you’re proud.
Can I Cut in Over Old Stains or Smoke-Damaged Walls?
Yes — you can cut in over old stains or smoke damage, but you’ll want to clean, prime with a stain-blocking primer, and let it cure so the stain blocking holds before applying your finish coats for lasting coverage.
Conclusion
You’ve got the steady hand and the right tools — now picture a clean, crisp line where color meets corner like a ribbon pulled taut. Trust your brush, move confidently, and let the room exhale as walls transform. Each precise stroke feels like finishing a piece of art you made. If a wobble happens, don’t fret; touch-ups are easy. Stand back, smile, and enjoy the calm satisfaction of a job done like a pro.