How Do You Make Glitter Paint for Walls? Diy Guide
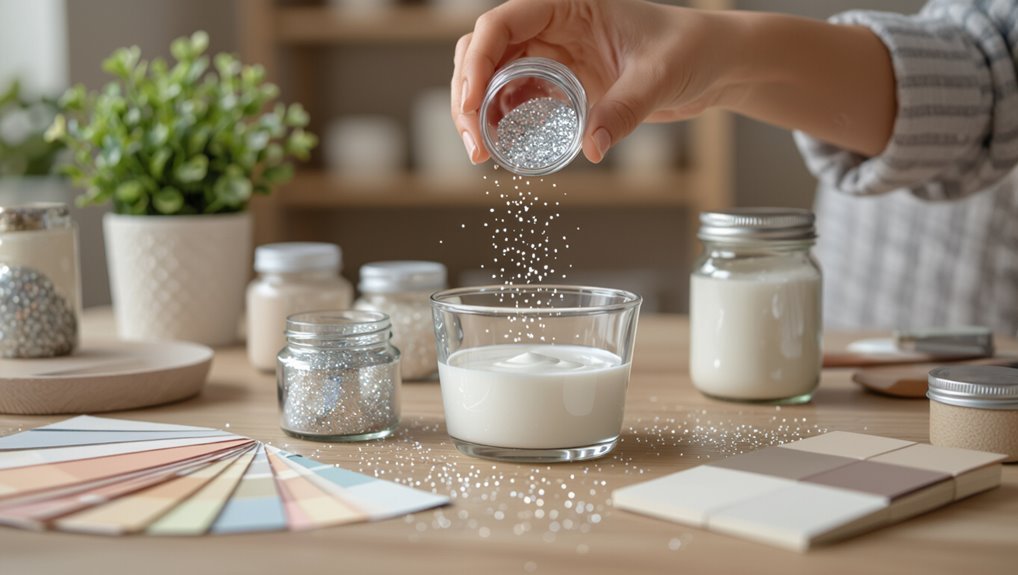
You can make glitter paint for walls by mixing a clear, water‑based binder—like matte acrylic or a water‑based sealer—with cosmetic‑grade microglitter at about 10–20% by volume, stirring thoroughly for even distribution. Prep your wall by cleaning, patching, and sanding, test on a scrap panel, and apply thin, even coats with a brush, roller, or spray. Seal with a clear topcoat for durability; keep tools clean and work in small batches if you want more tips.
Who This Guide Is For and What You’ll Learn
This guide is for DIYers who want to add a subtle sparkle to their walls without hiring a pro or buying specialty finishes.
You’ll learn practical steps, safe materials, and simple techniques tailored to DIY enthusiasts. You’ll get concise crafting tips, prep advice, and troubleshooting pointers so you can mix, apply, and seal glitter paint confidently—no fancy tools or prior experience required.
Quick Answer: Make Glitter Paint for Walls
Make a simple glitter paint by mixing clear, matte acrylic paint or a water-based sealer with cosmetic-grade microglitter (or glitter paint additive) at about a 10–20% glitter-to-base ratio.
You’ll test consistency, apply evenly, and choose compatible paint finishes for the desired sheen.
Tips:
- Stir thoroughly for even glitter application
- Thin slightly for smoother flow
- Test on scrap panel
- Seal with clear topcoat
When to Choose Homemade Glitter Paint vs. Store‑Bought
If you’re watching your budget, homemade glitter paint can save you money because you control ingredient costs and quantities.
If you want a specific sparkle level or pigment, making it yourself gives you precise customization.
But if you need consistent results, time savings, or professional-grade finishes, store‑bought options might be the smarter choice.
Cost And Budget
When budgeting for glittered walls, weigh the price per square foot and the value of your time—homemade mixes can cut material costs but take more effort, while store-bought glitter paints save time and include consistent binders and glitter ratios.
Use budget considerations and a quick cost analysis to decide based on scale and schedule.
- Materials vs. time
- Coverage per can
- Starter tool costs
- Waste and touchups
Control And Customization
Although store‑bought glitter paints give you predictable coverage and consistent sparkle, homemade mixes let you dial in sheen, particle size, and binder for a truly customized look.
Choose DIY when you want unique glitter color, varied finish options, or to match decor precisely.
Pick store brands for fast, consistent results, warranty, and easier cleanup.
Balance time, skill, and desired effect.
Safety: Ventilation, PPE, and Surface Protection
Because you’re working with paints, adhesives, and fine glitter particles, prioritize ventilation, personal protective equipment, and thorough surface protection before you start.
Because you’ll work with paints, adhesives, and glitter, prioritize ventilation, PPE, and surface protection first.
Use ventilation tips like open windows and fans, follow PPE essentials—respirator, goggles, gloves—and protect floors and furniture with drop cloths.
Keep cleanup tools ready and limit access while paint cures.
- Open windows and run fans
- Wear respirator, goggles, gloves
- Cover floors and furniture
- Keep cleanup supplies handy
Best Binders for Wall‑Grade Glitter Paint
When you mix glitter into paint, the binder you choose controls adhesion, durability, and finish.
Acrylic polymer binders are the go-to for wall-grade glitter paint because they’re flexible, water-resistant, and clear-drying.
If you prefer eco-friendly or mineral options, natural binders and mineral-based formulas can work well but may need different prep and sealer choices.
Acrylic Polymer Binders
Acrylic polymer binders are the backbone of any wall‑grade glitter paint, since they hold pigment, glitter, and additives together while providing adhesion, flexibility, and durability on interior walls.
You’ll choose between Binder types that emphasize acrylic properties like clarity, film formation, and water resistance for smooth, long‑lasting sparkle.
- Good adhesion
- Low VOCs
- Flexible film
- Easy tinting
Mineral And Natural Binders
While acrylic binders dominate, mineral and natural binders give you eco‑friendly alternatives that can suit specific aesthetics and performance needs. They include options like lime, casein, clay, and natural oils that bond pigments and glitter with different sheens, breathability, and aging characteristics.
You’ll choose mineral binders for durability and matte depth, or natural binders for warmth and low VOCs, adjusting ratios for adhesion.
Best Glitters for Wall Paint
Several types of glitter work well for wall paint, and choosing the right one depends on the effect you want and the application method you’ll use.
Several glitter types suit wall paint; pick one based on desired effect and your application method.
You should match glitter types to your finish and preferred application techniques to guarantee adhesion and sparkle without clogging rollers.
- Cosmetic-grade for subtle sheen
- Polyester for longevity
- Holographic for dramatic sparkle
- Metallic flakes for vintage warmth
Choosing Glitter Size and Material
Now that you’ve picked the glitter type that matches your finish and longevity needs, the next step is choosing size and material to control the final look and application.
Choose fine glitter for subtle sheen, medium for visible sparkle, and chunky for drama.
Metal or polyester alter reflectivity and durability.
Consider how each interacts with application techniques to avoid clumping and guarantee even coverage.
Picking Base Paint: Matte, Eggshell, Satin, or Gloss
Because the base paint determines how glitter looks and behaves on your wall, pick a sheen that matches your room’s purpose and the sparkle effect you want.
Consider base paint characteristics and finish durability to balance appearance and maintenance.
- Matte: hides flaws, low sheen
- Eggshell: soft glow, moderate durability
- Satin: easy to clean, good sparkle
- Gloss: maximum shine, high durability
Matching Glitter Color to Your Paint Base
When you choose glitter, think about how its color will interact with the base paint so the sparkle feels intentional rather than jarring. You’ll test swatches to guarantee color harmony and paint compatibility, favoring subtle contrasts or tonal matches for cohesion. Visualize samples:
| Base | Glitter |
|---|---|
| Navy | Silver |
| Blush | Rose gold |
| Cream | Champagne |
Glitter‑to‑Paint Mixing Ratio Guide
After you’ve settled on glitter and base combinations, it’s time to figure out how much sparkle to add so the effect reads intentional, not overbearing.
You’ll test ratios, considering glitter types and mixing techniques to balance shine and coverage. Start small, note results, and adjust for coats.
- 1–2% light shimmer for subtle sheen
- 3–5% for noticeable sparkle
- 6–10% for bold coverage
- Reduce chunky glitter to avoid clumping
Tools and Supplies You’ll Need
Gather the right tools before you mix—these will make application smoother and the finish more even.
You’ll need quality paint, clear binder or glaze, assorted glitter types (fine, chunky, holographic), measuring cups, stirring sticks, a mixing bucket, and disposable gloves.
For application, grab a high‑density roller or brush, a paint tray, and drop cloths.
Choose tools that suit your paint finishes.
Preparing Walls for Even Glitter Adhesion
Because glitter shows every bump and imperfection, you’ll want your walls smooth, clean, and dry before you start—patch holes with spackle, sand rough spots, wipe away dust and grease with a mild detergent, and let the surface fully dry so the binder adheres evenly.
Follow basic wall surface preparation and proven paint adhesion techniques:
- Remove loose paint and flaking
- Fill gaps and sand smooth
- Clean with degreaser and rinse
- Prime porous areas before glazing
How to Pre‑Test Glitter Paint on Samples
Before you commit to a full wall, prep small sample boards with the same cleaning, priming, and sanding you used on the actual wall so you get accurate results.
Test each sample under different lighting and from several angles to see how the glitter reflects and where it looks patchy.
Note any adhesion or texture issues on your checklist so you can adjust surface prep or product mix before painting the room.
Surface Preparation Checklist
Start with a small, controlled sample area so you can see exactly how the glitter paint will look and behave on your wall.
Test different surface types and wall textures, try adhesion methods, and note primer options.
Use proper preparation tools and cleaning techniques before applying samples.
- Smooth vs textured
- Sanding and degreasing
- Primer compatibility
- Adhesion test methods
Lighting And Angle Tests
When you test glitter paint samples, check them under the exact lighting and viewing angles you’ll encounter in the room so you know how sparkle changes with light intensity and sightlines. You’ll try lighting variations and make angle adjustments, noting shimmer, visibility, and texture. Use swatches, mark positions, and pick the look that reads best from main sightlines.
| Test | Light | Angle |
|---|---|---|
| A | Day | Low |
| B | Artificial | Mid |
| C | Spotlight | High |
Mix Glitter Paint by Hand (Step‑by‑Step)
Although it looks simple, mixing glitter paint by hand takes a steady technique, the right ratios, and patience to get an even sparkle without clumps.
Although simple in appearance, mixing glitter paint by hand demands steady technique, precise ratios, and patient stirring.
You’ll balance glitter types with base paint, test paint textures, and stir slowly to avoid air bubbles. Work in small batches and apply promptly.
- Measure glitter and paint accurately
- Fold, don’t whisk
- Test on scrap
- Strain if clumpy
Mix Glitter Paint With a Drill Mixer (Step‑by‑Step)
If you want a faster, more consistent blend than hand‑stirring, use a drill mixer fitted with a paddle to combine glitter and paint—just go slow and steady so the shimmer disperses evenly without foaming.
Clamp the can, wear eye protection, and follow drill safety.
Start at low RPM, lift periodically to prevent vortexing, check for clumps, and finish with short bursts for a uniform mixing technique.
Brush vs Roller vs Spray: Pros and Cons
Wondering which application method will give your glitter paint the best look? You’ll choose based on application techniques and finish selection: brush for detail, roller for speed, spray for even coverage.
Each affects sparkle distribution and texture differently, so pick the tool that matches your wall, patience, and desired sheen.
Consider how sparkle, texture, and patience align—choose the application that best complements your wall and desired sheen.
- Brush: precision
- Roller: efficiency
- Spray: uniformity
- Hybrid: best of both
Applying Glitter Paint for Subtle Shimmer
When you want just a whisper of sparkle, apply glitter paint sparingly and work in thin, even coats so the shimmer reads as subtle rather than glitter-bombed. You’ll blend with a soft brush, feather edges, and layer translucently. Use tested glitter paint techniques for controlled shimmer effects and let each coat dry before adding the next.
| Tool | Stroke | Dry Time |
|---|---|---|
| Brush | Feather | 30 min |
| Roller | Light | 45 min |
| Spray | Mist | 20 min |
| Cloth | Dab | 15 min |
Applying Glitter Paint for Full‑Coverage Sparkle
Because you want dramatic, continuous sparkle, plan for full, even coverage and work methodically from top to bottom so you don’t miss spots.
You’ll use specific glitter paint techniques and follow wall preparation tips to guarantee adhesion and uniformity. Work in manageable sections, maintain wet edges, and use consistent strokes for a seamless finish.
- Section off and tape edges
- Mix glitter evenly
- Use roller then brush
- Inspect under light
Layering: Base Coat, Glitter Coat, and Topcoat
Start by prepping the wall with a smooth, clean base coat so the glitter adheres evenly.
Apply your glitter layer while the base is tacky enough to grab sparkle but not so wet that it runs.
Finish with a clear topcoat to seal the glitter, protect the finish, and make cleanup easier.
Preparing The Base
Once you’ve prepped and primed the wall, lay down a solid base coat to create an even, adhesive surface for the glitter and topcoat.
Choose color and finish based on glitter paint types and follow wall preparation techniques for adhesion. Apply thin, even coats, allow full drying between layers.
- Smooth imperfections
- Sand lightly
- Use quality primer
- Check for uniform coverage
Sealing With Topcoat
After you’ve laid the base and sprinkled or rolled on the glitter coat, seal everything with a clear topcoat to lock in shine and protect against rubbing, dust, and fading.
You’ll choose a water-based polyurethane or clear acrylic, apply thin even coats, and sand lightly between layers.
Proper topcoat application guarantees glitter longevity and a smooth, durable finish you can clean without losing sparkle.
Avoiding Clumps and Uneven Distribution
If you want smooth, sparkly walls instead of patchy, glittery clumps, focus on proper mixing, the right glitter size, and even application techniques; these steps prevent flakes from bonding together or settling unevenly.
Maintain glitter consistency and choose an application technique that distributes particles evenly.
Use:
- Stir frequently during use
- Thin coats with a wide brush or roller
- Test spray or roll first
- Shake containers before pouring
Glitter‑Paint Drying Times and Recoat Timing
Because glitter changes how paint dries, you’ll need to plan your timing carefully so flakes don’t sink, clump, or get disturbed while tacky.
Use gentle drying techniques: steady room temperature, low humidity, and indirect airflow to set flakes without blowing them.
Wait full manufacturer cure times between coats and follow a strict recoat schedule—test a small patch before proceeding across the wall.
Sealing Glitter Paint: Best Clear Coats
When you’re ready to seal your glitter wall, pick a clear coat that matches the finish you want—matte, satin, or glossy—since each alters sparkle and sheen.
Compare spray versus brush-on application for ease, coverage, and how they affect glitter placement.
Finally, think about durability and upkeep so you choose a sealer that resists scratches, yellowing, and is easy to clean.
Choosing The Right Finish
Sealing your glitter paint with the right clear coat locks in sparkle, protects the finish, and determines how the wall will look and behave over time.
You’ll choose between glitter paint finishes like glossy vs matte; gloss boosts shimmer and wipes clean, matte softens glare and hides texture.
Pick durable polyurethane or water-based clear coats suited to room use.
- Gloss enhances sparkle
- Matte mutes reflection
- Oil-based = durable
- Water-based = low odor
Application Methods Compared
If you want your glitter finish to last and look its best, choosing how you apply the clear coat matters as much as which product you pick.
You’ll weigh application techniques—brushing for control, rolling for speed, spraying for smoothness—against finish comparisons like matte, satin, and gloss.
Test on scrap, work thin even coats, and let proper drying time prevent clouding or streaks.
Durability And Maintenance
You’ve picked the right application method; now you need a clear coat that protects sparkle without dulling it.
Choose water-based polyurethane or glossy acrylic for long term performance, apply thin even coats, and let full cure before light use.
For maintenance, dust gently and avoid harsh cleaners.
- Best clear coats
- Application tips
- Curing time
- Maintenance tips
Protecting High‑Traffic Glitter Walls
Because glitter walls take a beating in busy areas, you’ll want a clear, durable topcoat that resists scuffs, moisture, and regular cleaning, while keeping the sparkle intact.
Choose a high‑quality polyurethane or water‑based clear coat for improved glitter wall durability.
Apply thin, even layers and let cure fully.
Use felt pads, bumpers, and protective runners as simple maintenance techniques to prevent direct wear.
Cleaning and Maintenance for Glitter Finishes
Now that you’ve protected high‑traffic areas with a durable clear coat and pads, keeping that sparkle looking fresh is mostly about regular, gentle upkeep.
Use soft tools, mild cleaners, and spot methods to avoid abrasion. Follow these cleaning techniques and maintenance tips:
- Dust with a microfiber cloth weekly
- Blot spills immediately with damp cloth
- Test cleaners in hidden spot first
- Reapply clear coat yearly for protection
Repairing Glitter‑Paint Chips and Fallout
Start by evaluating the damaged area to see how much glitter and paint have come loose.
Carefully remove any loose glitter and debris with a soft brush or vacuum.
Patch the base paint, then reblend glitter into the wet paint or use a glitter-top coat to match the surrounding finish.
Assess Damage Area
Begin by inspecting the entire glitter-painted surface to find every chip, loose flake, and area of fallout so you’ll know exactly what needs repair.
For precise damage assessment and surface evaluation, note size, depth, density of fallout, and nearby adhesion issues.
- mark each spot
- photograph for reference
- measure affected area
- prioritize by severity
Remove Loose Glitter
Loosen and lift any remaining glitter flakes with gentle tools so you don’t make the damage worse; work methodically from the edges of each chip toward the center and collect loosened particles as you go. Use soft brushes, low-tack tape, and a vacuum with a brush attachment. Focus on glitter removal techniques and careful cleaning surfaces treatment.
| Tool | Method | Tip |
|---|---|---|
| Soft brush | Sweep gently | Edge-to-center |
| Low-tack tape | Lift flakes | Press lightly |
| Vacuum | Brush attachment | Short passes |
| Microfiber | Wipe area | Avoid rubbing |
Patch And Reblend
After you’ve removed loose glitter and cleaned the area, you’ll prepare to patch chips and blend new paint so the repair disappears.
You’ll sand, fill, and match the glitter application mix, then feather edges for a seamless finish. Good wall preparation guarantees adhesion and sparkle blends.
- Sand and fill chips
- Match paint and glitter ratio
- Feather edges smoothly
- Seal with clear topcoat
Cost Breakdown: DIY vs. Pro vs. Premade Kits
Whether you’re on a tight budget or aiming for a showroom finish, understanding the real costs of DIY glitter paint, hiring a pro, or buying a premade kit helps you choose smartly.
Do a cost comparison: DIY supplies and labor give biggest DIY savings but take time.
Pros charge more for flawless texture and speed.
Kits sit midrange—convenient, limited customization, predictable results.
Eco‑Friendly Low‑Dust Glitters for Walls
Because wall glitter will shed over time, picking low-dust, eco-friendly options matters for air quality and cleanup—especially in homes with kids, pets, or allergy sufferers.
Wall glitter sheds—choose low-dust, eco-friendly options and seal with low-VOC finishes for healthier air and easier cleanup.
You should choose glitters made from eco-friendly materials with sustainable sourcing, look for fine-cut mica or cellulose, and seal with low-VOC clear coats to minimize airborne particles.
- Fine-cut biodegradable cellulose
- Coated mica flakes
- Recycled PET alternatives
- Low-VOC sealers
Temporary and Kid‑Friendly Glitter Wall Ideas
If you want a sparkly wall that’s safe for kids and easy to change, focus on temporary solutions that keep glitter contained and cleanup simple.
Use removable wallpaper decals coated with low‑dust glitter, magnetic boards with glittery vinyl, or stencil accents applied with water‑based adhesive.
These temporary designs suit kid friendly themes—rainbows, stars, or animals—and let you update decor without long‑term commitment.
Common Mistakes and How to Fix Them
When you jump in enthusiastically, it’s easy to make avoidable errors—like using the wrong adhesive, overloading with glitter, or skipping a proper seal—that lead to uneven coverage, excess mess, or peeling.
You can fix common glitter paint mistakes and paint application errors by correcting technique, prep, and sealing.
- Thin adhesive, test first
- Apply thin, even coats
- Clean brushes between coats
- Use a clear topcoat
Room Ideas and Placement for Glitter Walls
Think about using glitter paint for an accent wall to draw attention without overwhelming the room.
You can also add subtle sparkle on ceilings or crown molding to catch light and expand a space.
For a more controlled effect, highlight furniture edges or trim to tie the look together.
Accent Wall Locations
A glitter accent wall can instantly lift a room’s vibe, so pick a spot that naturally draws the eye—behind a bed, the fireplace, or the wall you face when you enter.
You’ll highlight living room focal points or bedroom accents without overwhelming the space. Consider traffic flow, lighting, furniture placement, and scale.
- Entryway
- Behind sofa
- Headboard wall
- Dining focal wall
Ceiling And Crown Highlights
If you want to make a room feel taller or more glamorous, add glitter to the ceiling or crown moulding to catch light and draw the eye upward.
Try subtle accents on crown molding edges or selective ceiling designs like a recessed tray or border.
Use fine glitter for shimmer, test lighting first, and keep application neat to avoid spillover onto walls or fixtures.
Furniture And Trim Accents
One smart way to add glamour without overwhelming a room is to apply glitter accents to furniture and trim, so you can highlight architectural lines and favorite pieces while keeping most surfaces understated.
You’ll pick complementary furniture styles and subtle trim designs to create focal points without clutter.
- Highlight chair legs or drawer fronts
- Accent crown or baseboard edges
- Frame mirrors or art
- Stripe table tops
Troubleshooting: Common Glitter‑Paint Problems
When glitter flakes clump, shed, or go on unevenly, you’ll want quick fixes so your walls look intentional rather than messy. This section walks you through the common problems—clumping, poor adhesion, visible brush strokes, and uneven sparkle—and gives practical troubleshooting steps to get your finish back on track.
Check surface prep to improve glitter paint adhesion. Thin or remix to prevent clumps. Seal to boost glitter paint longevity. Use even strokes, and touch up sparse areas with a wash of binder and glitter.
Frequently Asked Questions
Can Glitter Paint Be Used on Exterior Walls Without Peeling?
Yes — you can, but you’ll need proper surface preparation and application techniques. You’ll clean, prime, and use exterior-grade paint plus glitter sealer; you’ll apply thin, even coats and allow full curing to prevent peeling.
Will Glitter Paint Affect Home Resale Value?
Right off the bat, it can be a double-edged sword: you’ll follow glitter paint trends carefully, but resale value considerations matter—buyers’ tastes vary, so stick to subtle accents and neutral surroundings to avoid turning people off.
Can You Add Glitter Paint to Wallpapered Walls?
Yes, you can add glitter paint to wallpapered walls, but you’ll need careful prep: test on scrap, use compatible glitter wallpaper or primer, and choose gentle application techniques like light brushing or roller glazing to avoid damaging seams.
Are There Odorless Binders for Indoor Glitter Paint?
Absolutely — you’ll find virtually odorless binders like water-based acrylics that’ll smell like nothing and perform superbly. They boost glitter paint durability and suit various application techniques; test adhesion, use proper sealer, and work in ventilated spaces.
Does Glitter Paint Interfere With Smoke/Carbon Detector Sensors?
No, glitter paint safety concerns rarely affect detector functionality directly, but you shouldn’t spray particles near sensors; they can accumulate and impair performance. You’ll want to avoid overspray, keep vents clear, and follow manufacturer guidance.
Conclusion
You’re practically a glitter wizard now — go on, bedazzle a whole room until it sparkles so much neighbors call it a national landmark. Remember to pick the right binder, ventilate, and test a swatch first so your masterpiece doesn’t turn into a glittery disaster. Whether it’s temporary kids’ fun or a grown-up feature wall, you’ve got the know-how to make walls shimmer like a disco ball with responsible sparkle and just a little dramatic flair.