How to Remove Adhesive From Painted Wall Without Damage
You can safely remove adhesive from painted walls by first testing a tiny hidden spot for softness or discoloration. Use warm soapy water and a microfiber cloth for fresh residue, low heat from a hair dryer to soften stubborn glue, or a safe oil (olive or coconut) to loosen sticky film. Gently scrape with a plastic putty knife or foam eraser, rinse and blot dry, and avoid harsh solvents; follow these steps and you’ll find more tips ahead.
Quick Start: Remove Adhesive Without Damaging Paint
Start by testing a small, inconspicuous spot to make sure your paint won’t lift or discolor.
Always test an inconspicuous spot first to ensure the paint won’t lift or discolor.
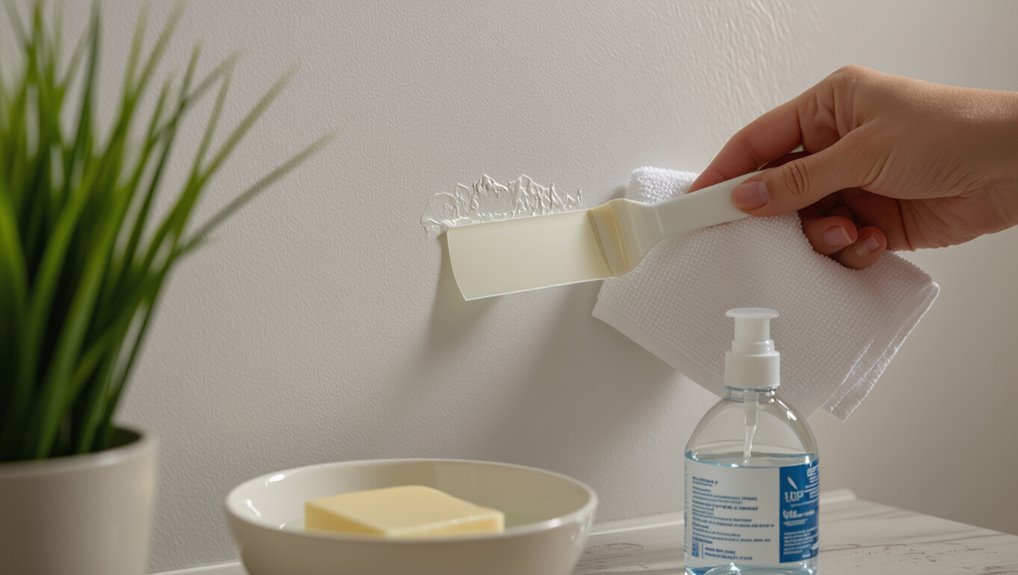
Work gently: soften residue with warm soapy water or a mild solvent compatible with your paint finishes, then scrape carefully with a plastic card.
Match method to adhesive types and the wall’s cure.
Rinse, blot dry, and repeat only if the surface stays intact.
Identify Your Adhesive: Tape, Sticker, or Putty?
How can you tell which remover will work best?
You’ll inspect residue: tape leaves thin tacky film, stickers often have gummy backing, putty stays pliable and thicker.
Identifying adhesive types guides your choice of removal techniques—mechanical lifting for putty, gentle heat or oil for tape film, solvent or adhesive remover for stubborn sticker glue—so you pick the least aggressive, paint-safe method.
How to Test a Hidden Spot Safely
Before you try anything on the visible wall, pick an inconspicuous spot like behind a switch plate or inside a closet.
Apply a tiny amount of a mild cleaner or soapy water with a cotton swab and wait a minute.
If the paint shows no softening, discoloration, or tackiness, it’s safe to proceed.
Choose An Inconspicuous Area
Pick a small, out-of-the-way spot—behind a light switch plate, inside a closet, or along a baseboard—so you can test without risking visible damage.
You’ll check for hidden damage and confirm paint integrity before proceeding. Use minimal cleaner or solvent, wait, and inspect for discoloration, softening, or lifting.
If the spot passes, continue cautiously elsewhere.
Test With Mild Cleaner
Start by dampening a clean cloth with a mild, pH-neutral cleaner or a mix of warm water and a few drops of dish soap, then gently blot the hidden spot you picked; don’t rub hard. Test for color change, tackiness, and finish before treating different adhesive types. If safe, proceed; if not, try a gentler method or consult pros.
| Step | What to check | Action |
|---|---|---|
| 1 | Color | Blot |
| 2 | Texture | Feel |
| 3 | Shine | Inspect |
| 4 | Residue | Wipe |
| 5 | Repeat | Proceed |
Gentle Tools That Won’t Scratch Paint
You’ll want tools that lift adhesive without harming the paint, like a soft microfiber cloth for gentle wiping.
Use a plastic putty knife to carefully scrape off thicker residue without scratching.
For stubborn spots, a foam eraser block can rub away adhesive safely.
Soft Microfiber Cloth
A soft microfiber cloth is your safest tool for lifting adhesive without damaging paint, because its fine fibers trap residue instead of rubbing it into the finish.
You’ll appreciate microfiber cloth benefits: lint-free pickup, gentle abrasion, and quick drying.
Use focused cleaning techniques—light pressure, circular motions, and frequent rinsing—to loosen adhesive without scrubbing.
Finish by blotting dry to protect the paint.
Plastic Putty Knife
After lifting loose residue with a microfiber cloth, reach for a plastic putty knife to scrape away stubborn adhesive without gouging the paint.
You’ll hold the blade flat, angling gently and working small areas. Combine plastic scraper techniques with steady pressure, peeling softened bits as you go.
These adhesive removal tools are inexpensive, safe, and let you control removal without scratching or chipping.
Foam Eraser Block
Try a foam eraser block when you need a gentle, paint-safe way to lift adhesive residue—its soft, fine-abrasive surface breaks bond without scratching or dulling finishes.
You’ll appreciate foam eraser benefits and simple foam eraser techniques as you work. Visualize motion and pressure:
- Small circular rubs
- Light, even pressure
- Edge detail work
- Dampen slightly if needed
- Inspect frequently
Use Warm Soapy Water for Fresh Adhesive
Start by mixing a few drops of mild dish soap into warm (not hot) water.
Then dip a soft cloth or sponge and gently blot the fresh adhesive until it loosens—don’t scrub hard, which can damage paint.
You’ll test a hidden spot, work from edges inward, and repeat as needed.
These simple removal techniques suit many adhesive types and protect finish without harsh chemicals.
Soften Glue With a Hair Dryer
When you apply a hair dryer on low to medium heat and hold it a few inches from the adhesive, the warmth will soften the glue so you can peel it away more easily.
Use this hair dryer technique for gentle adhesive removal, then scrape and wipe.
Use a hair dryer on low to soften adhesive, then gently peel, scrape, and wipe away residue.
Visualize the process:
- warm air loosens edges
- glue becomes pliable
- peel with fingernail
- scrape with plastic card
- wipe residue clean
Safe Oils: Olive, Coconut, and Goo Gone Tips
If you’d rather avoid harsh chemicals, safe oils like olive or coconut can loosen adhesive without damaging paint—apply a small amount, let it sit for 5–10 minutes, then rub gently with a soft cloth or plastic card to lift the residue.
Use natural oil benefits to break tackiness, blot excess, then clean with mild soap.
For stubborn spots, try Goo Gone sparingly as an adhesive removal technique.
When and How to Use Isopropyl Alcohol
1 simple rule: test first. Use isopropyl benefits to dissolve adhesive properties gently, but try a hidden spot.
Apply sparingly with a cloth, blot, don’t rub, and rinse.
- small cotton swab
- soft microfiber cloth
- dab, don’t scrub
- ventilate the room
- wait, inspect for finish damage
You’ll remove residue faster while protecting paint.
Using Vinegar Carefully on Sticker Residue
Before using white vinegar on sticker residue, test a diluted solution on an inconspicuous spot to make sure the paint won’t soften or discolor.
Mix equal parts vinegar and water, and apply it sparingly with a soft cloth or cotton swab rather than pouring directly onto the wall.
Use gentle tools—rub with light pressure or a plastic scraper—to lift residue without damaging the paint.
Test Inconspicuous Spot
Because painted finishes can react unpredictably, always try vinegar on a hidden spot first to check for softening, discoloration, or paint lift.
You’ll confirm compatibility with different adhesive types and paint finishes before treating visible areas.
- corner behind furniture
- inside a closet
- under trim
- behind outlet plate
- inside a cabinet door
Dilute White Vinegar
Reach for a small bowl and mix equal parts white vinegar and warm water to create a gentle solution that loosens sticker residue without attacking most paint finishes. You’ll dab the vinegar mixture with a soft cloth, let it sit briefly, then wipe away sticky bits—this natural cleaner calms frustration and restores your wall.
| Hope | Relief | Clean |
|---|---|---|
| Soft | Calm | Bright |
| Fresh | Simple | Safe |
| Quiet | Clear | Pure |
Gentle Application Tools
Grab a soft cloth, cotton swab, or microfiber pad to apply the vinegar solution gently so you don’t damage the paint.
You’ll use gentle scrapers sparingly and avoid harsh adhesive removers.
Visualize tools and motion:
- soft cloth gliding
- cotton swab precision
- microfiber pad buffing
- plastic scraper angled
- small spray bottle misting
Work slowly, test a hidden spot first.
Remove Mounting Putty Without Smearing
Warm the putty gently with a hair dryer on low to soften it, then peel it off slowly and evenly to avoid smearing the residue across the paint.
If residue remains, dab with a soft cloth and mild soapy water, then try rubbing alcohol sparingly.
Consider putty alternatives for future use and follow adhesive tips like testing solvents on an unseen spot first to protect finish.
Lift Stubborn Adhesive With a Plastic Scraper
If heat and gentle solvents haven’t removed the residue, a plastic scraper is your next tool to lift stubborn adhesive without gouging the paint.
You’ll use safe scraping techniques for different adhesive types, work at low angles, and test a corner first.
- thin glue film
- sticker edge
- label remnants
- dried tape strip
- gummy spots
Remove Double‑Sided Tape Without Stripping Paint
Removing double-sided tape without stripping paint takes patience and the right sequence of gentle steps, because aggressive pulling or harsh solvents can lift finish or leave ghosting. You’ll soften adhesive types with heat, peel slowly at low angle, then use mild solvent and a soft cloth. Test first. Use these quick notes:
| Step | Tool | Tip |
|---|---|---|
| Heat | Hairdryer | Warm 10–20s |
| Peel | Fingernail | Low angle |
Adhesive on High‑Gloss Painted Walls
Because high‑gloss paint is less forgiving than eggshell or flat finishes, you’ll need to be extra careful when removing adhesive to avoid scratches, clouding, or finish lift.
Identify adhesive types and test a hidden spot first. Use gentle tools, low‑strength solvents, and soft cloths.
- fingernail scraping
- warm soapy water
- microfibre cloth
- adhesive remover wipe
- gentle plastic scraper
Approach for Flat/Matte Painted Walls
When you tackle adhesive on flat or matte paint, go gentle: these finishes hide imperfections but soak up liquids and can show water marks, so test a hidden spot first and use minimal moisture, soft tools, and mild, non‑abrasive cleaners.
Use gentle adhesive removal techniques—soft cloths, plastic scrapers, and diluted soap—working slowly to preserve wall paint protection and avoid sanding or harsh solvents.
Removing Adhesive From Textured or Orange‑Peel Walls
Textured and orange‑peel surfaces need a gentler, more patient approach because their nooks trap residue and vigorous scrubbing can strip paint or tear texture.
Use textured wall techniques to soften adhesive; embrace adhesive removal challenges with care.
- soft cloths
- cotton swabs
- warm soapy water
- gentle solvent dabbed
- low‑sticky scraper
Work slowly, blotting and testing spots first.
Fixes for Hardened Craft, Hot‑Glue, and Superglue
Tackle hardened craft glue, hot‑melt, and superglue with targeted methods that dissolve or soften the bond without damaging paint.
You’ll try craft adhesive options like citrus solvent or isopropyl alcohol for small spots, scraping gently with a plastic scraper, and using acetone sparingly on gloss finishes.
Follow superglue techniques: apply solvent, let soak, lift loosened residue, then clean area and pat dry.
Why to Avoid Heat Guns and Safer Heat Tips
You’ve learned how solvents and careful scraping can free hardened glues, but reaching for a heat gun introduces different risks.
You’ll avoid heat gun risks like paint blistering, toxic fumes, burns, warped trim, and fire.
Try safer alternatives and gentle heat tips:
- warm cloth
- hair dryer (low)
- steamed towel
- heat pack
- indirect sunlight
When to Stop and Switch Methods
If you start to see paint peeling, bubbling, or other visible damage, stop and rethink your approach.
If repeated attempts aren’t lifting the adhesive, don’t keep scrubbing—switch to a gentler method.
Also pause if the wall’s texture changes or feels rougher, since that’s a sign you’re harming the finish.
Visible Paint Damage
When the adhesive lifts paint, flakes, or leaves a dull, rough patch, stop and reassess—continuing can make damage worse.
You’ll need to identify visible paint problems and consider adhesive types before proceeding. If damage appears, switch to gentler methods or consult a pro.
Visualize affected areas:
- tiny white flakes
- blistered patches
- matte, scuffed zones
- sticky residue outline
- torn paint edges
No Improvement After Attempts
If your earlier efforts haven’t improved the adhesive problem—or you’ve started to see paint lift, flaking, or dull patches—stop and reassess before doing more.
You’ll want to identify the adhesive types and consider gentler removal techniques or consult a pro.
Continuing risks permanent damage; switch to tested low-impact methods, test in a hidden spot, or hire a conservator for delicate finishes.
Surface Texture Changes
Watch for subtle changes in the wall’s texture—tackiness, chalky residue, or areas that look stippled or flattened—and stop treating the spot as soon as you notice them.
You’ll switch to gentler texture restoration techniques or wall repair methods to avoid further damage.
Visual cues to heed:
- soft, gummy patch
- powdery, rubbed area
- matte versus glossy mismatch
- tiny pits appearing
- paint lifting
Rinse and Clean Painted Walls After Removal
Although the adhesive is gone, you’ll still need to rinse the area thoroughly to remove residue and cleaning agents that can dull or streak the paint.
Use gentle wall care: wipe with a soft sponge and clear water, then blot dry with a microfiber cloth.
For stubborn residue, apply a mild soap solution, rinse fully, and let the wall air-dry to prevent streaks.
Remove Paint Smudges Caused by Removal
Once the wall’s rinsed and dried, check for paint smudges left by scraping or adhesive removal and address them before they set.
For paint smudge removal and adhesive residue prevention, gently blot, spot-clean, and use fine-grade sanding if needed.
Visualize damage and fix carefully:
- small scuff
- raised tack marks
- faded patch
- thin streaks
- edge chips
Repainting Touch‑Ups: Match Color and Sheen
Before you start touching up, make sure you’ve identified the exact paint color and sheen so your repairs blend seamlessly with the surrounding wall.
Test a small hidden area to confirm color matching, and use the same finish—flat, eggshell, satin, or gloss—to avoid visible sheen variations.
Feather edges, apply thin coats, and let each dry fully before evaluating visibility.
Prevent Future Adhesive Damage
To avoid repeating this repair, use painter’s tape borders to catch adhesive and protect the paint.
Pick low‑tack alternatives like removable strips or poster putty for lighter items so you’re not stripping paint later.
And keep walls clean by wiping away dust and grime regularly to improve adhesion and make removal easier.
Use Painter’s Tape Borders
A simple strip of painter’s tape can keep adhesive off your painted walls and save you hours of cleanup later.
Use tape borders to protect edges, guide placements, and reduce residue. Painter’s tape benefits include easy peel-off and paint-safe adhesion; it complements adhesive removal techniques by preventing mess.
- clean straight lines
- photo frames
- masking trim
- craft projects
- temporary hooks
Choose Low-Tack Alternatives
Painter’s tape helps, but when you want long-term solutions that won’t leave residue or pull paint, pick low-tack adhesives instead.
You’ll protect finishes by using low tack tape for temporary mounts, tabs, or hanging décor.
Consider adhesive alternatives like removable mounting strips, putty, or magnetic solutions for lightweight items.
Test a small area first to verify compatibility with your paint finish.
Regularly Clean Wall Surfaces
If you clean walls regularly, you’ll remove dust, oils, and other residues that make adhesives stick more tenaciously and increase the chance of paint lifting when you peel them off.
You should set a cleaning frequency, use gentle cleaners, and include wall maintenance in chores.
Visualize results:
- Fresh painted surface
- No greasy fingerprints
- Even paint sheen
- Clean corners
- Ready for low-tack tape
Recommended Products and What to Avoid
When choosing products to remove adhesive from painted walls, pick gentle, paint-safe options like citrus-based solvents, rubbing alcohol (70–90%), or a dedicated adhesive remover labeled safe for painted surfaces.
You should prefer adhesive removers that mention paint protection and test first in an inconspicuous spot.
Avoid harsh solvents, acetone, abrasive pads, and strong solvents that strip paint or leave stains.
DIY Cost‑Effective Solutions vs. Store‑Bought Removers
You’ll compare the upfront cost of common DIY fixes like baking soda or vinegar to commercial removers and what you actually get for your money.
Consider how effective and safe each option is for painted surfaces so you don’t strip the finish while removing adhesive.
Also weigh time and convenience—DIY may be cheaper but store-bought products often save effort and speed.
Cost Comparison Overview
Comparing DIY fixes to store-bought adhesive removers helps you decide where to spend your time and money: you’ll weigh budget considerations and product comparisons to pick the best route.
Consider visualizing costs and supplies:
- jar of white vinegar
- bottle of rubbing alcohol
- roll of paper towels
- commercial adhesive remover
- replacement paint can
Choose based on price, availability, and project size.
Effectiveness And Safety
1 clear rule: choose the remover that balances strength with paint safety. You’ll weigh DIY adhesive removal techniques against store-bought removers, apply safety precautions, and test a hidden spot. Compare effectiveness, risks, and surface compatibility to protect finish.
| Option | Strength | Paint Risk |
|---|---|---|
| DIY | Moderate | Low |
| Store | High | Moderate |
| Test | Varies | Minimal |
Time And Convenience
After weighing effectiveness and paint safety, you’ll also want to contemplate time and convenience: DIY methods like oil, heat, or household solvents are usually cheaper but take more time and patience, while store‑bought removers work faster at a higher cost and with greater risk to finishes.
You’ll choose between time saving techniques and convenience tools; imagine:
- Cloth and oil
- Hairdryer and scraper
- Rubbing alcohol
- Commercial gel
- Paint-safe solvent
Troubleshooting: If Paint Peels or Discolors
If the paint peels or discolors after you remove adhesive, don’t panic — this section walks you through quick checks and fixes so you can restore the finish without making things worse.
First, identify paint types and adhesive characteristics to choose solvent or gentle sanding.
Test a small area, patch with matching primer and paint, and let cures fully before rehanging items.
Frequently Asked Questions
Can Adhesive Removal Affect Voc-Sensitive Household Members or Pets?
Yes — adhesive toxicity can affect VOC-sensitive people and pets; you should improve ventilation, use low-VOC or natural removers, keep them away during treatment, and follow household safety practices to minimize exposure and symptoms.
How Long Should I Wait Before Applying Adhesive to Freshly Painted Walls?
You should wait at least two weeks for paint curing, though some finishes need 30 days; check paint specs and adhesive types (removable vs permanent). If unsure, wait longer so adhesive won’t lift or stain.
Can Removing Adhesive Void My Home Insurance or Warranty?
About 30% of home claims relate to maintenance issues, so you should check insurance implications and warranty considerations first. If removal causes damage, insurers or manufacturers might deny claims or void warranties, so document and use approved methods.
Will Adhesive Removal Methods Damage Wallpaper or Decorative Finishes?
Yes — some adhesive types and aggressive solvents can damage wallpaper or decorative finishes, so you’ll test methods on an inconspicuous spot, follow wallpaper care guidelines, use gentle removers, and proceed slowly to avoid harm.
Are There Environmentally Friendly Adhesive Removers That Actually Work?
Yes — you can use natural alternatives and DIY solutions that work: mix citrus or vinegar-based cleaners with baking soda, apply oil (olive or coconut) to soften adhesive, let it sit, then gently scrape and rinse without harming surfaces.
Conclusion
You’ve learned gentle, tested ways to lift sticky residue without wrecking your paint — and by coincidence, the method that worked on your hallway will likely work on the kitchen, too. Test a hidden spot, start with warm soapy water, then try oil or a mild commercial remover if needed, always working gently and patiently. If paint peels, stop and patch before proceeding. Take your time, and you’ll save both walls and money.