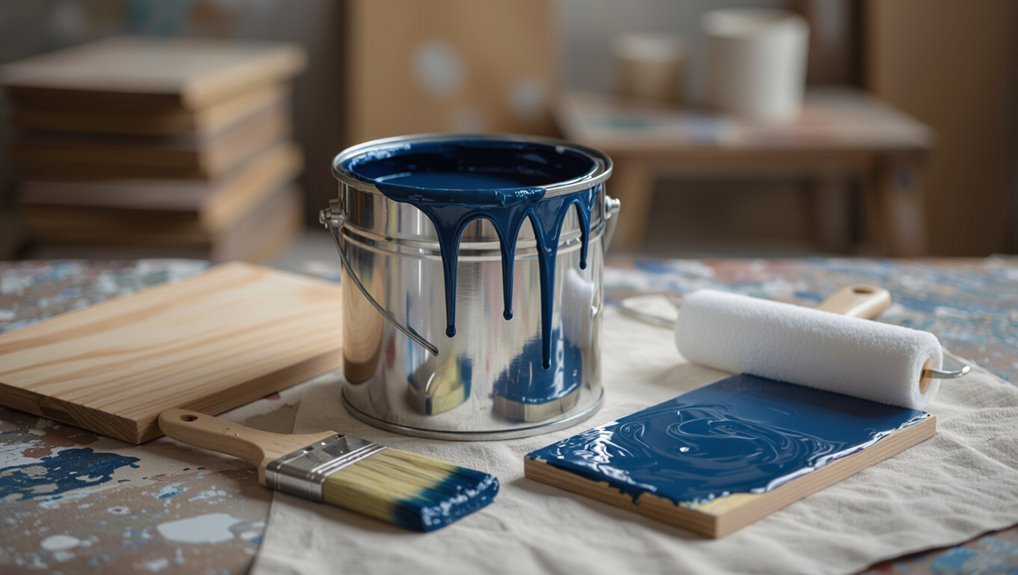
What Is Gloss Paint? Uses, Pros, and Cons Explained
Gloss paint is a high-sheen coating that gives surfaces a tough, reflective finish you can wipe clean easily. You’ll get crisper color, pronounced highlights, and enhanced detail—ideal for doors, trim, cabinets, kitchens, bathrooms, and high-traffic areas. It comes in oil- and water-based formulas, dries hard, and resists scuffs, though it can show imperfections and needs careful prep and application. Keep going to see pros, cons, alternatives, and practical tips to get it right.
What Is Gloss Paint?
Gloss paint is a high-sheen finish that dries to a hard, reflective surface, making colors look sharper and details more pronounced.
You’ll notice gloss paint characteristics like durability, easy cleaning, and pronounced highlights.
You can choose from types of gloss—full, semi, and satin-like variations—depending on sheen and surface needs.
Use it where toughness and crisp detail matter.
Should You Choose Gloss Paint?
Think about how much wear your surfaces get and whether you want an easy-to-clean finish—gloss paint stands up well to scrubbing and lasts longer in high-traffic areas.
Also consider the look: glossy surfaces make colors pop and highlight details but can reveal imperfections.
Weigh durability and maintenance against the bold aesthetic to decide if gloss fits your space.
Durability and Maintenance
Because you’ll clean glossy surfaces more often, durability and maintenance are key when deciding whether to use gloss paint.
You’ll assess long term performance and surface resilience, compare products, and set realistic longevity expectations.
Adopt proper cleaning techniques, monitor maintenance frequency, and watch wear patterns.
Also factor environmental conditions into product comparisons so you choose a finish that meets real-world demands.
Aesthetic Impact
How will a high-sheen finish change the look of your room? You’ll tap into modern aesthetics and current aesthetic trends, using color psychology to enhance mood.
Gloss boosts visual appeal through light dynamics and highlights surface textures, enabling bold contrasts and design harmony. It supports artistic expression across decorative styles, but choose wisely to balance shine with surrounding materials.
Gloss vs. Satin vs. Matte: Which to Pick?
Wondering which sheen fits your space best? You’ll weigh gloss benefits and gloss drawbacks against satin and matte in a clear sheen comparison.
Consider gloss applications, sheen preferences, finish durability, reflectivity factors, surface choices, gloss aesthetics and color variations.
Pick gloss for durable, high-impact areas; satin for balanced resilience and subtle sheen; matte for muted, forgiving walls.
Why Gloss Paint Looks Shiny
Shine comes from the way gloss paint forms a smooth, hard surface that reflects light directly back to your eye.
You notice greater sheen perception because the finish reduces scattering, so light interaction stays directional. That concentrated return makes colors appear crisper and highlights more pronounced.
You’ll see imperfections more easily, but you’ll also get a durable, easy-to-clean surface that visually pops.
The Science of Sheen and Reflectivity
When you look at gloss paint, you’re seeing how light reflection mechanics work: smooth surfaces send more light back in a focused beam, which creates that bright sheen.
Small differences in surface smoothness change how much light scatters versus reflects, so imperfections dull the finish.
Understanding those two factors helps you predict and control how shiny a painted surface will appear.
Light Reflection Mechanics
Because gloss paint has a smooth, hard surface, it reflects light differently than flat finishes, and you’ll notice brighter highlights and clearer reflections on glossy walls and trim. You’ll see light behavior change with angle; surface interaction directs specular reflections, increasing perceived brightness. Use gloss where you want vivid highlights; control glare with placement.
| Angle | Reflection | Effect |
|---|---|---|
| 0° | High | Bright |
| 30° | Medium | Noticeable |
| 60° | Low | Subtle |
| 90° | Minimal | Diffuse |
Surface Smoothness Effects
Smooth, continuous surfaces create stronger specular reflections, so gloss paint shows clearer highlights and mirror-like details while flat paint scatters light and hides imperfections.
You’ll prioritize surface preparation and surface leveling to achieve a smooth finish; texture influence alters paint interaction and finish variation.
During gloss application you’ll monitor sheen consistency, sanding between coats and controlling substrate irregularities for predictable reflectivity.
Oil-Based vs. Water-Based Gloss Paint
Although both oil-based and water-based gloss paints give a shiny finish, they differ in drying time, durability, odor, and cleanup, so you’ll want to pick based on the job and your priorities.
You’ll weigh oil based advantages like hardness and leveling against water based benefits such as low odor, faster drying times, easier cleanup, broader color options, varied sheen levels, lower environmental impact, and specific application techniques for best finish comparison.
Where Gloss Paint Is Most Useful
Gloss gloss paint shines where durability and easy cleaning matter most, so you’ll often find it on doors, trim, cabinets, and high-traffic walls; its hard, reflective surface resists scuffs, wipes clean well, and highlights architectural details while making light bounce in darker spaces.
You’ll choose gloss paint applications for kitchens, bathrooms, stairways, and entryways when gloss finish benefits like stain resistance and longevity matter.
Why Gloss Is Favored for Trim and Doors
Trim and doors take the brunt of daily use, so you want a finish that stands up to knocks, fingerprints, and frequent cleaning.
You’ll choose gloss for trim aesthetics that highlight profiles, door durability that resists scuffs, and color contrast that pops against walls.
Gloss also offers maintenance ease and a finish variety so you can match sheen to style without sacrificing resilience.
Using Gloss Paint on Cabinets: Pros and Cons
When you want cabinets that resist scuffs, wipe clean easily, and reflect light to brighten a kitchen, a high-gloss finish delivers—but it also emphasizes every brushstroke, imperfection, and hinge gap, so prep and application need to be meticulous.
You’ll weigh durability concerns against sheen variations; proper application techniques reduce flaws.
Consider color selection for fingerprints and cabinet maintenance requirements before committing to gloss finishes.
When to Use Gloss on Furniture
If you liked the bright, durable look gloss provides on cabinets, you’ll find similar benefits on some furniture pieces—but the stakes change because furniture sees more contact, varied light angles, and different styles.
You should pick gloss finishes for trim, modern furniture styles, or pieces needing wipeability, balance with matte elsewhere, test color combinations, and use proper protective coatings to prevent scratches.
Gloss Paint for High-Traffic and Public Spaces
If you’re choosing paint for hallways, lobbies, or classrooms, gloss offers strong durability and resists scuffs better than flatter finishes.
You’ll find it wipes clean easily, which cuts down on maintenance time and keeps surfaces sanitary.
Just be aware that constant wear can highlight scratches and shine variations, so appearance under heavy use needs consideration.
Durability And Scuff Resistance
Durability matters in high-traffic and public spaces, and gloss paint often delivers—it stands up to bumps, scrapes, and frequent cleaning better than flatter finishes.
You’ll appreciate its scuff resistance on walls, trim, and doors.
Manufacturers subject gloss formulations to durability testing for abrasion and impact, so you can choose coatings rated for corridors, lobbies, and classrooms without sacrificing appearance.
Ease Of Maintenance
In busy halls and public rooms, gloss paint makes upkeep straightforward because its hard, nonporous surface resists dirt and wipes clean with mild detergent or a damp cloth. You’ll find routine cleaning techniques simple, and long term care is minimal: spot-clean scuffs, avoid abrasive pads, and touch up chips to keep finishes resilient.
| Task | Frequency |
|---|---|
| Dusting | Weekly |
| Spot-clean | As needed |
| Deep wash | Monthly |
| Inspect | Quarterly |
| Touch-up | Annually |
Appearance Under Heavy Use
Gloss surfaces hold up visually in high-traffic areas because their smooth, reflective finish hides small stains and shows fewer dull spots than flat paints.
However, they also highlight scratches, scuffs, and paint loss more readily. You’ll appreciate wear resistance and impact resistance, but frequent cleaning and proper gloss maintenance are required to preserve surface texture, color retention, and overall aesthetic longevity in public spaces.
Indoor vs. Outdoor Gloss Paint Uses
When you choose between indoor and outdoor gloss paint, think about where the finish will face moisture, sunlight, and wear; outdoor formulas resist UV and mildew while indoor versions prioritize low odor and easier clean-up.
You’ll match indoor applications to surface compatibility and low VOCs; outdoor durability fights color fading from light exposure and weather conditions while offering superior moisture resistance and handling environmental factors.
- Use indoors for trim, cabinets, doors
- Pick outdoor for siding, shutters, railings
- Consider substrate and prep
- Expect different VOC and cleanup needs
- Match finish to climate and usage
How Gloss Paint Changes Color Perception
Because a high-sheen surface reflects more light, gloss paint makes colors read brighter and more saturated than flatter finishes.
So you’ll notice stronger highlights and deeper-looking hues depending on viewing angle and lighting.
You’ll experience a perception shift: gloss impact creates color illusion and hue variation through light dynamics, reflective qualities, surface interaction, ambiance enhancement, and pronounced shadow play that alters visual brightness.
How Gloss Highlights Surface Imperfections
That same mirror-like sheen that makes colors pop will also make flaws stand out, so you’ll notice dings, brush strokes, and surface irregularities much more readily than with a matte finish.
Gloss increases imperfection visibility because of concentrated light reflection. You’ll want meticulous prep.
Gloss finishes highlight every flaw by concentrating reflections — meticulous prep is essential to avoid visible imperfections.
Consider:
- Sand carefully
- Fill dents
- Use proper primers
- Apply thin coats
- Inspect under varied light
Durability and Abrasion Resistance of Gloss Paint
Durability is a key reason many pros choose gloss paint: its hard, tightly bonded finish resists scuffs, scrapes, and repeated cleaning better than softer sheens, so you’ll get longer-lasting protection in high-traffic areas. You’ll enjoy abrasion resistance, impact resistance, wear resistance, and improved surface durability when you use proper application techniques and follow maintenance tips against environmental factors.
| Feature | Benefit | Tip |
|---|---|---|
| Abrasion resistance | Long lasting finish | Clean gently |
| Impact resistance | Fewer chips | Use quality primer |
| Wear resistance | Maintains sheen | Recoat as needed |
Gloss Paint: Stain and Moisture Resistance
When you choose gloss paint, its dense, nonporous surface helps repel stains and moisture, making spills easier to wipe away and reducing the chance of water penetration into the substrate.
You’ll get strong stain resistance and a moisture barrier that aids cleaning ease and color retention while supporting finish longevity.
- Consider gloss levels and market options
- Check surface compatibility
- Use proper application techniques
- Assess environmental impact
- Balance look and maintenance
Safety, VOCs, and Health Considerations
Check the VOC content on gloss paint labels, because higher-VOC formulas can release strong fumes during and after application.
You should work in a well-ventilated area and wear a respirator or mask rated for organic vapors when using solvent-based glosses.
Also protect skin and eyes with gloves and goggles, and follow disposal instructions for rags and leftover paint.
VOC Content Levels
1 key thing to know about gloss paint is that its VOC (volatile organic compound) levels can vary widely, and that variation affects both indoor air quality and your health.
You should check emission standards and VOC regulations, choose gloss alternatives or low VOC benefits, and consider environmental impact, health risks, and safe disposal.
- Check labels
- Ventilate
- Prefer low VOC
- Dispose properly
- Compare alternatives
Safe Application Practices
Applying gloss paint safely means planning for ventilation, protection, and minimizing VOC exposure from the start.
You’ll follow application safety steps: guarantee gloss ventilation, use protective gear, and do thorough workspace preparation.
Store cans properly with secure paint storage, follow cleanup procedures to limit spills, consider environmental considerations, and take health precautions like masks and breaks to reduce inhalation and skin contact.
Prep Before Painting With Gloss
Before you lay down gloss, make sure the surface is clean, smooth, and dry so the finish will adhere and shine evenly.
You’ll focus on surface cleaning and dust removal, consider repair techniques, primer application, and paint selection while accounting for environmental factors, lighting considerations, humidity control, safety precautions, and proper drying conditions.
- Clean and degrease
- Vacuum and tack cloth
- Mask and ventilate
- Check humidity
- Choose primer and gloss
Repairing Dents and Gouges Before Gloss Paint
Start by evaluating the damage so you know whether you need a simple filler or a more extensive patch; small dents and shallow gouges take lightweight spackling or polyester filler, while deeper holes or cracked substrate may require backing, wood or metal filler, or even replacement of the damaged section.
After dent removal and gouge filling, sand for surface smoothing so paint adhesion is reliable before you finish.
Best Primers for Gloss Paint
Before you slap on gloss, you’ll want to prep the surface properly to guarantee adhesion and a smooth finish.
Compare primer types—shellac, oil-based, and bonding primers—so you can pick one that suits the substrate and the topcoat.
Apply evenly, follow the manufacturer’s drying times, and sand lightly between coats for the best results.
Surface Preparation Tips
Choosing the right primer matters because it creates the adhesion and smooth base glossy paint needs to look its best.
You should focus on surface cleaning, sanding methods, filler applications, and dust removal before priming.
Consider temperature considerations and humidity effects for curing and gloss compatibility to guarantee paint adhesion and surface smoothing.
- Clean thoroughly
- Sand properly
- Fill imperfections
- Control environment
- Wipe dust free
Primer Types Compared
Primer choice directly affects how glossy paint adheres, levels, and resists imperfections, so you’ll want a primer that matches the substrate and the gloss system you’re using.
For primer types comparison, weigh primer categories like oil, acrylic, shellac, and bonding primers.
Consider primer effectiveness, primer adhesion, primer compatibility with finishes, primer benefits, primer selection criteria, primer application, and primer drying for ideal results.
Application And Drying
When you’re aiming for a true gloss finish, pick a primer that dries smooth and fast so sanding and topcoat application go cleanly. Oil-based and high-build acrylic primers often give the best combination of adhesion and fill for glossy paints, while shellac excels at sealing stains but needs quicker recoats and stronger ventilation.
- Use wet-sanding for smoothness
- Match primer to topcoat
- Note recommended drying times
- Thin coats prevent runs
- Control temperature and humidity
Tools That Produce the Smoothest Gloss Finish
Because a truly glass-like gloss depends as much on application as on paint quality, picking the right tools matters.
A glass-like gloss hinges on technique as much as paint—choose the right tools for flawless application.
You’ll prioritize surface preparation and sanding techniques, choose appropriate brush types or paint rollers, and prefer spray application for ultra-smooth coats.
Use finishing tools and gloss additives to control sheen levels and drying times.
Match application methods to substrate and finish goals for the best result.
Brushing, Rolling, or Spraying Gloss Paint?
Wondering whether to brush, roll, or spray your gloss paint? You’ll choose based on surface preparation, project planning, finish comparison and time.
Consider brush techniques for detail, roller application for flats, and spray methods for speed. Also weigh environmental impact and follow safety precautions.
- Small trim: brush techniques
- Large walls: roller application
- Cabinets: spray methods
- Prep: surface preparation
- Plan: project planning
How to Avoid Brush Marks With Gloss
1 simple change can cut visible brush marks in half: use a high-quality, fine-bristle brush and load it correctly so you lay down a smooth, even coat.
Use consistent brush stroke techniques, smoothing methods and appropriate application tools or roller choice for surface types.
Mind drying conditions, try paint additives sparingly, follow expert tips for finish quality, and blend final touches while paint’s open.
How Many Coats of Gloss Paint You Need
Most projects need two coats of gloss paint to get an even, durable finish: the first coat builds adhesion and hides minor flaws, and the second evens out coverage and boosts sheen.
You’ll use gloss paint techniques and gloss application tips to decide if a third coat’s needed for deep colors or repaired areas.
- Inspect coverage
- Consider color depth
- Check substrate
- Spot-prime repairs
- Finish for durability
Drying Times vs. Curing for Gloss Finishes
Although gloss paint can feel dry to the touch within an hour or two, it doesn’t reach full hardness for days or even weeks.
Sanding Between Coats: When and How
If you want a mirror-smooth, durable gloss finish, you’ll need to sand between coats to knock down dust nibs, level brush or roller marks, and promote adhesion for the next layer.
- Use light sanding techniques for smoothness.
- Wait recommended dry time before sanding.
- Start with ideal grit, then finer paper.
- Clean dust thoroughly.
- Recoat only when surface feels smooth and tack-free.
Temperature, Humidity, and Gloss Application
Because gloss paint cures and levels as it dries, the temperature and humidity in the room directly affect drying time, flow, and final sheen.
You should aim to paint within the manufacturer’s recommended range (usually between about 50–85°F/10–29°C and moderate humidity).
Monitor temperature effects and humidity impact, adjust application techniques—brush, roller, or spray—and control drying conditions to avoid runs, orange peel, or loss of gloss.
Color Matching and Touch-Ups for Gloss Paint
When you’re matching color for gloss paint, work from the finished surface—gloss changes how color reads, so samples that look right in flat or eggshell may appear darker or cooler once sheened.
Use precise color matching techniques and simple touch up methods to blend repairs seamlessly.
- Feather edges
- Match sheen, not just hue
- Test small swatch
- Use thin layers
- Blend with surrounding finish
When Gloss Is a Bad Idea: Surfaces to Avoid
Although gloss paint can brighten and protect, it isn’t right for every surface. You should avoid porous drywall, textured walls, old trim, and unprepared furniture due to gloss limitations, surface compatibility, application challenges, and sheen drawbacks.
| Surface | Reason | Concern |
|---|---|---|
| Porous drywall | Absorbs | Uneven shine |
| Textured walls | Highlights flaws | Hard to coat |
| Unprepped wood | Peels | Poor adhesion |
Alternatives When You Want Less Shine
If you want less shine, consider eggshell, satin, or matte options to match the room’s needs and traffic.
Eggshell gives a soft low-luster that hides imperfections better than gloss. Satin balances durability with a gentle sheen, and matte eliminates glare but can be harder to clean.
Think about where the paint will be used and how much wear it’ll get before you pick one.
Eggshell Finish Option
Because you want less shine without giving up durability, an eggshell finish is a great middle ground between gloss and flat: it softens reflections, hides minor wall imperfections better than gloss, and still wipes clean more easily than a flat coat.
- You’ll like the subtle sheen.
- It suits living rooms and hallways.
- Compare eggshell finish comparison to gloss for cleaning.
- Follow eggshell maintenance tips for stains.
- Touch-ups blend well.
Satin Finish Benefits
When you want less shine than gloss but more durability than eggshell, satin gives you a balanced, slightly lustrous finish that stands up well to everyday wear.
It wipes clean easily, resists scuffs better than flatter sheens, and still hides minor imperfections more effectively than high gloss.
You’ll appreciate satin finish benefits for trim, kitchens, and bathrooms, as satin versatility combines durability with a subtle sheen.
Matte Paint Tradeoffs
Although matte paint gives you the flattest, least reflective surface, it also brings tradeoffs you should know before choosing it for walls or trim.
You’ll appreciate matte finish advantages like hiding flaws and softening light, but understand matte paint limitations: lower durability and harder cleaning.
Consider these practical points:
- Shows stains more easily
- Touch-ups may be visible
- Not ideal for high-traffic areas
- Hides surface imperfections
- Softer, modern look
Cost Comparison: Gloss vs. Other Sheens
Compare prices per gallon first, and then factor in coverage and labor to see the true cost difference between gloss and other sheens. You’ll assess cost effectiveness in a sheen comparison, balancing higher gloss price versus potential fewer coats and easier cleanup. Quick reference:
| Sheen | Price | Coats |
|---|---|---|
| Matte | $ | 2 |
| Satin | $$ | 2 |
| Gloss | $$$ | 1 |
Longevity: When to Repaint Gloss Surfaces
Price and coverage tell part of the story, but how long a gloss finish will last before you need to repaint matters just as much.
You’ll track gloss lifespan and repaint timing by checking wear, adhesion, yellowing, scuffs, and gloss loss. Consider environment and usage; high-traffic or sun-exposed areas need earlier attention.
- Inspect annually
- Clean before evaluating
- Note chips and peeling
- Test adhesion
- Plan touch-ups promptly
Common Mistakes People Make With Gloss Paint
A few common mistakes can turn a glossy finish from striking to sloppy: skipping proper surface prep, using the wrong brush or roller, and rushing drying times.
You should follow application tips, match color and sheen comparison, choose correct paint types, and consider VOC considerations to avoid finish problems and durability issues.
Regular maintenance practices matter, and know stripping methods before major work.
How to Remove or Strip Old Gloss Paint
Before you start stripping old gloss paint, you’ll want to identify the paint type so you pick a compatible removal method.
Decide whether to use chemical strippers, heat, or sanding based on the surface and paint, and gather the right tools.
Finally, prep the area and protect yourself with masks, gloves, and drop cloths to contain dust and fumes.
Assess Paint Type
Start by identifying the type of gloss paint you’re dealing with—oil-based, water-based (latex), or enamel—since that determines the safest and most effective removal method.
Check paint finish and gloss levels, test solvent reaction, and note substrate.
Then:
- Scrape a small area carefully
- Use solvent test patches
- Sand minimally to inspect layers
- Check smell for oil vs. latex
- Photograph results for reference
Choose Stripping Method
Now that you’ve identified the paint type, pick a stripping method that matches the finish and substrate—mechanical, chemical, or heat—and your safety constraints.
Evaluate paint removal techniques by considering effectiveness, speed, and substrate sensitivity. Choose mechanical for durable wood/metal, chemical for intricate profiles, and heat for thick layers.
Always follow safety precautions: venting, PPE, and proper disposal of residues.
Prepare And Protect
Because removing gloss paint creates dust, fumes, and flammable residues, take time to prepare the area and protect yourself and the surroundings before you strip a single inch.
You’ll focus on preparing surfaces, protecting finishes, and safety: choose ventilation, PPE, containment, compatible strippers, and gentle tools to avoid damage.
- Open windows and ventilate
- Wear respirator and gloves
- Seal nearby furniture
- Test stripper compatibility
- Use plastic sheeting
Tips for Painting Small Details in Gloss
When you’re working with gloss paint on small areas, control matters more than speed: thin, steady layers and the right brush will keep edges sharp and prevent pooling. You should focus on surface preparation, detail precision, and brush technique. Use color contrast and edge definition to guide eyes. Keep touch up methods ready for tiny fixes.
| Tool | Purpose |
|---|---|
| Fine brush | Precision |
| Tape | Sharp edges |
Using Gloss Paint in Modern vs. Traditional Styles
After you’ve mastered tiny details and edge control, consider how gloss paint reads in different design languages: modern schemes lean on its sleek reflectivity to amplify minimal lines and contrast, while traditional interiors use gloss more sparingly to highlight moldings and furniture without overpowering ornate textures.
Master tiny edges, then let gloss either sharpen modern minimalism or subtly accent traditional moldings and textures
- Use modern aesthetics to emphasize form and design contrasts.
- Balance traditional charm with subtle application techniques.
- Match color choices to finish variety.
- Check style compatibility with texture considerations.
- Test samples before committing.
Eco-Friendly Gloss Paint Options
When choosing gloss paint, look for low-VOC formulations to cut fumes and improve indoor air quality.
You can also opt for plant-based binders that reduce petrochemical content without sacrificing durability.
Check brands offering recycled packaging to lower your project’s environmental footprint.
Low-VOC Formulations
Although high-gloss finishes traditionally relied on strong solvents, low-VOC gloss formulations now give you the same durable, shiny look with fewer emissions. They replace or reduce volatile organic compounds with water-based binders and safer co-solvents so indoor air quality improves and odor decreases.
- You get low voc benefits: less smell
- You choose eco friendly options
- Cleaning’s easier
- Durability stays high
- Ideal for bedrooms
Plant-Based Binders
Low-VOC formulas cut emissions, but you can reduce environmental impact even more by choosing gloss paints made with plant-based binders. You’ll find plant based alternatives using natural ingredients, offering biodegradable options and lower environmental impact. Check sustainable sourcing and labels to make eco conscious choices for durable, glossy finishes.
| Benefit | Note |
|---|---|
| Biodegradable options | Breaks down more easily |
| Natural ingredients | Fewer toxins |
| Sustainable sourcing | Traceable supply |
| Eco conscious choices | Better long-term impact |
Recycled Packaging Options
Choosing gloss paints packaged in recycled materials cuts waste and makes your project greener without changing the finish you want.
You’ll find brands using sustainable sourcing and eco friendly packaging, so you can prioritize recycled materials and waste reduction while keeping gloss performance.
- Look for recycled materials labels
- Choose suppliers with sustainable sourcing
- Prefer eco friendly packaging
- Check refill options
- Reuse leftover containers
How to Test Gloss Samples Before Committing
Before you commit to a full gallon, test gloss samples on the actual surface and under the same lighting so you see true color, sheen, and texture; small differences in substrate, primer, or light can change how glossy paint reads.
Try different sample sizes, note color variations, run finish tests, and experiment with application techniques—brush, roller, and spray—to confirm durability and appearance before buying.
Case Studies: Trim, Cabinet, and Door Makeovers
We’ll walk through real-world trim, cabinet, and door makeovers so you can see how gloss choices perform in practice.
- You’ll study trim transformations that sharpen rooms and show finish comparisons.
- Explore cabinet upgrades balancing durability and color choices.
- Review door designs that shift curb appeal and style integrations.
- Find makeover inspirations from small to bold project showcases.
- Learn practical tips to replicate results.
Quick Checklist for a Successful Gloss Paint Job
Before you pick up the brush, make sure the surface is clean, sanded, and primed so the gloss will stick and look smooth.
Apply thin, even coats with the right brush or roller and watch for drips and brush marks as you go.
Allow proper drying between coats and follow full curing times before heavy use so the finish hardens and resists damage.
Surface Preparation Steps
Because gloss paint highlights every imperfection, you’ll need a solid prep routine to get a smooth, durable finish.
Follow these focused surface preparation steps before painting:
- Surface cleaning and dust removal to start.
- Filling imperfections, then using proper sanding techniques.
- Priming surfaces suitable for gloss.
- Applying tape and choosing brushes wisely.
- Monitor drying conditions, ventilation needs, and test color samples.
Paint Application Tips
Start with steady, deliberate strokes and keep a wet edge as you work to avoid lap marks and get the mirror-like finish gloss paint promises. Use proper application techniques, light pressure, and quality tools for finish smoothing. Work section by section, overlap minimally, and inspect under good light.
| Task | Tip |
|---|---|
| Roll | Thin coats |
| Brush | Long strokes |
| Inspect | Good lighting |
Drying And Curing
After you’ve applied your final coat with steady strokes and inspected under good light, pay close attention to drying and curing—this determines the durability and gloss.
You’ll monitor humidity, temperature, and airflow, use proper drying techniques, and respect manufacturer curing times to avoid tackiness or blushing.
- Keep area dust-free
- Control humidity
- Use gentle airflow
- Wait full curing times
- Avoid touching
Troubleshooting Common Gloss Finish Problems
When your gloss finish doesn’t look right, troubleshooting it methodically will save time and materials.
Check brush application and texture evaluation first, then address surface imperfections and paint compatibility.
Use finish comparison and sheen measurement to spot issues, note drying challenges and environmental factors, and confirm correct color application.
For ongoing gloss maintenance, fix flaws promptly and follow manufacturer guidelines to prevent recurrence.
Frequently Asked Questions
Can Gloss Paint Be Applied Over Wallpaper Without Removal?
You can, but you’ll need proper wallpaper prep to guarantee paint adhesion; clean, sand glossy surfaces, fill seams, apply a high-quality primer or sealer, and use a compatible gloss paint to avoid peeling and guarantee a smooth durable finish.
How Does Gloss Paint Affect Acoustics in a Room?
Gloss paint increases sound reflection, so you’ll hear more echoes and less absorption; it’ll amplify hard surfaces’ acoustic effects while providing a glossy aesthetic impact, so you’ll trade quieter, softer acoustics for a brighter visual finish.
Will Gloss Paint Yellow Over Time Under Indoor Lighting?
Yes — it can, but not always. You’ll notice yellowing over time depending on color stability and lighting effects; oil-based glosses yellow more, while modern water-based formulations resist it if you control UV and heat exposure.
Can You Tint Gloss Paint at Home Reliably?
Yes — you can tint gloss paint at home, but you’ll need proper color mixing and compatible paint types; don’t guess ratios, use quality tints, stir thoroughly, test samples, and adjust gradually for consistent, reliable results.
Is Gloss Paint Suitable for Radiators and Heating Pipes?
Yes — you can use gloss paint on radiators and heating pipes; it resists heat, cleans easily, and aids radiator maintenance, but you should choose a heat-resistant formulation, prep surfaces well, and follow manufacturer temperature limits.
Conclusion
You’ve learned what gloss paint does and when to pick it — now decide based on durability, shine, and upkeep. You’ll love gloss on trim, cabinets, and doors for a crisp, easy-to-clean finish; avoid it where imperfections show. Test samples in different light, prep thoroughly, and sand between coats. Like an explorer with a pocket watch, trust both modern science and your eye to choose the right sheen for each space.