How to Texture Plaster Walls for a Stylish Finish
You can transform plain plaster walls into stylish focal points by prepping, mixing, applying, and finishing carefully. Clean and repair surfaces, wear protection, and mix small plaster batches to the right consistency. Use trowels, brushes, rollers, combs, or floats to make swirls, knockdown, or linear textures, then prime, seal, and paint for durability. Practice on a scrap board, control timing, and sand or glaze for polish — keep going and you’ll pick up pro tips and refinements.
Quick 6-Step Guide to Texturing Plaster Walls
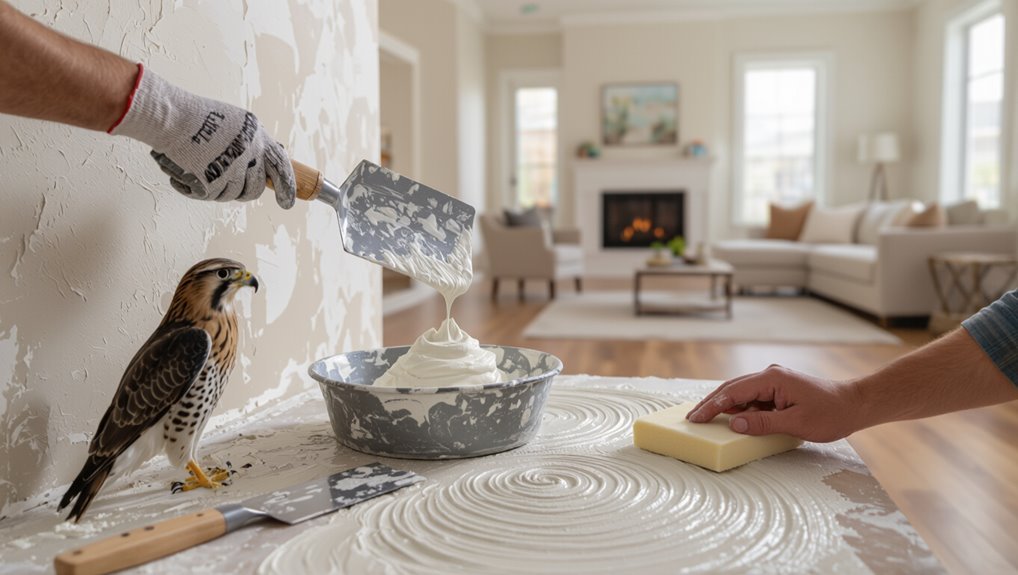
1. You’ll prep the wall, mix plaster, and choose texture techniques suited to your skill.
Apply base coats smoothly, then use trowel, brush, or sponge for desired plaster finishes.
Let layers dry between passes, sand lightly if needed, and seal.
Follow safety steps, work systematically, and practice on scrap board so your final surface looks intentional and consistent.
Where Textured Plaster Works Best
You’ll find textured plaster shines in high-traffic interior areas because it’s more forgiving of scuffs and hides imperfections.
It also makes a strong statement on accent and feature walls, drawing the eye and adding depth without extra trim.
Think about using texture where durability or visual focus matters most.
High-Traffic Interior Areas
Because they hide scuffs and stand up to frequent contact, textured plaster is ideal for hallways, entryways, family rooms, and stairwells where walls take the most abuse.
You’ll get high traffic durability and easier texture maintenance.
Picture common spots:
- Mudroom
- Main corridor
- Playroom
- Open-plan living
- Stair landing
These areas benefit from resilient, forgiving finishes you can touch up quickly.
Accent And Feature Walls
Anyone can make a room pop by using textured plaster on an accent or feature wall; it draws the eye, adds depth, and highlights architectural elements like fireplaces, alcoves, or built-in shelving. You’ll explore textured patterns, color variations, surface finishes, and accent techniques to achieve texture harmony, wall styling, and strong visual impact tied to current design trends.
| Feature | Benefit |
|---|---|
| Pattern | Depth |
| Finish | Mood |
| Color | Contrast |
| Technique | Focus |
Tools You’ll Need for Textured Plaster Finishes
A handful of basic tools will make textured plaster work faster and give you cleaner results:
- Hawk and trowel for smooth application and control
- Joint knives in varied sizes for subtle lines and plaster texture techniques
- Texture brushes and rollers for patterning and creative texture combinations
- Sponge and rasp for softening edges
- Mixing bucket and paddle for consistent plaster consistency
Materials and Plaster Types for Different Textures
Now you’ll look at the common plaster types—gypsum, lime, and cement—and how each affects texture and workability.
You’ll also go over the tools and materials you’ll need for specific finishes, from trowels and hawks to aggregates and primers.
This will help you pick the right combination for the look and durability you want.
Plaster Types Overview
Texture starts with the mix you pick: different plaster materials give distinct working properties and finished looks, so you’ll choose based on the texture you want, the substrate, and how durable the surface must be.
You’ll match plaster types to texture techniques, application methods, surface preparation, finishing touches, decorative elements, environmental impact, historical styles, modern trends, maintenance tips.
- Lime plaster
- Gypsum plaster
- Cement render
- Venetian plaster
- Clay plaster
Tools And Materials
Tools and materials determine how your chosen plaster behaves and what finishes you can achieve, so pick them to suit the texture, substrate, and durability you need. Choose plaster types, eco friendly options, and tools for texture techniques. Prioritize surface preparation, proper mixing ratios, application methods, tool maintenance, and repair strategies to get desired texture finishes and design inspiration.
| Item | Use | Tip |
|---|---|---|
| Trowel | Apply | Clean after use |
| Sponge | Texture | Wet for soft finish |
| Mixer | Blend | Follow ratios |
How to Pick the Best Plaster for Interior Walls
When choosing plaster for interior walls, consider the room’s moisture level, desired finish, and your skill with application, because each plaster type performs differently and demands different techniques.
You’ll weigh plaster types, application techniques, texture finishes, wall preparation, design inspiration, and color selection.
Pick based on durability, ease, and look:
- Lime plaster for breathability
- Gypsum for smoothness
- Cement for damp areas
- Clay for warmth
- Venetian for polish
Safety Gear and Ventilation Basics Before You Start
Safety comes first: before you mix or apply any plaster, put on eye protection, a respirator rated for fine dust and chemical vapors, and gloves that resist alkaline materials, and make sure the room has steady fresh-air flow so dust and fumes don’t build up.
Then set up safety equipment, choose ventilation methods, control plaster dust, use respiratory protection, maintain workspace organization, and mind noise considerations.
Testing Wall Substrate for Plastering
After you’ve set up ventilation and PPE, check the wall substrate to make sure the plaster will bond and hold.
Do a substrate compatibility assessment and simple plaster adhesion tests to confirm surface strength and cleanliness. Look for loose paint, dust, moisture, and incompatible coatings.
Perform spot repairs before texturing.
- scrape loose material
- tape pull test
- moisture meter check
- solvent wipe
- document findings
Preparing Old Plaster and Drywall for Texture Application
1 key step before texturing is prepping old plaster and drywall so the new texture bonds evenly and lasts.
You’ll do a quick wall assessment, surface cleaning, and moisture assessment to guarantee adhesive bonding.
Choose primer application suited to texture compatibility, then pick finish selection that matches substrate and style.
Proper drywall preparation prevents peeling and guarantees an even, durable textured surface.
Repairing Cracks and Holes Before Texturing Walls
Start by inspecting every crack and hole so you know what needs full repair versus quick filling.
You’ll do crack assessment and surface cleaning, choose repair techniques, apply bonding agent, and follow patch preparation.
Focus on hole filling, drying considerations, and priming process to guarantee texture adhesion.
Finish with a smooth finish checklist:
- clean edges
- apply bonding agent
- fill and level
- sand smooth
- prime
Taping and Corner Reinforcement for Textured Finishes
With cracks repaired and surfaces primed, you’ll move on to taping seams and reinforcing corners so your texture lays evenly and won’t crack later. Use proper taping techniques, embed tape, and apply corner protection for durable joints. This step guarantees consistent texture application and thorough wall preparation.
| Tool | Step | Tip |
|---|---|---|
| Tape | Embed | Smooth excess |
| Corner bead | Fasten | Check alignment |
| Compound | Feather | Sand light |
Protecting Floors, Trim, and Furniture From Plaster Mess
Before you start texturing, cover floors with heavy-duty drop cloths or taped plastic sheeting so dust and splatters won’t embed in rugs or hardwood.
Protect baseboards and trim with painter’s tape and thin foam or cardboard guards to keep edges neat.
Move or fully wrap furniture in plastic and seal with tape to prevent plaster dust from settling.
Protecting Floors Effectively
Protecting floors, trim, and furniture from plaster mess pays off—you’ll save time on cleanup and prevent costly damage.
Use solid floor coverings and drop cloths as protective barriers, plan furniture relocation, and set cleanup strategies for spill prevention and dust containment. Organize your workspace before you start.
- Thick canvas drop cloths
- Plastic sheeting taped down
- Cardboard walkways
- Boots-only zone
- Trash bin nearby
Shielding Trim And Furniture
Start by removing small pieces of furniture and hardware you can easily move; for larger items, wrap them tightly in plastic sheeting and secure it with painter’s tape so dust and splatter can’t sneak in.
Next, apply trim protection—use low-tack tape and foam to cover edges.
For furniture shielding, use drop cloths or moving blankets and weight edges to prevent shifting and gaps.
Mixing Plaster: Proportions and Consistency Tips
Mixing plaster properly comes down to the right proportions and a workable consistency—you’ll want a mix that’s fluid enough to spread but stiff enough to hold texture.
Use proper mixing techniques and equipment, mind batch sizes, and plan color blending and texture combinations while considering drying considerations and application timing.
- Measure water-to-plaster ratios
- Use paddle mixer
- Test consistency variations
- Mix small batches
- Note pigment dispersion
How Long to Wait After Mixing Before Application
Because plaster’s working time is limited, you should apply it soon after mixing—typically within 10–30 minutes depending on the product and ambient conditions—so it’s still plastic enough to texture without sagging or setting up too fast.
Monitor mixing times and follow manufacturer guidelines for application intervals. If it skins or stiffens, remix small batches or scrap and remix to maintain consistent texture and bond.
Choosing the Right Trowel, Hawk, and Float for Each Texture
Choosing the right trowel, hawk, and float can make the difference between a crisp, consistent finish and a frustrating mess, so pick tools that match the plaster type and texture you want.
Choosing the right trowel, hawk, and float transforms plastering from messy guesswork into a crisp, consistent finish.
You’ll choose trowel types, master hawk techniques, select float materials, and follow tool maintenance and application tips.
- Narrow trowel for fine texture styles
- Curved float for swirl finishes
- Plastic hawk for light mixes
- Steel float for hard plasters
- Clean storage to prolong tools
Using Brushes, Rollers, and Combs to Create Texture Effects
Now that you’ve picked the right trowel, let’s look at brushes, rollers, and combs you’ll use to shape your finish.
You’ll learn which tool and stroke create specific patterns and how pressure, angle, and timing affect the final look.
With a few simple techniques you’ll control both the pattern and the smoothness of the finish.
Tools And Techniques
Grab the right tools and you’ll control every ripple, swirl, and stipple on your plastered wall.
You’ll pick tools that suit texture techniques and desired plaster finishes, then practice motion and pressure.
Use:
- Stiff brush for directional strokes
- Nap roller for subtle stipple
- Trowel for smooth spread
- Comb for linear grooves
- Sponge for soft texture
Practice to master rhythm and timing.
Pattern And Finish
Texture gives your walls personality, and using brushes, rollers, and combs lets you control that personality precisely.
Choose pattern ideas—stipple, dragged lines, or crosshatch—then practice stroke speed and pressure.
Rollers add subtle nap, brushes carve definition, combs create rhythmic grooves.
Combine finish techniques like sanding or glazing to refine depth and sheen so your plaster looks intentional and lasts.
Applying a Base Coat for Even Texture Adhesion
Before you start rolling or troweling on texture, apply a uniform base coat so the finish will bond evenly and avoid visible seams or patchy spots.
You’ll focus on base coat preparation and texture adhesion techniques to guarantee grip and uniformity.
- Clean and repair substrate
- Prime for porosity
- Mix consistent base coat
- Apply even thickness
- Lightly float for keying
Knockdown Texture: Step-by-Step Application Technique
1 simple sequence will get you a clean knockdown finish: spray or trowel on the texture mix, let it set slightly, then flatten the peaks with a broad knife for a soft, mottled look.
You’ll focus on wall preparation, adjust texture consistency, control application timing, and practice the knockdown technique.
Experiment with texture styles and finish options to match the room.
Sand Finish: How to Create Subtle, Uniform Grain
Choose a sand and plaster mix that matches the grain size and color you want, since that choice controls the finish.
Mix carefully to distribute grit evenly and keep the consistency workable so the texture sprays or trowels on uniformly.
Apply with steady, overlapping strokes and finish by lightly leveling or burnishing to maintain a subtle, consistent grain.
Choosing Sand And Plaster
A fine, even sand is the backbone of a subtle sand finish, so pick a well-graded, angular sand that won’t segregate when mixed with plaster.
You’ll choose sand types and consider plaster ratios for strength and texture.
Visualize results:
- Fine angular grains
- Consistent color
- No clay or dust
- Matched plaster binder
- Test small patch before full application
Mixing For Even Grit
If you want a subtle, uniform grit in your sand finish, measure and mix ingredients precisely so each batch matches the last.
Use consistent mixing techniques, pre-sift sand, and follow exact plaster ratios to control particle distribution.
Test small samples to check grit consistency and adjust water slowly.
This method helps you achieve smoothness without surprises when you texture larger areas.
Application And Finishing Techniques
Start by troweling a thin, even coat of the sand finish onto a small section so you can control texture and spot inconsistencies quickly; keep your wrist steady and your strokes consistent to avoid ridges.
You’ll refine grain with precise application techniques and subtle finishing touches:
- Smooth passes with a clean trowel
- Light cross-hatching
- Consistent pressure
- Feather edges
- Final gentle mist sandblast
Skip Trowel Finish: A Quick Method for Rustic Character
One quick way to give plaster walls rustic character is the skip trowel finish, which you’ll create by dragging a barely loaded trowel across the surface so patches of undercoat peek through.
You’ll choose compatible plaster types, follow wall preparation steps, and use application techniques to achieve texture variations.
This finish style offers rustic charm, rustic aesthetics, design inspiration, and clear texture benefits.
Swirl and Circular Finishes: How to Get Consistent Patterns
Want perfectly even swirls on your plaster walls? Use precise swirl techniques and consistent tool selection to create circular patterns that boost design aesthetics.
Focus on application methods for texture consistency and explore pattern variations and finish types.
- soft brush rotation
- trowel fingertip arcs
- sponge clockwise motion
- overlapping circles
- staggered scale repeats
Venetian and Polished Plaster Basics for Sheen and Depth
Now you’ll learn which materials and tools create the smooth, burnished look of Venetian and polished plaster.
I’ll show application techniques that build thin, overlapping layers and how to burnish between coats for depth.
Finally, we’ll cover finishing steps and how to control sheen so your walls catch light the way you want.
Materials And Tools
Tools matter: to get the characteristic sheen and depth of Venetian or polished plaster you’ll need quality pigments, lime- or gypsum-based plasters formulated for burnishing, stainless steel trowels in varying widths, a hawk or mixing bucket, flexible finishing knives, fine-grit sandpaper or abrasive pads, breathable primers, and clear or pigmented sealers; also gather clean water, mixing paddles, and protective gear so you’re ready to mix, apply, and burnish without interruption.
- Trowels and knives
- Pigments and plasters
- Sanding pads
- Primers and sealers
- Safety gear
Choose materials matching your desired texture techniques and plaster finishes for consistent, durable results.
Application Techniques
With your materials laid out and mixed to the right consistency, you’ll move into how the plaster goes on the wall — the application technique shapes both sheen and depth.
You’ll explore texture techniques and application styles: Venetian trowel strokes, polished passes, and pattern ideas.
Prioritize surface preparation, texture layering, texture contrast, and style integration to follow current texture trends and select appropriate finish variations and finish options.
Finishing And Sheen
Although the base texture defines the wall’s character, the finishing stage determines its sheen and perceived depth. It’s where Venetian and polished plaster techniques really earn their reputation.
You choose finishing techniques and sheen options to control light and mood. Consider:
- Thin wax burnish
- Multi-layer Venetian glaze
- Trowel-polished marble effect
- Satin sealer
- High-gloss polish
Plaster Washes and Limewash: When to Use Them on Walls
When you’re deciding between plaster washes and limewash, focus on the wall’s condition and the look you want: choose plaster washes for subtle depth on smooth or repaired surfaces, and limewash applications for breathable, matte, historic textures on porous walls.
Consider color selection, porosity, and moisture.
Test finish techniques in small areas to confirm adhesion, opacity, and aging behavior before committing.
How to Create Raised Relief and Sculpted Plaster Accents
Start by sketching the design and planning your layers so you know where to build up relief and where to keep the surface flat.
You’ll use raised relief techniques and tools to model forms, then refine edges for sculpted accents. Work wet-on-wet or layer after drying for depth.
Materials and tools:
- Trowel
- Palette knife
- Modeling sponge
- Clay loop
- Fine rasp
Working Around Outlets, Switches, and Fixtures Cleanly
Before you texture, turn off power and cover outlets and switches with tight-fitting tape or plastic to keep plaster out of the boxes.
Cut and press the plaster neatly around fixture bases, using a straightedge or small trowel to create clean edges.
When the plaster’s set, remove covers, patch any gaps with skim coat, and reinstall trim for a professional finish.
Protecting Electrical Openings
One simple rule will keep your plaster job looking professional: protect every electrical opening so you don’t smear plaster into outlets, switches, or light fixtures.
Follow safety precautions, use outlet covers, respect electrical codes, guarantee wire protection, and check fixture alignment.
- Turn power off
- Staple protective tape
- Fit tight outlet covers
- Mask fixtures securely
- Remove excess plaster promptly
Finishing Around Fixtures
When you’re ready to finish around outlets, switches, and fixtures, work deliberately so plaster meets metal or plastic cleanly without clogging openings.
Use thin, controlled passes with a knife or trowel, feather the plaster to the device edge, and keep the face of the cover or trim free of compound so installation stays straightforward and safe.
Check fixture alignment, fixture protection, switch placement, outlet coverage, fixture compatibility; blend edges for texture alteration and finish continuity.
Feathering and Blending Texture at Edges and Seams
Feathering and blending texture at edges and seams keeps the finish seamless and professional, so you’ll want to work carefully and methodically.
Use feathering techniques and blending solutions to achieve edge smoothing and seamless shifts while focusing on texture matching and finishing touches.
- Thin outer coat
- Light tap with knife
- Match pattern density
- Blend into drywall tape
- Soften ridges gently
Timing Your Knockdown Stroke to Avoid Overworking Plaster
Timing your knockdown stroke is all about watching the plaster’s sheen and working confidently—wait too long and the plaster hardens, knock down too soon and you’ll smear the peaks;
so move in when the surface still holds a slight gloss but has begun to mat. Then glide the knife in a single, decisive pass to flatten peaks without overworking the compound.
Use timing techniques and maintain stroke precision.
Achieving Consistent Texture Across Multiple Walls or Rooms
If you want the same look from room to room, plan your workflow so mixes, tools, and environmental conditions stay consistent—match batch size, water ratio, and mixing time, and work at similar temperatures and humidity.
Use texture application strategies and achieving uniformity techniques to replicate patterns. Keep notes, photograph samples, and train helpers.
Use consistent texture techniques, document samples with photos, and train helpers to reliably reproduce patterns across rooms.
- Match batches
- Use same tools
- Control climate
- Photograph samples
- Note timings
How to Fix Common Texture Mistakes Mid-Application
If you notice high spots while the plaster’s still wet, go back with a clean trowel and smooth them out before they set.
When overlap lines appear between passes, feather the edges with light pressure to blend them into the surrounding texture.
Take quick, small corrections so the repair matches the rest of the wall.
Smooth Out High Spots
Spot the high spots quickly so you can correct them before the plaster sets; run a broad knife or flat trowel across the surface to reveal peaks that catch the light, then feather them down with light, even strokes.
Use smoothing techniques for precise high spot removal. Then:
- Scrape raised ridges
- Sand tiny peaks
- Re-wet and smooth
- Lightly re-trowel
- Check with raking light
Blend Overlap Lines
When seams or overlap lines show up while you’re texturing, stop and address them right away so they don’t dry into permanent ridges.
Use texture blending and careful overlap techniques: feather edges with a damp trowel, match texture depth, and work outward for seamless changes.
Focus on edge finishing, pattern continuity, and consistent application to restore visual harmony and keep the finish uniform.
Drying Times: When to Sand, When to Recoat, and When to Paint
Drying plaster properly matters because it determines when you can sand, apply another coat, or paint without ruining the finish.
Drying plaster properly matters — it tells you when sanding, adding another coat, or painting won’t damage the finish.
You’ll monitor drying conditions and ideal humidity to decide next steps. Wait until the surface is firm, not cold to touch.
Use this checklist:
- warm, ventilated room
- stable temperature
- 40–60% humidity target
- firm surface feel
- no visible damp spots
Sanding Textured Plaster Without Flattening the Effect
When you sand textured plaster, focus on preserving the peaks so the pattern stays visible.
Use gentle abrasion—light sanding blocks or fine-grit paper—to smooth ridges without flattening them.
Move with the texture and check frequently so you only remove high spots.
Preserve Texture Peaks
Preserve those peaks by sanding lightly and selectively—don’t attack the high points with a full sweep of the sander.
You’ll preserve texture and enhance aesthetics by targeting rough edges and blending shifts without flattening peak detail. Use fingertip pressure, short passes, and visual checks to keep sculpted character.
- Small orbital sander
- Hand sanding block
- Light grit paper
- Feathered passes
- Visual inspection
Use Gentle Abrasion
After you’ve kept the peaks intact, you’ll want to smooth rough spots without flattening the overall texture.
Use fine-grit sanding pads or a sanding sponge and light pressure to spot-treat high edges. Work in small areas, brush away dust, and repeat sparingly.
These gentle abrasion techniques are essential surface preparation methods to preserve character while creating a clean, paint-ready finish.
Sealing and Priming Textured Plaster Before Painting
Before you paint textured plaster, seal and prime it so the finish sticks evenly and resists stains; this step also prevents suction that can suck up paint and leave blotchy coverage.
You’ll choose sealing methods and primer types to suit porosity and texture. Prep, apply, and inspect carefully.
- clean surface
- patch imperfections
- choose primer
- roll into crevices
- dry fully
Best Paints and Finishes to Enhance Textured Walls
Finish choices make a big difference on textured plaster — they influence how light plays across ridges, how durable the surface is, and how easy it’s to clean.
Choose paint texture and finish options that suit traffic and style; consider sheen levels for highlight control, test color combinations, follow maintenance tips for longevity, and pick eco friendly paints to reduce VOCs while keeping vibrant, durable results.
How to Paint Textured Plaster for Depth and Shadow Play
When you paint textured plaster to emphasize depth and shadow, pick techniques that let light and texture do the work:
When painting textured plaster, choose techniques that let natural light and texture define depth and shadow.
You’ll balance color contrast and lighting effects through careful paint application and finish selection to achieve texture layering and design cohesion.
- dry-brush highlights
- darker troughs
- directional lighting
- satin vs. matte
- measured brush strokes
Applying Glaze and Antiquing to Emphasize Texture
When you pick a glaze, choose one with the right translucency and drying time to suit your plaster’s texture.
Use antiquing techniques like ragging, brushing, or stippling to settle glaze into crevices and highlight raised areas.
Have tools ready—natural-bristle brushes, lint-free rags, and soft sponges—to control application and achieve the look you want.
Choosing The Right Glaze
Although glazing can seem simple, choosing the right glaze will make or break how your texture reads — glossy, matte, translucent, or richly antiqued.
You’ll focus on glaze selection, color options, finish types, application techniques, layering effects and gloss levels to highlight texture.
- Base glaze choice
- Tint and contrast
- Satin vs high gloss
- Brush, rag, or spray
- Thin layered washes
Antiquing Techniques And Tools
Now that you’ve picked the right glaze and finish, it’s time to use antiquing to make the texture sing.
You’ll explore antiquing techniques and glaze options to create vintage finishes and distressed looks.
Focus on layering effects and color washes for texture depth, experiment with finish variations, and choose tool selection—rags, brushes, sponges—for precise, creative applications that highlight plaster character.
Cleaning and Maintaining Textured Plaster Walls Long-Term
Because textured plaster traps dust and grime in its crevices, regular care keeps the surface looking fresh and prevents long-term damage.
Use gentle cleaning techniques and follow maintenance tips for long term care; consider protective coatings and spot-check for common issues before pursuing restoration methods.
Clean with soft brush, mild detergent, vacuum, wipe with microfiber, and schedule annual inspections.
How to Repair Chips, Dents, and Worn Areas in Textured Plaster
Start by evaluating the damage so you know whether you’ll need a quick patch or a more involved repair: small chips and shallow dents can often be filled and retextured in one session, while larger gouges or worn areas may require backing, multiple coats, and careful matching of the existing texture.
For chipped plaster and dent repair, perform patch repair, feather edges, rebuild worn texture, sand to a smooth finish, and follow plaster maintenance for lasting wall restoration of the textured surface.
Cost Breakdown: DIY Versus Hiring a Professional Plasterer
After you’ve assessed the damage and decided on the repair steps, you’ll want to weigh costs before committing — doing it yourself saves labor but takes time and may need tools or materials you don’t already own, while hiring a pro adds expense but brings speed, skill, and a guarantee.
Consider this Cost Comparison:
- DIY Savings: lower Material Costs
- Professional Rates vs DIY
- Labor Expenses avoided or paid
- Time Investment trade-offs
- Warranty and quality assurance
Time Estimate: How Long Each Texture Technique Takes
Before you start, you’ll want to factor in prep and drying time for primers, patching compound, and any taping—these steps can add hours to a project.
The actual application time varies by texture style and room size, from a quick skim coat to several hours for knockdown or heavy stipple.
Finally, account for cure time before sanding, painting, or light use, since some finishes need 24–72 hours to fully set.
Prep And Dry Time
Timing matters: prepping the wall and knowing how long each texture takes to dry will keep your project on schedule.
You’ll consider plaster characteristics and drying conditions before starting. Prep includes cleaning, patching, priming, and masking.
Typical dry windows vary by technique and humidity. Plan buffers for slow cures.
- Clean and dust
- Patch holes
- Prime surface
- Mask trim
- Monitor humidity
Application And Cure Time
Start by choosing the texture method that fits your schedule, since each technique has a distinct application time and cure window you’ll need to plan around. You’ll gauge application timing, cure duration, and sequencing so coats dry properly. Use the table below to compare typical times.
| Technique | Application Time | Cure Duration |
|---|---|---|
| Knockdown | 2–4 hrs | 24–48 hrs |
| Skip trowel | 1–3 hrs | 48–72 hrs |
| Orange peel | 1–2 hrs | 24–36 hrs |
When to Hire a Pro: Complex Textures and Structural Concerns
If you’re tackling elaborate textures or suspect underlying structural issues, hire a pro—these jobs demand specialized tools, experience, and code knowledge that most DIYers don’t have.
You should weigh textured finishes, hiring considerations, professional expertise, complex designs, structural integrity, budget constraints, project timelines, and skill assessment.
- Load-bearing repairs
- Intricate plaster motifs
- Permits and codes
- Time-sensitive schedules
- Warranty and liability
Matching New Texture to Existing Plasterwork Seamlessly
Once you’ve decided whether to hire a pro for complex work, you’ll face the challenge of blending new texture into existing plaster so repairs don’t stand out. Use texture blending techniques, feather edges, and match paint sheen for matching finishes. Test patches first.
| Step | Tip |
|---|---|
| 1 | Sample textures |
| 2 | Feather & sand |
| 3 | Paint match |
Room-by-Room Texture Suggestions and Style Pairings
In the living room, you can choose warm, subtle textures like a fine skip trowel to boost coziness without overpowering furniture or art.
For bathrooms, pick moisture-friendly finishes—smooth, sealed plaster or a light knockdown—that resist mildew and are easy to clean.
We’ll match specific textures to each room’s function and style so your choices look intentional and hold up over time.
Living Room Ambiance Ideas
Want your living room to feel cozy, modern, or somewhere in between? You’ll use textured plaster with soothing colors and ambient lighting to set tone.
Balance plush textiles and decorative accents, plan furniture arrangement for open spaces, add natural elements and art displays for depth.
- Layer soft rugs and throws
- Highlight textured walls with lamps
- Group seating for flow
- Add plants and wood
- Curate wall art
Bathroom Moisture-Friendly Finishes
Shifting from cozy living-room textures to wet-room needs means choosing finishes that handle humidity without sacrificing style.
You’ll pick moisture resistant materials and steam resistant finishes, apply waterproofing techniques behind tiles, and use mold prevention strategies like breathable sealants.
Combine ventilation solutions with humidity control—exhaust fans, timed timers, and smart sensors—to protect textured plaster and keep the bathroom looking crisp.
How Texture Changes Light, Sound, and the Feel of a Room
Texture has a huge impact on how a room feels: rough, matte plaster soaks up light and softens echo, while smooth, glossy finishes bounce light and make spaces feel brighter and more lively.
You’ll control light reflection, sound absorption, room ambiance, texture perception, visual interest, and tactile experience by choosing texture.
- soft, dimpled matte
- polished sheen
- layered Venetian
- coarse stucco
- subtle sanded finish
Eco-Friendly Plaster Options and Low-VOC Finishes
Because the finish you choose affects indoor air quality and long-term maintenance, pick eco-friendly plasters and low‑VOC finishes that suit your climate and lifestyle.
You’ll favor natural plasters and low VOC options using recycled aggregates and non toxic additives.
Choose sustainable materials and green finishes, follow eco conscious practices, and consider eco friendly alternatives that reduce emissions, improve durability, and simplify upkeep.
Weekend Project Checklist: Tools and Materials for One Accent Wall
Tackle one accent wall this weekend with a focused checklist: gather a hawk and trowel or a quality finishing knife, a mixing bucket and drill with paddle, drop cloths and painter’s tape, joint compound or chosen eco‑plaster, primer and low‑VOC finish, sanding blocks, a level, and protective gear (gloves, goggles, mask).
- Trowel and hawk
- Mixing drill and bucket
- Tape and drop cloths
- Sanding tools and level
- Primer and finish
Use these tools for confident Accent Wall DIY Techniques and efficient weekend progress.
Troubleshooting Guide: Peeling, Cracking, and Efflorescence
If your plaster finish starts to peel, crack, or show white powdery deposits, don’t panic—you can usually diagnose the cause and fix it with the right steps.
You’ll perform substrate assessment, improve wall preparation, and apply peeling solutions.
Use moisture control to stop efflorescence treatment needs, follow cracking prevention techniques, and maintain texture durability with routine finish maintenance to prevent recurrence.
Photo Tips for Documenting Texture
After you’ve addressed peeling, cracking, and efflorescence, photograph the texture to document condition and guide future repairs.
You’ll want consistent photo angles and lighting techniques to capture shadow play, color contrasts, texture close ups, and pattern exploration.
- Use multiple photo angles
- Try varied lighting techniques
- Shoot texture close ups and detail shots
- Capture before after comparisons
- Emphasize shadow play and color contrasts
Creative Variations: Combining Textures for Unique Walls
Mixing textures lets you create walls that feel layered and intentional rather than uniform, and you can do it without overcomplicating the process. You’ll use layering techniques and texture combinations to build visual contrast and creative patterns. Seek design inspiration for unique finishes; let artistic expression guide textured harmonies while you experiment confidently.
| Method | Effect |
|---|---|
| Base coat | Depth |
| Accent glaze | Sheen |
| Scrape | Movement |
| Stencil | Pattern |
Next Steps: Planning, Practice Walls, and Scaling Up Your Project
You’ve explored combining textures to create layered, expressive walls; now plan how to turn those ideas into a successful project.
Use planning strategies, focus on wall preparation, and practice techniques to guarantee texture consistency before project scaling.
Try a small test wall, then expand.
- define scope and timeline
- prep and prime surfaces
- test mixtures and tools
- document methods
- scale progressively
Frequently Asked Questions
Can Textured Plaster Be Applied Directly Over Painted Wallpaper?
You can, but you shouldn’t; textured wallpaper often prevents reliable plaster adhesion. You’ll need to remove or sand the wallpaper, apply a bonding primer, and patch seams so the new plaster adheres evenly and lasts longer.
Will Textured Plaster Hide Uneven Electrical Conduit or Piping?
Yes — you can hide uneven conduit or piping using plaster texture techniques; you’ll build up skim coats, feather edges, and apply textured finishes. For larger runs, consider conduit concealment options like boxing or false channels before plastering.
How Do Pets Affect Drying or Curing of Textured Plaster?
Pets can slow curing by depositing pet hair and altering moisture levels; you’ll need to keep animals away, control humidity, clean surfaces before application, and cover drying areas so fur and dampness don’t ruin texture or adhesion.
Can Radiant Floor Heating Interfere With Plaster Adhesion?
Yes — radiant floor heating can interfere with adhesion factors if it creates excessive substrate movement or rapid temperature changes; you’ll control heating systems, allow proper curing, use compatible primers, and maintain stable temperatures for good plaster bond.
Are Textured Plaster Finishes Suitable for Exterior Covered Porches?
Yes — you can use textured plaster on exterior covered porches, but you’ll want mixes and finishes rated for exterior durability and weather resistance, and you’ll need proper substrate prep, seals, and periodic maintenance to prevent moisture damage.
Conclusion
You’ve got the basics and a few creative tricks—now it’s time to try them. Start small with practice walls, pick the right plaster, and remember that “measure twice, cut once” applies to prep too. Expect imperfect first passes; texture gains character with a little practice. Scale up as your confidence grows, document what works, and don’t be afraid to mix techniques. With patience and the right tools, you’ll craft walls that look intentional and last.