What Size Does Paint Come In? Common Can Sizes Explained
Paint comes in lots of sizes to match your job: tiny sample pots for trying colors, half‑pints and quarts for touch‑ups, one‑gallon cans (about 350–400 sq ft per coat) for most walls and trim, and five‑gallon buckets for big rooms or exterior work. Spray cans and contractor pails cover specialty needs. Smaller cans cut waste; gallons give consistency and economy. Keep extras for touchups, and keep going to learn sizing, coverage calculations, and buying tips.
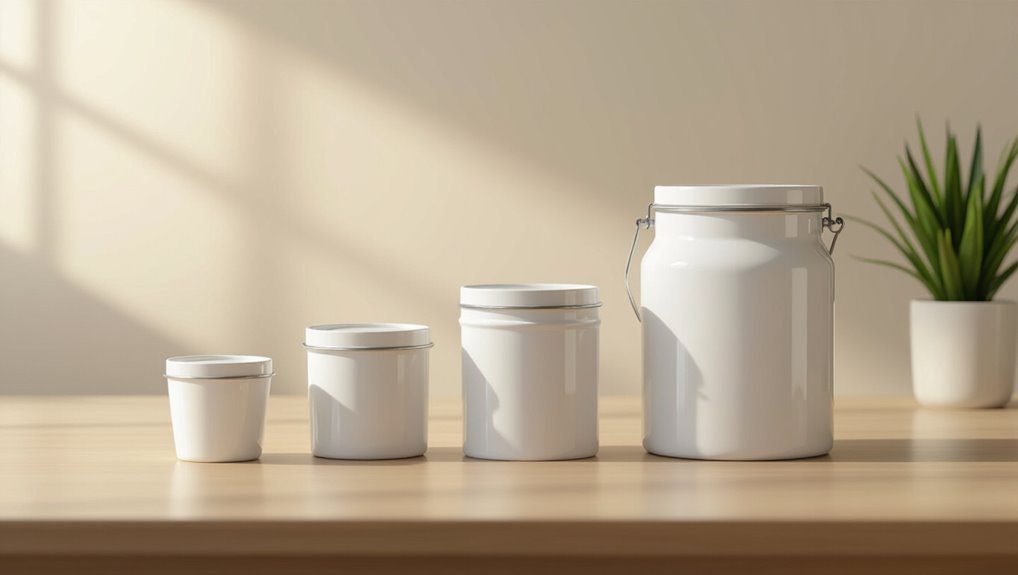
Quick Answer: Common Paint Can Sizes and When to Use Them
When you’re planning a painting project, choosing the right can size saves time and money: quarts and pints work best for touch-ups and small crafts, gallons suit most walls and ceilings, and five-gallon buckets are ideal for large rooms or exterior jobs.
You’ll pick sizes based on coverage, transport, and paint storage needs, and plan responsible paint disposal for leftovers or expired cans.
Common Retail Paint Packaging and Formats
When you pick paint for a project, you’ll most often encounter standard one-gallon cans for walls and trim.
For smaller jobs or touch-ups, quarts and pints give you just enough without waste.
You’ll also see specialty containers—sample pots, spray cans, and contractor-sized pails—designed for specific uses and application methods.
Standard Gallon Cans
Most homeowners and pros reach for the standard one-gallon can because it balances coverage, cost, and convenience.
You’ll get roughly 350–400 sq ft per coat, predictable drying, and easy mixing.
Consider gallon benefits like fewer seams and better color consistency.
If you need less or more, look into gallon alternatives such as 5-gallon buckets or sample pots for touch-ups.
Quart And Pint Options
If a full gallon is more than you need, quart and pint cans give you convenient, lower-cost options for small jobs and samples. You’ll appreciate quart benefits for touch-ups and pint versatility for trims. Choose smaller cans to test colors or finish a single room without waste.
| Size | Typical Use |
|---|---|
| Quart | Touch-ups |
| Pint | Trims |
| Sample | Color test |
| Small projects | Cabinets |
Specialty Containers And Sizes
Because some projects need more than standard cans, specialty containers give you formats made for specific tasks and materials.
You’ll find options for specialty finishes and unique applications — sachets, sprayable cartridges, and tubs.
Retailers offer eco friendly options and custom packaging for gifting or branding, plus professional sizes for contractors and bulk purchasing for large jobs so you get fit-for-purpose supply.
Sample Pots and Test Jars : When to Use Them
When you’re unsure about a color or finish, sample pots and test jars let you try paint on a small trial area before committing to a full can.
Use them to check color matching under your home’s light and next to existing trim or furnishings. They’re also handy for quick, temporary touch-ups where you don’t need a large quantity.
Small Trial Areas
A few well-placed sample pots or test jars can save you time and money by showing how a color, finish, and coverage behave on your actual walls and in your lighting.
You’ll use them for small spaces, color experimentation, quick fixes, texture testing, design inspiration and DIY projects.
Try blending techniques, artistic touches, creative applications and pattern trials.
- Boost confidence
- Reduce risk
- Spark ideas
- Save money
Color Matching Checks
You’ve used sample pots to test finish and texture; now use them to confirm exact color under real conditions.
Apply paint samples beside color swatches and paint chips to assess hue selection, shade comparison, undertone differences and finish variations.
Check color matching in morning and artificial light—lighting considerations affect color psychology perception.
Use small test jars for precise comparisons before committing to larger cans.
Temporary Touch-Ups
Keep a few sample pots and test jars on hand for quick, temporary touch-ups so you can fix scuffs, chips, or small stains the moment they appear.
You’ll save time and avoid anxiety by matching tones fast. Use simple touch up techniques and subtle color blending to hide flaws.
- Calm
- Confident
- Relieved
- Proud
Half-Pints and Quarts: Best for Color Testing and Small Touch-Ups
Small half-pints and quarts are perfect when you want to test a color or fix a few scuffs without committing to a larger can.
You’ll buy small amounts for spot checks, easy color application, and quick drying. Bring samples to compare light, then use precise touch up techniques with a brush or sponge.
They save money and reduce waste for minor fixes.
Pints and Quarts: Trim, Doors, and Minor Repairs
When you’re painting trim or a single door, pints and quarts give you the control and color consistency you need without excess.
You can cover scuffs, chip-outs, and narrow trim runs with a quart or two, and a pint will handle touch-ups or small accent pieces.
Keep a pint on hand for quick repairs so you don’t have to open a larger can for minor jobs.
Trim And Door Uses
Because you’re usually working on narrow surfaces and quick touch-ups, pints and quarts are the go-to sizes for trim, doors, and minor repairs.
You’ll manage trim finishes and door aesthetics with precise application methods, sheen choices, and color coordination.
Use prep techniques and touch up strategies to boost paint durability and follow maintenance tips aligned with current style trends.
- Evoke pride
- Relieve stress
- Inspire confidence
- Spark joy
Small Repair Coverage
One pint or a quart often gives you just enough paint to tackle scuffs, nicks, and dinged-up trim without wasting materials.
You’ll use pints for quick door edges and quarts for slightly larger spots.
Follow simple touch up techniques: clean, sand, feather edges, and apply thin coats.
These repair strategies save time and match finish without mixing large quantities.
Gallon Can Sizes: The Standard for Most Interior Rooms
A gallon can is the go-to size for most interior rooms, giving you enough paint to cover walls, trim, and a second coat in average spaces without juggling multiple small cans.
You’ll estimate gallon coverage from room dimensions, surface texture, paint finish, and color saturation.
Consider application method, environmental factors, and project duration to avoid surprises.
Five-Gallon Paint Buckets: When Bulk Makes Sense
If you’re tackling a large job or want to avoid multiple trips to the store, five-gallon paint buckets give you the bulk you need while cutting cost per gallon and waste from partial cans.
You’ll save with bulk savings, but only if you match quantity to scope.
Use careful project planning: measure surfaces, consider storage and shelf life, and guarantee you can mix and apply consistently.
Specialty Formats: Spray Cans, Brush-In Tubs, and Small Tubs
Bulk five-gallon buckets save money on big jobs, but smaller specialty formats let you handle detail work, touch-ups, and hard-to-reach spots without wasting product.
Buy five-gallon buckets for big jobs; keep small specialty tubs and spray cans for touch-ups and tight spots.
You’ll appreciate spray can advantages for quick sprays, brush tub benefits for controlled edges, and small tub uses for tiny repairs in specialty paint applications.
- Relief
- Pride
- Confidence
- Satisfaction
Coverage Per Can: Typical Square Feet by Size
Coverage estimates help you plan paint purchases and avoid runs to the store mid-project. You’ll typically get about 350–400 sq ft per gallon for smooth interior walls; primers and heavy colors vary.
Remember coverage factors like paint sheen, application methods, surface texture, environmental conditions, and paint absorption—they’ll change yields. Smaller cans scale down proportionally, while rollers and sprayers can alter actual coverage.
How to Calculate How Many Paint Cans You Need
Now that you know typical yields per can, you can figure out how many cans you’ll actually need by measuring your space and doing a few simple calculations.
Use a paint calculator for quick coverage estimation: measure wall area, subtract doors/windows, divide by can coverage, then round up.
- Measure accurately
- Subtract openings
- Divide by yield
- Round up and add extra
Paint Type and Can-Size Choice: Latex, Oil, and Enamel
Choosing the right paint type affects both finish and how much you should buy, so match can size to the product: latex usually comes in quarts and gallons for walls and trim, oil-based paints often show up in smaller cans for detailed work, and enamel is sold in quarts, gallons, or specialty sizes for high-durability jobs.
You’ll weigh latex vs. oil by drying times, sheen levels, paint durability, application tools, environmental factors, and storage solutions.
Buying Paint for Doors, Trim, and Cabinetry
When you move from walls to doors, trim, and cabinets, you’ll pick paint and can sizes with a tighter focus on durability and finish.
You’ll want premium finish options and careful color selection to match hardware and style.
Choose smaller cans for touch-ups or sample runs, and larger quarts for full projects.
- Pride
- Calm
- Confidence
- Relief
Exterior Projects: Picking the Right Can Size and Quantity
For exterior projects you’ll balance coverage, weather resistance, and convenience, so pick can sizes that match surface area and access rather than just buying the biggest tin available.
You’ll estimate square footage, account for surface preparation waste, and choose quantities to suit primers, topcoats, and touch-ups.
Consider seasonal considerations for application windows, and pick finishes that promote color durability for long-lasting exterior finishes.
Cost-Per-Gallon and Cost-Per-Square-Foot Comparisons
Now let’s look at cost-per-gallon and cost-per-square-foot so you can compare true value between can sizes.
You’ll see that a lower price per gallon doesn’t always mean lower cost for your project once coverage is factored in.
Focus on cost per square-foot to pick the size that gives you the best overall price for the area you need to paint.
Cost Per Gallon
One quick way to compare paints is to look at cost per gallon, because it tells you the base price you’ll pay for volume and helps normalize different container sizes and brands.
Use cost analysis for budget planning and quantity estimation; factor project budgeting, price comparison, bulk discounts, quality assessment, brand differences, regional pricing and market trends.
- Shocked?
- Relieved?
- Empowered?
- Confident?
Cost Per Square-Foot
Start by converting paint cost to dollars per square-foot so you can compare brands and container sizes on the metric that matters for your project.
Use coverage estimates and area measurement for accurate project sizing, then factor cost efficiency into paint selection.
Include material costs, labor considerations, environmental impact and perform a price comparison to support budget planning and smart purchasing.
How Finish and Pigment Load Affect Coverage
Because the finish and pigment load determine how light interacts with a surface, they play a big role in how many coats you’ll need.
Your pigment concentration and product formulation affect coverage efficiency and paint absorption; finish types change sheen and hiding.
Mind surface preparation, application techniques, drying time, environmental factors, and whether you use roller versus brush.
- Frustration
- Relief
- Confidence
- Pride
Storage and Shelf Life: Unopened vs. Opened Cans
When stored properly, unopened cans can last several years, but opened paint degrades faster once air gets in.
You should label dates, keep lids tight, and store cans upright in a cool, dry place to maximize can longevity.
For opened cans, minimize air exposure, use clean tools, and consider transferring small amounts to airtight containers.
Regularly check odor and texture for spoilage.
Short-Term Sealing and Long-Term Stacking Tips
When you need to pause a project, press a piece of plastic wrap over the can’s surface and snap the lid back on to create a short-term seal that keeps skinning down.
For longer storage, wipe the rim, replace the lid firmly, and consider transferring paint to smaller airtight containers to reduce air exposure.
If you’re stacking cans, put heavier cans on the bottom, use shelf liners or cardboard between layers, and avoid piling too high to prevent dents and leaks.
Short-Term Seal Methods
If you’re planning to store partly used paint for a few days to a few months, sealing the can properly and stacking thoughtfully will keep the paint usable and prevent messes.
Use temporary seals and effective barriers to slow skinning and spills.
Try these quick methods to protect your paint and calm your worry:
- Press plastic wrap tight.
- Fit lid snugly.
- Add a zip bag layer.
- Store upright.
Long-Term Stack Strategies
Because you’ll likely keep cans for months or years, setting up a safe, organized stacking system preserves paint quality and prevents accidents.
For long term storage, store full cans upright on sturdy shelves, label lids, and use spill trays.
Rotate oldest cans forward for paint preservation, avoid direct sunlight and temperature swings, and employ simple stacking techniques for ideal organization and easy access.
Leftover Paint: Reuse, Recycling, and Disposal Options
Though you mightn’t plan to throw paint away, leftover cans are common—and you’ve got practical options for reusing, recycling, or disposing of them safely.
Use paint reuse and storage solutions, seek donation opportunities, and follow proper disposal for hazardous waste.
Consider eco friendly options and recycling methods via community programs.
- Creative projects
- Donation opportunities
- Recycling methods
- Proper disposal
When to Buy Samples, Quarts, Gallons, or Buckets to Save Money
After you’ve handled leftover paint and explored reuse or donation options, it helps to decide what size to buy for your next project so you don’t end up with excess or run out mid-job.
You’ll buy samples for color selection, quarts for small touch-ups, gallons for rooms, and buckets for large jobs.
Use paint budgeting, project planning, and quantity estimation to minimize cost and waste.
Common Buying Mistakes and How to Avoid Running Out Mid-Job
If you want to avoid mid-job panic, plan paint quantities and purchases before you start—measure surfaces, account for ceilings and trim separately, and factor in surface type and number of coats.
You’ll avoid mismatched batches by noting paint quantity and using consistent mixing techniques. Don’t guess; buy a bit extra and label cans.
- Run out frustration
- Color mismatch dread
- Time-wasting trips
- Budget surprises
Quick Checklist: Pick the Right Paint Can Size for Your Project
Pick the right can size by matching the paint quantity to your room and task: measure square footage, note sheen and surface (ceiling, wall, trim), decide how many coats you’ll apply, and choose a size that leaves a small safety margin so you don’t run out or end up with excess. Use this quick checklist to balance paint color selection and can size importance.
| Calm | Confident |
|---|---|
| Ready | Smart |
| Relief | Pride |
Frequently Asked Questions
Can Paint Cans Be Shipped by Air or Have Shipping Restrictions?
Yes — you can’t freely ship paint by air; aircraft regulations treat it as hazardous materials, so you’ll need proper labeling, packaging, and carrier approval, or use ground transport to avoid refusals, fines, or delays.
Do Can Sizes Vary by Country or Region?
Yes — you’ll see regional variations: international standards exist for labeling and safety, but countries use different can sizes, measurements, and packaging norms, so expect variation when buying paint abroad or importing products.
Are There Legal Labeling Requirements for Paint Cans?
Yes — you must follow labeling standards and safety regulations: you’ll include product ID, volume, ingredients, hazard warnings, VOC info, manufacturer details, and instructions; local laws and industry standards determine exact content and format.
How Do Can Lids Seal to Prevent VOC Leaks?
Like a drumskin tight, you’ll press lids with gasketed lid design and interlocking sealing mechanisms that secure container integrity, meeting VOC regulations; manufacturers engineer precise fits and tamper bands so vapors can’t escape and labels stay compliant.
Can You Mix Different Brands in the Same Can?
You can, but you shouldn’t assume brand compatibility; differing paint formulation, pigments, or binders can cause adhesion, color, or curing problems. Test a small mixed batch first and stir thoroughly to check consistency and performance.
Conclusion
Think of paint cans as seeds: samples are single blooms, quarts and gallons are rows, and buckets are orchards. Choose the right size and you’ll plant just enough color to grow your space; pick too little and you’ll stunt the vision, pick too much and you’ll hoard unused harvest. Match can size to project scale, plan for touch-ups, and let the right container help your idea blossom without waste.