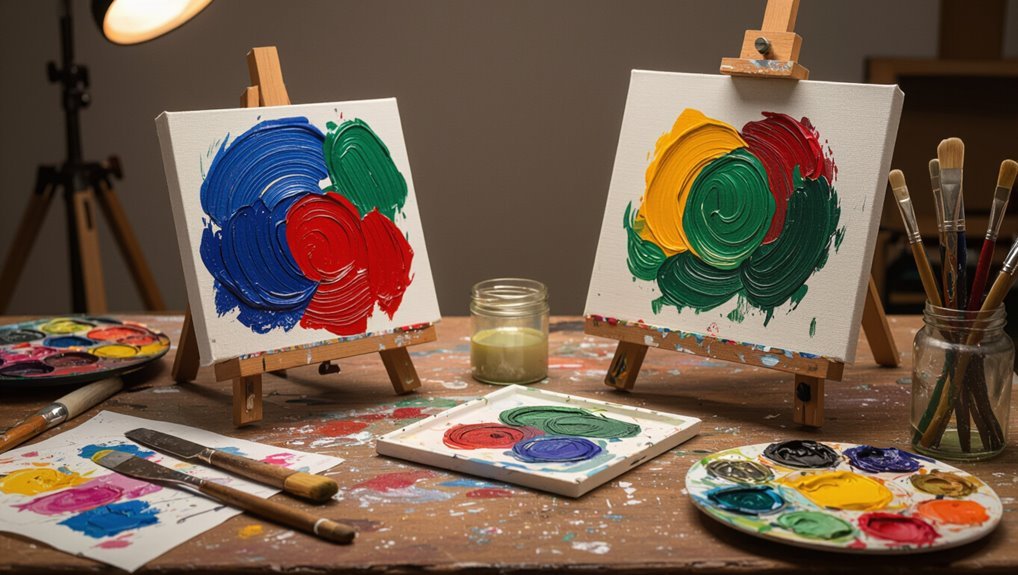
How to Paint Oil Pastels for Rich Artistic Effects
Decide whether you want painterly richness or crisp sketches, then match paper and pastels to that goal. Start with a loose underpainting, layer boldly, and use solvents or fingertips to blend for soft shifts. Add impasto strokes, sgraffito, and palette-knife marks for texture and highlights. Choose lightfast, high-pigment sticks and heavyweight, primed or sealed supports. Protect finished work with sparing fixative or varnish, and try a short series to refine your approach—keep going to uncover detailed workflows and tips.
Identify Your Goal: Painterly Effects vs. Sketching
Before you touch the pastels, decide whether you want loose, painterly effects or crisp, sketch-like lines—each approach needs different marks, pressure, and blending.
If you choose painterly techniques, plan broad strokes, softer edges, and layering for texture.
If you prefer sketching benefits, focus on controlled pressure, sharp edges, and economy of line.
Match tools and paper to that goal.
Quick Start: 5 Steps to Painterly Oil Pastel Results
Follow these five focused steps to get painterly oil pastel results quickly:
Study color theory and oil pastel history for context.
Sketch composition guided by artistic inspiration and visual storytelling.
Apply layering methods, then use blending techniques to unify marks.
Explore texture exploration and color contrasts for drama.
Embrace creative experimentation across artistic styles, refining edges and mood until the piece reads confidently.
Choose Oil Pastels for Rich Color and Lightfastness
When you pick oil pastels, prioritize pigment quality so your colors stay vivid and mix cleanly.
Check lightfastness ratings to know which hues will resist fading over time.
Also consider the binder and texture—firmer sticks give detail while softer ones lay down richer, creamier color.
Pigment Quality Matters
Color is everything: choosing oil pastels with high-quality pigments gives your work richer tones and better lightfastness so your colors stay true over time.
You’ll learn pigment types, color saturation and pigment transparency impacts, and how binder effects alter color mixing and light reflection.
Examine pastel formulation and do a brand comparison so you pick pigments that perform reliably in your work.
Lightfastness Ratings Explained
You’ve already seen how pigment choice affects hue and mixing; now look at how long those colors will last.
You should learn lightfastness definitions and testing methods so you can judge color stability and pigment longevity.
Choose pastels rated for art preservation to reduce fading.
Understanding ratings guides selection, conservation, and fading prevention for durable, vibrant work.
Binder And Texture Choices
Think about binder and texture as the working heart of oil pastels: the binder—usually a mix of waxes and non-drying oils—determines how buttery or firm a stick feels and how well pigments sit on the surface, while texture controls blending, layering, and archival performance.
You’ll choose binder types for desired texture effects, adapt surface preparation, use blending mediums, refine application methods, layering techniques, and color mixing to match oil pastel properties.
Pick Surfaces That Support Layering and Blending
Pick a surface that helps you layer and blend without soaking up the pastel.
Smooth, nonabsorbent papers and primed canvas or board will let the pigments sit on the surface so you can build color and scrub or smudge as needed.
Test a small area first to see how many layers it can handle before texture or adhesion becomes an issue.
Smooth, Nonabsorbent Papers
Several kinds of smooth, nonabsorbent papers work best with oil pastels because they let you layer and blend without the pigments sinking in.
Choose heavyweight papers with a slight tooth that still offer smooth texture so colors sit on the surface. You’ll get clean pastel blending, controlled scumbling, and fine detail.
Test brands for grip and oil resistance before committing to a final piece.
Primed Canvas Or Board
When you want sturdy support for heavy layering and vigorous blending, choose a primed canvas or sealed board that holds oil pastels on the surface without absorbing their oils.
- Select primed surfaces and canvas types with texture choices suited to your layering strategies.
- Use preparation techniques and primers to guarantee surface compatibility and medium interaction.
- Apply application methods and blending techniques to boost color vibrancy.
Set Up a Safe, Ventilated Oil Pastel Workspace
Because oil pastels can release dust and solvents from solvents or fixatives you might use later, set up in a well-ventilated area and keep flammable materials and food away from your workspace.
You’ll monitor air quality, use a fan or open windows, and position work near ventilation.
Practice strict workspace organization: store pastels, rags, and cleaners in labeled, sealed containers to reduce hazards and clutter.
Must-Have Tools: Blenders, Solvents, and Marking Aids
If you want smooth changes, precise details, and clean preparatory marks, you’ll need a small kit of blenders, solvents, and marking aids tailored to oil pastels: stumps, tortillons, blending sticks, odorless mineral spirits for heavier blending (used sparingly), soft brushes for feathering, fixative for final protection, and pencils or charcoal for initial sketches.
- Choose tools by pastel types and tool selection priorities.
- Practice blending techniques with safe solvent use; follow solvent safety.
- Arrange marking aids in your workspace setup for quick access.
Basic Oil Pastel Strokes & Pressure Control
Now that you’ve set up your blenders, solvents, and marking aids, you’ll rely on stroke choices and pressure to turn sketches into finished work.
Practice stroke techniques and stroke direction to control color intensity and texture application. Use pressure variations for subtle mark making and bold pastel layering.
Combine light and heavy touch for precise color blending without overworking areas, keeping edges intentional.
Layer Colors Without Muddying Your Oil Pastels
Start by planning your layers so each stroke builds color instead of smearing it into brown or gray; choose a clear sequence—lights into midtones, then accents—and work with thin, deliberate applications so pigments mix optically rather than physically.
- Consider surface selection and layering methods to preserve vibrant contrasts.
- Use pressure control and texture techniques for desired visual effects.
- Prioritize color mixing, pastel blending, and creative exploration toward your artistic goals.
Blend Smooth Gradients With Fingers, Cloth, and Tools
You’ll get the smoothest gradients by using your fingers for warm, controlled blends and a soft cloth or paper stump for wider, subtler shifts.
Try fingertip pressure and circular motions to melt edges, then switch to a folded cloth or blending tool to even out streaks without overworking the pastel.
Keep a clean cloth or separate stumps handy to prevent muddying colors as you move between areas.
Finger Blending Techniques
Finger blending is one of the quickest ways to soften edges and build smooth gradients in oil pastels, and it gives you direct tactile control over changes.
Use finger techniques and pressure variations to explore blending styles, texture effects, color shifts, application methods, layering techniques, and artistic expression.
- Start light, build layers.
- Smudge edges, preserve highlights.
- Vary pressure for texture.
Tool And Cloth Methods
A few simple tools and a soft cloth can extend the control you get from finger blending, letting you pull smoother gradients, protect delicate highlights, and reach tight spots without muddying colors. You’ll refine blending techniques, control color intensity, and create texture variations using deliberate tool selection and cloth application while advancing layering methods.
| Tool | Purpose |
|---|---|
| Cotton cloth | Soft blending |
| Tortillon | Detail smoothing |
Use Solvents Safely to Soften and Thin Oil Pastels
When you need to soften or thin oil pastels, reach for solvents with care: they’ll loosen the binder and extend blending possibilities, but they can also be harsh if misused.
When softening oil pastels, use solvents thoughtfully—they loosen binders and expand blending, but can damage if mishandled.
Use solvent types wisely, follow safety precautions, control odor, and set workspace setup.
- Application techniques and blending methods.
- Drying times and color mixing.
- Equipment choices and cleanup tips.
Create Thick, Impasto-Like Texture With Pastels
You can build dense, sculptural layers by pressing and stacking oil pastels to create real impasto effects.
Use a little solvent to loosen the stick for smoother blending and to help paint flow between thick strokes.
Then shape and refine the texture with a palette knife or palette blade to get crisp peaks and edges.
Build Dense Pastel Layers
Push thick strokes and layer boldly to build dense, impasto-like textures with oil pastels that catch light and gesture.
You’ll explore color mixing, layering techniques, texture exploration, pastel maintenance, blending methods, color vibrancy, artistic expression, and pastel diversity while working confidently.
- Press and rotate for varied ridges.
- Alternate soft and firm strokes.
- Scrape and reapply to increase depth.
Use Solvent For Flow
Loosen the pastel’s skin with a touch of solvent to make thick, buttery strokes glide and merge into impasto-like passages.
You’ll choose solvent types based on odor and drying speed, use application techniques like brush or cotton swab, and employ blending methods to soften edges or build texture.
Follow safety precautions: ventilate, wear gloves, and store solvents properly to avoid fumes and spills.
Sculpt With Palette Knife
Reach for a palette knife to sculpt oil pastels into bold, impasto-like textures that catch light and add tactile drama to your work.
- Use palette knife techniques and tool selection after surface preparation to layer: impasto effects, layering methods, and color mixing.
- Experiment texture exploration and blending styles for creative applications.
- Maintain tools and practice oil pastel maintenance to preserve sharp edges and vivid results.
Sgraffito & Subtractive Tricks for Bright Highlights
One simple trick for getting razor-sharp highlights with oil pastels is sgraffito — you layer a bright color, press it firmly, then scrape through it to reveal the color beneath or the paper itself. You’ll use sgraffito techniques and subtractive methods to boost highlight enhancement, exploit color contrast, create texture variation, and refine layering strategies.
| Tool | Effect |
|---|---|
| Blade | Crisp lines |
| Stylus | Soft scratches |
| Toothpaper | Grip variation |
Mix Color Intuitively: Warm/Cool Shifts and Values
Decide whether a warm or cool base will carry the mood of your piece, and use that choice to guide every mix.
Shift values smoothly by adding tiny amounts of the opposite temperature or white/black while watching the mark on paper.
Trust your eye—mix by sight, not recipe, until the changes read natural.
Warm Vs Cool Choice
While you mix oil pastels, think of warmth and coolness as tools that shift mood and depth—warm tones advance and grab attention, cool tones recede and calm a composition.
Use warm color schemes and cool color palettes to control emotional impacts and color harmony.
Try these approaches:
- Push foreground with warm accents.
- Soften background with cool washes.
- Balance contrasts for coherent mood.
Shifting Values Smoothly
Having controlled warmth and coolness to push and pull planes, you’ll next focus on shifting values smoothly so colors read as believable light and form.
You’ll use mixing techniques and layering methods to create value gradients and gradient blending, managing tonal shifts and hue variations for subtle color changes.
Work deliberately to preserve color harmony while building depth and believable form.
Mixing By Eye
Start by trusting your eye: you’ll learn to judge warm and cool shifts and subtle value changes without relying on formulas or swatches.
You’ll use color theory while favoring intuitive mixing to achieve tonal balance and visual harmony. Embrace personal style through experimental techniques and layering methods during creative exploration.
- Test warms/cools quickly
- Adjust values by tinting
- Layer for depth and mood
Underpainting With Oil Pastels to Build Depth
Because underpainting sets the tone, you’ll begin by laying down simplified shapes and values with thin, muted strokes to map light, shadow, and temperature before committing to richer color.
This groundwork lets subsequent layers of oil pastel sit and interact, creating a sense of depth and cohesion.
Use underpainting techniques to establish values, then practice careful color layering, glazing, and scumbling to build form and atmosphere.
Combine Oil Pastels With Acrylic, Ink, and Pencil (How)
Mixing oil pastels with acrylic, ink, and pencil gives you control over texture, line, and translucency—so plan which medium will lead: use acrylics for opaque underlayers and fast-drying structure, inks for sharp lines and washes, and pencils for fine detail and edges that oil pastels can’t achieve on their own.
- Layer acrylic, then scumble pastels for rich mixed media effects.
- Use ink for crisp contours before rubbing pastels.
- Add pencil last for precise marks and subtle hatch in oil pastel techniques.
When to Use Fixatives and Varnish for Oil Pastels
You’ll want to know the difference between a light fixative that reduces smudging and a varnish that seals and protects finished oil pastel work.
Apply a fixative sparingly while you’re still building layers to stabilize soft areas.
Then wait until the piece is fully dry and cured before using a final varnish.
Timing and proper spray technique will prevent bloom, tackiness, or cloudy finishes.
Fixative Versus Varnish
While both fixatives and varnishes protect oil pastel work, they serve different roles and aren’t interchangeable; you’ll want a fixative for surface hold and a varnish for long-term sealing and gloss control.
- Choose fixative types by surface compatibility and quick drying times.
- Consider protective coatings: varnish application adds durability and sheen.
- Balance longevity concerns with reversibility—fixatives are lighter; varnishes last.
Timing And Application
Having chosen between a lighter fixative for surface hold and a more durable varnish, you’ll need to decide when to apply each so your oil pastels stay stable and look their best. Use timing techniques: fixative sparingly during layering; varnish after full cure. Choose application methods for spray or brush respectively.
| Stage | Choice |
|---|---|
| Midwork | Fixative |
| Finished | Varnish |
Translate Light and Color From Reference Photos
If you want your oil pastel work to read as believable, start by breaking the photo into simple light and color zones rather than copying every detail.
You’ll train light perception and aim for color harmony by observing values, temperature, and edges.
- Reduce shapes to highlights, midtones, shadows.
- Note dominant hue shifts, not every color.
- Match contrast and soft edges.
Composition Strategies for Bold Oil Pastel Paintings
Start by choosing a strong focal point and arranging other elements to support it—your composition should guide the viewer’s eye with clear paths, contrasts, and pauses.
Use composition techniques to balance visual balance and multiple focal points, employ color harmony and dynamic shapes, and create rhythmic patterns through spatial arrangement.
Aim for clear hierarchy so your work delivers immediate emotional impact.
Step-by-Step Layering Workflow for a Finished Piece
Once you’ve blocked in your composition and established values, build your oil pastel piece in deliberate layers: lay down a thin underpainting to set major colors and tones, refine midtones and edges with more opaque strokes, push depth and texture with scumbled or cross-hatched layers, and finish by lifting highlights and crisp details with the softest touches.
- Use layering techniques and blending methods for color harmony.
- Pursue texture exploration and artistic styles tied to composition tips.
- Practice pastel maintenance and draw creative inspiration.
Common Problems: Blooming, Smudging, and Cracking
Although oil pastels give you rich color and buttery texture, they can also present problems like blooming, smudging, and cracking that wreck a finished piece if you don’t address them early.
You’ll learn blooming solutions like controlled solvent use, smudging prevention through fixative layers and careful handling, cracking remedies via flexible supports, and application techniques that boost pastel durability and long-term stability.
Care and Storage: Conserve Your Pastels and Tools
When you finish a session, clean your hands and tools and store pastels in a cool, dry place to prevent breakage, contamination, and color transfer.
Use pastel preservation techniques and tool organization tips to keep sets sorted and wrapped.
- Label and separate by color or hardness.
- Wrap fragile sticks in tissue.
- Keep tools in closed, labeled boxes away from sunlight.
Practice Projects and Next Steps: Building a Series
If you want to grow as an oil pastel artist, start by planning a short series of related pieces that let you explore a single idea, palette, or technique across multiple works.
Choose clear series themes, map project organization, and pursue color exploration to test personal style.
Embrace creative challenges, document artistic evolution, build thematic connections, and refine visual storytelling as you complete each piece.
Frequently Asked Questions
Can Oil Pastels Be Thinned and Used Like Traditional Oil Paint?
Yes, you can thin oil pastels slightly and use them like paint, but you’ll mostly rely on oil pastel techniques and blending methods; you’ll mix with solvents or oil mediums carefully to preserve texture and color intensity.
How Do I Photograph Oil Pastel Artwork for Portfolio Printing?
You’ll use diffuse, even lighting techniques and neutral background choices to avoid glare and color shifts; position lights at 45° angles, shoot perpendicular to the artwork, use a tripod, shoot RAW, and calibrate colors before printing.
Are There Non-Toxic Solvents Safe for Use Around Pets and Children?
Right off the bat, you can use safe alternatives like odorless mineral spirits substitutes and water-mixable mediums; they’re pet friendly options, so you won’t sleep on it—just guarantee good ventilation and store products out of reach.
Can Oil Pastels Be Applied to Flexible or Wearable Textiles?
Yes — you can apply oil pastels to flexible or wearable textiles; you’ll need textile applications suited for fabric, fixatives, and pastel techniques like blending and layering, and you’ll test durability, washability, and flexibility before wearing.
How Do Museums Conserve and Restore Oil Pastel Paintings?
Museums conserve and restore oil pastel paintings by stabilizing surfaces, using conservation techniques like consolidation and protective varnishes, and employing restoration methods such as careful inpainting, surface cleaning with solvents, and humidity-controlled storage to prevent damage.
Conclusion
You’ve got the basics and a clear path forward—now grab your pastels and get to work. Treat each layer like a chess move: deliberate, strategic, and with an eye for the long game (no dial-up patience here). Experiment with surfaces, solvents, and pressure; learn from setbacks like blooming or cracking; and build a cohesive series. With consistent practice and proper care, your oil pastel work will deepen in color, confidence, and impact.