How Do You Paint Crown Molding Like a Pro
You can paint crown molding like a pro by prepping thoroughly, cleaning and sanding the trim, filling gaps with caulk, and priming for even adhesion. Tape adjacent surfaces, use an angled sash brush for cutting in, and a mini roller for flat faces, keeping coats thin and wet‑edged to avoid lap marks. Back‑brush drips, sand lightly between coats, and choose semi‑gloss or satin for durability. Keep working methodically and you’ll pick up pro tips as you go.
Quick Step-by-Step: Paint Crown Molding
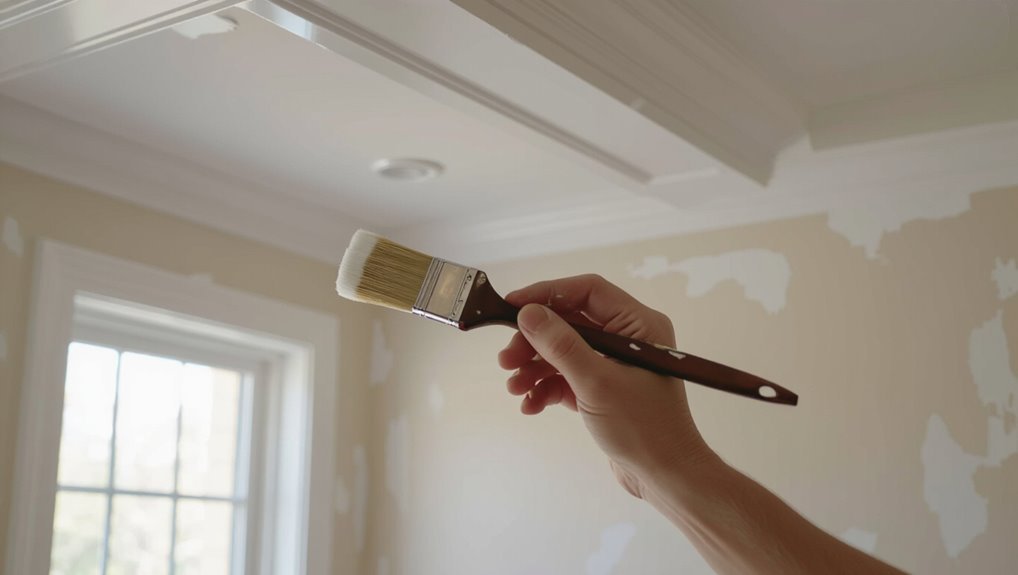
Gather your tools and prep the room so you can paint crown molding efficiently; start by cutting in the edges.
Then use a steady brush and light pressure to pull paint along the molding’s profile, back-brushing any drips before they dry.
Work systematically, sanding and priming as needed.
Choose a compatible paint color for your crown molding styles, tape adjacent surfaces, and let each coat dry fully.
How to Choose Paint and Finish for Crown Molding
Wondering which paint and finish will make your crown molding stand out without showing brush marks? You’ll choose paint types for durability and sheen, and weigh finish options: semi-gloss for wipeability, satin for low glare, or high-gloss for trim pop. Picture choices:
| Look | Use |
|---|---|
| Satin | Subtle light reflection |
| Semi-gloss | Easy cleaning |
| High-gloss | Sharp detail highlights |
How to Pick Brushes and Tools for Crown-Molding Work
Now that you’ve picked the right paint and sheen, pick tools that’ll let the finish look its best: the right brush, angled sash brush, mini-roller, and quality painter’s tape make clean lines and smooth coverage possible.
For crown-molding work, focus on brush types — polyester for latex, natural for oil — and smart tool selection: trim knives, small rollers, and a steady hand will speed precise results.
How to Prepare Existing Crown Molding for Paint
Before you start painting, clean the molding thoroughly to remove dust, grease, and cobwebs so paint adheres properly.
Patch dents and cracks with wood filler or caulk, then sand smooth for a seamless finish.
Finally, sand and prime the edges and any bare spots to guarantee even coverage and durability.
Clean Surface Thoroughly
Start by removing dust, cobwebs, and any loose paint so the new finish will stick evenly and look professional.
Wipe molding with a damp microfiber cloth, use mild detergent for greasy spots, and rinse.
For intricate profiles, soft-bristled brushes reach crevices.
These cleaning techniques are essential to effective surface preparation, ensuring paint adheres and you get a smooth, consistent result without trapped debris.
Repair Dents And Cracks
Once the molding’s clean, check for dents, cracks, and nail pops so you can fix them before painting.
Use appropriate filling materials and proven repair techniques to restore profiles.
Follow these steps:
- Remove loose debris and old caulk
- Drive and countersink popped nails
- Apply filler in thin layers
- Shape to match the molding
- Let cure fully before finishing
Sand And Prime Edges
1. You’ll sand edges smoothly using fine-grit paper and feathering sanding techniques to blend repairs into surrounding molding.
Wipe dust thoroughly, then apply a quality primer along corners and profiles.
Follow priming tips: thin, even coats, brush into crevices, and sand lightly between coats for a uniform surface.
Let primer cure fully before painting to guarantee adhesion and a crisp finish.
How to Protect Walls and Ceilings Before Painting Crown Molding
Before you paint crown molding, protect the area by covering floors and furniture with drop cloths or plastic sheeting.
Use painter’s tape and a thin paper overlap to shield adjacent walls from brush strokes and splatters.
For clean lines at the ceiling, mask along the molding edge carefully so paint won’t seep onto the ceiling.
Cover Floors And Furniture
Start by clearing as much furniture as you can from the room and laying down drop cloths or plastic sheeting over the floor and any remaining pieces.
You’ll want overlapping seams taped down so dust and paint splatter can’t creep underneath. Use floor protection and furniture covering to keep surfaces safe.
- Secure edges with tape
- Fold cloths at corners
- Cover vents and radiators
- Wrap small items
- Replace removed furniture afterward
Protect Adjacent Walls
Two simple precautions will save you hours of cleanup: mask the junctions where molding meets the wall and ceiling, and block off nearby surfaces that you don’t want painted. For paint protection and wall preparation, use low-tack tape and thin plastic. Work steadily, pressing edges. Table example:
| Item | Purpose |
|---|---|
| Tape | Protect edges |
| Plastic | Cover surfaces |
| Brush shield | Prevent splatter |
| Drop cloth | Catch drips |
Mask Ceiling Edges
Now that you’ve protected the walls and nearby surfaces, focus on masking the ceiling edge where the crown molding meets the ceiling.
Use careful masking techniques and thorough edge preparation to get a crisp line. Follow these steps:
- Clean the seam
- Use painter’s tape
- Press tape firmly
- Extend drop cloths
- Seal gaps with caulk
When and How to Fill Gaps and Caulk Crown-Molding Seams
Gaps in crown molding are normal where corners meet or where trim meets uneven walls and ceilings. You’ll want to caulk and fill them before painting so the finish looks seamless.
Use gap filling compounds for larger voids and paintable latex caulk for seams. Apply smooth beads, tool joints with a damp finger or caulking tool, and wipe excess promptly for neat, professional results.
How to Sand Crown Molding for a Flawless Surface
After you’ve filled seams and caulked joints, sanding is the next step to create a perfectly smooth surface that accepts paint evenly.
You’ll use proper sanding techniques and sanding tools to refine edges and feather filler. Work light, follow profiles, and clean dust before priming.
- Start with 120–150 grit
- Blend filler seams
- Sand along profile
- Use a sanding block
- Vacuum dust
Masking, Taping, and Bleed-Proof Techniques for Crisp Lines
When you’re ready to paint, masking and taping set the stage for crisp, professional lines; pick the right tape, apply it tightly along edges, and plan for bleed-proofing before the first coat.
Use masking techniques like pressing edges with a putty knife, sealing seams with a thin bead of caulk, and employ bleed proof methods—primer or paintable sealant—to prevent color seepage for sharp results.
How to Cut In Crown Molding Without Brush Marks
When you cut in crown molding, use a sharp angled brush and steady wrist to control the stroke and avoid visible bristle marks.
Keep paint thin and work wet edges so each pass blends seamlessly into the next.
With the right cutting technique and paint consistency, you’ll get a crisp, brush-mark-free finish.
Proper Cutting Technique
Master precise cuts to keep paint lines crisp and skip brush marks along crown molding profiles.
You’ll focus on measuring angles, selecting saws, and steady technique to avoid tear-out and gaps.
- Mark exact angles on molding
- Use a miter or compound saw
- Cut with support and slow feed
- Test-fit before final trimming
- Sand bevels lightly for snug joints
Seamless Paint Application
Although crown molding lives at the junction of wall and ceiling, cutting in without brush marks takes steadiness, the right tools, and a methodical approach; start by sealing joints and choosing a high-quality angled sash brush or a tapered synthetic brush for smooth paint laydown.
Practice a seamless technique: load brush lightly, use steady strokes, feather edges, and lightly back-roll to blend colors, avoiding overworking the wet paint.
Bracing and Two-Person Methods for Long Molding Runs
Long runs of crown molding need steady support, so you’ll usually brace sections and work with a partner to keep joints tight and seams aligned.
Use proper molding support and clear team coordination to prevent sagging and gaps.
Use sturdy supports and clear teamwork to keep long molding straight and gap-free.
Tips:
- Position temporary braces every 3–4 feet
- Clamp joints firmly
- Have one hold while one fastens
- Communicate measurements
- Check level frequently
How to Roll, Brush, and Level Paint for Even Crown-Molding Coverage
Start by cutting in with a steady brush along the top and bottom edges of the molding, then use a small roller on the flat faces to lay down an even base coat; this combination lets you control edges and quickly cover larger surfaces while minimizing brush marks. Feather brush strokes, roll lightly, and level seams for smooth texture effects and clean color combinations.
| Tip | Tool | Result |
|---|---|---|
| Cut-in | Brush | Sharp edge |
| Fill | Roller | Even coat |
| Smooth | Light pass | Seamless finish |
Drying, Recoat Timing, and How Many Coats You Need
Once your cut-in brushwork and rolling are smooth, you’ll need to let the paint dry to the touch before deciding on a second coat.
Dry times vary by paint type, temperature, and humidity, but most latex paints feel dry in 30 minutes to an hour and need 2–4 hours before recoating; oil-based paints take longer, often 6–8 hours or more.
- Check manufacturer’s drying times
- Wait proper recoat intervals
- Apply thin, even coats
- Use two coats for durability
- Add a third only for coverage
Fix Common Problems and Finish-Care for Painted Crown Molding
If you spot drips, brush marks, or uneven coverage after the paint dries, address them right away so small issues don’t become big repairs.
Lightly sand flaws, feather edges, and spot-prime before recoating. For finish durability, use a durable topcoat and avoid abrasive cleaners.
Follow simple maintenance tips: dust regularly, touch up chips promptly, and inspect seams yearly to prevent moisture damage.
Frequently Asked Questions
Can I Paint Crown Molding Without Removing Light Fixtures and Switches?
Yes — you can, but you’ll need care. Use brush techniques for precise edges, secure masking tips like painter’s tape and plastic, remove bulbs/plates if needed, and work slowly to avoid drips and accidental paint on fixtures.
Will Paint Color on Molding Affect Perceived Ceiling Height?
Yes — ceiling colors on molding affect perceived height. If you paint molding and ceiling the same lighter shade, you’ll blur boundaries and use visual tricks to make ceilings feel taller; contrasting trim drops perceived height.
Is It Okay to Paint Crown Molding With Existing Lead-Based Paint?
Like handling a live wire, you shouldn’t paint crown molding with existing lead-based paint without precautions. You’ll follow lead paint safety protocols, perform careful crown molding preparation, and hire pros for testing and safe encapsulation or removal.
How Do I Paint Crown Molding on Textured or Popcorn Ceilings?
You’ll prep popcorn ceiling preparation by sealing and masking, then use textured ceiling techniques: a flexible putty knife and caulk to fill gaps, a roller with nap suited to texture, and a small brush for crisp molding edges.
Can I Use a Paint Sprayer Indoors for Crown Molding?
Yes — you can use a paint sprayer indoors for crown molding, but you’ll need paint sprayer tips, masking, tarps, ventilation, and PPE; follow indoor safety practices, work in short bursts, and test spray patterns first.
Conclusion
You’ve learned the steps to smartly seal, sand, and smooth crown molding so paint performs professionally. Stay steady with the right rollers, reliable brushes, and recommended finishes; resist rushing and recoat only when dry. Protect walls, practice precise placement, and prep properly to prevent pesky problems. With patience and proper protection, your project will present pristine, polished results—consistent, careful, confident craftsmanship creates clean, classy crown molding that commands attention.