How to Paint Walls With a Sprayer for a Smooth Finish
You can get a factory-smooth wall fast by choosing the right sprayer, tip, and prep. Wash, patch, sand, and mask the room, then strain and thin paint to the manufacturer’s specs. Test the spray on cardboard, hold the gun 6–12 inches away, overlap passes 50%, and keep a steady speed to avoid drips and lap marks. Clean the sprayer immediately and use respirator and ventilation for safety — keep going and you’ll find detailed tips and troubleshooting next.
Can I Paint Interior Walls With a Sprayer?
Curious if you can paint interior walls with a sprayer? You can, and you’ll enjoy sprayer benefits like speed, even coverage, and fewer brush marks.
Address common misconceptions: it’s not just for pros or large spaces, though prep and technique matter. You’ll need masking, thinning for some models, and practice to control overspray and achieve a smooth, professional finish.
When to Choose a Sprayer vs. Rollers or Brushes
When you’re weighing options, pick a sprayer when speed, ultra-smooth coverage, and getting into nooks quickly matter—use rollers for textured walls, small rooms, or when you want less prep and waste, and grab brushes for trim, corners, and touch-ups where control is essential.
You’ll choose based on sprayer advantages like uniform finish and speed, balancing roller disadvantages such as overspray and poor texture match.
Types of Paint Sprayers for Walls
When you’re choosing a sprayer for walls, you’ll want to compare airless models, which push thicker coatings fast, with HVLP units that give finer control and less overspray.
Also decide between corded power for continuous work and cordless for easier maneuvering and portability.
Understanding these trade-offs helps you pick the right tool for your project.
Airless vs. HVLP
Pick the right sprayer and you’ll save time and get a smoother finish; two common choices are airless and HVLP systems, each suited to different jobs and skill levels.
You’ll choose airless for fast coverage and superior sprayer efficiency on large walls; pick HVLP when finish quality and control matter, especially for thinner coatings or detailed areas where overspray must be minimized.
Corded vs. Cordless
If you need uninterrupted power and steady output for long sessions, go with a corded sprayer; cordless models give you mobility and convenience for quick jobs or tight spots.
Choose corded power when tackling whole rooms or thicker coatings; you’ll avoid battery swaps and maintain consistent flow.
Pick cordless convenience for touch-ups, trim, or hard-to-reach areas where a cord would hinder you.
Best Nozzle Sizes for Interior Wall Spraying
You’ll want the right tip size to get even coverage without overspray or clogging.
Match the tip to your paint’s viscosity—thicker paints need larger tips, thinner paints need smaller ones.
I’ll explain common tip ranges and how to pair them with different interior wall paints.
Optimal Tip Sizes
Choosing the right tip size is essential because it controls paint flow, spray pattern, and finish—use too small and you’ll get slow coverage and clogging; use too large and you’ll get overspray and drips.
You want ideal tip sizes for common spray techniques. Pick:
- 0.013–0.015 for thin primers
- 0.015–0.017 for latex
- 0.017–0.019 for thicker coatings
- 0.019+ for heavy textures
Matching Paint Viscosity
Match the sprayer nozzle to paint viscosity to get even coverage and fewer clogs.
You’ll check paint consistency and use a viscosity measurement like a Zahn cup or flow cup to pick the right tip. Thinner paints need smaller nozzles; heavier or textured finishes require larger sizes.
Test on cardboard, adjust flow, and recalibrate based on spray pattern and surface absorption.
What Paints and Primers Work With Sprayers
When you’re deciding what to spray, pick paints and primers labeled for sprayer use or those that thin easily—these flow smoothly through the nozzle and reduce clogging.
Use these tips for paint types, primer options, sprayer compatibility, and surface preparation:
- Water‑based latex for walls
- Oil‑based for durability
- Bonding primers for slick surfaces
- Universal primers when unsure
How to Tell If Paint Needs Thinning for Spraying
Now that you’ve picked paints and primers suited for spraying, you’ll need to know whether a specific can will pass through your gun as-is.
Check label viscosity recommendations and use a viscosity cup or toothpick test: paint should flow smoothly without stringing.
If it sputters or orange-peels, thin gradually per manufacturer instructions.
Adjust spray technique—pressure and tip size—after thinning for consistent coverage.
Essential Tools and Supplies for Spraying Walls
Before you start spraying, make sure you’ve got the right safety gear, paint and thinner, and a properly set-up sprayer with its accessories.
You’ll need a respirator, goggles, gloves and drop cloths to protect yourself and the area.
I’ll walk you through selecting compatible paint and thinner and checking the sprayer, nozzles, hoses and filters so you’re ready to go.
Safety Gear Essentials
Because spraying atomizes paint and creates fine mist, you’ll need the right protective gear to keep yourself safe and comfortable throughout the job.
Choose safety gear and protective equipment that fit well and are rated for paint particles. Essentials include:
- Respirator mask (P100 or N95)
- Safety goggles
- Disposable coveralls
- Nitrile gloves
Use them consistently and replace as needed.
Paint And Thinner
Pick a paint designed for spraying—typically a low-VOC, water-based latex or a solvent-based enamel—so you get the finish and durability you want without clogging the sprayer.
Check manufacturer recommendations for paint types and proper thinning techniques. Thin only as needed to match viscosity specs, use the recommended thinner or water, and strain paint before loading to prevent blockages and guarantee even atomization.
Sprayer And Accessories
A good sprayer and the right accessories make the job faster and give a professional finish, so choose equipment that matches your paint type, room size, and experience level.
You’ll need sprayer maintenance tips and essential sprayer accessories to keep work smooth.
- Spray gun and tip sizes
- Masks and protective gear
- Filters and extension wands
- Cleaning kit and spare seals
Protect Floors, Furniture, and Fixtures From Overspray
Before you pull the trigger, cover everything you don’t want painted: lay down drop cloths on floors, wrap furniture in plastic, and mask off light fixtures and trim with painter’s tape and paper.
Use protective coverings and secure edges to prevent paint seeping underneath. Position larger sheets to block airborne mist and work from far to near for effective overspray prevention and quick cleanup.
Mask Trim, Outlets, and Windows Like a Pro
Before you start spraying, tape off trim edges tightly so paint won’t creep under the mask.
Cover outlets and switches with removable outlet covers or tape and use plastic sheeting to seal windows.
Take your time on these prep steps — they’ll keep lines crisp and cut cleanup way down.
Protecting Trim Edges
When you’re spraying walls, take the time to mask trim, outlets, and windows carefully so overspray and drips never touch them; good masking saves hours of cleanup and keeps your finish professional.
Use precise tape methods and edge sealing to protect trim edges.
- Clean surface
- Apply low-tack tape
- Fold paper over edges
- Press seal firmly
Securing Outlets And Windows
After you’ve firmly sealed trim edges, shift your focus to outlets and windows so overspray can’t sneak under the tape or paper.
Remove plates, cover sockets with outlet masking film or folded tape, and secure tightly.
For window protection, use painter’s plastic and tape the edges flush to the frame.
Check seals, overlap materials, and keep ventilation while spraying for a clean, professional result.
Prepare Walls: Cleaning, Repairing, Sanding
Start by giving your walls a thorough inspection and cleaning so the paint will stick evenly and look professional.
You’ll follow wall surface preparation steps, use effective cleaning techniques, apply repair methods, and choose sanding options.
Do these four tasks:
- Wash with detergent.
- Fill cracks and holes.
- Sand patched areas smooth.
- Remove dust before priming.
Set Up Your Sprayer for a Wall Job
Gather your equipment and set up the sprayer in a well-ventilated, protected area so you can work efficiently and avoid overspray. Check filters, hoses, and tip; mix and strain paint per manufacturer. Complete wall preparation: mask trim, cover floors, and remove fixtures. Use this quick reference:
| Item | Action |
|---|---|
| Filter | Inspect/clean |
| Hose | Secure |
| Tip | Install |
| Paint | Strain/mix |
Test Spray Pattern and Adjust Fan Width
Before you paint a wall, test the spray pattern on a piece of cardboard or scrap to confirm coverage and adjust the fan width for even application.
Hold the gun at your planned distance and trigger a few short bursts. Then widen or narrow the fan until the pattern’s edges are smooth and the center isn’t overloaded.
- Spray a test pass.
- Inspect for stripes.
- Adjust fan width.
- Repeat until even.
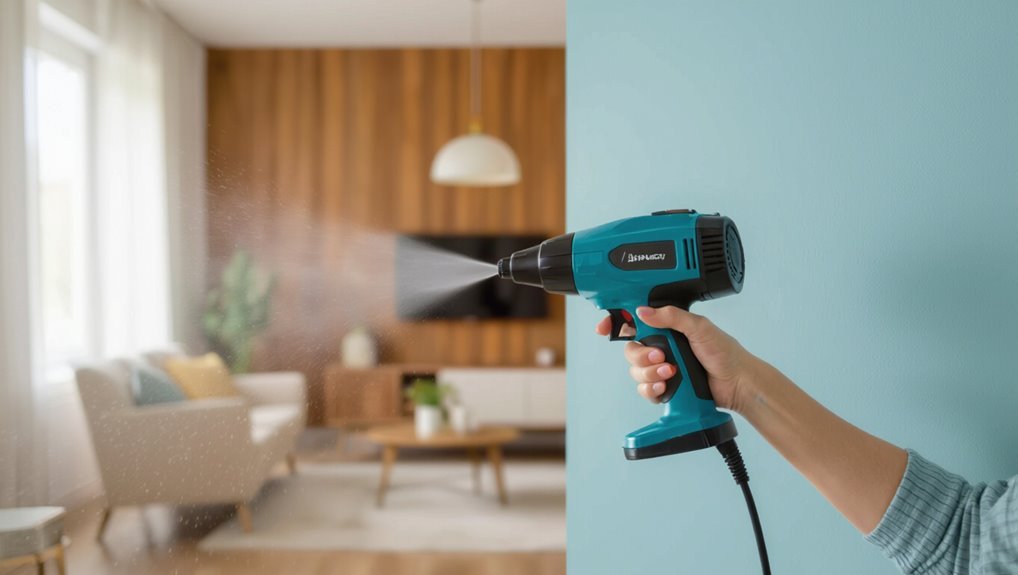
Hold the Gun and Maintain Spray Distance
Keep the sprayer steady and hold the gun perpendicular to the wall at a consistent distance—usually 6 to 12 inches for most handheld units—so your coat goes on even and without runs.
You’ll grip firmly, support with your other hand if needed, and move smoothly. Maintain the recommended spray distance, use a controlled spray technique, and avoid sudden motions that create drips or uneven buildup.
Use Speed and Overlap for Even Coverage
Once you’ve got a steady hold and maintain the proper distance, focus on your motion and overlap to get an even coat.
With a steady hold and proper distance, concentrate on smooth motion and consistent overlap for an even coat.
You’ll use steady speed control and simple coverage techniques to avoid streaks.
- Move at a consistent pace.
- Overlap each pass by 50%.
- Keep strokes level and parallel.
- Adjust speed for thicker or thinner coats.
Spray Edges and Corners Without Cutting In
Keep the sprayer a steady distance from the wall so your fan pattern stays consistent.
Aim slightly away from the corner and feather the edge into it with short, overlapping passes. That way you’ll cover corners cleanly without cutting in by hand.
Maintain Consistent Distance
Maintain a steady distance—typically 6 to 12 inches depending on your sprayer and nozzle—so the paint lays down evenly and you avoid heavy buildup at edges and corners.
Use consistent technique and distance control as you work.
- Hold gun steady
- Move at even speed
- Overlap passes slightly
- Adjust distance for trim
Feather Spray Into Corners
1 simple technique lets you spray right into corners without cutting in by brush: feather your spray.
You’ll angle the gun slightly away, start wide, then narrow the fan as you approach edges. Use light, overlapping passes so the sprayer technique blends into the wall, ensuring even corner coverage without buildup.
Finish with a soft cross-pass for uniform texture.
Feather and Blend Passes to Avoid Lap Marks
When you spray a wall, feathering and blending each pass prevents visible lap marks by softening the edges of fresh paint into the previous wet area; you’ll use feathering techniques and blending methods to keep changes invisible.
Follow these steps:
- Overlap passes slightly.
- Reduce nozzle pressure near edges.
- Move steadily, not stopping.
- Cross-hatch lightly for even buildup.
How Many Coats and Dry Times Between Them
Most jobs need two coats, and you’ll wait between them just long enough for the first to dry to the touch and lose its tack; check the paint can for recommended recoat times, but plan on 1–4 hours for water-based paints and 4–24 hours for oils or alkyds depending on temperature and humidity.
You’ll assess drying conditions, maintain ideal humidity, and apply the second coat evenly.
Spraying Textured or Porous Wall Surfaces
Textured or porous walls need a bit more prep than smooth surfaces, so you’ll clean, repair, and prime any areas that could soak up extra paint.
You’ll also adjust your sprayer—use a heavier tip, slower pass speed, and overlap more—to guarantee even coverage without drips.
Test on a small area first so you can fine-tune settings and technique before tackling the whole wall.
Surface Preparation Tips
Because porous and heavily textured walls can gobble up paint and create uneven coverage, you’ll want to prep them more thoroughly than smooth surfaces.
Do surface cleaning and wall repair first, then follow these steps:
- Vacuum or brush to remove dust.
- Wash with mild detergent; rinse well.
- Patch cracks and deep pits; sand smooth.
- Apply a high-quality primer suited for porosity.
Adjusting Spray Technique
Now that you’ve cleaned, patched, and primed, adjust your spray technique to match the wall’s porosity and texture so you’ll get even coverage without wasting paint.
For porous or textured walls, slow your pass, overlap more, and hold a consistent spray distance to allow penetration.
Use thinner coats, check for mottling, and repeat as needed rather than blasting on heavy layers.
Avoid and Fix Runs, Sags, and Drips
One clear way to prevent runs, sags, and drips is to control how much paint you put on the wall: spray light, even passes, keep the nozzle moving, and overlap each pass slightly so paint builds up uniformly instead of pooling.
- Inspect for sags immediately.
- Smooth small runs with a dry brush.
- Sand and feather cured drips.
- Adjust technique for run prevention and drip correction.
Control Overspray and Haze on Nearby Surfaces
Before you start spraying, mask trim, windows, and floors with tape and protective sheeting so nearby surfaces stay clean.
Use cardboard or a shield for edges and plants, and work from the masked area outward to catch stray mist.
Adjust your spray pattern and pressure to narrow the fan and reduce haze when you’re close to other surfaces.
Masking And Shielding
Masking and shielding let you control overspray and haze so nearby surfaces stay clean and sharp; you’ll use masking techniques and shielding methods to protect trim, floors, furniture, and fixtures.
Follow these steps:
- Tape edges tightly.
- Apply plastic sheeting.
- Use drop cloths for floors.
- Install temporary shields at fixed heights.
Adjust Spray Pattern
With your surfaces masked and shields in place, you’ll want to adjust the sprayer’s pattern to control overspray and haze on nearby surfaces. Test spray, refine fan adjustment for width, and change spray technique—angle, distance, and speed—to minimize drift. Stay steady, overlap evenly, and protect edges.
| Hope | Calm | Confidence |
|---|---|---|
| Care | Skill | Pride |
| Trust | Ease | Focus |
| Calm | Warm | Safe |
| Joy | Rest | Secure |
Troubleshoot Common Sprayer Problems on the Job
Troubleshoot sprayer hiccups quickly so you don’t lose time or create a mess: most jobsite problems—clogs, uneven spray, sputtering, or overspray—come from simple causes like wrong tip size, thick paint, air leaks, or dirty filters.
Troubleshoot sprayer hiccups fast—clogs, sputtering, or overspray usually stem from simple causes like wrong tip, thick paint, air leaks, or dirty filters.
You can usually fix them on the spot with a few targeted checks and adjustments.
- Check tip, filter, hose.
- Thin paint per specs.
- Tighten fittings, test air.
- Clean nozzle, purge lines.
Use sprayer troubleshooting techniques to handle common spray issues fast.
Estimate Paint Quantity and Coverage for a Room
Once you’ve sorted sprayer issues and confirmed an even spray, you’ll want to figure how much paint the room actually needs so you don’t run out or waste material.
Measure room dimensions, subtract windows/doors, and calculate wall area.
Check paint coverage per gallon on the can, factor in porosity and number of coats, then buy slightly extra for touch-ups.
Work Faster on Large Projects Without Sacrificing Finish
Scale up smartly: plan a consistent spray pattern, stage your work area, and use the right equipment so you can cover large walls quickly without sacrificing an even finish.
You’ll boost project efficiency and maintain a crisp spray technique by prepping and pacing.
- Mask and stage
- Choose appropriate tip/pressure
- Work in controlled passes
- Keep overlap consistent
Repaint and Touch Up Sprayed Walls Later
If you need to repaint or touch up sprayed walls later, plan your approach so new coats blend seamlessly with the original finish.
Match paint sheen and color, feather edges with light passes, and use same spray settings for consistent texture.
For small fixes, practice touch up techniques on scrap material.
Keep records of spray maintenance and paint mix for future touch-ups.
Clean and Store Your Sprayer After Use
After finishing your touch-ups, don’t leave paint sitting in the sprayer—cleaning it now prevents clogs and preserves spray quality.
Follow these cleaning techniques and storage tips:
- Flush with appropriate solvent until clear.
- Disassemble nozzle and filter; scrub gently.
- Dry parts thoroughly to prevent rust.
- Reassemble and store in a dry, labeled case away from temperature extremes.
Dispose of Spray Paint and Solvent Waste Safely
Because leftover paint and solvents can harm your health and the environment, you should never pour them down drains or into the ground; instead, collect them in their original containers or in clearly labeled, sealed receptacles and take them to a local hazardous-waste drop-off or community paint-recycle program.
For proper spray paint disposal and solvent waste management, follow local rules, use approved transport, and record drop-off receipts.
Safety Tips: Ventilation, PPE, and Fire Risks
Proper disposal keeps toxins out of your home, but you also need to control fumes and other hazards while you’re spraying.
Use ventilation strategies, don PPE essentials, and watch for fire hazards.
Follow these sprayer precautions:
- Open windows, run fans.
- Wear respirator, goggles, gloves.
- Remove ignition sources.
- Store solvents in sealed, labeled containers.
When to Hire a Pro for Spray-Painted Walls
When should you call in a pro? If your project budget is tight, weigh pros and cons: hire pros for complex surfaces, high ceilings, tricky trim, or time-sensitive jobs to guarantee even coverage and minimal overspray.
Do it if you lack equipment, experience, or insurance.
DIY suits small, simple rooms; otherwise, a pro saves time and costly mistakes.
Frequently Asked Questions
Can I Use a Garden Hose to Thin Paint for Spraying?
No — you shouldn’t use a garden hose to thin paint. You’ll ruin paint thinning balance and clog or damage your sprayer. Follow manufacturer’s sprayer techniques and use recommended thinners for safe, consistent spray performance.
Will Spraying Paint Mask Severe Odor From Previous Smoke Damage?
Like a bandage on a wound, spraying alone won’t hide severe smoke smell. You won’t rely solely on sprayers; odor sealing and thorough surface preparation are necessary, plus primers or cleaners, to truly stop persistent smoke odors.
Can I Spray-Painted Walls in Very Humid Conditions Without Issues?
You can, but humidity effects can slow drying and harm paint adhesion, so don’t spray in very high humidity. Wait for drier conditions, use fast-drying formulas and dehumidifiers, and guarantee proper ventilation to avoid problems.
How Long After Spraying Can I Hang Heavy Pictures or Mirrors?
You can hang heavy pictures or mirrors after paint’s fully cured—usually 7–30 days depending on drying times and humidity; follow weight limits of anchors or studs, and wait longer if the finish still softens under pressure.
Does Spraying Affect Wall-Mounted Electronics or Wi‑Fi Signals?
No, spraying won’t affect Wi‑Fi signals or electronics directly, but you’ll want sprayer maintenance to avoid overspray and clogging. Protect electronics by covering or removing devices, sealing vents, and letting paint fully cure before reconnecting.
Conclusion
You can paint interior walls with a sprayer—it’s faster, smoother, and ideal for large or textured surfaces. You can choose a sprayer when you want speed over detail, select the right HVLP/airless model for coverage, and pick the correct nozzle and paint type for adhesion. You can prep, mask, and thin paint properly, clean and store equipment carefully, and dispose of waste safely. You can wear PPE, ventilate, and call a pro when the job’s complex.