What Type of Roller for Ceiling Paint? Best Options Explained
Pick a roller nap and material that match your ceiling texture and paint type for fast, even coverage with less splatter. For smooth ceilings use a 1/4″–3/8″ low-pile or foam roller; for light texture go 3/8″–1/2″ polyester or microfiber; for heavy texture or popcorn choose 3/4″–1″ lambswool or high-nap microfiber. Use synthetic covers for latex and natural blends for oil-based paints. Keep an extension pole and anti-shed cover handy—more tips follow if you want to optimize results.
Best Roller for Ceilings: Quick Picks by Surface
Different ceilings need different rollers, so pick one that matches the texture you’re painting.
You’ll choose a roller surface that suits smooth, orange-peel, or popcorn ceilings. For smooth surfaces, use a low-pile roller and a steady roller technique to avoid lines.
For textured ceilings, pick a higher-nap roller and a dabbing technique to fill crevices efficiently without splatter.
Roller Basics: Nap, Pile, and Why It Matters
Because the nap (or pile) determines how much paint a roller holds and how it lays down color, picking the right one matters more than you might think.
You’ll choose nap based on surface roughness: longer nap grabs more paint, shorter nap gives smoother finish.
Consider roller texture for even coverage and improved paint adhesion, and match pile to ceiling irregularities for efficient, consistent results.
What Nap To Use for Smooth Ceilings?
For smooth ceilings, reach for a short-nap roller—typically 1/4″ to 3/8″—since it holds just enough paint to lay down a thin, even coat without leaving texture or roller marks.
Consider smooth ceiling considerations and proper roller application techniques:
- Use a high-density foam or short microfiber nap.
- Load lightly and roll evenly.
- Overlap passes to avoid lap marks.
What Nap To Use for Lightly Textured Ceilings?
If your ceiling has a light texture—like a subtle orange peel or light knockdown—choose a 3/8″ to 1/2″ nap roller so it can pick up paint and settle into shallow grooves without overloading the surface.
You’ll get even coverage on a light texture and maintain a consistent ceiling finish. Use synthetic blend naps for latex paints and keep pressure gentle to avoid splatter.
What Nap To Use for Heavy Texture and Popcorn?
When you move from light textures to heavy textures or popcorn ceilings, switch to a thicker nap so the roller can reach deep crevices without leaving bare spots.
You’ll improve coverage and speed with proper roller selection for varied ceiling finishes.
- 3/4″–1″ nap for heavy texture
- Use deep‑pile rollers on popcorn ceilings
- Backroll to press paint into crevices
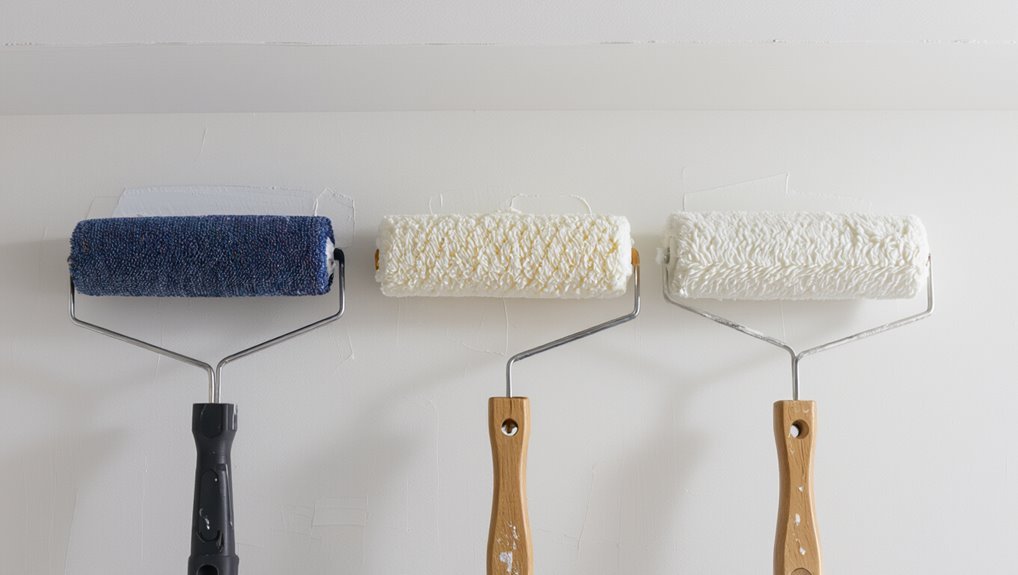
Roller Materials Compared: Polyester vs. Microfiber vs. Lambswool
Although all three roller covers can handle ceiling paint, choosing between polyester, microfiber, and lambswool comes down to surface and paint type:
Polyester works well with smooth to semi‑smooth ceilings and latex paints.
Microfiber offers superior pickup and a smoother finish on moderately textured surfaces.
Lambswool excels at holding lots of paint for heavy textures and popcorn ceilings.
You’ll weigh polyester durability, microfiber absorbency, lambswool softness, and simple roller maintenance.
Foam Rollers: When To Use Them for Ceilings?
Ever wondered whether foam rollers belong in your ceiling-paint toolkit? You’ll use them when you need smooth finishes, minimal texture, and quick touch-ups.
Foam roller benefits include even coverage on flat ceilings and less splatter. Choose foam for satin or semi-gloss paints. Consider ceiling paint techniques and surface prep.
- Smooth finish
- Low texture
- Fast touch-ups
Roller Core Size & Frame Length for Ceilings
If you’ve decided a foam roller suits your ceiling work, the next choice is core diameter and frame length—these determine reach, stability, and how the nap rides over the surface.
Choose a thicker roller core size (1.5–2 inches) for less flex and consistent paint laydown, and pick a longer frame length to reduce arm strain and wobble when reaching high ceilings.
Roller Width: Speed vs. Control on Ceilings
When you’re painting a ceiling, narrow rollers give you the control to work around fixtures and edges without slop.
Wider rollers cover more area fast, so they cut down on time in open, unobstructed sections.
You’ll often get the best result by switching between widths—precision where you need it and speed where you don’t.
Narrow Rollers For Precision
Choosing a narrower roller—typically 4 to 7 inches—gives you tighter control over paint application on ceilings, letting you work around fixtures, trims, and uneven surfaces without splattering or overshooting.
You’ll enjoy narrow roller benefits and precision painting when tackling detail work.
- Easier edge work
- Less splatter near lights
- Better control on textured areas
Wide Rollers For Speed
Because wider rollers cover more surface with each pass, you’ll finish ceiling sections much faster than with narrow options.
You get wide roller advantages like fewer lap marks and reduced trips across the room, boosting ceiling painting speed. They suit large, flat ceilings when you want efficiency.
Expect less precision near edges, so plan for touch-ups with a smaller tool where needed.
Balance Between Speed-Control
Wider rollers speed up ceiling work, but you’ll trade some control for that efficiency; picking the right width means balancing how fast you want to move against how neatly you need to finish.
- Choose 18″ for speed vs. control when covering large rooms.
- Use 9–12″ for tighter areas and precision techniques.
- Combine sizes: start wide, finish with smaller rollers for crisp edges.
Sleeve Density: Pick the Right Cover Thickness
Think about nap thickness when you pick a sleeve, because shorter naps give a smoother finish while longer naps hold more paint for better coverage on textured ceilings.
You’ll want a 1/4″–3/8″ nap for flat ceilings and a 3/4″–1″ nap for popcorn or rough surfaces.
Match nap to texture to balance coverage and the finish you want.
Nap Thickness Guide
When you’re choosing a roller sleeve, nap thickness determines how much paint the cover holds and the texture it leaves behind.
Pick a low nap for smooth ceilings, mid nap for slight texture, and high nap for rough surfaces.
Use nap testing techniques to check coverage, and follow roller maintenance tips to prolong sleeves.
- Smooth
- Semi-smooth
- Rough
Coverage Versus Finish
Alongside nap thickness, sleeve density controls how much paint a cover releases and how smooth your ceiling will look.
You’ll choose denser sleeves for finer finish quality and thinner sleeves when you need faster coverage techniques. Denser sleeves hold less paint but spread it evenly, reducing stipple.
Match sleeve density to paint type and ceiling texture so you get consistent coverage and a professional-looking finish.
Anti-Shed and Lint-Free Covers: Do They Matter?
Ever noticed tiny fibers stuck in fresh ceiling paint? You want lint-free roller cover materials to avoid shedding issues and speed painting techniques.
Mind surface preparation, paint application, roller maintenance, texture matching, paint type compatibility, ceiling height considerations, and finish options.
- Choose quality covers.
- Test on scrap.
- Replace worn covers quickly.
Low-Splatter Roller Covers That Actually Work
If you’ve settled on lint-free, anti-shed covers, the next thing to contemplate is how much paint they’ll throw back at you—especially on ceilings where splatter shows up instantly.
You want low splatter effectiveness without sacrificing coverage; choose dense, tightly woven nap that resists flicking.
Check roller cover durability for repeated use and edge wear.
Test a small swath before committing to a full ceiling.
Commercial Rollers Pros Use for Big Ceiling Jobs
When you’re tackling large ceiling jobs, pros reach for commercial-grade rollers because they cover more surface, hold more paint, and reduce fatigue on long runs.
You’ll see clear commercial roller benefits in speed and durability, improving ceiling job efficiency.
Use heavy-duty frames, long-reach poles, and industrial nap for consistent coverage.
- Heavy-duty frames
- Long-reach poles
- Industrial nap
Budget Rollers That Still Perform Well
You don’t have to spend big to get good results on a ceiling—durable microfiber sleeves give you long wear, economical foam rollers handle smooth finishes, and reusable synthetic covers cut replacement costs.
Pick based on texture and paint type so you won’t waste time on rework. I’ll walk you through when each option makes the most sense.
Durable Microfiber Sleeves
Think of durable microfiber sleeves as the practical middle ground for ceiling work: they’re affordable, shed less lint than cheaper covers, and hold paint evenly so you get consistent coverage without reloading constantly.
- You’ll see microfiber benefits in smoother finishes.
- They clean easily; good roller maintenance extends life.
- They balance cost and performance for most ceilings.
Economical Foam Rollers
Although foam rollers won’t match high-end covers, they’re a smart, low-cost choice for ceilings where smooth, even application matters more than luxury feel. You’ll find affordable options that deliver good coverage and easy cleanup. Foam benefits include minimal splatter and tight texture reach.
| Type | Cost | Use |
|---|---|---|
| Small foam | Low | Touchups |
| Wide foam | Low | Full ceilings |
| Dense foam | Low | Smooth finishes |
Reusable Synthetic Covers
Reusable synthetic covers give you a durable, budget-friendly option that balances performance and longevity.
You’ll get a good durability comparison versus foam, and they resist matting while staying affordable.
Focus on cover maintenance to extend life—clean promptly and store dry.
- Affordable performance
- Easy cleaning
- Reusable across projects
Which Rollers Work Best With Oil vs. Water-Based Paints?
Wondering which roller to grab for oil- versus water-based ceiling paints? You want rollers that suit roller compatibility and control paint absorption. Use synthetic covers for water-based paints; natural or blended naps work for oil-based coats. Match nap thickness to texture to limit splatter and guarantee even coverage.
| Paint Type | Best Roller |
|---|---|
| Water-based | Synthetic |
| Oil-based | Natural/blend |
| Textured ceilings | Thick nap |
How Paint Sheen Changes Roller Choice for Ceilings
Since sheen affects reflectivity and hide, it also changes how a roller lays down paint and what nap you should choose for ceilings.
You’ll pick based on sheen impact and desired roller finish. Consider:
- Matte: thicker nap for texture and hide.
- Eggshell/satin: medium nap for smoother finish.
- Semi-gloss/gloss: short nap to reduce texture and highlight imperfections.
Primer Then Topcoat: Roller Choices for Each Layer
For primer you’ll want a medium-nap roller that lays down a uniform, penetrative coat without leaving texture.
For the topcoat, switch to a shorter nap for smoother, more even sheen and fewer roller marks.
Choosing the right nap for each layer makes the finish look professional and reduces touch-ups.
Primer Roller Selection
Choosing the right roller for your primer is a simple decision that sets the foundation for a smooth topcoat: You’ll pick based on substrate and primer viscosity.
Consider primer roller types and ideal primer materials when selecting nap and core.
- Smooth ceilings: 1/4″–3/8″ nap
- Slight texture: 3/8″–1/2″ nap
- Porous or rough: 3/4″ nap
Topcoat Roller Options
Pick a topcoat roller that complements the primer you used and the ceiling’s texture to get an even, durable finish—match nap length to the surface and choose a core that suits your paint type.
For topcoats, you’ll pick shorter naps for smooth ceilings and longer for textured ones.
Use a roller cover comparison to pick fabric and pile, and follow ceiling paint techniques for uniform coverage.
Roller Combos That Reduce Lap Marks and Speed Drying
When you want a smooth, fast ceiling finish, pairing a low-nap synthetic roller with a high-solids, quick-drying paint cuts lap marks and shortens wait time between coats.
You’ll get lap mark reduction and improved drying speed by choosing combos targeting even laydown and quick cure.
Choose combinations that promote even laydown and fast curing to cut lap marks and speed up coats.
- Low-nap synthetic roller
- High-solids quick-dry paint
- Microfiber blend for even spread
Extension Poles: Best Types for Ceiling Rollers
Because ceiling work keeps you reaching and twisting, a sturdy, lightweight extension pole makes the job safer and faster.
You’ll weigh extension pole types by pole material choices—aluminum for lightness, fiberglass for strength—and check pole length options to match ceiling height.
Look for adjustable poles with telescoping features and ergonomic handles so you’ll paint longer with better control and less fatigue.
Ergonomics: Technique for Low vs. High Ceilings
For low ceilings, stand with feet shoulder-width apart and keep your arm close to your body so you can reach without overextending.
For high ceilings, use a stable ladder or scaffold and position it so you can work within a comfortable arm’s reach rather than stretching.
Always check ladder/scaffold safety, lock mechanisms, and keep tools within easy reach to avoid awkward movements.
Proper Stance And Reach
Proper stance and reach keep you steady and reduce fatigue whether you’re painting a low ceiling or one that’s out of arm’s length.
Use ergonomic positioning and aim for ideal reach by adjusting your body, roller length, and foot placement.
- Square shoulders, slight knee bend.
- Extend from the shoulder, not the wrist.
- Move your feet to follow the roller, not just your arm.
Ladder And Scaffold Safety
Now that you’ve got your stance and reach dialed in, think about how you’ll get there safely—ladders and scaffolds change how you move and balance.
For low ceilings use a sturdy ladder, test ladder stability, face the work and keep hips between rails.
For high ceilings choose a scaffold, follow scaffold precautions, lock casters, work from the platform, and avoid overreaching.
Loading a Roller To Minimize Drips and Splatter
Start by pouring a modest amount of paint into the tray well and dipping the roller lightly—too much paint invites drips and splatter.
Use careful paint loading techniques and focus on minimizing splatter as you work.
Load paint with care and work deliberately to keep splatter to a minimum as you go.
- Roll slowly in the tray to evenly load.
- Tap roller edge on tray ridge to shed excess.
- Wipe seams with a rag before lifting to ceiling.
Keeping Pressure Consistent While Rolling Ceilings
While you roll the ceiling, keep a steady, even pressure on the pole so the nap makes consistent contact and the paint lays down uniformly; varying your grip or pressing harder at the edges will create visible lines and uneven texture. Use roller pressure techniques and consistent rolling methods, keep wrists loose, overlap passes, and pause to reload evenly.
| Tip | Action |
|---|---|
| Grip | Relaxed |
| Overlap | 50% |
| Speed | Moderate |
| Reload | Regular |
| Check | Inspect |
How To Avoid Roller Marks and Stippling on Ceilings
Pick a roller nap that matches your ceiling texture—short naps for smooth ceilings, medium for light texture—to lay paint evenly.
Keep your pressure steady as you roll so the nap deposits paint uniformly and you don’t leave ridges.
Work in overlapping passes while maintaining that consistent pressure to minimize marks and stippling.
Choose The Right Nap
Because ceilings are a large, flat surface, the nap you choose matters more than you might think: the wrong roller leaves visible lines and a stippled texture, while the right nap helps the paint lay smooth and even.
- Match nap thickness to surface—smooth ceilings need 1/4″–3/8″.
- Use 1/2″–3/4″ for slight texture.
- Prioritize roller selection based on finish and coverage.
Roll With Consistent Pressure
Choosing the right nap sets you up for success, but how you roll makes the finish.
You’ll avoid roller marks and stippling by using consistent pressure techniques: start light, load evenly, and maintain steady wrist tension while overlapping each stroke.
Finish with a light “dry” pass per roller application tips.
Pause to reload before paint gets thin to keep texture uniform.
Cutting In and Edging Near Ceilings: Best Rollers
When you need crisp, clean lines where wall meets ceiling, the right edging roller makes the job faster and reduces touch-ups. Slim-profile rollers and angled trim rollers give you control in tight corners while minimizing splatter.
Use proper cutting techniques, edging tools, and ceiling preparation, plus routine roller maintenance.
- Slim-profile roller for tight gaps
- Angled trim roller for control
- Foam edger for smooth edges
Popcorn Ceilings: Rollers and Special Tools That Help
If your ceiling has a popcorn texture, you’ll need rollers and tools designed to reach into nooks without flattening the bumps—use thick-nap or textured rollers, a stippling roller, and sometimes a hopper gun for spray application to preserve texture and guarantee even coverage. You’ll prefer tools that support textured finishes and careful roller application to avoid smearing.
| Tool | Purpose | Tip |
|---|---|---|
| Thick-nap roller | Coverage | Don’t press hard |
| Stippling roller | Blend texture | Light strokes |
| Hopper gun | Spray application | Test first |
Cleaning Roller Covers: Reusable Options and How-To
Cleaning your roller covers right after you finish painting lets you reuse them without losing nap or causing color bleed, and it only takes a few straightforward steps.
Use proper cleaning techniques and choose reusable materials to save money.
- Rinse with warm water and mild soap.
- Spin or shake excess paint.
- Dry flat or hang to preserve nap.
When To Replace a Roller Cover Mid-Job
Although a roller can often last most of a job, you should swap it out mid-project the moment it starts leaving streaks, clumps, or stray fibers on the ceiling.
Replace when nap compacts, paint builds up, or coverage falters.
Follow simple roller maintenance tips to extend roller cover lifespan, but don’t hesitate to change covers to keep finish quality consistent and avoid rework.
Quick Cleanup Tips After Ceiling Rolling
When you finish rolling the ceiling, rinse the roller quickly in warm water (or the appropriate solvent) to keep paint from drying in the nap.
Cover or tape floors and fixtures before you move ladders so drips and splatters don’t create extra work.
A fast cleanup and simple protections will save you time and effort on the next job.
Fast Roller Cleaning
Tackle roller cleanup right after you finish the ceiling to keep paint from drying into the nap—if you act fast, rinsing and spinning the roller will take only a few minutes and save you work later.
Use simple roller cleaning techniques and quick rinse methods:
- Rinse under warm running water, spin to remove excess.
- Use mild detergent, repeat rinse.
- Shake, air-dry vertically.
Protecting Floors And Fixtures
Once you’ve cleaned the roller, turn your attention to protecting floors and fixtures so splatters don’t mean hours of cleanup later.
Lay drop cloths or plastic sheeting for reliable floor protection, taping edges.
Use painter’s tape and plastic bags or disposable covers for fixture covering—light fixtures, vents, and trim.
Remove or mask furniture, check seams, and replace coverings only after paint is dry.
How Humidity and Temperature Affect Roller Performance
Although temperature and humidity often seem like background details, they’ll directly change how your roller holds and releases paint, how it glides across a ceiling, and how fast the finish dries.
You should note:
- Humidity effects: raise drying time, alter paint consistency, reduce surface adhesion.
- Temperature impacts: change viscosity, affect roller absorption.
- Environmental conditions govern finish quality and coverage, so adjust technique and timing.
Testing a Roller on Scrap Before You Start
Before you start rolling the ceiling, try the roller on a scrap piece of drywall or cardboard to confirm coverage and evenness.
Check that the nap matches the paint and surface so you’re not leaving streaks or texture differences.
Make sure the roller releases paint smoothly without shedding fibers or holding too much.
Test Roller Coverage
When you’re ready to roll, test the roller on a scrap of drywall or cardboard to check coverage, nap leave, and paint absorption.
You’ll confirm test roller efficiency and test roller durability quickly. Try this:
- Apply full stroke to check evenness.
- Backroll to spot thin areas.
- Inspect for lint, clumping, or excessive shedding before starting the ceiling.
Check Nap Compatibility
You’ve already checked coverage and shedding, so next confirm the roller nap matches your ceiling surface by testing on scrap drywall or cardboard. Roll a few passes, inspect texture, and adjust nap length for even laydown. Verify surface compatibility—smooth vs. textured. Use this quick checklist:
| Test | Result | Action |
|---|---|---|
| Roll marks | Visible | Upsize nap |
| Pilling | Yes | Replace roller |
| Texture match | Good | Proceed |
Inspect Paint Release
Although the nap and fit matter, inspect paint release by rolling the loaded roller across scrap drywall or cardboard to see how evenly the paint transfers; watch for streaks, blotches, or excess pooling that signal poor release.
Test different roller types and note behavior, then:
- Check for even coverage.
- Look for lint or fibers.
- Note absorption and drip rate.
Rental vs. One-Time Use: Which Rollers To Choose?
Anyone tackling a ceiling job has to decide whether to rent a professional roller or buy a single-use one; each option changes cost, cleanup, and finish quality.
You’ll weigh rental options for heavier-duty frames and better finishes against one time use rollers for cheap, quick jobs.
Choose rentals for large or textured ceilings; pick one time use for small, simple touch-ups.
12×12 Ceiling: Roller Kit Checklist
If you’ve decided whether to rent or buy, it helps to have a clear kit for an x12 ceiling job so you don’t waste time mid-project.
Gather roller kit essentials and basic ceiling painting tools, then confirm fit and condition.
Pack:
- Extension pole, sturdy roller frame
- 9–12″ low-nap roller covers
- Drop cloths, painter’s tape, sturdy ladder
Specialty Features To Look For (Anti-Shed, Low-Splatter)
Look for roller covers labeled anti-shed and low-splatter so you’ll cut down on lint and airborne droplets while you paint the ceiling.
You’ll want anti-shed technology to keep fibers off fresh paint and out of your nose.
Choose low splatter options with dense, short naps for smooth coverage and minimal misting; they save cleanup time and reduce touch-ups.
Pro Tips Roundup: Small Changes That Improve Results
Pick the right roller nap for your ceiling texture so you get even coverage without excess splatter.
Make sure the roller frame is locked tight before you start to avoid wobble and missed spots.
These small tweaks save time and give a cleaner, more professional finish.
Correct Roller Nap Choice
When you’re choosing a roller nap for ceiling paint, match the nap length to the surface texture—short naps (1/4″–3/8″) for smooth ceilings, medium naps (3/8″–1/2″) for lightly textured surfaces, and thicker naps (3/4″–1″) for heavy texture—so you get even coverage without excess splatter or loss of detail.
- Pick nap by ceiling texture.
- Use shorter nap for sheen control.
- Thicker nap hides imperfections and holds more paint.
Secure Roller Frame
Tighten the roller frame and you’ll cut down on wobble, drips, and uneven coverage—secure end caps and a snugly seated roller sleeve keep paint where it belongs and make your strokes more predictable. Check roller frame security before starting; verify frame compatibility with sleeves and extension poles to avoid slippage and wasted touch-ups.
| Tip | Action |
|---|---|
| Security | Tighten end caps |
| Compatibility | Match sleeve size |
Final Quick Guide: Choose the Right Roller by Ceiling Type
1 clear choice can make ceiling painting faster and neater: match the roller nap to your ceiling’s texture and material.
You’ll check roller texture and finish, do ceiling prep, then pick nap accordingly.
Follow this quick list to decide fast:
- Smooth ceilings: 1/4″ nap for even coats.
- Light texture: 3/8″ nap for coverage.
- Heavy texture: 3/4″–1″ nap for deep reach.
Frequently Asked Questions
Can I Use the Same Roller for Walls and Ceilings in One Day?
Yes — you can, but you’ll want to switch roller types between tasks and use proper ceiling techniques; shorter naps suit walls, thicker naps handle ceilings, and you’ll avoid texture and finish issues by cleaning or swapping rollers regularly.
How Long Should I Wait Between Ceiling Coats for Best Adhesion?
By sundial standards, you should wait 2–4 hours between ceiling coats for best adhesion, depending on drying time and coat thickness; thicker coats need longer, and tight ventilation or cooler temps can extend the wait.
Are Disposable Roller Covers Ever More Economical Than Reusable Ones?
Yes — you’ll find disposable roller covers can be cheaper for occasional jobs when factoring time and cleanup, but do a cost comparison; they increase environmental impact, so reuse or recycle when possible to balance savings and waste.
Can Roller Paint Thickness Hide Minor Ceiling Cracks or Imperfections?
You can’t fully hide cracks with paint alone, but thicker coats and textured finishes help. Use appropriate texture types and larger roller sizes to build surface depth, then skim or caulk remaining gaps for a smoother look.
What Safety Gear Is Recommended When Rolling High Ceilings?
You should wear safety glasses, a dust mask or respirator, gloves, and hearing protection as needed; guarantee ladder stability with a helper or stabilizer, use a sturdy extension pole, and keep work area well lit and free of tripping hazards.
Conclusion
You’ve read the whole guide to pick the perfect ceiling roller—and yes, you still have to lift it above your head. Ironically, the “right” roller will make that overhead arm workout feel almost like a spa treatment: smoother coverage, fewer drips, and less cursing. Choose nap by texture, grab anti-shed and low-splatter features, and use a good pole. Then sit back, admire your ceiling, and wonder why you didn’t do it sooner.