How Big of a Paint Chip to Color Match for Accurate Results
You should bring at least a 2 by 2 inch paint chip—larger if possible—so you and the technician can judge hue, saturation, finish, and texture accurately. Smaller pieces change light scattering, show edge loss, and can fool spectrometers or phone apps. For instrument reads you may need 3–12 mm areas depending on the device, but those still benefit from a bigger sample. Follow safe removal and label chips; keep going to learn tool limits, lighting tips, and practical alternatives.
How Big Should a Paint Chip Be? Quick Answer
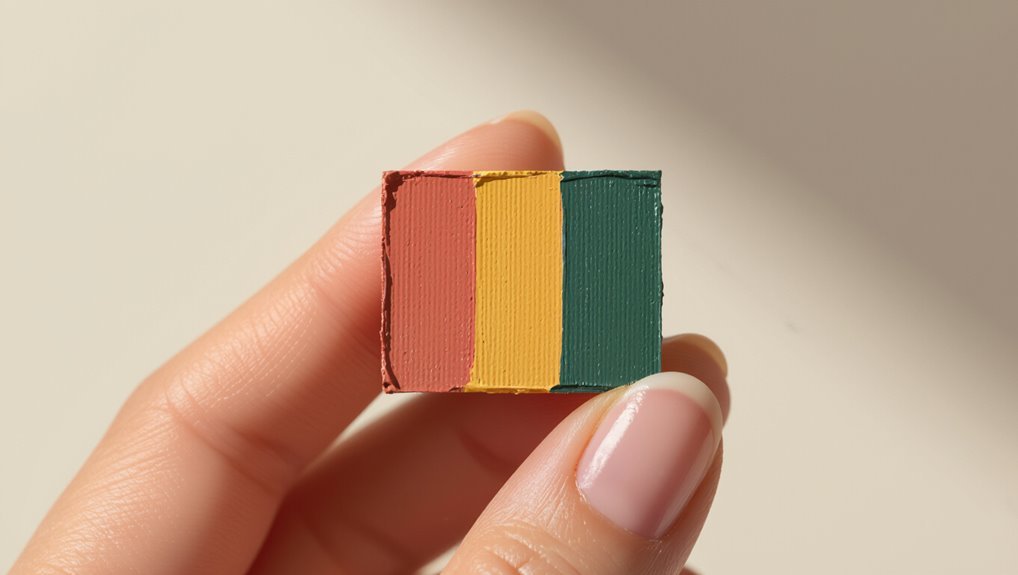
Aim for a paint chip that’s at least 2 by 2 inches so your color sample gives you enough area to see hue, saturation, and finish under different lights.
You’ll hold it near the wall, compare tones, and note how color perception shifts with lighting. Use neutral surroundings to minimize visual contrast, and test multiple angles so you trust the match before cutting or blending paint.
Why Chip Size Affects Color Accuracy (Texture, Translucency, Edge Loss)
When you hold a tiny chip, the surface texture can look different than a full-sized sample, changing how light scatters and how the color reads.
Small pieces also let more or less light pass through thin paint layers, so translucency alters the perceived hue.
And because pigment thins toward the edges, you’ll often see color loss around small chips that makes them unreliable for exact matches.
Surface Texture Effects
Small paint chips can trick your eye and instruments because texture and translucency change how light interacts with the sample. You should perform texture analysis and chip comparison on larger areas so brush marks and surface sheen don’t distort readings. Edge loss skews perceived color, so match on representative texture and finish for accurate results.
| Texture | Translucency | Edge Effect |
|---|---|---|
| Smooth | Low | Minimal |
| Brushed | Medium | Moderate |
| Orange peel | High | Significant |
Light Transmission Variance
Light transmission through a paint chip changes with size, and that shift can make a chip read noticeably different from the full-painted surface.
You’ll notice light absorption effects alter translucency and surface response, creating color perception differences versus the intact area.
- Smaller chips increase translucency impact.
- Backing and substrate change readings.
- Measurement geometry amplifies variance.
Edge Color Loss
Because paint thins toward a chip’s edges, you’ll see color shift where texture and translucency change, making the perimeter look lighter or less saturated than the intact surface. You should avoid sampling edges because edge degradation alters color perception and texture. Sample central areas for true match.
| Area | Issue | Action |
|---|---|---|
| Edge | Thinning | Avoid |
| Center | Stable | Sample |
| Corner | Varied | Inspect |
| Surface | Textured | Note |
What’s the Minimum Chip Size for Common Tools?
When preparing paint chips for measurement, you’ll want to know the smallest size each tool can reliably read.
Consider color perception and chip texture when cutting samples so readings aren’t skewed.
Consider both how color appears and chip texture when cutting samples to avoid skewed readings.
- Portable spectrometer: 5–8 mm, flat smooth surface.
- Bench spectrophotometer: 3–5 mm, uniform texture required.
- Colorimeter/reader: 8–12 mm, avoid rough edges and gloss variations.
Spectrophotometers vs. Smartphone Apps: Key Differences
Having the right chip size ready makes comparing measurement methods more meaningful, since tool capabilities affect accuracy.
You’ll see spectrophotometer accuracy shine on controlled surfaces, capturing precise spectral data.
By contrast, smartphone app limitations—camera variability, lighting, and software algorithms—can skew matches.
Use apps for quick checks, but rely on spectrophotometers when you need consistent, professional color matching results.
Auto Refinishing vs. Interior Walls: Chip‑Size Rules
When you match paint for auto refinishing versus interior walls, chip size matters — cars usually need a larger sample to account for metallics and clearcoat.
You’ll also have to prepare surfaces differently: automotive chips must be sanded and clean of wax or polish, while interior samples need a smooth, dry area free of grime.
Keep these minimum size and prep differences in mind before you collect or send samples.
Minimum Chip Size
Size matters: you need a much larger paint chip for auto refinishing than for matching interior wall paint because automotive finishes use multilayer systems and specialty pigments that reveal color differently.
You’ll focus on minimum chip, chip extraction, sample preparation, measurement accuracy, testing methods, color theory, surface analysis, paint formulation and environmental factors to guarantee color consistency.
- Auto: larger chip.
- Walls: smaller chip.
- Test under real light.
Surface Preparation Requirements
You’ve already seen why chip dimensions differ between automotive panels and interior walls; now focus on how the substrate must be prepared to make those chips useful.
You’ll perform surface cleaning to remove oils and contaminants, follow chip preparation steps for uniform edges, and run adhesion tests on automotive primers or wall primers.
Proper prep guarantees accurate color consistency and reliable spectrometer readings.
How Paint Finish (Gloss vs. Matte) Changes Sample Needs
Paint finish changes how a color reads, so you’ll need different samples depending on gloss level.
You should test gloss differences and matte effects to judge finish impact and sheen variation.
Consider texture influence and light reflection when evaluating color perception.
Do a focused sample comparison to match finish, not just hue.
- Test gloss levels
- Compare matte swatches
- Use controlled lighting
How Surrounding Paint and Substrate Skew Readings
When you hold a chip up against nearby colors, those surrounding hues can bias what your eye and instruments register.
The surface beneath the paint—smooth, textured, or porous—also changes reflectance and skews measurements.
Watch for edge bleed and shadows from the chip or lighting, since they’ll throw off both visual matches and spectrophotometer reads.
Surrounding Colors Influence Reads
Because nearby colors change how your eye and instruments perceive a chip, surrounding paint and the substrate beneath can skew readings more than you expect.
You’ll need to control visual context and apply color theory to preserve color perception and color balance.
Consider these steps:
- Isolate the chip to reduce color relationships influence.
- Use neutral surrounds for true color context.
- Check complementary colors for contrast effects.
Substrate Texture Alters Measurement
Although subtle, the texture and porosity of the substrate beneath a chip can shift both what you see and what a spectrophotometer records. You’ll manage texture measurement and chip consistency by using proper sampling techniques and preparation methods. Monitor color variation and surface impact with calibrated measurement tools to control accuracy factors.
| Substrate | Effect |
|---|---|
| Smooth | Lower scatter |
| Porous | Higher variation |
Edge Bleed And Shadowing
If you place a paint chip against neighboring colors or a contrasting substrate, nearby pigments and shadows will skew both your eye and your instrument, making a true match harder to find.
You’ll notice edge bleed and shadowing effects from lighting influence and texture variation. Make contrast adjustments to correct color perception, account for visual depth, and inspect paint layering.
- Isolate chip
- Neutralize light
- Flatten texture
How Lighting Conditions Change Measurements
When you change the light hitting a paint chip, its color readings shift—sometimes subtly, sometimes dramatically—because pigments reflect different wavelengths unevenly under different light sources. You should account for lighting effects and use consistent measurement techniques; compare readings under daylight, fluorescent, and incandescent sources to spot metamerism and errors.
| Light Type | Effect | Action |
|---|---|---|
| Daylight | Baseline | Calibrate |
| Fluorescent | Cool cast | Adjust |
| Incandescent | Warm cast | Compensate |
| Mixed | Unstable | Standardize |
Remove a Single Large Paint Chip Safely
Start by protecting yourself and the surrounding area: put on nitrile gloves, safety glasses, and a dust mask. Then lay down a drop cloth and tape off edges to catch fragments.
Start by protecting yourself and the area: wear gloves, safety glasses, a dust mask, and lay down a drop cloth.
Use chip extraction with effective tools and safe methods to avoid damage. Follow removal precautions and handling techniques to protect surface care and color integrity.
- Gently pry loose.
- Clean residue.
- Preserve sample.
Remove Chips From Trim, Baseboard, or Hardware Without Damage
Having removed a single large chip, shift your focus to trim, baseboards, and hardware where paint sits on narrower profiles and finishes that can be easily marred; work slowly, use padded tools like plastic scrapers or wooden sticks, and support the surrounding area with painter’s tape and a soft cloth to prevent gouging.
Use delicate chip extraction techniques and damage prevention methods: lift edges, avoid twisting, and steady the substrate.
How to Prepare, Label, and Package Multiple Chips for Testing
Once you’ve removed chips, clean and flatten them so the surface reflects the true color.
Label each chip clearly and consistently with location and date, and include a simple legend if you have many samples.
Pack chips separately in protective sleeves or between cardstock to prevent scuffs and cross-contamination during testing.
Clean And Flatten Chips
Prep the chips carefully: clean off dust, grease, and loose paint, then flatten curled edges so each swatch sits true.
For reliable chip preparation and color uniformity, you’ll wipe with solvent, press gently, and keep surfaces matte. Pack matched groups separately to avoid scratches.
- Use lint-free cloth.
- Flatten with a soft roller.
- Store flat in rigid sleeves.
Clear, Consistent Labeling
Because accurate comparison depends on organization, you’ll prepare a clear labeling system before you package chips for testing.
Assign unique IDs, note location, surface condition, and date on each chip. Use durable markers and standardized abbreviations to guarantee consistent communication with the lab.
Establish simple labeling standards everyone follows, and include a master list linking IDs to sample details so nothing gets misidentified.
Protective, Separate Packaging
With labels in place, you’ll package each chip so it stays protected and separate during transport and testing.
Use protective packaging and separate containers to prevent scratches, contamination, or mixing.
Follow these steps:
- Wrap each chip in acid-free tissue and place in a small, clear pouch.
- Slip pouches into individual rigid sleeves.
- Seal sleeves in labeled, separate containers for shipment.
When to Bring Painted Test Panels Instead of Loose Chips
When should you bring painted test panels instead of loose chips? You should when texture, sheen, or environmental fading matters.
Bring painted test panels — not loose chips — when texture, sheen, or environmental fading affect the finish.
Test panel benefits include accurate lighting checks and full-surface evaluation.
Follow chip collection tips: label panels, include original substrate, and note location and exposure.
Bring multiple panels showing variations so the matcher can compare real-world finish, not just tiny fragments.
Common Sampling Mistakes and How to Avoid Them
Ever wondered why a chip that looked perfect at home turns out wrong at the store? You can avoid common sampling mistakes by using proper sampling techniques and controlling color perception factors.
Follow these quick tips:
- Provide a clean, flat chip from the final coat.
- Bring samples under neutral light, not direct sun.
- Label substrate and finish to prevent mixups.
How Technicians Validate a Match and What They’ll Test
Although the paint looks right to your eye, technicians will run a series of objective tests to confirm the match before mixing, starting with spectrophotometry and visual comparisons under controlled lighting.
You’ll see instrument reads, cross-checks on test panels, and assessments of gloss and texture. They’ll account for color perception differences and use proven matching techniques, then tweak formulas until samples match your reference.
When an Exact Match Is Impossible : Realistic Alternatives
If an exact chip-to-chip match proves out of reach, you still have practical options that keep the repair or touch-up looking intentional.
Use color theory and smart finishing to blend or conceal mismatches. Consider these alternative solutions:
- Blend surrounding paint into the repair area.
- Use a deliberate accent or trim color.
- Apply textured or matte finishes to hide slight differences.
Cost and Time Expectations for Accurate Matching
When you want an accurate paint-chip match, expect to pay more and wait a bit longer than for a simple touch-up: precision color matching—especially for aged, specialty, or custom finishes—requires technician time, spectrophotometer readings, test mixes, and sometimes small-batch tinting or trial applications to get it right.
You should plan cost analysis upfront and practice strict time management to avoid surprises and repeated trips.
Quick Checklist: What to Bring to the Paint Counter or Technician
Bring the right items and you’ll save time and improve your match: a clean, unwarped paint chip or sample, photos of the surface under natural light, the paint can with manufacturer and color code (if available), notes about the finish and where it will be used, and any related hardware or trim pieces for visual comparison.
- Show chip and photos.
- Share paint types and finish.
- Mention color theory clues and location.
Frequently Asked Questions
Will Old or Weathered Chips Still Yield Accurate Matches?
No — old or weathered chips often won’t yield accurate matches. You’ll need fresher samples because weathered surfaces and chip texture alter color; you should sand or collect unexposed paint to get a true match.
Can Mixed or Layered Paints on a Chip Affect Results?
Layered liabilities: you’ll lose accuracy if mixed or layered paints mask base tones, so you’ll need a clean, single-layer chip. You’ll rely on color perception and controlled lighting conditions to capture true, consistent color.
Do Paint Additives (Tint Extenders, UV Blockers) Change Matching?
Yes — additives like tint extenders and UV blockers alter tint properties and can shift hue, gloss, or durability, so you’ll need consistent samples and application to preserve color consistency during matching and formulation adjustments.
Will Nearby Metal or Plastic Substrates Alter Spectrophotometer Readings?
Yes — you’ll see effects: nearby metal or plastic substrates can skew spectrophotometer readings because substrate reflectivity and surface texture influence light return, so you’ll need controlled backing or masking to isolate the paint layer accurately.
How Do Manufacturers’ Color Standards Impact Match Availability?
Think of manufacturers’ standards as a rulebook directing a choir; you’ll get color consistency when they’re clear, but standardization challenges can limit match availability, so you’ll sometimes need custom tuning or alternate suppliers to achieve true harmony.
Conclusion
Think of your paint chip like a seed for a garden: bring one big enough to show texture, translucency, and edge so the technician can grow an exact bloom. Too tiny, and you’ll get weeds of mismatch; too large, and you’ll carry a sapling. Give them the right-sized seed, trust their tools, and you’ll harvest a color that blossoms where you planted it.