Why Is My Spray Paint Bubbling? Causes and Fixes Explained
You’ve got bubbling because something under the finish is breaking adhesion — often dust, oil, moisture, trapped solvent from thick coats, or an incompatible primer/paint. Clean and degrease, sand smooth, apply thin even coats with proper flash times, control humidity, and use compatible primer/paint to stop it. Small bubbles mean surface contamination; large blisters often mean moisture or rust. Keep following the guide and you’ll find how to diagnose specific patterns and fix them for good.
Quick Troubleshooting: What To Try Right Now
If your spray paint is bubbling, stop painting and check a few fast things you can fix immediately: feel for dampness, sand rough spots, and test paint pressure on scrap.
Wipe surface with a tack cloth and let it dry fully. Adjust nozzle distance and spray in even passes.
Use proper ventilation and follow spray paint tips for bubble prevention and quicker recovery.
Quick Answer: Why Spray Paint Bubbles
You’re seeing bubbles because the surface had oils or dust, you sprayed on too thick, or there was moisture or high humidity interfering with drying.
Check for contamination and sand or clean the area, use thinner coats with proper flash time, and avoid painting in damp conditions.
Fixing those three issues usually stops bubbling fast.
Surface Contamination
When dust, oil, grease, or old paint residues stay on the surface, they stop fresh spray paint from bonding properly and cause bubbling or fisheyes. You’ll see the paint pull away where contaminants prevent adhesion.
You should do surface preparation: substrate inspection, identify contamination sources, use degreasing methods and cleaning techniques, remove chemical residues, employ sanding importance, check paint compatibility, and prevent moisture barriers to avoid adhesion issues.
Excessive Paint Thickness
Although applying several heavy coats might seem faster, too much paint traps solvents and prevents proper drying, which causes bubbling as the solvent tries to escape.
You should use proper spray application techniques, apply thin, even layers, and wait recommended flash times.
Adjust paint viscosity control and thinning to manufacturer specs so each coat cures fully and avoids solvent entrapment that leads to bubbles.
Moisture And Humidity
If humidity’s high or your surface is damp, trapped moisture will turn to steam as the paint solvents evaporate and form bubbles beneath the finish.
You should manage moisture control and monitor humidity levels before spraying.
- Dry surfaces fully; use a dehumidifier or wait for low humidity.
- Avoid painting after rain or in bathrooms.
- Test a small area to confirm conditions are stable.
Diagnose Bubbling From A Glance
Want a quick way to tell what’s causing bubbling? Do a rapid surface inspection: note size, pattern, and location of bubble formation. Compare against this chart to narrow causes and next steps.
| Size | Pattern | Likely clue |
|---|---|---|
| Tiny | Even | Contamination |
| Large | Cluster | Moisture |
| Isolated | Edge | Poor adhesion |
Bubbling Vs. Blistering Vs. Fisheye: What’s Different
You’ll want to tell bubbling, blistering, and fisheye apart because they point to different causes and fixes.
Bubbling looks like trapped air or solvent popping up. Blistering is usually heat or moisture lifting the film, and fisheye shows as small cratered dots from contamination.
Knowing these signs helps you choose the right prep and repair.
Bubbling Vs Blistering
Although bubbling, blistering, and fisheye can all ruin a finish, they’re different problems with different causes and fixes.
- You’ll see bubbling causes tied to moisture effects, poor surface preparation, and application techniques that trap air.
- Blistering symptoms point to failed paint adhesion or paint compatibility and drying factors.
- Use troubleshooting methods and repair strategies focused on prep, compatibility, and correct technique.
Fisheye Formation
If you’re seeing small, round craters in your spray finish rather than raised bubbles or peeled blisters, you’re likely dealing with fisheyes—tiny depressions caused when contaminants like oil, silicone, or wax prevent the paint from wetting the surface.
You can address fisheye formation causes by cleaning, sanding, and using silicone-free products.
For fisheye formation fixes, apply adhesion promoters or recoat after thorough degreasing.
Surface Contamination: Causes And Immediate Fixes
When spray paint bubbles, it’s often because contaminants like oil, grease, dust, or old wax are sitting on the surface and keep the new paint from adhering properly.
You should focus on surface preparation and substrate evaluation to avoid adhesion challenges. Use cleaning techniques and inspection methods, choose primer selection and paint compatibility, and control drying conditions to prevent application errors.
- Clean thoroughly
- Prime correctly
- Inspect before spraying
Trapped Moisture: How It Leads To Spray Paint Bubbling
If the wood you’re painting still holds moisture, that water can turn to vapor as the paint cures and form bubbles under the finish.
High humidity while you spray also slows drying and traps that vapor, making bubbling more likely.
Check moisture content in the wood and pick a dry, low-humidity day to paint.
Moisture In Wood
Because wood can hold more moisture than you expect, trapped dampness beneath the surface often forces its way out after you’ve applied spray paint, causing bubbles to form in the finish.
You should address moisture absorption and use proper wood treatment, drying techniques, and surface sealing to protect paint adhesion:
- Test moisture content before painting.
- Apply appropriate wood treatment and sealers.
- Allow thorough dry time and recheck.
Humidity During Application
Although warm, humid air might feel fine while you’re spray painting, it can trap moisture on and just under the surface, causing tiny droplets to form that interfere with adhesion and create bubbles as the solvent tries to evaporate. You should monitor humidity effects, moisture levels and air circulation; adjust application timing in damp conditions to protect paint adhesion and speed drying times.
| Environmental factors | Impact |
|---|---|
| Weather impacts | Increased surface moisture |
| Poor ventilation | Longer drying times |
Incompatible Primers Or Paints: Diagnosis And Fixes
Compatibility problems between primers and spray paints are a common cause of bubbling, and you’ll usually spot them by the way the finish lifts, wrinkles, or separates shortly after spray application.
Diagnose incompatible coatings by checking primer types and product compatibility, paint chemistry, and adhesion problems. Fix with proper primer selection, surface preparation, and adjusted application techniques to guarantee surface compatibility and correct paint layering.
- Inspect labels
- Test small area
- Reprime as needed
Spraying Too Close Or Too Thick: Application Errors That Cause Bubbles
If you hold the can too close or apply heavy, wet coats, the solvent can’t flash off fast enough and trapped gases form bubbles or cause the finish to wrinkle.
Check your spray technique: keep a consistent 8–12 inch distance, use light, overlapping passes, and maintain steady application speed.
Let thin coats dry between passes to prevent bubbling and runs.
Spray Painting: Temperature And Humidity Effects
You’ll see bubbling when temperatures are outside the paint’s recommended range because curing slows or solvents evaporate too fast.
High humidity traps moisture in the film and can cause bubbling or fisheyes as the paint dries.
Check the label for the ideal temperature range and avoid painting in humid conditions to prevent problems.
Temperature Range Effects
Because spray paint’s solvents and binders dry at specific rates, temperature plays a huge role in whether you get a smooth finish or bubbling.
- Know temperature effects: follow application temperature on cans; avoid extremes.
- Heat sensitivity speeds drying time, causing skinning and trapped solvents.
- Cold weather and temperature fluctuations slow cure, promoting blisters and poor adhesion; aim for ideal conditions.
Humidity And Drying
Although humidity doesn’t seem as obvious as temperature, it directly affects how solvents evaporate and how the paint film forms, so you’ll want to account for it when you spray.
You should monitor humidity levels and weather conditions, adjust application methods and drying techniques, and use moisture control during surface preparation.
These environmental factors shorten or extend drying time and change paint application success.
Solvent Entrapment: How Pinholes And Blisters Form
When solvent can’t escape during drying, it gets trapped under the film and creates pinholes or blisters as it vaporizes and expands.
You’ll see raised spots where solvent pushed through, weakening spray paint adhesion.
Use controlled coats and proper flash times.
Bubble prevention strategies focus on substrate prep and thinner selection.
- Thin coats
- Adequate flash
- Clean surface
Old Or Degraded Base Layers: When Previous Paint Causes Problems
If you spray over flaking old paint, the new coat won’t bond and you’ll see bubbling and peeling soon after.
You also get problems when the previous layer is chemically incompatible—like oil over latex—because the paints won’t adhere properly.
Always remove loose or incompatible coatings before you spray to prevent failures.
Flaking Old Paint
Because old paint can lose adhesion and turn brittle over time, spraying over it often leads to bubbling and flaking instead of a smooth finish.
You’ll need to address flaking paint and peeling layers before repainting.
- Scrape loose areas to sound substrate.
- Sand feathered edges for a level surface.
- Prime bare spots to restore adhesion and prevent future bubbles.
Incompatible Previous Coats
Although the surface may look sound, old or chemically incompatible base layers can react with new spray paint and cause bubbling, wrinkling, or poor adhesion.
You should test for incompatible coatings by scuffing, solvent testing, or spot priming. Strip or sand previous layers until stable, then apply a compatible primer.
This prevents failure and gives a durable finish.
Chemical Reactions With Previous Coatings: What To Watch For
When you spray over an existing finish, incompatible chemistry between coatings often causes bubbling as solvents, catalysts, or residual moisture react and release gases trapped under the new layer.
You should check for chemical interactions that weaken paint adhesion and cause blisters.
Consider these steps:
- Test solvent compatibility.
- Remove or sand doubtful coatings.
- Allow full cure and dry time before repainting.
Rust And Corrosion Under Paint: Diagnosis And Repair
If your spray paint is bubbling, you should check for reddish or flaky spots and listen for hollow-sounding areas to identify rust beneath the coating.
Once you confirm corrosion, remove loose paint and scale with a wire brush or sandpaper.
Then treat remaining rust with a chemical converter or rust remover.
Finish by priming with a rust-inhibiting primer before repainting to prevent recurrence.
Identifying Rust Beneath Paint
Because rust can start under paint long before you see obvious damage, you’ll want to check suspicious bubbling or flaking carefully to determine whether corrosion is the culprit.
Use simple rust detection methods and cautious paint removal techniques to expose edges.
- Probe bubbles for soft metal or orange staining.
- Scrape small areas to inspect substrate.
- Tap and listen for hollow spots.
Proper Rust Removal Techniques
Although rust can lurk out of sight, you can stop it from spreading by removing corrosion down to clean, solid metal before repainting.
Use wire brushes, sanding, or media blasting to expose bare metal, then apply rust treatment options like converters or primers.
Clean, dry the surface, and follow rust prevention methods—galvanizing, proper primers, and regular maintenance—before you repaint to prevent bubbling.
Outgassing From Plywood Or MDF: Why It Bubbles
Ever notice tiny bubbles forming after you spray paint plywood or MDF?
You’re seeing outgassing effects from plywood composition or MDF characteristics releasing gases, especially with poor substrate preparation.
That breaks paint adhesion during drying phases as moisture retention and surface tension shift.
Adjust spray techniques and paint properties to minimize trapped gases.
- Prep
- Control
- Dry
Painting Over Oil Or Grease: Why Bubbles Appear
If you paint over oil or grease, you’re leaving surface contamination that stops the paint from bonding properly.
That residue can trigger chemical reactions that cause bubbling as solvents try to evaporate.
The end result is poor adhesion and paint lifting, so you’ll need to clean or strip the surface first.
Surface Contamination Present
Oil and grease left on a surface keep spray paint from sticking properly, so the solvent in the paint can’t wet the substrate and instead forms blisters as it tries to evaporate.
- Identify contamination sources and contamination types to assess contamination effects and surface defects.
- Use cleaning techniques and cleaning solutions; prioritize surface preparation and prep importance.
- Address adhesion issues and avoid chemical interactions that undermine coating performance.
Chemical Reaction Occurring
After cleaning won’t fix bubbling, you may be dealing with a chemical reaction between leftover grease and the paint’s solvents.
You should consider chemical composition and surface chemistry: spray paint interactions with oil alter drying mechanisms and solvent volatility, disrupting paint adhesion.
Adjust application techniques and paint layering, verify substrate compatibility, and account for environmental influences to prevent renewed reactions and bubbling.
Poor Adhesion Formation
Know that painting over surfaces with even trace amounts of grease or oil almost guarantees poor adhesion and bubbling. You’ll see blisters where paint can’t bond. Prevent this by addressing contamination and moisture.
- Remove oil thoroughly—poor surface preparation causes failure.
- Use a degreaser and sand to promote adhesion.
- Ascertain complete curing—avoid inadequate drying before repainting.
Wax, Silicone, And Mold Release Agents: Adhesion Killers
When spray paint bubbles and peels even on seemingly clean surfaces, it’s often because waxes, silicones, or mold-release agents are hiding on the substrate and preventing adhesion.
You should use wax removal techniques like citrus-based cleaners or isopropyl wipes, explore silicone alternatives if needed, apply mold release prevention steps, and choose proper adhesion improvement methods and surface treatment options so paint bonds reliably.
Improper Sanding: Residues That Cause Problems
Residual contaminants like waxes and silicones aren’t the only things that sabotage spray paint—improper sanding can leave behind dust, polishing compound, or smeared paint fragments that prevent proper adhesion and cause bubbling.
- Follow sanding techniques, then perform residue removal and surface inspection for clean surfaces.
- Match primer selection and surface preparation to improve paint adhesion.
- Time drying times and refine application methods for bubble prevention.
Why Skipping Prep Causes Paint Bubbles And Rework
If you skip proper prep, you’re inviting bubbles and a redo—contaminants, uneven surfaces, and trapped solvents keep paint from bonding, so moisture and gases push up as blistering or pinholes. You’ll undermine spray paint results; preparation importance = surface cleanliness + coating compatibility + correct application techniques. Use simple DIY tips for paint adhesion and bubble prevention.
| Cause | Effect | Fix |
|---|---|---|
| Grease | Lift | Clean |
| Rust | Blisters | Remove |
| Incompatibility | Peel | Prime |
| Moisture | Pinholes | Dry |
| Roughness | Poor bond | Sand |
Inspecting The Substrate Before Painting: Step-By-Step
Start by giving the surface a close visual sweep and touch—look for rust, grease, flaking paint, dents, or raised texture and run your hand to feel contaminants or unevenness you might miss with your eyes.
- Note substrate type, surface texture, and coating compatibility to guide primer selection and preparation techniques.
- Assess environmental factors and drying times for chosen application methods.
- Plan paint adhesion checks and finishing touches.
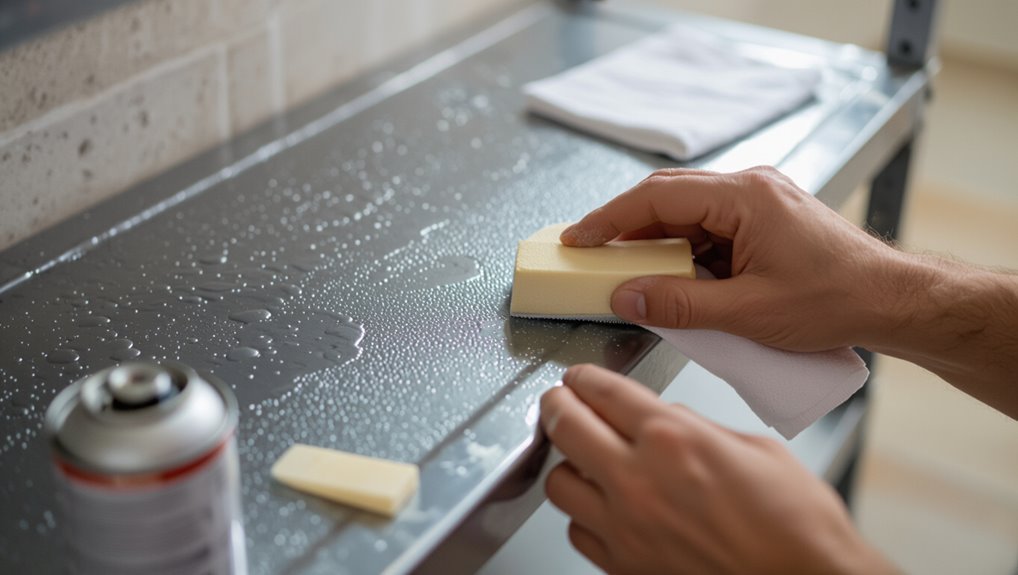
Cleaning Checklist: What To Remove And What To Keep
Before you spray, remove loose debris and flaky paint so the new coat can bond properly.
If any areas are greasy or oily, degrease them thoroughly because contaminants cause bubbling.
Leave solid, well-adhered surfaces intact and only sand or prime where necessary.
Remove Loose Debris
Brush away dust, dirt, and flaky paint from the surface so the new spray coat can adhere properly.
You’re removing dust and cleaning surfaces while preparing substrate; inspect materials and assess conditions before you work.
Check ventilation and choose tools that won’t recontaminate the area; save applying primers until debris is fully cleared.
- Scrape loose paint.
- Brush and vacuum.
- Tidy edges and seams.
Degrease Oily Areas
After you’ve cleared loose debris, tackle any oily or greasy spots so paint will grip instead of repelling.
You’ll use degreasing techniques like solvent wipes, biodegradable degreasers, or isopropyl alcohol applied with a lint-free cloth. Work in small areas, rinse if required, and dry fully.
Proper oil removal prevents undercoat failure and bubbling, giving spray paint a stable, clean surface to adhere to.
Keep Sound Surfaces
While you’re cleaning, focus on preserving sound, intact surfaces so you don’t create new problems; remove only loose paint, dirt, grease, and contaminants while leaving solid, well-adhered coatings and undamaged substrate alone.
- Scrape loose paint and rust for proper surface preparation.
- Wipe away grease and dust to guarantee paint adhesion.
- Leave hard, bonded coatings and undamaged metal or wood untouched.
Drying Checklist: Making Sure The Surface Is Moisture-Free
Before you start spraying, make sure the surface is completely dry—any trapped moisture will react with the paint and cause bubbling. Do a surface assessment and surface evaluation, use moisture testing, humidity monitoring, and prep essentials. Use drying techniques, improve air circulation and temperature control for the drying environment, and confirm paint compatibility.
| Step | Check | Result |
|---|---|---|
| 1 | Visual | Dry |
| 2 | Probe | Pass |
| 3 | Hygro | OK |
| 4 | Vent | Good |
| 5 | Temp | Stable |
Choosing The Right Primer To Prevent Bubbles
If you want to prevent bubbling, start by choosing a primer that’s formulated for your substrate and paint type so it bonds uniformly and blocks moisture or outgassing; primers for metal, wood, and plastic each tackle different causes of bubbles, and using the wrong one just invites problems.
- Assess material preparation, primer types, surface adhesion, and paint compatibility.
- Follow primer application, sealing techniques, and drying times; heed weather considerations.
- Use product recommendations to boost finish durability and prevent bubbles.
Matching Paint Chemistry: Solvent-Based Vs. Water-Based
When you match solvent- or water-based paint with a compatible primer and existing finish, you cut the risk of bubbling, poor adhesion, and solvent entrapment; solvent-based paints dissolve older solvent-based coatings and can react unpredictably with water-based layers.
So always check manufacturer guidance and test a small area before full application.
You’ll also manage solvent evaporation rates to preserve paint adhesion and prevent blistering.
Can You Spray Lacquer Over Enamel? What To Know
You can spray lacquer over enamel, but you need to know if the two coatings are compatible to avoid cracking or bubbling.
Make sure you thoroughly clean and scuff the enamel so the lacquer bonds properly.
Apply thin, even coats and allow adequate flash and cure time between layers to prevent solvent trapping.
Compatibility Between Coatings
Because different coatings cure and dissolve in different ways, spraying lacquer over enamel can cause bubbling, wrinkling, or failure unless you take steps to verify they’re compatible.
Consider:
- Assess spray paint compatibility and coating interactions; check material compatibility and chemical resistance.
- Use proper primer selection to confirm paint adhesion and finish durability.
- Match application techniques and careful paint layering to avoid reactions.
Surface Preparation Importance
If you’re thinking about spraying lacquer over enamel, prepping the surface properly is critical to prevent bubbling and secure adhesion.
You’ll do surface cleaning, substrate inspection, and assess surface texture before work. Use proper prep tools and quality materials, apply recommended priming techniques, respect drying times, and plan paint layering.
Choosing correct application methods secures consistent paint adhesion and reduces failures.
Application And Drying Tips
Now that the surface is clean, smooth, and primed correctly, focus shifts to how you apply and dry lacquer over enamel to avoid bubbling.
- Plan project planning: confirm paint compatibility, primer selection, and environmental factors; choose application methods and spray technique.
- Respect drying times, control ventilation practices, and avoid high humidity.
- Maintain tools: tool maintenance guarantees even coats and prevents defects.
How To Thin Spray Paint Correctly To Avoid Solvent Traps
When you thin spray paint correctly, you prevent excessive solvent from pooling under wet layers and forming solvent traps that cause bubbling and soft spots; the key is using the right reducer, mixing ratio, and application technique for your paint type. You’ll measure spray paint viscosity, follow manufacturer solvent ratio, stir thoroughly, test on scrap, and apply thin, even passes.
| Step | Action |
|---|---|
| 1 | Measure viscosity |
| 2 | Mix reducer ratio |
| 3 | Test and adjust |
Adjusting Spray Distance And Motion For Even Coats
Although small changes in distance and motion can make a big difference, you should hold the can or gun at a consistent 6–12 inches from the surface (check your product’s recommendation) and move in smooth, overlapping passes to lay down even, feathered coats.
- Practice steady spray distance and tempo.
- Use light, overlapping strokes for thin layers.
- Let each pass tack before the next to prevent runs and bubbling.
Best Conditions For Spray Painting
You’ll get better results when you control temperature and humidity, prep the surface thoroughly, and keep fresh air flowing.
Start by sanding, cleaning, and removing grease or rust so paint adheres evenly.
Also work in temperatures the paint manufacturer recommends and use fans or respirators to maintain proper ventilation.
Temperature And Humidity
If you want smooth, bubble-free spray paint, pick days with moderate temperatures and low humidity; extremes make solvents evaporate too fast or too slow, causing blisters or runs.
- Check temperature effects and humidity impacts—moisture levels change drying times.
- Plan around seasonal variations and environmental factors for favorable conditions.
- Use application strategies that adjust coats and wait times to match conditions.
Surface Preparation Steps
1. You’ll begin with surface cleaning and proper surface drying. Then use sanding techniques to smooth and boost adhesion improvement.
Choose primer selection that guarantees paint compatibility, follow recommended application timing, and test spray patterns on scrap.
Work in ideal conditions, inspect between coats, and perform a final inspection to prevent bubbling and secure durable, even coverage.
Proper Ventilation Practices
Because solvents and airborne particulates directly affect finish quality, you should set up ventilation that removes fumes and controls airflow without blasting the surface—aim for a steady, gentle crossflow that carries overspray away from the work and replaces it with fresh air.
- Use exhaust fans to capture fumes and realize ventilation benefits.
- Position intake for consistent air circulation.
- Avoid turbulent blasts that disturb wet paint.
Avoid Painting In Direct Sun Or High Wind
When you spray paint in direct sun or strong wind, the finish will often bubble, dry too fast, or collect dust and debris. These conditions upset the paint’s flash time and solvent evaporation, causing poor adhesion and surface defects.
You should monitor weather conditions, adjust application methods, consider product selection, control drying times, prioritize surface preparation, and meet ventilation needs to account for environmental factors and painting techniques.
Spray Technique Tips To Prevent Runs And Bubbles
Keep your can at the recommended spray distance—usually 6–12 inches—to avoid heavy wet coats that cause runs and bubbles.
Use smooth, even strokes and overlap each pass by about 50% so the paint lays down uniformly.
If a section starts to pool, stop and let it flash off before continuing.
Proper Spray Distance
Aim to hold the can 8–12 inches from the surface and move steadily to lay down thin, even coats—too close and the paint pools and bubbles, too far and it dries mid-air, causing a rough, uneven finish.
- Use this spray distance for ideal technique and distance guidelines; vary spray patterns by application angle.
- Maintain distance consistency and spray height for even coverage and proper paint layering.
- Watch distance effects to prevent runs and bubbling.
Even Overlapping Strokes
Although you might be tempted to blast on thick coats, overlap each pass about 25–50% and move at a steady pace so you lay down thin, even layers that dry uniformly and resist bubbling.
Use consistent overlapping techniques, watch your spray pattern, and adjust distance to keep edges wet enough to meld. That disciplined rhythm prevents runs, trapped solvents, and surface tension that cause bubbles.
How Many Coats Are Too Many: Timing Between Coats
If you keep piling on coats without giving each one time to flash and tack up, you’ll trap solvents and cause bubbling or poor adhesion; instead, follow the paint manufacturer’s recommended dry and recoat times.
Wait until each layer is dry to the touch but not fully cured, and apply thin, even coats rather than heavy ones.
- Monitor paint layer timing and respect drying intervals.
- Thin, consistent coats reduce solvent buildup.
- If unsure, err on longer drying before recoating.
Spotting Bubbles That Form During Drying Vs. Later
Knowing when bubbles appear tells you what’s causing them and how to fix the problem.
You’ll distinguish bubbling types: early bubbles during drying often link to paint application, environmental factors, or paint chemistry; later bubbles suggest adhesion issues from poor surface preparation or substrate contamination.
Do a substrate inspection, note drying stages, and trace causes to adjust prep, application technique, or material choice.
Fixing Small Surface Bubbles Without Stripping The Whole Piece
When you catch small bubbles forming after the paint has mostly dried, you don’t have to strip the whole piece to fix them; you can spot-repair with minimal disruption by following a careful sequence of cleaning, flattening, and recoating.
Inspect, clean, and test compatibility to focus on bubbling prevention and adhesion improvement.
Inspect, clean, and test compatibility to prevent bubbling and improve adhesion before spot-repairing paint.
- Surface inspection and Surface preparation.
- Quick fixes: puncture, flatten, clean.
- Recoat using correct spray technique, paint layering, application tips, and account for drying conditions.
When To Sand And Feather Before Recoat
You should sand whenever bubbles, drips, or raised texture interrupt the finish so the new coat can adhere smoothly.
Feather the edges of the sanded area to blend into the surrounding paint and avoid visible ridges.
Wait until the surface is clean and fully dry—then sand, wipe, and recoat within the paint maker’s recommended window.
When To Sand
If a bubbled finish feels rough or the surface shows lifted edges, sand and feather the area before recoating to guarantee the new paint bonds smoothly.
- Use gentle sanding techniques to remove loose paint without gouging.
- Lightly blend perimeter using feathering edges so junctions sit flush.
- Clean dust, tack cloth, then inspect; only recoat when surface is smooth and dry.
Feathering For Smooth Transitions
Feathering the edges of a sanded area helps the new coat blend seamlessly with the old, so you won’t see obvious ridges or color shifts after recoating.
You’ll use gentle sanding and progressive grit to taper edges, then clean before spraying.
Proper feathering techniques create smooth shifts, reduce visible overlap, and guarantee the new layer bonds uniformly without showing sanding lines or abrupt texture changes.
Timing Before Recoat
When the paint feels dry to the touch, don’t assume it’s ready for sanding or a feathered recoat—check the manufacturer’s recoat window and let full cure or flash time pass as recommended.
You’ll avoid bubbles by making timing adjustments and respecting ideal intervals.
- Wait full flash/cure time.
- Sand lightly within recoat window.
- If unsure, extend intervals before feathering.
How To Fully Remove Bubbled Paint Safely
Start by evaluating the extent of the bubbling so you know whether you’ll need spot repairs or to strip the whole surface; you’ll want to work methodically and use the right protective gear.
Remove loose paint with a scraper, sand to sound substrate, clean contaminants, and strip stubborn areas chemically or mechanically.
Restore surface preparation, consider paint adhesion, material suitability, paint compatibility, humidity control, spray technique, drying time, and documented repair methods.
Repair Workflow For Rust-Induced Bubbling
Because rust keeps spreading beneath paint, you’ll need a deliberate, step-by-step repair workflow that stops corrosion, restores sound metal, and prevents recurring bubbling.
- Assess rust removal, surface preparation, primer selection, and moisture control to expose clean metal.
- Choose paint compatibility, application technique, and control environmental factors for even coats.
- Monitor drying time, maintain tool maintenance, and inspect finish quality to guarantee durable results.
Addressing Outgassing On Engineered Wood
If you’re dealing with bubbling on engineered wood, outgassing—volatile compounds released from adhesives, resins, or core materials—can be the culprit and needs to be managed before repainting or refinishing.
You should evaluate outgassing effects, adjust product selection for spray paint compatibility, perform thorough surface preparation, control moisture management, use sealing techniques, plan paint layering with proper drying times, and maintain ventilation strategies.
Using Heat Or Solvents To Fix Bubbles: Risks
Thinking you can zap bubbles out with a heat gun or dissolve them with a solvent? You shouldn’t rush: improper heat application or solvent use alters paint consistency, surface temperature, and drying time, and risks material compatibility issues.
Follow safety precautions and monitor air pressure during spraying.
- Heat: low, controlled.
- Solvent: test small area.
- Protect: ventilation, PPE.
When To Re-Prime After Bubble Removal
After you’ve removed bubbling down to a sound surface and allowed the area to fully dry, you’ll want to re-prime before repainting if the exposed substrate looks raw, porous, or uneven. Use proper Re priming techniques and consider Primer selection for adhesion and sealing. Test a small patch, sand between coats, and follow drying times.
| Step | Action | Tip |
|---|---|---|
| 1 | Clean | Wipe dust |
| 2 | Prime | Thin coats |
| 3 | Test | Check adhesion |
Best Primers And Sealers To Block Future Bubbling
When you want to prevent bubbling for good, choose primers and sealers that specifically block moisture, oils, and tannins while promoting strong adhesion. Oil-based or shellac-based primers excel at sealing problematic substrates, and high-adhesion acrylic primers work well on plastics and previously painted surfaces.
- Pick primer types for substrate; check paint compatibility and product recommendations.
- Use sealer benefits with proper surface preparation and application techniques to avoid adhesion issues.
- Mind drying times, environmental factors, and finish durability for lasting results.
Spray Paint Product Tips: What To Avoid
Now that you’ve picked primers and sealers to block moisture, oils, and tannins, you also need to know what spray paint products to avoid so your work doesn’t bubble later.
Avoid mismatched spray paint selection and incompatible coating types; check surface compatibility and primer choices.
Poor prep techniques, wrong spray distance, bad drying conditions, neglecting ventilation importance, or ignoring surface textures all invite bubbling during paint application.
Choosing The Right Spray Paint For Your Material
Which spray paint matches your material? You’ll pick spray paint types based on material compatibility, surface textures, and desired paint finishes.
Consider drying times, primer selection, application techniques, and environmental factors to avoid bubbling. Match adhesive formulas to metal, wood, plastic, or masonry.
Test a small area and adjust technique for porosity and temperature to guarantee smooth, durable results.
Tools And Accessories That Reduce Bubbling
Equip yourself with the right tools and accessories to prevent bubbling before you even spray: a quality primer and compatible respirator-grade thinner, a high-density foam roller or fine-grit sanding block for smooth prep, and a nozzle cleaner or replacement caps to guarantee even atomization.
Use spray paint additives, follow surface prep techniques, maintain equipment, select proper spray nozzle types, control environment, manage paint mixing, ventilation, drying aids, application tools, and layering.
Preventive Checklist Before Every Spray Session
Before you pull the trigger, run through a quick checklist so you don’t waste time or ruin a finish:
- Confirm proper ventilation, temperature, and humidity for reliable spray preparation techniques.
- Use recommended surface cleaning methods: degrease, sand lightly, and remove dust with tack cloth.
- Shake cans, test spray on scrap, and verify even distance to prevent runs, sags, or bubbling.
How To Test For Compatibility Before You Commit
Wondering if that primer, filler, or previous paint will play nice with your new spray can?
You’ll do quick compatibility testing by spraying a hidden patch, letting it cure, then checking adhesion, bubbling, and solvent reaction.
Try different primer selection if issues show: use a recommended chemistry match.
If problems appear, switch primers—pick one with chemistry that’s compatible with your spray can.
Document results and wait full cure before committing to full coverage to avoid bubbles.
Quick Fixes For Small DIY Projects Vs. Professional Jobs
If you’re tackling a small touch-up, a quick spot-sand, a bit of primer, and a couple of light spray coats will usually do the trick; for larger or visible surfaces you’ll want pro-grade prep, matching materials, and controlled application to prevent bubbles and laps.
- Use DIY Techniques: proper Surface Preparation, Material Selection, basic Equipment Choices.
- Follow Professional Standards: precise Application Methods, Finishing Techniques.
- Avoid Common Mistakes: rushed prep, mismatched materials, heavy coats.
Cost-Benefit: Repair Now Or Start Over
When you weigh bubbling paint, consider whether a spot repair will save time and money or just mask a deeper issue that demands stripping and repainting.
Do a cost analysis, estimate long term savings, and list repair benefits versus full redo.
You’ll balance quality considerations, aesthetic impact, and project evaluation to decide if quick fixes meet standards or replacement is wiser.
Common Myths About Spray Paint Bubbling Debunked
Having weighed repair versus replacement, you’re probably ready to separate facts from fiction about paint bubbling.
Myth busting relies on paint science, application techniques, and surface preparation—not luck. Consider:
- Material selection and paint compatibility matter.
- Environmental factors, coating layers, and drying times influence results.
- Repair methods hinge on correct troubleshooting tips and proper prep, not quick fixes.
Troubleshooting Flowchart: What To Try First
Because bubbling can come from several sources, start by isolating variables so you can pinpoint the cause quickly.
Check spray paint types and product reviews, test surface types and clean one area, vary application techniques and spray patterns, note environmental factors and drying times, and try removing paint additives.
Record results systematically so you can identify which change stopped bubbling and repeat only that adjustment.
Action Plan: How To Get A Bubble-Free Finish Next Time
Start by prepping your workspace and materials so you control the variables that cause bubbling.
Use surface preparation, primer selection, paint compatibility, and appropriate painting tools.
Use proper surface prep, choose the right primer, match paint types, and pick suitable tools for bubble-free results.
Monitor humidity control and environmental factors to manage drying times.
Follow these steps for bubble prevention and application techniques, plus troubleshooting methods if problems recur:
- Clean, sand, prime.
- Test spray, thin coats.
- Control temp, wait between coats.
Frequently Asked Questions
Can Bubbled Spray Paint Release Harmful Fumes After Drying?
Yes — dried bubbled spray paint can still emit solvents and particulates, so you should prioritize fume safety. Address bubbling causes, sand and seal the surface, and ventilate or wear respirators to reduce exposure risks.
Will Clear Coat Bubbling Behave Differently Than Base Color Layers?
Definitely—clear coat bubbling behaves differently. Smooth, subtle starts soothe: clear coat adhesion struggles show sooner, sealing scabs you’ll spot; prioritize proper prep, compatible products, and bubble prevention measures to avoid surface separation and glossy gaps.
Can Humidity Cause Bubbling Even After Paint Feels Dry?
Yes — humidity effects can still cause bubbling after paint feels dry. You’ll trap moisture under the film, weakening paint adhesion and later causing blisters; always guarantee low humidity and full cure before sealing or recoating.
Does Brushing Over Spray Paint Eliminate Bubbles Without Sanding?
Straight up, no — brushing over spray paint rarely eliminates bubbles without sanding. You’ll need gentle brush techniques to smooth edges, but proper spray application and stripping or sanding out trapped air are usually the only reliable fixes.
How Long Should I Wait Before Declaring Bubbling Is Permanent?
Wait about 48–72 hours; if bubbles persist after proper drying and any bubbling prevention techniques and paint application methods were followed, you can assume it’s permanent and you’ll need to sand, strip, or refinish to fix it.
Conclusion
You can stop stressing and start fixing: clean the surface, sand the rough spots, and strip any failed layers; thin heavy coats, keep cans moving, and dry between passes; replace incompatible primers, pause for proper curing, and work in the right temperature. Do the simple checks first, do the correct prep next, and do steady application last. Follow these steps, and you’ll avoid bubbles, save time, and finish with smooth, lasting paint every time.