How Long Does Concrete Paint Take to Dry? Full Guide
You can expect concrete paint to be touch-dry in a few hours but not fully cured for 24 hours to several weeks, depending on paint type, coat thickness, temperature and humidity. Thin, even coats and good airflow speed drying; high humidity and cold slow it. Acrylics and latex dry fastest, epoxies and masonry paints take longer. Plan staged use—light foot traffic after about 24 hours, vehicles after 24–72 hours—and keep reading to learn practical tips and tests.
Quick Answer: How Long Concrete Paint Takes to Dry
Wondering how long concrete paint takes to dry? You’ll usually notice surface dryness within hours, but full curing can take longer.
Focus on paint application techniques—thin, even coats speed drying and reduce tackiness.
Ignore drying time myths that promise instant cure; temperature, humidity, and coat thickness matter.
Plan for staged use, not immediate heavy traffic, to protect the finish.
Typical Drying Time Ranges by Paint Type
While exact times vary, you can expect most concrete paints to reach surface dryness within a few hours and full cure within days to weeks depending on the type. You’ll choose based on paint durability, surface texture, application techniques, paint adhesion, seasonal considerations, color choices, product recommendations, and safety precautions.
| Type | Dry Time | Notes |
|---|---|---|
| Acrylic | 1–4 hrs | Good adhesion |
| Epoxy | 6–12 hrs | High durability |
| Latex | 2–6 hrs | Easy application |
| Masonry | 4–24 hrs | Texture-specific |
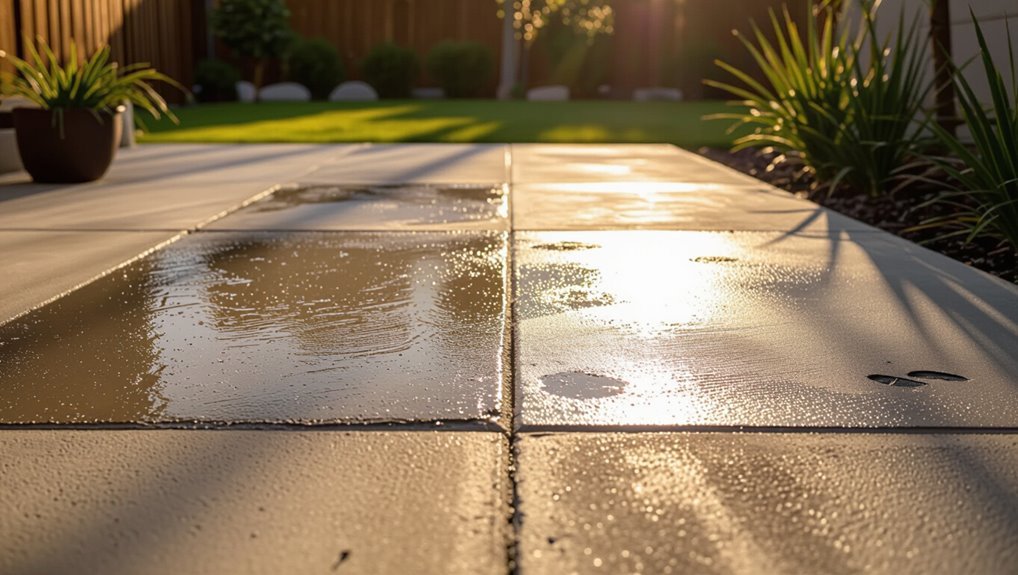
Surface Drying vs. Full Cure: Why Both Matter
You’ll notice the paint feels dry to the touch long before it’s fully cured, which is the difference between surface drying time and full cure.
Temperature, humidity, paint formulation, and coat thickness all affect how long curing actually takes.
Don’t use or stress the surface until the full cure is reached, since strength, adhesion, and chemical resistance continue developing well after the surface is dry.
Surface Drying Time
Because surface drying happens long before a paint job fully cures, you shouldn’t assume a dry-to-the-touch coating is ready for heavy use.
You’ll check tackiness, adherence, and wait for deeper cure based on concrete surface textures and paint application techniques.
Monitor times and test before traffic.
- touch test
- adhesion check
- humidity monitor
- gentle load trial
- manufacturer guidelines
Factors Affecting Cure
Although surface dryness gives you a quick sense that paint has set, it’s not the whole story—full cure depends on chemical cross-linking and moisture migration that continue long after the top feels dry. You’ll monitor cure time and paint adhesion; temperature, humidity, porosity, and coating thickness all matter.
| Factor | Effect | Action |
|---|---|---|
| Temperature | Speeds cure | Warm environment |
| Humidity | Slows cure | Dehumidify |
Importance Of Full Cure
Understanding matters when you’re deciding if a painted concrete surface is truly ready—the paint may feel dry to the touch, but full cure is a deeper, time-dependent process that determines long-term durability and adhesion.
You should wait recommended cure time and maintain moisture control to prevent failures.
Consider these differences:
- Surface feels dry vs. structural cure
- Traffic and load limits
- Environmental effects
- Repair timing
- Warranty implications
How Temperature Speeds or Slows Concrete Paint Drying
Temperature has a big influence on how quickly concrete paint dries: warmer air speeds evaporation and chemical curing, while cooler conditions slow both processes.
You’ll notice paint that dries fast in summer can take much longer in cold weather, and too-cold conditions may prevent proper curing altogether.
Plan your painting schedule around temperatures and check manufacturer guidelines for the ideal range.
Temperature Effects On Drying
When the air and concrete are warmer, paint cures faster because the solvents evaporate more quickly and chemical reactions proceed at a higher rate; conversely, cold conditions slow evaporation and can leave paint tacky for much longer.
You’ll notice temperature fluctuations affect drying consistency; manage heat and airflow to guarantee uniform cure.
- Monitor ambient temperature
- Improve ventilation
- Use heaters cautiously
- Avoid direct sun spikes
- Schedule during stable days
Cold Weather Slowdown
If you’re working in colder conditions, expect paint to take much longer to set and cure because low heat slows solvent evaporation and the chemical reactions that harden the coating. You’ll face cold weather challenges and higher risk of paint adhesion issues; slow drying raises dirt pickup and recoat timing. Plan heaters or warmer days to guarantee proper cure.
| Temperature | Effect | Solution |
|---|---|---|
| <40°F | Very slow | Use heaters |
| 40–50°F | Slow | Extend dry time |
| >50°F | Normal | Standard cure |
How Humidity Affects Concrete Paint Drying Times
Although moisture in the air might seem subtle, humidity plays a major role in how quickly concrete paint dries. High humidity slows solvent evaporation and prolongs tackiness, while low humidity speeds evaporation but can cause rapid skinning and adhesion problems.
You’ll adjust humidity effects with proper drying strategies:
- Monitor %RH and forecast
- Use dehumidifiers or fans
- Schedule during moderate conditions
- Apply thinner coats
- Allow extended cure times
How Concrete Porosity Changes Paint Drying Time
Because concrete soaks up liquids like a sponge, its porosity directly shapes how fast paint dries: higher porosity pulls solvent and water into the substrate, speeding surface evaporation but starving the film of binders and causing longer tack time and poor coverage.
On the other hand, low-porosity surfaces keep solvents at the surface so paint skins and cures more predictably.
You’ll assess concrete texture, adjust primer use, and improve paint adhesion.
Why Concrete Moisture Content Controls Paint Drying
Porosity affects how paint interacts with concrete, but the moisture trapped in those pores actually dictates whether a coating will dry or fail.
Porosity influences paint adherence, but it’s the moisture in those pores that determines whether coatings will dry or fail.
You should test and control moisture before painting; wet concrete prevents solvent evaporation and weakens paint adhesion.
- Use reliable moisture measurement tools
- Measure at multiple depths
- Allow drying time after remediation
- Use vapor barriers if needed
- Recheck before coating
Acrylic vs. Epoxy vs. Oil-Based: Drying Time Comparison
When you’re choosing a concrete coating, drying time often decides which product fits your schedule and performance needs; acrylics typically dry fastest, epoxies take longer due to chemical cure, and oil-based paints fall somewhere in between.
You’ll pick acrylics for quick recoats, epoxies for durability, and oils for compromise.
Consider color impact and tailor application techniques to temperature and humidity for predictable results.
Solvent-Based vs. Water-Based: Drying Tradeoffs for Concrete Paint
When you’re choosing between solvent-based and water-based concrete paint, drying time is a key tradeoff: solvent-based formulas often dry faster, while water-based paints can take longer to cure fully.
You’ll also want to weigh environmental impact—water-based options emit fewer VOCs and are generally safer for indoor or enclosed spaces.
Consider the project timeline and ventilation before you pick one.
Drying Time Comparison
Although both solvent-based and water-based concrete paints aim to protect and beautify your surface, they dry by different mechanisms that affect speed, odor, and durability.
You’ll choose based on project timing, ventilation, and finish needs; use appropriate drying methods and drying tools to speed cure without harming the coat.
- Solvent: faster touch-dry
- Water: longer cure
- Temperature matters
- Humidity slows drying
- Thin coats dry quicker
Environmental Impact
Because solvent-based paints release volatile organic compounds as they dry, you’ll get faster touch-dry times at the cost of greater indoor air pollution and stronger odors that need ventilation and proper disposal.
You should favor water-based options for lower emissions, use eco-friendly materials, follow sustainability practices like proper disposal and low-VOC products, and ventilate during application to protect health and the environment.
How Primer Choice Affects Concrete Paint Drying Schedule
If you pick the right primer, you’ll speed up drying and improve adhesion, while the wrong one can trap moisture and extend cure times.
Choose primer types suited to concrete, follow manufacturer application techniques, and monitor porosity. Properly primed surfaces dry predictably and reduce recoat delays.
- Use acrylic primers
- Consider alkyd for specific jobs
- Seal high-porosity areas
- Thin coats, avoid pooling
- Follow cure times
How Paint Color and Sheen Affect Drying Perception
When you choose darker colors or higher sheens, the paint can look dry faster even if the underlying moisture hasn’t fully evaporated; gloss and semi-gloss films reflect light and mask tackiness, while matte finishes absorb light and reveal slight sheen or damp spots longer.
You’ll notice color psychology alters perceived warmth or coolness, sheen impact creates a drying illusion, and visual perception can mislead your touch test.
How Coat Thickness Alters Drying and Cure Times
If you apply a thin coat, it’ll dry faster per layer but may require more coats to build protection.
Thicker coats take longer to dry on the surface and even longer to cure through, which can trap solvents and extend overall cure time.
Plan each layer’s thickness so you balance drying time per coat with the total time needed for a full cure.
Thin Versus Thick Coats
Although thinner coats dry to the touch faster, they also require more layers to build durable coverage.
On the other hand, thicker coats take longer to evaporate solvent and cure fully but can hide imperfections in fewer applications.
You’ll choose based on durability, appearance, and time.
- thin coats speed drying
- thick coats improve hide
- more layers increase protection
- thicker films need longer cure
- balance look versus schedule
Drying Time Per Layer
Because paint dries from the surface inward, each additional millimeter of film slows both evaporation and chemical curing.
So you’ll see noticeably longer touch-dry and full-cure times as coats get thicker.
You should control coat thickness during concrete preparation, use proper drying techniques like ventilation and moderate heat, and wait recommended intervals between layers to prevent trapping solvents or creating soft, uneven films.
Impact On Full Cure
Thicker coats don’t just take longer to become touch-dry; they slow the whole curing process by trapping solvents and limiting oxygen and heat transfer through the film.
So you’ll see extended times before the paint reaches its rated full cure. You should adjust application and curing conditions to manage impact factors.
- Reduce thickness per coat
- Improve ventilation
- Control temperature
- Allow extra cure time
- Follow manufacturer guidelines
Roller, Brush, or Sprayer: Which Dries Fastest on Concrete?
Wondering which application method gets concrete paint dry the quickest? You’ll find roller versus sprayer trade-offs: spray lays a thinner, even coat that typically dries fastest, while a roller deposits more paint and takes longer.
Brush application is best for edges and touch-ups but slows drying where strokes overlap.
Choose sprayer for speed, roller or brush for coverage control and texture.
How Airflow and Ventilation Boost Drying Speed
You can speed up concrete paint drying by improving airflow and cutting indoor humidity.
Open windows, run fans, or use a dehumidifier to keep air moving and moisture levels low.
That helps solvent and water-based paints evaporate faster and cure more evenly.
Improve Air Circulation
Because moving air carries moisture away from the surface, boosting ventilation speeds up concrete paint drying noticeably—so open windows, run fans, or use exhaust systems to keep steady airflow across the coating.
You’ll improve air quality and employ ventilation techniques as gentle drying aids while monitoring moisture control.
- Position fans for crossflow
- Use timed exhausts
- Avoid stagnant corners
- Shield from dust
- Cycle fresh air
Reduce Indoor Humidity
When you lower indoor humidity, paint solvents and water evaporate faster from concrete, so the coating sets and cures in less time.
You can use dehumidifiers, exhaust fans, and open windows to speed drying and improve moisture management.
Monitor conditions with a hygrometer for effective humidity control, and adjust ventilation or HVAC to maintain ideal drying rates for durable, evenly cured concrete paint.
Substrate Prep That Shortens Concrete Paint Drying
Proper substrate preparation speeds drying by creating a uniform, breathable surface that lets moisture escape instead of trapping it under the paint.
You’ll inspect substrate types, use surface cleaning, remove moisture barriers, and choose primer selection and adhesion techniques for consistent paint application.
Consider texture effects and compatible curing agents to optimize drying.
- Clean and etch
- Repair cracks
- Test moisture
- Select primer
- Sand for texture
Temperature and Humidity Control During Curing
You’ll want to keep the curing area within the paint’s ideal temperature range to guarantee proper film formation and consistent drying times.
Also control humidity—too much moisture slows drying, while very low humidity can cause rapid surface curing and cracking.
I’ll explain how to monitor and adjust both so your concrete paint cures evenly.
Ideal Temperature Range
Although concrete paint can cure in a range of conditions, aiming for an ambient temperature between 50°F and 85°F (10°C–29°C) gives you the most reliable drying times and adhesion; temperatures below that slow chemical reactions and above it can cause surface flash-drying that traps solvents and weakens the film.
You should control temperature fluctuations and maintain ideal conditions:
- Monitor hourly temperatures
- Avoid direct sun exposure
- Use heaters or fans cautiously
- Schedule work during stable weather
- Protect fresh paint from drafts
Managing Humidity Levels
When humidity climbs above about 70% it slows solvent evaporation and retards the chemical reactions that let concrete paint cure, so you’ll want to keep relative humidity in the 40–60% range for most coatings. You’ll use dehumidifiers, ventilation, and schedule work to maintain humidity control and moisture management for ideal drying.
| Tool | Purpose |
|---|---|
| Dehumidifier | Lower RH |
| Fans | Airflow |
| Hygrometer | Monitor RH |
| Timing | Avoid rain/night |
When to Apply a Second Coat (Practical Timing Rules)
If the first coat feels dry to the touch but still soft or tacky, wait longer before applying the second coat to avoid lifting or uneven coverage.
For clear second coat timing during paint application, check surface dryness, follow manufacturer recoat intervals, and test a small area.
Use these rules:
- Confirm no tackiness
- Note temperature/humidity
- Use recommended recoat window
- Light sanding if needed
- Apply even coats
When Light Foot Traffic Is Safe on Painted Concrete
You can usually do a cautious walk-through of painted concrete within 24 hours, but full light foot traffic is often best after 48–72 hours depending on temperature and humidity.
Check the paint’s dry-to-touch and recoat times on the label and test a small area before trusting it with regular use.
If conditions were cool or damp during drying, wait longer to avoid scuffing or tracking.
Safe Walk-Through Time
Wondering how long you should wait before walking on freshly painted concrete? You’ll follow traffic guidelines and use proper drying techniques, considering moisture control and environmental considerations.
Choose safe paint with careful paint selection, surface preparation, and application methods to minimize risk.
- Inspect tackiness
- Check manufacturer cure time
- Avoid puddles
- Protect edges
- Test a small step
Light Traffic Timing
A good rule of thumb is to wait at least 24 hours before allowing light foot traffic on freshly painted concrete, since most acrylic and latex floor paints form a walkable film by then under warm, dry conditions. Follow light traffic guidelines: avoid dragging heavy items, use soft-soled shoes, and keep moisture away. Safe walking tips reduce scuffs and curing delays.
| Time | Condition | Action |
|---|---|---|
| 24h | Warm/dry | Walk lightly |
| 48h | Cool | Limit traffic |
| 72h | Humid | Protect area |
| 7d | Fully curing | Normal use |
| 14d | Cured | Heavy use allowed |
When Vehicle Traffic Is Safe on Painted Driveways
While paint may feel dry to the touch within a few hours, you should wait until it reaches its recommended cure time before driving on it so you don’t scuff or embed tire marks.
You’ll follow traffic guidelines and prioritize paint safety; typically wait 24–72 hours depending on product and weather.
- Check manufacturer cure time
- Avoid sudden starts/stops
- Drive slowly initially
- Inspect for tackiness
- Keep tires clean before use
When Heavy Loads or Furniture Can Be Placed
Before you move heavy furniture or appliances onto freshly painted concrete, make sure the paint has fully cured to avoid permanent indentations, scuffs, or trapped moisture under sealant.
Use timing strategies and drying indicators from the product to respect weight limits and load capacity.
Plan furniture placement to minimize concentrated loads, add surface protection like pads or plywood, and consider traffic considerations when scheduling final setup.
How to Test If Concrete Paint Is Truly Dry or Fully Cured
To check if your concrete paint is dry, start with a gentle touch and thumbprint test—press lightly in an inconspicuous spot to see if the surface feels tacky or leaves an impression.
If it seems dry to the touch, perform a tape adhesion check by pressing a piece of painter’s tape down firmly and pulling it off quickly to see if any paint comes away.
Use both tests together to decide whether the paint is ready for use or needs more curing time.
Touch And Thumbprint Test
A simple touch or thumbprint test gives you a quick, practical way to tell if concrete paint is truly dry or still curing.
Use gentle pressure; don’t rub. These test methods reveal surface tack, color change, and resistance—key drying indicators.
- Press lightly with fingertip
- Look for tackiness
- Check color uniformity
- Note residue on skin
- Repeat after an hour
Tape Adhesion Check
When you want a reliable check beyond a fingertip test, use a piece of painter’s tape to assess whether the concrete paint has bonded and cured; press a short strip down, rub it firmly, then pull it off at a sharp angle and inspect both the tape and the surface for lifting, smudging, or residue. Use different tape types for clear adhesion testing.
| Tape type | Adhesion level | Notes |
|---|---|---|
| Painter’s | Low–Med | Gentle |
| Masking | Med | Common |
| Duct | High | Aggressive |
| Specialty | Variable | For tests |
Plan the Full Timeline: Prep, Dry, and Cure Windows
Before you pick up a brush, map out each step so you know exactly how long prep, drying, and curing will take under your conditions.
Before you pick up a brush, map each step so prep, drying, and curing fit your conditions.
You’ll schedule prep, paint application, and drying techniques while noting temperature, humidity, and ventilation to predict curing windows.
- Surface prep time
- Primer and coat schedules
- Drying milestone checks
- Environmental adjustments
- Final cure verification
Safe Ways to Accelerate Drying Without Damaging the Finish
If you’re short on time, you can speed up concrete paint drying without harming the finish by controlling temperature, airflow, and humidity and by choosing gentle acceleration methods like fans, heaters with thermostats, and quick-dry additives rated for masonry.
Use layered drying techniques: ventilate, raise temperature modestly, and dehumidify.
Test paint additives on a small area first to verify adhesion and color stay true.
Eight Common Mistakes That Extend Concrete Paint Drying
Speeding up drying helps, but using the wrong methods or ignoring preparation can actually slow paint cure and ruin the finish.
Speeding drying can help — but wrong methods or poor prep will slow curing and ruin the finish.
You need correct drying techniques and careful paint application; avoid shortcuts that trap moisture or cause uneven coats.
- Applying thick coats
- Painting on damp concrete
- Skipping primer
- Poor ventilation
- Using wrong temperature range
Painting New vs. Old Concrete: Drying Differences
When you’re deciding whether to paint new or old concrete, expect different drying behaviors because porosity, moisture content, and surface contaminants change how paint soaks in and cures.
You’ll tailor surface preparation, application techniques, and paint compatibility checks for each.
Consider color selection, environmental conditions, project timelines, maintenance considerations, and product warranties to guarantee proper cure and lasting results.
Painting in Cold Weather: Drying Strategies
When you’re painting concrete in cold weather, pick a fast-setting paint formulated for low temperatures so it cures more reliably.
Raise the ambient temperature with heaters or by painting during the warmest part of the day to speed drying.
Use fans to boost airflow and a dehumidifier to remove moisture for consistent results.
Choose Fast-Setting Paint
Because cold slows chemical reactions, pick a fast-setting concrete paint to cut drying time and reduce the risk of tackiness or rework.
You’ll focus on fast drying options during paint selection, comparing labels and specs so you apply formulations meant for low temps.
- Check cure and recoat times
- Verify cold-weather rating
- Prefer acrylic-urethane blends
- Favor low-VOC, fast-set formulas
- Test a small area first
Increase Ambient Temperature
Raise the ambient temperature by 10–20°F to speed evaporation and help paint cure properly in cold weather.
You’ll reduce tack time and film formation delays so ambient temperature effects favor curing. Use reliable heaters and monitor temps to maintain ideal drying conditions throughout the recommended drying window.
Avoid overheating surfaces; gradual, consistent warmth prevents bubbles and poor adhesion, ensuring durable concrete paint finish.
Use Airflow And Dehumidification
If you boost airflow and cut humidity, paint solvents evaporate faster and films set more evenly on cold concrete.
Use targeted airflow techniques and proven dehumidification methods so coatings cure reliably. Position fans and vents, run a portable dehumidifier, seal drafts, monitor RH, and avoid oversaturation.
These steps speed drying and reduce blistering or adhesion issues in low temperatures.
Painting in High Humidity or Rainy Seasons
When you paint in high humidity or during rainy seasons, moisture slows drying, increases tackiness, and can cause streaks or poor adhesion.
Plan for longer drying times, pick paints labeled for high humidity, and schedule work during the clearest window you can find.
You should focus on humidity effects, rainy season precautions, moisture management, paint selection, drying optimization, surface preparation, environmental considerations, and weather impacts.
How to Choose Fast-Dry Paint Products for Concrete
Because you’ll often be racing against weather and foot traffic, pick concrete paints that advertise fast-dry times and are formulated for masonry; these products cure quicker and give you a reliably hard finish so you can recoat or reopen the area sooner.
- Look for solvent or acrylic fast dry options
- Compare paint brands’ dry and recoat times
- Check surface prep requirements
- Verify coverage rates
- Choose anti-slip additives when needed
How Warranties and Product Specs Define Acceptable Drying
Although drying times listed on the label sound straightforward, you should treat them as performance targets tied to specific conditions and warranty limits.
You’ll need to follow product specifications precisely—temperature, humidity, substrate prep—to meet warranty implications. Deviations can void coverage or cause premature failure.
Keep records of conditions and application steps so you can prove compliance if a warranty claim arises.
Read Paint Labels: Dry, Recoat, and Cure Times Explained
Curious what those tiny numbers and symbols on a paint can really mean? You’ll learn paint label terminology so you avoid drying time misconceptions and plan correctly:
- Dry time (touch dry)
- Recoat time (when next layer’s safe)
- Full cure (maximum hardness)
- Temperature/humidity notes
- Surface prep and coverage info
Read labels closely; they guide safe recoating and realistic cure expectations.
Troubleshooting: Why Paint Sometimes Never Seems to Dry
Reading the label is your first step, but sometimes paint still seems to refuse to dry—and when that happens you need to troubleshoot.
Check paint consistency and correct thinning; review surface preparation to remove contaminants.
Fix drying errors by adjusting humidity control and ventilation.
Reassess paint layering and application techniques to avoid overbuild.
Consider environmental factors and try targeted drying solutions like dehumidifiers or fans.
Surface Defects Caused by Improper Drying (What to Look For)
When concrete paint doesn’t dry properly, you’ll start noticing a range of surface defects that signal deeper problems—tacky or gummy patches, blistering, powdery chalking, uneven sheen, and visible streaks or brush marks are the most common.
- Check surface inspection for tackiness and blistering.
- Note drying indicators and uneven drying patterns.
- Perform moisture assessment before recoating.
- Evaluate paint adhesion and finish quality.
- Use surface evaluation to guide defect prevention.
How Sealers and Maintenance Affect Long-Term Curing
Those surface defects often trace back to moisture and exposure issues that sealers and maintenance routines can either fix or make worse.
You’ll weigh sealer types and application techniques to support the curing process and surface protection.
Consider environmental considerations and maintenance frequency to prevent failure. Proper care limits long term effects and boosts performance longevity, so inspect, reapply, and address moisture promptly.
Phased Painting: Scheduling Across Multiple Areas
If you’re managing paint across multiple concrete areas, phase the work to match drying times, traffic patterns, and weather windows so each section cures properly before the next is started.
You’ll use a phased approach with area coordination, a clear painting schedule, and project management practices.
Delegate tasks, plan resource allocation, improve time estimation, and apply workflow optimization.
- task delegation
- time estimation
- resource allocation
- area coordination
- workflow optimization
How Pros Manage Drying on Large Concrete Jobs
Because large concrete jobs amplify minor delays into schedule bottlenecks, pros rely on tight sequencing, moisture testing, and buffer windows to keep drying on track.
You’ll adopt drying techniques like accelerated ventilation and low-heat curing, apply professional strategies for staged work, and log timing considerations per zone.
Large project management means you monitor humidity, adjust crews, and enforce hold times to prevent rework.
Document Drying Times for Warranties and Inspections
A clear, dated record of concrete paint drying times helps you meet warranty terms and pass inspections without surprises.
You should keep precise drying documentation tied to batch numbers, weather, and surface prep so you can prove compliance with warranty requirements.
- Date and time stamps
- Product and batch ID
- Temperature and humidity
- Surface prep notes
- Inspector or technician initials
Quick Checklist Before You Finish: Go/No-Go for Traffic
With your drying records in hand, run this quick go/no-go checklist to decide if the surface can take traffic:
Check cure time met per product label, surface temp within range, no tackiness, even color and adhesion, and humidity stable.
Verify a small foot traffic test in an inconspicuous spot, review warranty thresholds, and confirm tools and signage to control access until full traffic readiness is certified.
Frequently Asked Questions
Can Painted Concrete Be Pressure-Washed Soon After Curing?
Yes — but don’t assume immediate pressure-washing’s safe: you’ll want to wait until the paint’s fully cured to protect paint durability. Use gentle cleaning techniques first, then gradually increase pressure to avoid stripping finish.
Do Concrete Paints Off-Gas Harmful Fumes During Curing?
Yes—you may notice odors as concrete paints off-gas during the curing process; you’ll want to prioritize fume safety by ventilating, using low-VOC formulas, and wearing respirators if ventilation’s limited or sensitivity is an issue.
Will UV Exposure Accelerate or Damage Concrete Paint Drying?
Yes — intense UV exposure can speed drying but can also scorch finishes, so you’ll balance faster drying times with potential reduced paint durability; monitor weather conditions, provide shade or gradual curing to avoid premature damage.
Can Additives (Accelerators/Retarders) Void Paint Warranties?
Yes — using additives can void warranties; you’ll need to check additive types and warranty details, because manufacturers often restrict unapproved accelerators or retarders, and altering product chemistry may relieve them of liability for failures.
How Does Salt or De-Icing Chemicals Affect Cured Paint Longevity?
Like frostbite on skin, salt damage eats at cured coatings; you’ll see fading, cracking, and flaking faster where de-icing chemicals attack. You should choose high chemical resistance paints and rinse surfaces after exposure to extend longevity.
Conclusion
You’ll usually wait 1–24 hours for concrete paint to feel dry and up to 7 days to fully cure, so don’t rush foot or vehicle traffic. If you’re worried that short “dry” times mean it’s ready, remember surface dryness isn’t full strength—curing builds adhesion and durability. To be safe, follow the paint’s cure times, keep conditions warm and dry, and avoid stress on the surface until the full cure period’s passed.