How to Hang a Painting on a Brick Wall Securely
You can hang a painting on brick securely by choosing masonry anchors, drilling into the brick (not the mortar), and matching fasteners to the artwork’s weight and wall condition. Clean and dry the surface, mark locations, and use a hammer drill with carbide-tipped bits on low speed, clearing dust as you go. Embed anchors to the correct depth, space multiple fasteners for heavy pieces, and check level and stability—keep going to learn specific anchors, tools, and safety tips.
What This Guide Covers and Who It’s For
Before you pick up a drill, this guide walks you through practical, step-by-step methods for hanging art on exposed or painted brick—whether you’re working with soft mortar, hard brick, or a veneer finish.
You’ll learn how different painting types and wall aesthetics affect fastener choice, damage risk, and placement.
It’s for renters, homeowners, and DIYers who want secure, tidy results without guessing.
Quick Steps: Hang a Painting on Brick
Start by deciding where the painting will hang. You’ll mark height, check brick surface, and choose hardware suitable for art placement to preserve wall aesthetics. Drill, insert anchors, and hang securely. Adjust level and spacing.
| Step | Tool | Tip |
|---|---|---|
| 1 | Pencil | Mark |
| 2 | Drill | Steady |
| 3 | Anchor | Secure |
| 4 | Hook | Level |
| 5 | Tape | Measure |
Why Brick Needs Different Hardware Than Drywall
Brick is much harder and more brittle than drywall, so you can’t just use the same nails or anchors.
You’ll need fasteners designed for masonry—like sleeve anchors, masonry screws, or plugs—that grip in brick or mortar without cracking it.
Choosing the right hardware guarantees your painting stays secure and the wall isn’t damaged.
Different Material Properties
Because brick and drywall behave so differently, you can’t use the same fasteners for both—brick is dense and brittle while drywall is soft and hollow, so the anchors, screws, and load-bearing methods you choose must match the material.
Assess material durability and surface texture before installing hardware.
Brick transfers load through mortar and masonry; drywall relies on studs or specialized anchors, so plan anchoring accordingly.
Appropriate Fastener Types
While drywall lets you rely on studs or lightweight anchors, masonry demands fasteners that bite into dense, brittle material—so you’ll use different hardware for brick than for drywall.
You should pick fastener materials and designs based on brick type and weight capacity.
Consider options:
- Masonry screws for solid brick
- Sleeve anchors for heavy loads
- Plastic anchors for light frames
- Epoxy anchors for maximum strength
Brick or Mortar: Where Should I Anchor?
Aim for the brick, not the mortar, since mortar crumbles and won’t hold weight reliably.
You should drill into the solid brick using a masonry bit and hammer drill for a secure hole.
Then insert proper masonry anchors sized for your screws and the painting’s weight.
Anchor In Brick Not Mortar
If you want a secure anchor, drill into the brick itself rather than the mortar between bricks; brick holds fasteners far better than the softer, crumbly mortar and won’t loosen over time.
You should focus on anchor placement and proper drill techniques. Consider:
- Choose solid brick, not glazed faces
- Mark stud-like centers
- Use compatible anchors
- Check depth and alignment
Drill Into Solid Brick
Drill directly into the solid brick, not the mortar, because brick provides a reliable, long-lasting grip for anchors and won’t crumble under load the way mortar can.
Choose correct drilling techniques: start with a masonry bit, use a hammer drill on low speed, clear dust frequently, and keep the bit perpendicular.
Use appropriate masonry tools and steady pressure to avoid cracking the brick.
Use Masonry Anchors
Now that you’ve targeted solid brick and prepared the hole, pick the right masonry anchor for the job — and decide whether to set it in the face of the brick or in the mortar.
Choose based on masonry types, anchor depth, and load. Consider:
- Face of brick: stronger, avoid cores
- Mortar: easier, lower strength
- Sleeve anchors: versatile
- Plug anchors: light loads
Estimate Your Painting’s Weight and Load
Before you pick anchors, figure out how much your painting and its hanging hardware actually weigh so you choose fittings rated for that load.
Weigh the frame, glass, backing, and wire together for accurate weight estimation. Add a safety margin (25–50%) and perform a simple load analysis to select anchors and screw sizes that comfortably exceed the total rated load.
Best Brick Locations for Anchors
1 solid brick is usually your best bet for anchor placement, since bricks carry loads far better than the softer mortar between them.
You should pick full, undamaged bricks near the painting’s center of gravity to guarantee ideal load distribution.
Consider these points and best anchor types:
- Choose center of brick, not edge
- Use solid-brick anchors rated for weight
- Avoid cracked bricks
- Space anchors for balance
Inspect Brick and Mortar Before Drilling
Before you drill, check the mortar for cracks or crumbling so you don’t rely on weak material.
Tap or press the brick to gauge hardness—soft, chalky brick won’t hold anchors well.
Choosing solid brick over damaged mortar will keep your painting secure.
Check Mortar Condition
Because the mortar holds the bricks together, you should inspect it carefully for cracks, crumbling, or gaps before you drill.
Check mortar quality and plan repair techniques if needed. Look for loose joints, soft spots, hairline cracks, and voids.
Use proper patching, tuckpointing, or professional help so your anchor will grip and the wall stays sound.
Identify Brick Hardness
Brick density tells you how the wall will take a hole, so tap each brick and listen for a solid, ringing sound versus a dull thud; harder, dense bricks ring and hold anchors better, while soft or hollow-sounding bricks can crumble under a drill.
You’ll note brick types and perform simple hardness testing—tap, probe with a nail, and avoid drilling into crumbling or weathered units.
Tools You Need to Hang Art on Brick
You’ll need the right tools to make hanging art on brick safe and secure: a hammer drill with masonry bits, appropriate anchors (masonry screws or sleeve anchors), a masonry bit set in the right sizes, a tape measure, a pencil or chalk, a level, and safety gear like goggles and gloves.
To hang art on brick safely, use a hammer drill, proper anchors, measuring tools, level, and safety gear.
This tools overview lists essential items to prepare:
- Measure precisely
- Mark securely
- Protect yourself
- Match anchors to weight
Choose the Right Drill and Bit for Masonry
Now that you’ve lined up the right anchors and measured carefully, pick a drill and bit that’ll handle masonry reliably: a hammer (rotary) drill works best for brick or mortar, and you should match its power and speed settings to the size of the anchor.
Compare masonry drill types—corded hammer, cordless hammer, SDS—and choose correct drill bit sizes (carbide-tipped) for clean, accurate holes.
Fasteners for Solid Brick: Sleeve, Wedge, Expansion
Three common choices for fastening into solid brick—sleeve anchors, wedge anchors, and expansion anchors—give you reliable holding power when matched to the hole size and load.
You’ll pick based on weight, edge distance, and vibration. Follow brick installation tips and masonry tool recommendations.
- Sleeve: good for hollow or solid
- Wedge: high shear strength
- Expansion: adjustable grip
- Torque carefully
Fasteners for Mortar: Screws, Hooks, and Plugs
When fastening into mortar instead of brick, pick hardware designed to grip softer, crumbly material so your picture stays secure without cracking the joint.
You’ll choose screws with proper plugs and coated hooks that match mortar strength and fastener compatibility.
Drill gently, use plastic or nylon plugs sized to mortar density, and avoid over-torquing; test load before hanging the painting.
When to Use Expansion vs. Sleeve Anchors
If you’re fastening into brick or mortar and need something stronger than screws and plugs, pick between expansion and sleeve anchors based on load, hole size, and material condition.
You’ll choose anchor types by considering strength and edge distance.
Use:
- expansion anchors for solid brick and point loads
- sleeve anchors for variable holes and heavier weight distribution
- inspect mortar before selecting
Do Plastic Anchors or Wall Plugs Hold on Brick?
You can use plastic anchors in solid brick, but they work best in the face of the brick rather than the mortar.
Choose plugs for lighter pieces or when the hole snugly matches the anchor size; they expand to grip the brick pores.
For heavy paintings, though, you’ll want sturdier anchors or masonry screws instead of relying solely on plastic plugs.
Plastic Anchors In Brick
1 simple fact: standard plastic anchors can work in brick, but their holding power depends on the hole quality and the anchor type.
You’ll choose plastic anchor types suited to solid vs. porous bricks and follow installation tips precisely.
Consider:
- Match anchor size to screw and hole
- Clean and deep-drill the hole
- Avoid crumbling mortar
- Test weight incrementally
When To Use Plugs
Having used plastic anchors successfully in brick, you’ll next decide when to use plugs (often called wall plugs) versus other fasteners.
Use plugs types matched to brick condition: soft, crumbly brick needs sleeve or molly plugs; solid brick accepts plastic or nylon expansion plugs.
Choose anchor sizes by weight and screw diameter. Test a pilot hole, and prefer longer anchors for deeper bite and reliable hold.
Using Masonry Screws (Tapcon): Step-by-Step
Start by gathering the right tools and hardware: a hammer drill with a masonry bit, Tapcon masonry screws sized for your wall and picture weight, a pencil, a vacuum or brush for dust, and safety gear.
You’ll drill, clean dust, drive Tapcons flush, and check stability. Consider installation techniques that protect wall aesthetics.
- Drill per screw
- Clear debris
- Tighten slowly
- Inspect fit
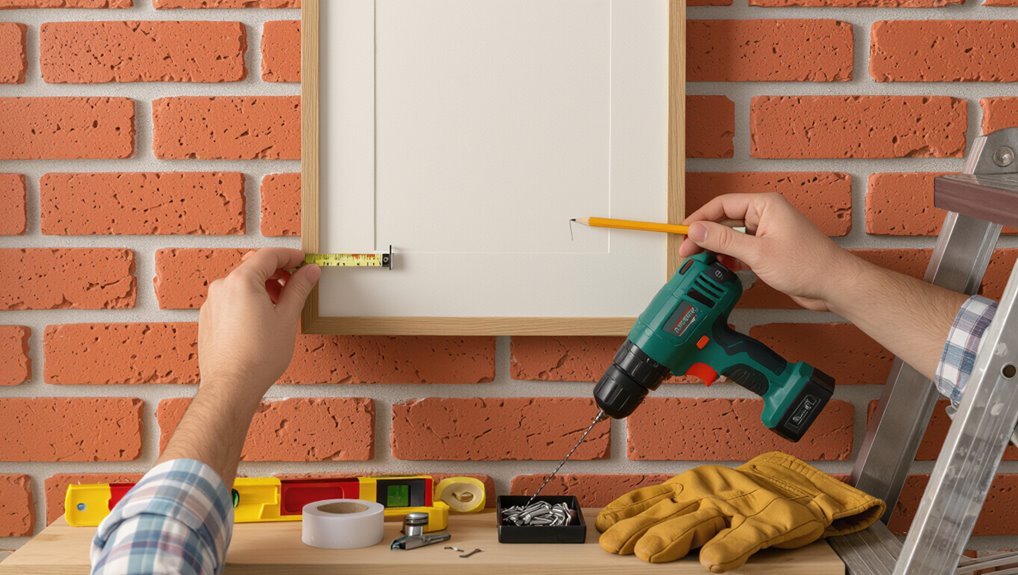
How to Mark and Level Mounting Points
First, pick anchor locations that align with the frame’s hardware and avoid mortar lines.
Use a level to guarantee the points are perfectly horizontal, and mark them with a pencil on the brick face.
Double-check your measurements by transferring distances from the frame to the wall before drilling.
Choose Anchor Locations
Before you drill, decide exactly where the anchor points must go so the painting hangs level and centered; measure the picture’s hanging hardware, transfer those distances to the wall, and mark the spots with a pencil or chalk.
Pick anchor types based on weight and brick vs mortar, and use a clear placement strategy:
- Target solid brick, not mortar
- Check stud-like support
- Space for load distribution
- Avoid edge crumbling
Use A Level
Grab your level and place it against the wall where you marked the anchor spots, then adjust the marks until the bubble sits centered—this guarantees both mounting points are perfectly horizontal so the painting won’t tilt. Make small level adjustment moves, confirm wall stability, and recheck after tightening anchors.
| Step | Action | Check |
|---|---|---|
| 1 | Align level | Bubble centered |
| 2 | Mark | Spacing match |
| 3 | Verify | Stable wall |
Transfer Measurements Carefully
Once your leveled marks are set, transfer them to the wall with a sharp pencil or masking tape so you get precise, visible guides for each anchor. Hold the level steady, recheck the bubble, then mark the exact drill points and note left/right positions to avoid mirror mistakes.
Use Measurement techniques and Accurate tools, then:
- Verify spacing with a tape measure
- Use a center punch for pilot holes
- Double-check level before drilling
- Label marks for hardware types
Drill Into Brick Without Cracking It
If you want to drill into brick without cracking it, work slowly, pick the right bit, and keep the masonry cool and supported.
Choose a carbide-tipped masonry bit, mark the spot, and use a hammer drill on low speed.
Pick a carbide masonry bit, mark the spot, and drill slowly with a hammer drill on low speed.
Apply steady pressure, back the bit out to clear dust, and avoid overheating.
These brick maintenance drilling techniques protect the face and guarantee a secure anchor.
Drill Into Mortar Safely Without Weakening the Wall
After drilling into brick, you may find mortar an easier place to set anchors—but you still need to protect the joint and the wall’s strength.
Use careful drill techniques to avoid overcutting and preserve mortar strength. Follow these steps:
- Choose low-speed masonry bits
- Support surrounding brick
- Drill perpendicular to joint
- Clean dust, avoid widening hole
Anchor Depth and Spacing for Multiple Fasteners
Make sure your anchors go deep enough into solid mortar or brick to match the anchor’s embedment rating so they’ll hold the weight.
Space multiple fasteners according to the picture’s width and manufacturer guidelines to keep loads from concentrating in one spot.
Staggering anchors and using a rail or wire can help distribute the load evenly across the wall.
Proper Anchor Depth
Drill the anchor to the right depth so it sits flush with the brick face and expands fully inside the cavity or mortar—this guarantees the anchor reaches solid material and carries the load rather than the fragile surface.
You’ll check anchor types and use a depth measurement to match manufacturer specs.
- Match anchor length to brick thickness
- Verify drill bit size
- Test fit before final insertion
- Confirm expansion clearance
Fastener Spacing Guidelines
When you’re hanging a piece that needs more than one anchor, spacing them correctly guarantees the load spreads evenly and prevents cracking or pullout.
Generally place anchors at least 6–12 inches apart and aligned with the brick’s solid body rather than the mortar, adjusting distance for the artwork’s size and weight so each fastener shares the burden.
Choose fastener materials suited to brick and follow proper installation techniques.
Load Distribution Techniques
Having anchors spaced correctly is only part of the equation; you also need to balance how deep and how far apart each fastener sits so the weight shares evenly across the wall.
You’ll test load capacity and optimize weight distribution by choosing depth and spacing. Consider:
- Deeper anchors for higher load capacity
- Even lateral spacing
- Match anchor type to brick
- Stagger for shear support
Hang Heavy Paintings on Brick (50+ Lbs)
For paintings over about 50 pounds, you’ll need more than basic picture hooks—you’ll need heavy-duty anchors, the right masonry bit, and a clear plan for load distribution to keep the art and wall safe.
Use sleeve or wedge anchors into brick, space fasteners to share load, and mount a cleat or French cleat for stability.
Prioritize art display and wall protection; check anchors regularly.
Hang Light Frames on Brick Without Drilling
You can hang lightweight frames on brick without drilling by using adhesive or tension-based solutions that won’t damage the surface. You’ll choose adhesive alternatives and other lightweight options, test strength, and protect the brick finish.
Consider these simple approaches:
- Clean brick and plan placement
- Use non-invasive hanging strips
- Try tension-mounted rails
- Rotate and inspect regularly for safety
Adhesive Hooks and Mounting Strips: What Works?
You can use adhesive hooks and mounting strips for lightweight paintings, but they’ve strict adhesive strength limits you need to respect.
Make sure you clean and dry the brick and mortar thoroughly—adhesives grip much better on smooth, dust-free surfaces.
Test a small strip first so you don’t risk a fallen frame.
Adhesive Strength Limits
Adhesive hooks and mounting strips can work on brick, but they’ve strict weight and surface limitations you need to respect.
You’ll match adhesive types to weight limits and brick texture, then choose accordingly.
Consider:
- Light prints: foam strips, low weight limits
- Small frames: removable hooks, moderate limits
- Medium canvases: heavy-duty adhesives, high limits
- Avoid oversized pieces beyond rated limits
Surface Preparation Needs
Preparation matters: to make adhesive hooks and mounting strips stick to brick, you’ll need a clean, dry, and reasonably smooth surface.
You should test brick wall types first — smooth painted or sealed brick works best; rough, porous, or crumbly brick won’t hold adhesives.
Use surface cleaning techniques: brush, vacuum, wipe with isopropyl alcohol, and let fully dry before applying strips for maximum bond.
Masonry Hangers and Brick Clips (No-Drill Options)
Several no-drill options let you hang art on brick without damaging the masonry. You can use masonry alternatives like adhesive brick clips and decorative clips that grip mortar or brick edges.
Choose rated products and test weight limits. Consider surface texture and weather exposure.
- adhesive brick clips
- mortar-grip hangers
- tension-mounted hooks
- removable metal clips
Conceal Hardware for a Clean Look
For a crisp, gallery-style finish, you’ll want to hide the hardware so the brick and artwork stay front and center.
Use concealed hanging brackets or recessed mounting boxes to tuck plates and anchors out of sight.
Also plan routes to hide wires and any visible fasteners for a seamless look.
Use Concealed Hanging Brackets
When you want a sleek, gallery-ready look, concealed hanging brackets hide the hardware so your painting appears to float on the brick. You’ll get concealed brackets that offer secure hanging without visible screws.
Choose size for weight, mount level, and anchor type. Install brackets to brick using masonry anchors, then hang and adjust for perfect alignment.
- weight capacity
- bracket depth
- anchor type
- alignment
Recess Mounting Boxes
Recess mounting boxes let you hide hanging hardware flush with the brick so your painting sits cleanly against the wall; you’ll cut or chase a shallow cavity, set the box, and anchor it so the bracket or hook is unseen.
You’ll match box placement to studs or anchors, finish edges to blend with wall textures, and avoid interference from recessed lighting or uneven mortar.
Hide Wires And Hardware
If you want a gallery-quality look, conceal wiring and hanging hardware so nothing distracts from the artwork — tuck cables into the mortar joints, run them behind a recessed mounting box, or route them down through a slim cable channel painted to match the brick.
Use wire concealment techniques and focus on hardware aesthetics to keep lines clean.
- hide fasteners
- paint channels
- use recessed boxes
- plan routes
Hang Frames With Wire, D-Rings, or French Cleats
Although brick needs sturdier anchors than drywall, you can still hang framed art securely using wire, D‑rings, or French cleats—each method offers different strengths depending on the frame size and weight.
Choose wire types rated for weight on lighter picture frame styles, follow D-ring installation for medium frames, and use French cleat advantages for heavy or irregular pieces to guarantee a stable, flush mount.
Transfer Hanging Points From Frame to Wall Precisely
Once you’ve marked the frame’s hanger locations, transfer those points to the wall precisely by measuring the distance from a fixed frame edge or the top and replicating those measurements on the brick surface.
Use a ruler or tape measure and a pencil to mark the exact spots, double-checking symmetry and level before drilling.
Use a ruler and pencil to mark exact spots, checking symmetry and level before drilling.
Use these transfer techniques and precise markings:
- Measure twice
- Mark lightly
- Use a level
- Reconfirm spacing
Protect Brick From Chipping During Installation
When you’re installing a hook, aim for the mortar rather than the face of the brick to reduce chipping and preserve the brick’s look.
Use rubber padding or a thin gasket between hardware and brick to cushion impacts and distribute pressure.
Pre-drill slowly with a masonry bit and steady pressure to avoid cracks or spalling.
Protect Mortar, Not Brick
Start by focusing on the softer mortar joints rather than the brick faces—you want to avoid chipping the brick while ensuring the mortar can carry the weight.
You’ll prioritize mortar preservation and preserve brick aesthetics by choosing anchors and techniques that engage mortar, not brick:
- probe mortar depth first
- use appropriate anchors
- avoid hammering brick
- seal drilled holes afterward for longevity
Use Rubber Padding
If you want to prevent chips and scratches while drilling or setting anchors, press rubber padding against the brick to cushion impacts and stabilize your tools.
You’ll appreciate rubber padding benefits: it absorbs shock, prevents slips, and keeps edges intact.
For painting protection, place padding around the fixture area and under tools to avoid scuffs and maintain the wall’s appearance throughout installation.
Pre-Drill With Care
Because brick can crack or chip under sudden pressure, you’ll want to pre-drill slowly with the right bit and steady hands: use a masonry bit, mark your spot, hold the drill perpendicular, apply gentle, consistent pressure, and let the bit do the work rather than forcing it through.
- Choose proper drill bit types
- Start with a pilot hole
- Use low RPMs
- Clear dust frequently
Apply pre drill techniques to protect the brick.
Safety Precautions When Drilling Masonry
Before you drill into brick, take a moment to prepare: wear eye and ear protection, a dust mask, and sturdy gloves; check for hidden wiring or pipes with a detector; and plan your anchor type and drill speed so you avoid cracking the masonry.
| Tool | Tip | Outcome |
|---|---|---|
| Drill | Use hammer mode sparingly | Prevents damage |
| Anchor | Match size to load | Guarantees hold |
| Detector | Scan first | Avoids hazards |
Use proper drilling techniques and follow masonry safety at all times.
Control Dust and Debris When Drilling Brick
Before you drill, clear the area and cover nearby surfaces to make cleanup easier.
Use a vacuum attachment, dust collector, or wet-dry vac while you drill to capture dust at the source.
When you’re done, sweep up debris and dispose of it safely to keep the workspace clean.
Prepare the Work Area
Drilling brick kicks up a lot of dust and small chips, so clear the area and set up simple barriers and coverings to keep your home clean and your lungs safe.
Keep workspace organization and safety measures in mind:
- Remove furniture and cover floors
- Tape plastic sheeting to edges
- Lay drop cloths for debris
- Keep a clear exit path
Use Dust Control Tools
When you start cutting into brick, control dust at the source with a shop-vac attachment, a wet-cutting approach, or a dust shroud on your drill; these tools catch most debris so you won’t be breathing or sweeping it all day.
Use dust management strategies like a sealed work zone and HEPA vacuuming during drilling, and plan effective cleanup techniques to minimize airborne particles.
Clean Up Safely
1 simple cleanup routine will keep dust and debris from turning your project into a health and housekeeping headache: seal the work area, capture dust at the source with a vacuum or wet-cutting method, and finish with HEPA filtration and damp wiping so particles don’t resettle or spread.
You’ll want safety gear and a clean workspace. Follow these steps:
- Wear mask, goggles, gloves
- Use vacuum with HEPA
- Damp-wipe surfaces
- Dispose debris sealed
Test Anchor Pullout Strength Safely
Before you hang the painting, you should test the anchor’s pullout strength so the fastener won’t fail under the load.
Use gentle, increasing tension with a spring scale or by hanging a known weight to simulate the painting.
Perform quick anchor testing on each fastener, follow safety measures like eye protection and a spotter, and retest if you change anchors or mounting points.
Adjust or Reposition a Painting Without New Holes
If your painting hangs slightly off-center or sits unevenly, you can fix most issues without drilling new holes by using small, noninvasive adjustments like adhesive felt pads, picture-hanging wire tweaks, or foam shims behind the frame.
Use these adjusting height and repositioning tips to refine placement quickly:
- Add felt pads to level edges
- Shift wire to alter height
- Insert foam shims behind frame
- Use a spirit level for precision
Remove Anchors Cleanly From Brick or Mortar
When you’re ready to take down anchors from brick or mortar, work deliberately to avoid chipping the surface or widening the hole.
Use gentle anchor removal techniques: unscrew any visible screw, then grip the anchor with pliers and twist while pulling.
For stubborn anchors, tap them inward slightly and extract with lockjaw pliers.
Follow safe extraction methods to minimize damage and keep debris contained.
Repair Small Brick Chips and Mortar Afterward
Now that the anchors are out, assess any chips in the brick or gaps in the mortar so you can decide whether to patch or simply clean up.
You’ll do basic brick chip repair and mortar patching with minimal tools. Consider:
- Clean debris and dust
- Mix small mortar or epoxy
- Fill chips and smooth joints
- Let cure, then touch up color
Check stability before rehanging.
Will Weather or Humidity Affect Your Anchors?
Because brick and anchors sit exposed to changing moisture and temperature, weather and humidity can affect their performance over time. You should pick corrosion-resistant anchors and sealant to mitigate weather effects and monitor for loosening from humidity impact. Check anchors seasonally and replace any showing rust or movement to keep artwork secure.
| Anchor Type | Best Use |
|---|---|
| Stainless steel | Outdoor, damp |
| Plastic sleeve | Interior, dry |
| Toggle bolt | Hollow brick |
Hang Art on Historic Brick: Permissions and Care
If your brick wall is part of a historic building, you’ll need to get permission and follow specific care guidelines before drilling or attaching hardware.
You should consult preservation authorities and an art conservation expert, document conditions, and use reversible, noninvasive methods.
Consider:
- Obtain written approval from preservation board
- Use nonpenetrating mounts when possible
- Record condition photos
- Follow art conservation recommendations
Layout Tips for Gallery-Style Hanging on Brick
Start by sketching a balanced layout so you can plan symmetry and flow across the brick surface.
Mix frame sizes strategically to create focal points and keep the arrangement dynamic.
Keep spacing consistent between pieces so the whole gallery reads as a cohesive unit.
Plan Symmetry And Flow
When arranging a gallery-style display on brick, think about balance and visual flow so each piece connects with the next and the whole wall reads as a cohesive composition.
You’ll aim for artistic balance and visual harmony by aligning centers, repeating motifs, and pacing negative space.
- align centers
- repeat colors or themes
- maintain equal spacing
- use focal anchors
Vary Frame Sizes Strategically
Although varied frame sizes can feel chaotic, you can use that contrast to create rhythm and emphasis across a brick wall, placing larger pieces as anchors and smaller works as visual breaths between them.
When you arrange frame contrasts, prioritize visual balance by grouping odd numbers, alternating scale, and positioning focal pieces where sightlines naturally fall so the gallery feels intentional and cohesive.
Maintain Consistent Spacing
Consistent spacing makes a gallery on brick read as a single composition rather than a random collection, so keep the gaps between frames uniform—typically 2–4 inches for a tight, modern look or 4–6 inches for a relaxed arrangement—and stick to that rule across the entire wall.
Use spacing techniques and visual alignment to guide viewers.
- Measure gaps precisely
- Use a template or level
- Align centerlines
- Keep sightlines consistent
Match Hardware to Painting Style and Weight
Start by matching the hanging hardware to both the painting’s weight and its aesthetic so the installation looks secure and intentional.
Assess painting styles and weight considerations: wire-backed canvases need sturdy anchors, heavy framed art demands masonry screws or toggle anchors, and delicate pieces suit small hooks or picture rail fittings.
Choose finishes that complement the frame for a cohesive, professional look.
Budget-Friendly Hardware and DIY Alternatives
If you’re on a tight budget, you can still hang artwork securely by choosing affordable anchors and getting creative with DIY fixes.
Opt for budget friendly alternatives like masonry screws, adhesive hooks rated for brick, or repurposed picture wire.
Consider DIY hardware solutions for light pieces, but test load capacities first.
- masonry screws
- adhesive hooks
- picture wire
- repurposed brackets
When to Call a Pro for Very Heavy or Structural Concerns
When you’re dealing with very heavy artworks, large mirrors, or any installation that might affect the wall’s structure, call a professional rather than guessing your way through it.
You should get a professional assessment to evaluate load, masonry condition, and anchoring options.
They’ll verify structural integrity, recommend appropriate anchors or reinforcements, obtain permits if needed, and perform safe installation to protect you and your property.
How Often to Inspect Mounts and Anchors
You should do a quick visual check of mounts and anchors every month to spot looseness, rust, or cracks.
Once a year, give them a thorough inspection — tighten fittings, test anchors, and replace any corroded parts.
If you notice movement or damage during a monthly check, inspect and fix it immediately rather than waiting for the annual review.
Monthly Visual Checks
Although brick and mortar feel solid, the mounts and anchors that hold a painting can loosen over time.
So check them visually at least once a month for cracks, corrosion, or shifting. You should perform monthly maintenance with quick visual inspections and act on issues immediately.
- Look for cracking mortar
- Check anchor corrosion
- Verify hanger alignment
- Test slight movement
Annual Deep Inspections
Since mounts and anchors bear constant stress, schedule a thorough inspection at least once a year to catch wear that monthly checks might miss.
During annual maintenance, remove the painting, test anchor tightness, examine brick and mortar for cracks, and look for corrosion or loosening.
Use a clear inspection checklist, document findings, and replace any compromised hardware immediately to prevent failures.
Hang Art on Painted or Sealed Brick Surfaces
When you’re working with painted or sealed brick, the smooth surface changes how anchors bite and how adhesives stick, so pick hardware and methods made for non-porous finishes.
You’ll assess wall texture and your art style, then choose non-corrosive anchors or heavy-duty adhesive strips rated for sealed surfaces.
- Use masonry screws with anchors
- Try chemical anchors for heavy pieces
- Test adhesive on scrap
- Protect paint edges
Hide Wiring for Illuminated Paintings
Lighting can make a painting pop, but exposed cords will ruin the effect, so plan how to conceal wiring before you hang the piece.
You’ll choose lighting options like battery LED strips, low-voltage picture lights, or plug-in fixtures.
Use surface raceways, adhesive cable clips, or tuck wires into mortar joints for tidy wire management.
Label connections and test before final placement.
Common Mistakes That Crack Bricks or Fail Anchors
Concealing wires neatly is great, but don’t let the mounting itself damage the wall. You’ll avoid brick cracking and anchor failure by using correct drill bits, steady pressure, and proper hole depth.
Conceal wires neatly, but protect the wall—use correct bits, steady pressure, and proper hole depth to prevent damage.
Don’t oversize holes or force anchors. Remember:
- Use masonry bits sized to anchors
- Drill straight, not angled
- Clean debris from holes
- Test anchor grip before hanging
How to Read Anchor Labels and Choose Brands
Labels on anchor packaging tell you what the product can actually do, so read them closely to match anchor type, material, and load ratings to your brick and the painting’s weight.
Check anchor strength figures, manufacturer testing standards, and recommended drill sizes. Use label interpretation to confirm suitability for solid or hollow masonry.
Prefer reputable brands with clear specs, warranties, and customer reviews.
Quick Fixes: Loose Hooks, Tilted Frames, Fallen Art
Once you’ve confirmed anchors and hardware match your brick and painting weight, you’ll still run into everyday problems like loose hooks, tilted frames, or art that’s slipped off the wall.
Act fast with quick repairs: tighten or replace loose hooks, make anchor adjustments, level tilted frames, and rehung fallen art.
Act fast—tighten or replace hooks, adjust anchors, level frames, and rehang any fallen art.
Consider simple framing solutions to prevent repeats.
- Tighten hooks
- Re-seat anchors
- Add bumpers
- Check level
Document Mounts for Renters and Moving
If you’re renting or plan to move soon, use temporary document mounts that protect your art and the brick without damaging either: choose adhesive hooks or museum putty rated for brick, or opt for removable brick clips that grip mortar rather than face brick.
You’ll find renter friendly solutions that secure frames without permanent holes. Use temporary fixtures for easy removal and safe transport when you relocate.
Step-by-Step Checklist to Hang a Painting on Brick Securely
Before you start drilling or sticking anything to the brick, gather the right tools and pick the method that fits your wall and frame—whether that’s removable clips, masonry anchors, or heavy-duty adhesive hooks rated for brick.
Before touching the brick, gather proper tools and choose removable clips, masonry anchors, or heavy-duty brick-rated adhesive hooks.
Follow this checklist to balance hanging techniques and wall aesthetics:
- Measure and mark stud/brick gaps
- Choose anchor or adhesive type
- Level and pre-drill if using anchors
- Hang, check stability and adjust
Frequently Asked Questions
Can I Hang a Heavy Mirror Over a Fireplace Mantel on Brick?
Yes — you can, but you’ll need proper anchors for the mirror weight and keep fireplace safety in mind. Use masonry anchors or sleeve anchors, fasten into mortar or brick, and avoid heat damage to hanging hardware.
Do Brick Anchors Interfere With Electrical or Plumbing Inside Walls?
Yes — you might hit hidden veins if you’re careless. You’ll check brick wall types and choose anchors with proper anchor strength, probe for conduits, and avoid cores or cavities so electrical and plumbing stay untouched.
Will Seismic Activity or Vibrations Require Special Anchors?
Yes — you should account for seismic considerations and vibration effects; use rated masonry anchors or epoxy-set bolts, choose larger or seismic-specific hardware, and regularly inspect fastenings so your painting stays secure during tremors or steady vibrations.
Can I Hang Art Outdoors on Exposed Exterior Brick Year-Round?
Yes — you can hang outdoor art on exposed exterior brick year-round; just don’t expect miracles in a monsoon or blizzard! Use weather-resistant materials, sealed frames, rustproof anchors, and periodic checks to prevent damage.
Are There Paint or Finish Chemicals That Damage Anchor Holding Power?
Yes — certain paints, sealers, or acidic cleaners can weaken anchors by altering masonry or corroding metal. You’ll check chemical interactions for specific anchor types, avoid harsh treatments, and test compatibility before installation.
Conclusion
You’ve learned the ropes—think of yourself as an urban mason, marrying art to brick like Michelangelo mounting fresco on stone. With the right anchors, a focus on brick not mortar, and a careful weight check, your painting will stay put through knocks and moves. Use the checklist, fix wobbles fast, and document mounts if you rent. Go on—hang it confidently, knowing you’ve treated your wall with the respect (and skill) it deserves.