How Long Does It Take Oil Based Primer to Dry? Timing Guide
You’ll find oil-based primer is usually dry to the touch in about 6–8 hours and ready for a topcoat after roughly 24 hours, though full curing can take 7–30 days depending on conditions. Warm, dry, well-ventilated spaces speed things up; cold, humid areas slow them down. Thicker coats and nonporous surfaces extend drying time, and proper ventilation and PPE are important. Keep going to get tips on speeding things up, troubleshooting tacky primer, and safe cleanup.
Quick Answer: Oil-Based Primer Dry, Recoat, and Full-Cure Times
Generally, oil-based primer feels dry to the touch within 6–8 hours, lets you recoat after about 24 hours, and reaches full cure in 7–30 days depending on conditions and product.
You’ll want to check the manufacturer’s label and plan for slower drying in high humidity or low temperatures.
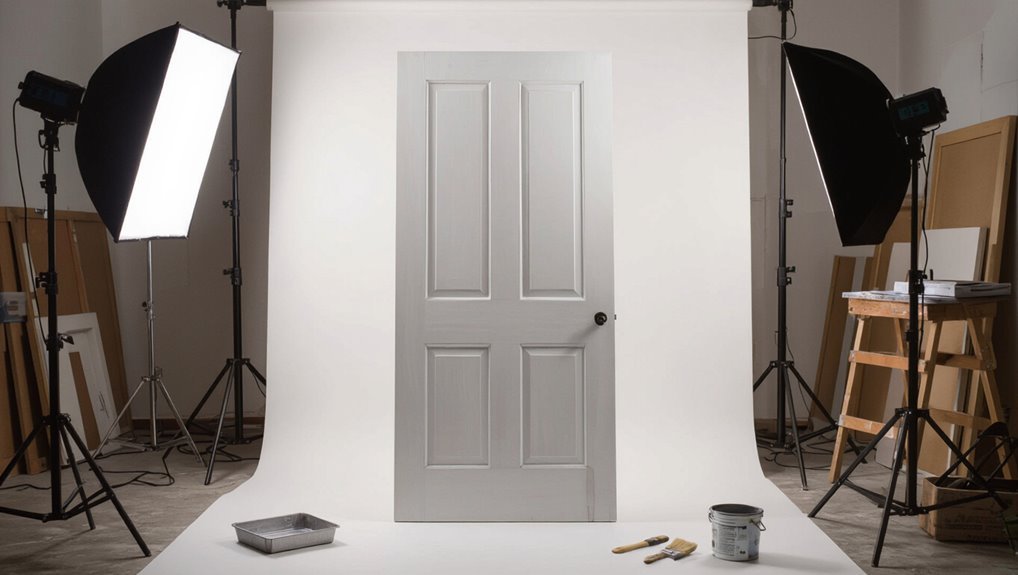
You’ll appreciate oil primer benefits for sealing and adhesion; use it in oil primer applications on wood, metal, and previously painted surfaces.
Typical Dry, Recoat, and Full-Cure Times (Touch, Recoat, Cure)
Now that you know the usual 6–8 hour touch, 24-hour recoat, and weeks-to-months cure ranges, here’s how those stages actually play out: you’ll feel tacky at touch time, can sand and recoat after 24 hours, and expect full mechanical strength after weeks. Use proper drying techniques with oil primer to avoid delays.
| Stage | Feel | Action |
|---|---|---|
| Touch | Tacky | Wait |
| Recoat | Dry | Sand/recoat |
| Cure | Hard | Use gently |
How Temperature Changes Oil-Based Primer Drying Speed
You’ll notice temperature has a big effect on how quickly oil-based primer sets.
Warmer conditions speed the chemical reactions and evaporation, so primer will reach touch and recoat times faster.
In cooler weather the cure slows, so you’ll need to wait longer before sanding or recoating.
Warmer Temperatures Speed Drying
When temperatures rise, oil-based primer dries noticeably faster because heat speeds up the chemical reactions and solvent evaporation that form the film; you’ll often see tack-free times drop from 24 hours to 8–12 hours in warm, dry conditions.
You should adjust application and drying techniques to account for temperature effects:
- Apply thinner coats to accelerate curing.
- Increase ventilation for faster solvent release.
- Time recoats based on tack-free feel.
Cooler Conditions Slow Cure
Although cooler temperatures slow the chemical reactions and solvent evaporation that let oil-based primer form a dry film, you can still get good results if you adjust your approach.
You’ll need longer wait times, thinner coats, gentle heat or improved ventilation, and avoiding humidity.
Monitor tackiness before recoating, since cooler temperatures extend drying processes and increase risk of improper cure without patience and control.
How Humidity and Ventilation Affect Cure Times
High humidity slows the solvent evaporation that lets oil-based primer set, so you’ll notice longer tack and cure times in damp conditions.
You can speed drying by increasing ventilation and directing airflow with fans or open windows to carry moisture away.
Pairing moderate heat with good airflow is the most effective way to reduce cure time without risking surface defects.
Humidity’s Role In Drying
Ever wondered why oil-based primer seems to take forever to cure on muggy days? You’ll notice humidity effects directly: moisture slows solvent evaporation, extending tack time and blocking full cure under poor drying conditions.
- High humidity = slower cure
- Low humidity = faster solvent release
- Monitor dew point to predict delays
Ventilation And Airflow Tips
When you improve ventilation and keep air moving, oil-based primer dries more predictably because solvents evaporate faster and moisture doesn’t linger on the surface.
Use ventilation techniques like window cross-venting and exhaust fans, and position oscillating fans for steady airflow.
Monitor humidity, avoid drafts that cool surfaces, and practice airflow management to guarantee even drying and consistent cure times.
Combining Humidity With Heat
If you combine humidity control with gentle heat, you’ll speed solvent evaporation without stressing the primer film; moderate warmth lowers relative humidity at the surface and helps solvents escape.
But too much heat or too little ventilation can trap moisture and slow curing. You should monitor humidity effects and heat interaction, adjust airflow, and balance temperature.
- Use gentle, even heat
- Increase ventilation
- Avoid high humidity
How Coat Thickness and Number of Coats Change Timing
Thicker coats and extra layers slow drying, so you’ll see longer tack-free and recoat times as film build increases.
Control coat thickness to speed curing; thin, even application promotes solvent release and reduces dust nibs.
Control coat thickness — thin, even layers speed curing, aid solvent release, and minimize dust nibs.
Each additional coat extends overall dry time—plan intervals per manufacturer recommendations.
If you apply multiple coats, wait fully between them to avoid trapping solvents and adhesion problems.
How Substrate (Wood, Metal, Drywall) Affects Drying and Adhesion
Because different substrates absorb and bond with oil-based primer differently, you’ll see noticeable changes in drying times and adhesion depending on whether you’re sealing wood, metal, or drywall.
Tailor surface preparation and application techniques to substrate compatibility; moisture content and drying mechanisms affect adhesion strength and paint layering, ultimately determining finish quality.
- Wood: absorbs; watch moisture content
- Metal: needs etch/clean
- Drywall: smooth, porous
How to Test If Primer Is Ready to Sand or Recoat
You’ll first do a surface dryness check by lightly touching the primer—if it’s cool or tacky, it needs more time.
Next, perform an adhesion and tack test by pressing a piece of painter’s tape or your fingernail and pulling it off; the primer should resist lifting and leave no residue.
If both tests pass, it’s ready for sanding or recoating.
Surface Dryness Check
Wondering if your oil-based primer is ready to sand or recoat? Check surface preparation and apply proper drying techniques before testing. Use light checks to avoid damage.
- Gently touch an inconspicuous spot; it should feel dry, not tacky.
- Run a fingernail lightly; no indentation means cured enough to sand.
- Inspect for uniform sheen and absence of sticky residue across the panel.
Adhesion And Tack Test
How do you know if the primer will hold up to sanding or a new coat? Check adhesion factors like surface cleanliness, cure time, and temperature.
Do a tack testing lift: press clean fingertip or tape gently, then peel. No transfer and slight resistance mean it’s ready.
If primer smears or lifts, wait longer, improve ventilation, or reapply per manufacturer guidance.
When to Wait Longer: Cold Weather and High-Humidity Fixes
If temperatures drop or humidity climbs, expect oil‑based primer to take considerably longer to cure, so plan your schedule accordingly.
You’ll want to use cold weather fixes and high humidity techniques to avoid tacky surfaces. Consider:
Use cold‑weather and high‑humidity techniques to prevent tacky primer — plan for slower curing and adjust accordingly.
- Delay sanding or topcoat until fully hard; test adhesion.
- Increase ventilation where possible.
- Keep cans sealed and store primer at moderate temps before use.
Speed Up Drying Safely (Heat, Fans, and Solvent Options)
When you need to speed drying safely, combine gentle heat, steady airflow, and careful solvent choices to cut wait time without harming the finish.
Use low-heat fans or a space heater placed safely distant, maintain ventilation, and avoid open flames.
Choose manufacturer-approved fast-dry solvents sparingly.
These drying techniques are effective when applied as safe methods, preventing surface defects while shortening cure time.
Common Causes of Slow or Tacky Oil Primer and Fixes
Speeding drying with heat and airflow helps, but it won’t fix all problems—slow or tacky oil primer often signals issues with surface prep, environmental conditions, or the primer itself.
You can troubleshoot and fix by addressing these common causes:
- Poor prep: contamination leaves tacky residue; sand and clean thoroughly.
- Thick coats: thin and recoat.
- Environmental factors: wait for proper temperature and humidity.
Safety Tips: Ventilation, PPE, and Fumes With Oil Primers
Because oil-based primers release strong solvent fumes and can irritate your lungs and skin, you should prioritize ventilation and personal protective equipment every time you work with them.
Open windows, run mechanical ventilation systems, and aim for cross-breeze.
Wear respirators rated for organic vapors, gloves, and eye protection.
Keep safety equipment accessible, limit exposure time, and don’t work alone in confined spaces.
Cleanup, Disposal, and Project Timeline Examples (Touch-Up to Full Room)
Cleanup and disposal are straightforward if you follow a few simple steps: You’ll use proper cleanup methods and follow disposal guidelines to finish efficiently.
Plan time: quick touch-up, half day; small room, 24–48 hours between coats; full room, 3–5 days including curing and ventilation.
- Rags and brushes: mineral spirits, ventilate.
- Waste: seal and follow disposal guidelines.
- Timeline: prep, primer, topcoat.
Frequently Asked Questions
Can Oil-Based Primer Be Used Over Latex Primer Without Problems?
Yes — you can apply an oil primer over latex primer, but you’ll face latex primer concerns: adhesion issues and trapped moisture. For oil primer compatibility, scuff, clean, and verify the latex is fully cured before priming for best results.
Will Oil Primer Yellow Over Time and How to Prevent It?
Yes—you’ll see oil primer yellow over time; its oil primer lifespan shortens with UV and heat exposure. Preventing yellowing, you should topcoat with a UV-resistant acrylic or use water-based primers instead for stable color.
Is Oil-Based Primer Suitable for Bathrooms and High-Moisture Rooms?
Yes — you can use oil-based primer in bathrooms, but think of it as a waterproof cloak for walls; you’ll use careful application techniques, guarantee full curing, and expect improved moisture resistance though ventilation still matters.
Are There VOC Regulations Affecting Oil Primer Use Indoors?
Yes — you’ll need to follow VOC compliance rules; many jurisdictions limit VOCs for indoor paints and primers. You should pick low-VOC products, ventilate well, and monitor indoor air quality to protect occupants and meet regulations.
Can Oil Primer Be Thinned and With What Solvent?
Imagine repainting a kitchen cabinet after sanding; you can thin oil primer with mineral spirits (example). You’ll use careful application techniques, ensuring smoother flow and adjusted drying times, and you’ll avoid over-thinning to preserve adhesion.
Conclusion
In short, oil-based primer takes patience: touch-dry in a few hours, ready for recoat in 8–24 hours, and fully cured in up to 7 days depending on conditions. Remember, “haste makes waste”—rushing recoat or finishing can trap solvents and leave tacky spots. Control temperature, humidity, ventilation, and coat thickness to speed things safely. With the right prep and timing, you’ll get a durable, smooth base that sets you up for a flawless final finish.