Do Mixtiles Work on Textured Walls? Honest Answer
Yes — but only sometimes. If your wall is smooth or has a light orange-peel texture, Mixtiles will usually stick well when you clean and press firmly. Deep knockdown, stucco, popcorn, and very rough finishes often prevent good contact and cause tiles to peel. Test one tile for 24–48 hours, avoid extreme heat or humidity, and consider alternate hanging methods for rough walls. Keep going and you’ll find practical tests, fixes, and safer mounting options next.
Will Mixtiles Stick to Textured Walls?
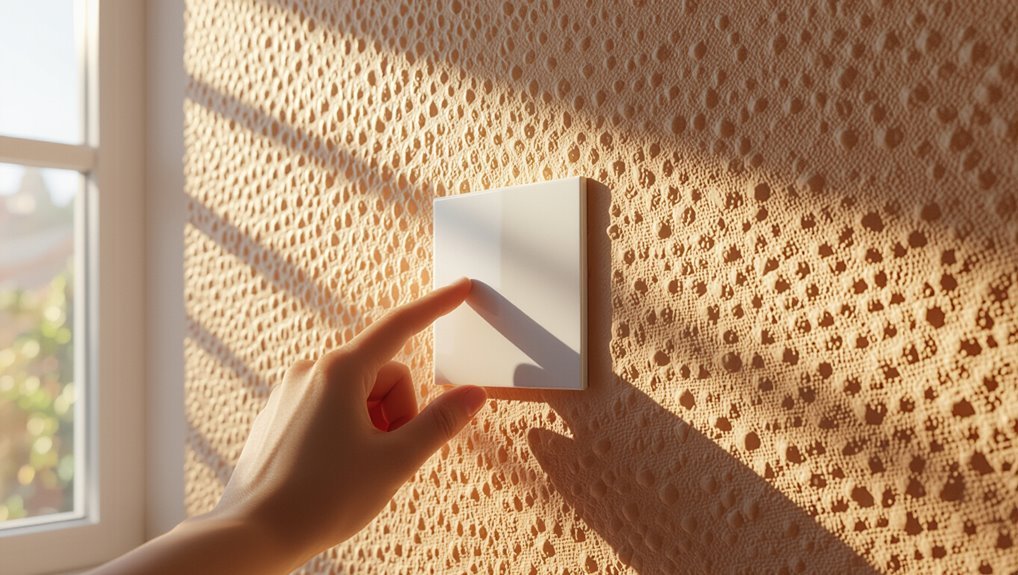
Wondering if Mixtiles will stick to your textured walls? You’ll face adhesion challenges on rough or uneven surfaces, since adhesive pads need close contact.
Check wall compatibility by testing a single tile for 24–48 hours; if it holds, you can proceed.
Smooth, painted textures usually work better, while heavily pebbled or flaky finishes often prevent a reliable bond.
Quick Verdict: Which Textures Work Best
If you have smooth painted drywall, you’ll find Mixtiles stick reliably and stay put.
For pronounced textured finishes, though, adhesion can be hit-or-miss and they may peel sooner.
Let’s look at why surface smoothness matters and what to try if your wall’s rough.
Smooth Painted Drywall
Because smooth painted drywall gives the most consistent surface, Mixtiles stick and stay with minimal fuss—press, hold for 30 seconds, and you’re done.
You’ll use smooth surface techniques and simple drywall maintenance to guarantee lasting adhesion. Follow these steps:
- Clean with a dry cloth.
- Remove dust with rubbing alcohol.
- Press firmly for 30 seconds.
- Avoid humid areas for best results.
Pronounced Textured Finishes
When walls have bold, pronounced textures—like knockdown, heavy orange peel, or thick stucco—Mixtiles may struggle to make full contact and hold reliably; you’ll get the best results on textures with shallower, more regular patterns.
You’ll face textured surface considerations and adhesion challenges: test small areas, clean dust, press firmly, and expect reduced lifespan or need for alternative hanging methods on deeply textured finishes.
How Mixtiles’ Adhesive Actually Works
Mixtiles’ adhesive uses a pressure-sensitive, removable gel that sticks to walls by forming millions of tiny contact points; press a tile firmly for a few seconds and the gel conforms to surface irregularities to create a strong hold.
You’ll notice improved adhesive performance and clear wall compatibility guidance:
- Clean surface
- Firm press
- Short dwell
- Gentle removal
How Texture Depth Affects Adhesion
You’ll notice that texture depth changes how well the gel contacts your wall: shallow textures let the adhesive form many contact points and hold reliably, while deep or pronounced textures create gaps the gel can’t bridge, reducing bond strength.
You’ll weigh texture types against Mixtiles’ pad flexibility, anticipate adhesion challenges with uneven surfaces, and choose mounting spots where contact area is maximized for dependable hold.
Which Textures Are Hardest to Hold?
You’ll notice some finishes give Mixtiles almost nothing to grip. Highly textured stucco, rough orange peel, and deep knockdown finishes have peaks and valleys that prevent full contact with the adhesive.
If you’ve got any of these, expect weaker holds and consider testing a tile first.
Highly Textured Stucco
When stucco’s texture is pronounced—think deep ridges, heavy dash, or a coarse sand finish—it creates fewer continuous contact points for adhesive strips to bond.
As a result, your Mixtiles are more likely to peel or shift over time. You should consider stucco durability and adhesive performance impacts:
- Inspect contact area.
- Clean debris thoroughly.
- Test one tile first.
- Use stronger mounting alternatives.
Rough Orange Peel
If your wall has a rough orange peel texture—small, raised bumps spread evenly across the surface—the Mixtiles’ adhesive will get less continuous contact and the tiles can start to peel or creep over weeks.
You’ll find rough texture reduces grip, so placements need frequent checks.
Consider how compromises affect wall aesthetics before committing; lighter, smaller tiles fare slightly better than large, heavy pieces.
Deep Knockdown Finish
Because deep knockdown creates pronounced valleys and high ridges, the Mixtiles’ foam adhesive can’t form a continuous bond and will struggle to stay put.
You should test spot adhesion for deep texture and assess wall compatibility.
- Inspect surface
- Clean thoroughly
- Press firmly
- Consider alternative hangers
Popcorn Ceilings: Why Mixtiles Fail
Although popcorn ceilings can look quaint, they’re one of the worst surfaces for Mixtiles to stick to—those nubby textures prevent the adhesive from making full contact, so tiles peel off or hang crooked almost immediately.
You’ll face popcorn ceiling challenges and clear adhesion limitations, so don’t expect a reliable hold. Instead, consider alternative mounting methods or different walls for display.
Orange Peel Walls: Will They Hold?
When you press a Mixtile onto an orange peel wall, the small bumps let the adhesive grab in many spots, so you’ll usually get a decent hold—better than on popcorn ceilings but not as secure as on completely smooth drywall.
You should focus on adhesive performance and wall preparation:
- Clean surface
- Press firmly
- Wait before rehanging
- Reinforce problem spots
Sand-and-Skip vs Orange Peel: Comparison
If you’re choosing between sand-and-skip and orange peel textures, think about how each surface affects adhesive contact and repair options: You’ll notice texture types differ in peak size; sand-and-skip may give uneven contact, orange peel offers finer grip. Expect adhesion challenges on rougher peaks, and plan simple patching.
| Feature | Impact |
|---|---|
| Peak size | Contact area |
| Repair ease | Patchability |
| Adhesive grip | Hold strength |
| Visibility | Seam showthrough |
Plaster vs Drywall Texture: Differences
Because plaster and drywall textures come from different materials and installation methods, you’ll notice clear differences in surface hardness, porosity, and how textures hold up to adhesives.
Because plaster and drywall differ in material and finish, expect noticeable differences in hardness, porosity, and adhesive performance.
You should weigh plaster characteristics against drywall benefits when deciding if Mixtiles will stick.
- Plaster: harder, less forgiving
- Drywall: smoother, consistent
- Adhesion: varies by porosity
- Prep: cleaning and priming matter
Heavy Texture vs Light Texture Effects
Plaster and drywall differences set the stage for how texture level affects adhesive performance, but the amount of texture on your wall will be the deciding factor for Mixtiles’ grip.
You’ll face heavy texture challenges: deep peaks and uneven surfaces reduce contact and holding power.
With light texture benefits, shallow, consistent patterns let adhesive engage more surface area, improving stability and easier placement.
Does Painted Texture Reduce Adhesion?
When you paint a textured wall, the paint can fill in tiny crevices and change how much surface your Mixtiles’ adhesive can actually touch.
As a result, adhesion often decreases on heavily painted textures. You should consider adhesion factors and wall preparation before mounting.
- Clean surface
- Light sanding
- Use primer sparingly
- Test a corner first
How Mixtile Size and Weight Matter
Once you’ve cleaned, lightly sanded, and tested the surface, think about how Mixtile size and weight affect adhesion on textured walls.
You should choose smaller, lighter tiles for rough textures to improve mixtile durability and reduce pull.
Larger or heavier tiles concentrate stress and demand better wall compatibility; use multiple anchors or reposition to even load and prevent peeling.
When to Add a Backing Board
You should first assess your wall’s texture—deep orange peel or heavy stucco may not give Mixtiles enough contact.
If the surface is too rough, pick a backing board material that matches the weight and size of your tiles and provides a flat mounting surface.
Then plan the installation and support points so the board is secured to studs or with proper anchors before you stick the tiles on.
Assess Wall Texture Type
Wall texture matters because it determines whether a Mixtile can make full contact with the wall or needs a rigid backing board to create a smooth surface.
You should inspect common wall texture types and focus on evaluating adhesion by touch and a small tape test.
- Smooth
- Light orange peel
- Heavy knockdown
- Stucco
Choose Suitable Backing
After you’ve identified the texture and checked adhesion by touch or a small tape test, decide whether a backing board is necessary to give your Mixtile a flat, secure surface.
If gaps or unevenness reduce contact, choose rigid backing materials like thin plywood or foam board. Match the board to compatible adhesive types and wall finish, and cut to fit so the Mixtile sits flush.
Installation And Support
If the surface texture or adhesive test shows uneven contact, add a backing board to guarantee your Mixtile sits flat and holds securely.
You’ll extend lifespan and avoid failures. Follow these installation tips and evaluate support options:
- Clean wall, press test.
- Use thin plywood or foam board.
- Trim to fit frame depth.
- Recheck adhesion after 24 hours.
Simple Prep Steps for Textured Walls
Because textured surfaces trap dust and reduce adhesion, you’ll want to clean and smooth the area before applying Mixtiles.
For prepping walls, remove loose particles, wipe with a damp cloth, and let dry fully. Lightly flatten high peaks with fine-grit sanding where permitted.
Use adhesion tips like testing one tile first and avoiding overly rough patches to guarantee secure placement and easy removal.
Cleaning Textured Walls for Adhesion
Start by checking how rough or uneven your textured wall is so you know what level of cleaning it needs.
Wipe away dust and cobwebs with a soft brush or microfiber cloth to clear loose debris that can stop adhesive from sticking.
Finish by swabbing high-contact areas with rubbing alcohol to remove oils and residues for better Mixtile adhesion.
Assess Surface Texture
When you’re prepping textured walls for Mixtiles, focus on removing dust, grease, and loose paint so the adhesive can make full contact.
Assess surface compatibility and note texture variations before sticking. Then:
- Inspect bumps, ridges, and paint condition.
- Press lightly to test adhesion points.
- Mark uneven zones for larger tiles.
- Decide if smoothing or backing is needed.
Remove Dust Build-Up
Before you stick Mixtiles, remove all dust buildup on textured walls so the adhesive can bond properly.
Use a soft-bristle brush or microfiber cloth to sweep surfaces, then vacuum crevices with a brush attachment.
You’ll want to follow basic dust prevention strategies and routine wall maintenance tips to keep textured surfaces cleaner longer, improving long-term adhesion and appearance.
Use Rubbing Alcohol
One simple step to improve adhesion is wiping textured walls with rubbing alcohol; it removes oils, residue, and remaining dust that soap and water can miss.
You’ll use a targeted rubbing technique to guarantee proper surface preparation. Follow these steps:
- Test a small area.
- Apply alcohol to a microfiber cloth.
- Wipe in overlapping strokes.
- Let fully air dry.
How to Test a Small Area First
Start by choosing a hidden corner or spare scrap of wallpaper where a failed test won’t bother you. You’ll perform quick adhesion tests and a surface evaluation: clean, press a Mixtile for 30 seconds, then remove gently after an hour. Note residue and hold. Use this table to imagine textures and results:
| Texture | Result |
|---|---|
| Smooth | Strong |
| Light orange peel | Fair |
| Heavy texture | Poor |
| Wallpaper seam | Avoid |
How Temperature and Humidity Affect Hold
You’ll want to evaluate temperature because adhesives get softer in heat and stiffer in cold, which can weaken the bond to textured surfaces.
Humidity also matters—excess moisture can reduce tack and make the adhesive slide or peel.
Test in the conditions the room usually stays in so you know how well Mixtiles will hold.
Temperature Effects On Adhesive
Because adhesives are temperature-sensitive, the hold of Mixtiles changes noticeably with heat and cold.
You’ll notice weaker tack in extreme heat and stiffer adhesion in cold; temperature fluctuations interact with humidity levels to alter performance.
Consider these tips:
- Apply at room temperature.
- Avoid direct sun.
- Allow acclimation time.
- Recheck after seasonal shifts.
Humidity Impact On Grip
When humidity rises, the adhesive on Mixtiles can soften and lose some of its initial tack, so you should avoid applying them during damp conditions or in rooms that regularly feel clammy.
Monitor humidity levels before mounting; high moisture lowers adhesive performance and shortens hold.
If you must install in humid areas, wait for a drier day, dehumidify the room, and press firmly for a longer initial bond.
How Long to Wait for Full Hold
If you’ve just applied Mixtiles to a textured wall, give the adhesive time to bond fully before stressing the hang—typically 24 to 72 hours depending on texture and room conditions.
You’ll guarantee adhesive longevity with proper wall preparation. Follow these quick steps:
- Wait 24–72 hours.
- Avoid touching or nudging.
- Keep humidity moderate.
- Check adhesion gently after 72 hours.
Spacing Tiles on Uneven Surfaces
While uneven surfaces make perfect alignment trickier, you can still create a balanced layout by planning consistent gaps and using a level as your guide.
Measure and mark spacing with a pencil or painter’s tape, keeping equal gaps to mask small height differences.
Focus on overall tile alignment across the composition rather than obsessing over each edge, and adjust spacing to suit sightlines.
Aligning Tiles on Bumpy Walls
Start by checking how rough your wall actually is so you can match mounting choices to the surface texture.
Then try simple adhesion improvements—like cleaning, priming, or using alternative strips—to boost stickiness on high points.
Finally, test a corner tile first so you can adjust placement and pressure before committing to the whole layout.
Surface Texture Assessment
Because textured walls change how adhesive contacts the surface, you’ll need to evaluate the bumpiness before mounting Mixtiles.
Check texture compatibility and wall integrity first, then use this quick assessment:
- Run your hand to feel highs and lows.
- Measure peak-to-valley depth.
- Look for loose paint or crumbling plaster.
- Mark flat zones for tile placement.
Decide based on scores and avoid compromised areas.
Adhesion Improvement Techniques
After you’ve scored and marked the flattest zones, focus on techniques that improve adhesion and keep tiles aligned on bumpy walls. You’ll prep surfaces, use stronger tabs, and press longer while respecting texture considerations. Try spacers or a level guide to align rows. Use appropriate adhesion techniques for your wall finish to avoid failures and keep Mixtiles straight.
| Tip | Purpose |
|---|---|
| Prep | Clean/prime |
| Spacer | Align tiles |
| Strong tab | Better hold |
Best Adhesives for Textured Paint (Avoid?)
When you’re dealing with textured paint, the adhesive you pick matters more than the frame or print—texture reduces surface area contact and can quickly defeat weak glues.
You should choose adhesives suited to textured surfaces and understand common adhesive types.
- Construction adhesive
- Heavy-duty removable gel
- Foam-safe mounting putty
- High-tack spray adhesive
Using Double-Sided Mounting Strips Safely
If your walls have texture, use double-sided mounting strips with care to avoid damage and weak bonds; pick strips rated for textured surfaces and follow the manufacturer’s weight and surface instructions.
You should test a small area first, clean and dry the spot, and press firmly per instructions.
Use double sided tape sparingly, prioritize wall safety, and check adhesion before leaving frames unattended.
When to Avoid Extra Adhesives or Nails
Why risk more damage than necessary? You shouldn’t add adhesives or nails when surface texture, paint fragility, or rental rules conflict with adhesive types and wall compatibility.
Why risk added damage? Avoid adhesives or nails when paint, texture, or rental rules make attachment unsafe.
Choose restraint if you’ve tested a small patch.
- Freshly painted walls
- Crumbling plaster or drywall
- Strict lease rules
- Sensitive finishes (veneer, wallpaper)
Alternative Mounting Methods for Very Rough Walls
Because really rough surfaces thwart standard adhesive strips, you’ll need alternate mounting methods that don’t rely on full contact with the wall.
Consider picture rails, wire hangers, or adhesive hooks anchored into studs or masonry using screws and wall plugs.
For rental situations, lean on freestanding frames or display shelves.
These alternative mounting options respect textured surfaces while keeping Mixtiles secure and removable.
How to Install Without Damaging Texture
When you need to hang Mixtiles without stripping or gouging textured paint, pick methods that transfer weight away from the surface and rely on minimal, localized contact.
Use these installation tips and focus on wall preparation:
- Use adhesive hooks anchored into studs.
- Mount a slim rail or picture wire.
- Apply foam bumpers to reduce pressure.
- Space tiles to avoid concentrated stress.
Removing Mixtiles From Textured Paint Safely
Removing Mixtiles from textured paint takes a careful, slow approach to avoid peeling or gouging the finish. You’ll lift edges gently, use steady heat, and choose removal techniques that match adhesive options to minimize damage. Work slowly, pull flat, and reheat as needed. If paint starts lifting, stop and reassess to protect the texture.
| Step | Action |
|---|---|
| 1 | Warm edge |
| 2 | Lift slowly |
| 3 | Pull flat |
| 4 | Reheat as needed |
| 5 | Stop if paint lifts |
Removing Adhesive Residue From Texture
When you pull Mixtiles off textured paint, some adhesive can stay behind and you’ll want to remove it carefully.
Try gentle options first—like a soft cloth with warm soapy water or a citrus-based adhesive remover—to avoid harming the texture.
If residue persists, test stronger products on an inconspicuous spot and use a plastic scraper to prevent gouging.
Safe Adhesive Removal Methods
If you’ve peeled Mixtiles off a textured wall, you’ll often find gummy residue clinging to bumps and crevices — and you can remove it without damaging the finish.
Use gentle, tested removal techniques to respect adhesive longevity and texture.
Try these steps:
- Warm with hairdryer.
- Peel slowly with fingernail or plastic card.
- Dab goo with rubbing alcohol.
- Rinse and pat dry.
Preventing Texture Damage
You can protect a textured finish while cleaning off adhesive by using techniques that lift residue without scraping or soaking the surface.
Use gentle heat, a soft brush, and a citrus-based remover applied sparingly to avoid saturation.
Test in an inconspicuous spot, blot—don’t rub—and rinse minimally.
These texture preservation techniques prioritize wall surface protection and reduce risk of stain or gouge.
When Paint Lift Is Likely and Why
Although textured surfaces can look sturdy, paint lift tends to happen when the adhesive meets loose or poorly bonded paint layers.
You should check paint types and wall conditions, perform texture assessment, and follow surface preparation and installation tips to reduce risk.
Consider adhesive options, adhesion factors, rental considerations, and mild wall repair for damage prevention.
- Poor prep
- Flaky paint
- High-traction adhesives
- Fragile texture
How to Repair Texture After Removal
When adhesive or paint comes off with the texture, you’ll want to address both the damaged substrate and the missing texture before repainting; clean adhesive residue, sand edges, and fill gouges with joint compound.
Use appropriate texture repair techniques—spray, stomp, or dab—to match the surrounding finish.
Prime patched areas to guarantee adhesion and color match, reducing future wall damage prevention concerns.
Cost-Effective Fixes for Bad Texture
If your wall texture’s too rough for Mixtiles, you can smooth seams with paintable caulk to create a flatter surface.
You might also use peel-and-stick wall covers for a quick, low-cost makeover that Mixtiles will adhere to.
For a removable option, attach thin plywood or poster backing behind each tile to give you a solid, flat mounting surface.
Fixing Texture With Caulk
While caulk won’t erase heavy popcorn or deep stippling, it’s a cheap, effective way to smooth small bumps and seams so your Mixtiles stick properly.
Use caulk application for quick texture repair.
Steps:
- Clean area.
- Apply paintable acrylic caulk.
- Smooth with a wet finger.
- Prime and paint when dry.
Peel-And-Stick Wall Covers
Peel-and-stick wall covers give you a fast, affordable way to hide uneven texture so your Mixtiles lay flat and look sharp.
You can apply them yourself to improve wall surface compatibility and smooth bumps before hanging frames.
Check peel stick longevity ratings and choose breathable, removable options to prevent adhesive failure or paint damage.
They’re a low-cost, reversible fix for problematic texture.
Thin Plywood Poster Backing
When your wall’s texture keeps Mixtiles from sitting flush, thin plywood poster backing gives you a sturdy, low-cost solution you can install yourself.
You cut thin plywood to size, mount it with double-sided tape or small anchors, then attach Mixtiles for reliable poster stability.
Steps:
- Measure
- Cut plywood
- Mount backing
- Attach Mixtiles
How Pros Hang Mixtiles on Texture
Although textured surfaces can complicate adhesion, pros use a few precise steps to make Mixtiles sit flat and stay put.
You’ll follow installation techniques that include cleaning, degreasing, and priming high-friction areas.
Pros press firmly, use adhesive pads rated for uneven surfaces, and temporarily brace tiles while adhesive cures.
Good wall preparation and steady alignment prevent gaps and future peeling.
How to Document Wall Condition First
Before you stick anything up, take clear photos and notes of the wall’s condition so you can track damage, texture, and moisture spots.
Before you stick anything up, photograph and note the wall’s texture, damage, and moisture for comparison.
You’ll perform a quick wall inspection and texture assessment to compare before/after. Follow this checklist:
- Photo close-ups of texture
- Wide shots with scale
- Note soft spots or peeling
- Record room humidity and date
Landlord Rules and Rentals: What to Know
Check your lease for any rules about wall treatments or hanging items so you don’t accidentally break a term.
You’ll also want to know the landlord’s deposit and damage policies in case adhesive leaves marks or the removal process causes wear.
If the lease restricts permanent changes, consider temporary mounting options that keep your security deposit safe.
Lease Agreement Restrictions
When you rent, your lease often contains specific rules about what you can hang on the walls, so it’s important to read those clauses carefully.
You’ll need to follow lease terms to avoid disputes and limit wall damage. Consider these steps:
- Check adhesive/photo rules.
- Ask landlord for permission.
- Note approved locations.
- Document pre-existing marks.
Deposit And Damage Policies
Because your security deposit’s return often hinges on wall condition, you should know how landlords assess damage and what counts as normal wear-and-tear.
You’ll document textured wall spots before hanging Mixtiles, ask permission, and use recommended adhesives. Clear communication protects deposit security.
Take photos on move-in/out, follow damage prevention tips, and get written approval for any adhesive-based displays.
Warranty and Returns for Textured-Wall Issues
If your Mixtiles won’t stick to a textured wall or start falling down, you’re covered by the company’s warranty and return policies in specific situations — but you’ll need to follow their guidelines for proof and timing to get a replacement or refund.
- Gather photos and dates for warranty claims.
- Contact support within the allowed window.
- Follow return policies for damaged or defective tiles.
- Ship or discard per instructions to receive credit.
How Customers Rate Mixtiles on Texture
You’ll find mixed ratings when people test Mixtiles on rough surfaces, with many noting lower scores on heavily textured walls.
Customers often report varying peel strength—some say the tiles hold well for months, while others experience early lifting or partial detachment.
Use these real-world reports to gauge whether Mixtiles will stick reliably on your specific wall texture.
Ratings On Rough Surfaces
Many customers report mixed results when sticking Mixtiles to textured or rough walls, noting that adherence often depends on the specific texture and how well the surface was prepared.
You’ll see varied ratings where adhesion challenges on textured surfaces are common.
Typical feedback includes:
- Good on light orange peel.
- Weak on popcorn ceilings.
- Mixed on heavy stucco.
- Better after priming.
Peel Strength Reports
Customers report a wide range of peel-strength results when attaching Mixtiles to textured walls, with ratings strongly tied to texture type and surface prep.
You’ll see higher peel strength on lightly orange-peel or skim-coated walls after cleaning; deep textures and popcorn reduce adhesive performance.
Many recommend pressing firmly, warming the adhesive slightly, or using supplemental mounting for long-term security on rough surfaces.
Mixtiles vs Framed Prints: Which to Choose?
Curious which option fits your space better? You’ll weigh pros and cons and aesthetic appeal: Mixtiles are lightweight, repositionable, and renter-friendly; framed prints offer permanence and depth.
Consider:
- Budget and longevity
- Wall texture compatibility
- Visual impact and scale
- Installation time and tools
Choose based on how much permanence and polish you want versus flexibility.
Creating Damage-Free Gallery Layouts
Once you’ve decided between Mixtiles and framed prints, plan a gallery that keeps your walls intact while looking polished.
Map layout on paper, measure spacing, and test with paper templates. Mix lightweight pieces, stagger heights, and use level guides.
For textured surfaces, follow damage prevention tips: choose adhesive strengths wisely, alternate mounting points, and rotate displays to minimize long-term stress.
When Mixtiles Aren’t the Right Option
Although Mixtiles work great on many surfaces, they aren’t the right option if your wall is extremely textured, frequently humid, or if you need a long-term, heavy-duty solution—choose traditional hanging hardware or framed prints instead.
Mixtiles suit most walls, but for very textured, humid, or long-term needs, use hardware or framed prints instead.
Consider mixtiles alternatives and wall surface considerations:
- Heavy framed prints for durability
- Screws and anchors for textured walls
- Moisture-resistant displays for humid areas
- Professional installation for valuable art
How to Test Adhesion Before Committing
If you’re unsure whether your wall fits the Mixtiles checklist, run a simple adhesion test before committing to a full layout. You’ll peel a corner, press a test tile for 24 hours, then check hold and residue. Use Adhesion testing and Surface evaluation notes to decide.
| Step | Time | Result |
|---|---|---|
| Peel | 0 min | Prep |
| Press | 24 hr | Hold |
| Check | 24 hr | Residue |
| Note | — | Texture |
| Decide | — | Go/No-go |
Frequently Asked Questions
Can Mixtiles Damage Textured Wallpaper Seams?
Yes — they can. You’ll risk lifting textured wallpaper seams because adhesive strength can grab edges and pull backing when removed. Test a small area first, use lower-tack options, and peel slowly to minimize damage.
Do Humidity Changes Over Seasons Loosen Mixtiles on Texture?
Yes — seasonal effects can loosen Mixtiles on textured walls: moisture impact from humidity swings weakens adhesive bonds, so you’ll notice reduced grip after wet seasons and restored hold when air dries and humidity drops.
Can I Use Mixtiles in Bathrooms With Textured Tile Walls?
Yes — you can, but cautiously: textured tile reduces adhesion, so pick flat sections, clean thoroughly, and avoid steam; you’ll preserve bathroom decor and wall art, maintain appearance, and prevent loosening by checking adhesive and reapplying when needed.
Will Adhesive Discolor Porous Textured Paint Over Time?
Yes — adhesives can discolor porous textured paint over time if the adhesive longevity exceeds paint resistance; you’ll want to test compatibility and choose products rated for wall surface compatibility, avoiding strong adhesives on delicate, porous finishes.
Are There Mixtile-Sized Wall Anchors for Very Rough Surfaces?
Yes — you’ll find heavy-duty Mixtile-sized wall anchors that laugh at rough walls: pick anchors rated for adhesive strength and coarse wall surface, follow instructions, and they’ll hold frames steady without drama or paint rebellion.
Conclusion
Short answer: yes—but don’t expect miracles if your walls look like the moon. Mixtiles’ll cling like a lovesick squirrel on lightly textured surfaces, but deep stucco or popcorn? Not so much. You’ll get great, damage-free galleries on subtle textures; anything rough risks slippage. Test one corner first, clean surfaces, and keep backup hanging plans handy. If your wall’s a crater field, consider frames or rails instead of betting your photos on pure adhesive hope.