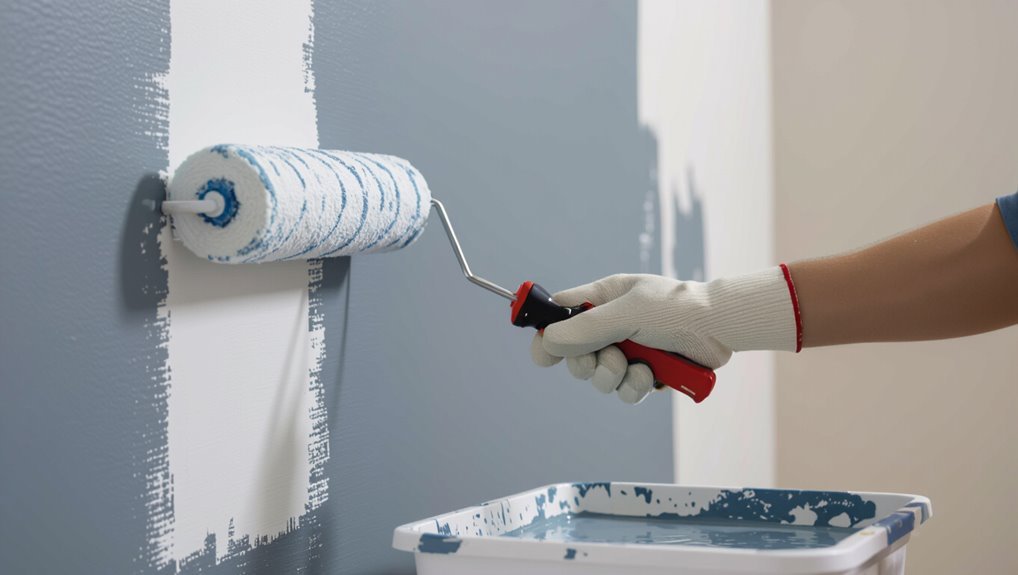
How to Paint a Wall With a Roller Without Streaks
You can get a streak‑free wall by prepping well, choosing the right primer and paint, and using a properly loaded roller with the correct nap for your texture. Clean and sand the surface, repair holes, and prime where needed. Apply paint in a loose W or M, then finish with light vertical passes while keeping a wet edge and even pressure, reloading before overworking a section. Keep going and you’ll find detailed tips to perfect each step.
Quick Answer: Get a Streak‑Free Wall With a Roller
Start by loading your roller evenly and rolling out excess paint on the tray so you don’t overload it; that prevents drips and heavy stripes.
Use consistent roller techniques: work in W or N patterns, finish with light vertical passes, and keep a wet edge.
Match roller nap to paint types and surface texture so coverage stays uniform and streaks don’t form.
Why Prepping Walls Prevents Streaks
Because paint only sticks well to a clean, even surface, prepping your walls removes the bumps, dust, and loose material that cause the roller to skip or leave thin streaks.
You’ll use wall preparation techniques like light sanding, cleaning, and priming after a quick surface condition assessment.
That consistent base lets the roller apply paint evenly, prevents patchy coverage, and guarantees smooth, streak-free results.
Inspect Walls for Damage and Stains Before Painting
Before you start rolling, walk the length of the wall and check for surface damage like cracks, holes, or loose plaster.
Mark any problem spots so you can fill and sand them before painting.
Also spot and remove stains—grease, mildew, or water marks—so they don’t bleed through the new coat.
Check For Surface Damage
A quick inspection will save you time and give your new paint a smooth finish: walk the room with good light and look for cracks, holes, peeling paint, stains, and bulges that’ll need attention before you roll.
Do a crack assessment and basic stain identification so you can plan repairs, patching, and priming.
- Note hairline cracks
- Mark larger gaps
- Flag peeling areas
- Check bulges
Identify And Remove Stains
Spot stains early so they don’t show through your new paint. Walk the room, note stain types—water, nicotine, grease, mold—and test with a damp cloth.
Use appropriate stain removal: bleach for mold, trisodium phosphate for grease, degreaser for smoke, spot primer for stubborn tannin bleed.
Let surfaces dry, sand lightly, then prime before rolling for even coverage.
Clean Walls Properly Before You Paint
Before you roll on paint, remove dust and cobwebs with a brush or vacuum so the surface’s clean.
Degrease stains thoroughly with a suitable cleaner so paint will stick evenly.
Patch holes and cracks, sand smooth, and wipe away residue before priming.
Remove Dust And Cobwebs
Start by sweeping or vacuuming the walls to knock down dust and cobwebs so your paint will stick evenly.
You’ll follow up with gentle wiping and targeted cobweb cleaning, focusing on corners and light fixtures. Proper dust removal prevents lift-off and uneven texture.
- Use a soft-bristle broom or vacuum brush
- Work top-to-bottom
- Wipe with a damp microfiber cloth
- Check vents and baseboards
Degrease Stains Thoroughly
After knocking down dust and cobwebs, you’ll need to tackle greasy residues that can repel paint and cause peeling.
Identify stain types—cooking oil, fingerprints, soot—and choose appropriate cleaning solutions: degreasing detergent, trisodium phosphate substitute, or citrus-based cleaner.
Scrub gently with a sponge, rinse thoroughly, and let dry.
Test a small area first to verify the cleaner won’t damage the finish.
Repair Holes And Cracks
Once you’ve cleaned the wall, patch any holes and cracks so your roller gives a smooth, lasting finish:
Use proper patching techniques, choose appropriate filling materials, sand flush, and prime spots before painting.
- Clean edges and remove debris
- Apply filler with a putty knife
- Sand level after drying
- Prime patched areas for uniform absorption
Sand and Smooth Uneven Surfaces
If your wall has dents, drips, or rough patches, you’ll want to sand and smooth them before painting so the finish looks even and professional. Use proper sanding techniques and smoothing methods for surface preparation; finish with a light wipe before priming to guarantee consistent wall finishing.
| Tool | Purpose |
|---|---|
| Sandpaper | Level rough spots |
| Block | Even pressure |
| Sponge | Remove dust |
| Vacuum | Clean debris |
When and How to Fill Holes and Cracks
With the surface smooth, check the wall for holes, cracks, and nail pops so you can decide what filler to use and when to fix them.
Do a quick surface inspection, choose patch materials, and apply repair techniques for hole repair and crack filling. Match texture, sand, and note drying time before painting.
- Assess size
- Pick filler
- Texture matching
- Sand and clean
Choose the Right Primer for Your Wall
Because primer creates the foundation your paint needs, pick one that suits the wall material and the job—latex for most interior drywall, oil-based for stained or glossy surfaces, or a bonding primer for slick or patched areas.
You’ll assess surface porosity and stain risk, choose among primer types, and enjoy primer benefits like improved adhesion, uniform sheen, and fewer coats, so your roller delivers consistent coverage.
Why and How to Prime for Even Roller Coverage
1 simple coat of primer can make the difference between streaky, patchy roller work and a smooth, uniform finish—you’ll get better adhesion, truer color, and fewer topcoats when the substrate is sealed and leveled first.
You should prioritize wall preparation, understand primer necessity, choose primer types, and use proper application techniques to get priming benefits.
- Seal porous surfaces
- Block stains
- Improve adhesion
- Smooth texture
Pick Paint Finishes That Hide Flaws
When you’re choosing paint, pick a finish that downplays imperfections—flatter sheens hide bumps and small repairs better than glossy ones, which catch light and highlight flaws.
You’ll favor matte finishes or flat paint for textured walls; eggshell finish or a subtle satin sheen gives slight durability without emphasizing reflective surfaces.
Consider color selection and light diffusion to further conceal blemishes.
Choose Paint Sheens That Minimize Roller Marks
Along with hiding surface flaws, your choice of sheen also affects how visible roller marks will be after the paint dries.
Along with hiding flaws, your chosen paint sheen determines how noticeable roller marks will be once dry.
You should do a paint sheen comparison and consider sheen impact: flatter sheens hide marks better, eggshell balances durability and concealment, satin shows more texture, and semi-gloss highlights roller strokes.
- Flat: best concealment
- Eggshell: moderate
- Satin: more texture
- Semi-gloss: most visible
Select the Best Paint Formula for Walls
Pick a paint formula that matches the room’s needs: latex (water-based) is easiest to clean, dries quickly, and resists yellowing, while oil-based paints offer tougher finishes and smoother leveling for high-traffic or trim areas.
Consider paint types, finish options and paint durability; weigh drying times, weather considerations, light reflection, texture effects, color selection, eco friendly paints and brand comparisons to choose what performs best.
Calculate How Much Paint You Need
First, measure each wall’s width and height to calculate the total square footage you’ll paint.
Then multiply by the number of coats you plan to apply and check the paint can’s coverage per square foot.
Finally, add a small wastage allowance for touch-ups and roller loss so you don’t run short.
Measure Wall Area
Start by measuring each wall’s width and height so you can calculate the total square footage to be painted; multiply width by height for every wall, add them together, and subtract areas for large windows and doors.
Use measure tools to record wall dimensions, then total the area to estimate paint.
- Measure each wall
- Subtract doors/windows
- Note ceiling height
- Record totals
Account For Coats
Decide how many coats you’ll need based on the surface and paint type, because the number of coats directly affects the total gallons required.
Consider coat types—primer, base, and finish—and how many passes each requires.
Check coverage per gallon on the can and multiply by coats.
Factor in recommended drying times between coats to schedule work and guarantee proper adhesion before applying the next layer.
Include Wastage Allowance
Because some paint is lost to rollers, trays, drips, and touch-ups, you should add a wastage allowance when calculating how much paint you need.
Do a clear wastage calculation (typically 5–15%), round up for coats, and plan for touch-ups. Store extras properly for future touch-ups.
- Estimate percentage loss
- Add coat requirements
- Buy an extra small can
- Follow paint storage instructions
Match Roller Nap Length to Wall Texture
When you’re choosing a roller, match the nap length to your wall’s texture so you get even coverage without excess splatter or visible roller marks.
For smooth walls pick a short nap to lay paint flat; for lightly textured walls use a medium nap; for rough or popcorn surfaces choose a long nap.
Test on a scrap area to confirm even coverage and minimal stipple.
Choose Roller Covers: Material and Pile Explained
Although the nap length matters, choosing the right roller cover also comes down to the material and pile—these determine how much paint the cover holds, how it releases paint onto the wall, and how smooth the finish will be.
You’ll pick among roller cover types based on surface and paint; match roller nap but focus on material for durability.
- Synthetic for latex
- Natural for oil
- Blends for versatility
- Microfiber for ultra-smooth
Pick a Roller Frame and Handle for Control
If you want steady, precise strokes, pick a roller frame and handle that fit your grip and the job—sturdy frames reduce wobble, and the right handle gives you leverage for smooth coverage. Choose among roller types for size and shaft strength, and test handle grips for comfort. Use a secure connection to your cover for even pressure and consistent application.
| Frame | Benefit |
|---|---|
| Metal | Durable |
| Plastic | Lightweight |
| Extension | Reach |
| Ergonomic | Comfort |
Choose Brushes and Trim Tools That Match Your Roller
Match your brushes and trim tools to the roller’s nap, width, and paint type so you get consistent texture and clean edges; choose a sash brush for fine trim, a 2–3″ angled brush for cutting in, and a mini-roller or edging tool that shares the same nap thickness as your main roller to avoid visible changes.
Use appropriate roller types and brush sizes.
- Sash brush for detail
- 2–3″ angled brush for cutting
- Mini-roller matching nap
- Edging tool for straight lines
Tape and Masking Supplies That Prevent Bleeding
Pick a high-quality painter’s tape that sticks firmly but removes cleanly to cut down on bleed-through.
Use a liquid masking sealant along edges for an extra barrier where tape alone might fail.
Prep the surface—clean, dry, and smooth—so tape and sealant can adhere properly.
Choose High-Quality Painter’s Tape
1 essential trick for clean, sharp paint lines is choosing high-quality painter’s tape that actually prevents bleeding.
You’ll get crisper edges, easier tape application, and smoother tape removal. Pick tape rated for your surface and paint type, press edges firmly, and avoid overstretching.
- surface compatibility
- adhesive strength
- clean edge press
- remove at angle
Use Liquid Masking Sealant
When you want razor‑sharp paint edges with minimal cleanup, use a liquid masking sealant along your tape lines to block seepage before you roll. You’ll see liquid sealant benefits: reduced bleeding and crisper lines. For best results, follow simple application techniques and let it cure.
| Tip | Result |
|---|---|
| Thin bead | Seal gaps |
| Brush out | Smooth edge |
| Cure time | Strong bond |
| Test spot | Confidence |
| Remove tape | Clean edge |
Proper Surface Preparation
After you’ve sealed tape lines with liquid masking, get the surface ready so tape and masking materials can do their job. You’ll do surface cleaning, wall inspections, and paint preparation to prevent bleeding.
Use proper roller techniques during paint application and avoid overloading edges.
- Clean and degrease edges
- Inspect for gaps or loose tape
- Apply primer where needed
- Press tape firmly before painting
Prepare Drop Cloths and Protect Floors
Lay out heavy-duty drop cloths and tape their edges so paint can’t seep under or spread across the floor.
Choose drop cloths types suited to the job—canvas for reuse, plastic for quick containment, or rosin paper for hardwoods.
Pick drop cloths for the task—canvas for reuse, plastic for quick containment, rosin paper to protect hardwoods.
Smooth wrinkles, overlap seams, and secure edges with painter’s tape.
Keep a spare cloth near walls and doors for extra floor protection and quick cleanup.
Mix and Thin Paint for Optimal Roller Performance
Because proper consistency keeps your roller from spitting or leaving streaks, stir the paint thoroughly and thin only if the manufacturer recommends it—add small amounts of water (for latex) or the specified thinner for oil-based paints, mixing and testing between additions until the paint flows smoothly without running.
- Check paint viscosity for your roller selection
- Match paint consistency to surface compatibility
- Avoid unnecessary paint additives
- Test roller technique before full application
When to Use Paint Conditioners or Flow Enhancers
If you’ve mixed paint to the right consistency but still notice poor leveling, slow drying, or brush marks, consider a paint conditioner or flow enhancer to improve workability and finish.
Use paint additives sparingly—follow manufacturer ratios—to reduce brush/roller marks and improve open time.
They’ll help with leveling when paired with proper roller techniques, but don’t compensate for bad surface prep or overly old paint.
Load a Roller Properly Without Overloading
A properly loaded roller saves time and prevents drips, so dip only the nap into the tray well and roll back and forth on the grid until the roller is evenly saturated but not dripping.
You’ll control paint consistency and use correct roller technique to avoid blobs and thin patches.
- Load lightly, avoid excess
- Wring on grid gently
- Check edges for drips
- Refill small amounts
Evenly Saturate the Roller in a Paint Tray
Dip the nap into the tray well and roll it across the ridged grid until paint coats the roller evenly without pooling; you want a consistent, damp surface that won’t drip when you lift it. Use roller saturation techniques and simple paint tray tips to avoid blotches.
| Action | Result |
|---|---|
| Roll across grid | Even coat |
| Tap edge | Remove drips |
| Repeat lightly | Consistent dampness |
Establish and Maintain a Wet Edge When Rolling Walls
Now that your roller’s evenly loaded, keep the paint moving so each stroke blends into the next and you maintain a wet edge.
Use wet edge techniques and consistent roller application to avoid lap marks. Work in manageable sections, overlap each pass slightly, and finish edges before paint skins over.
- Start top to bottom
- Overlap by 50%
- Maintain steady speed
- Re-load as needed
Rolling Technique for the Smoothest Finish
Load your roller evenly—don’t glob paint on or leave it too dry—so you get consistent coverage from the start.
Work in overlapping “W” or “M” patterns and keep each pass connected to the wet edge.
If you maintain that wet edge and a properly loaded roller, you’ll avoid lap marks and get the smoothest finish.
Load Roller Properly
Start by evenly covering the roller with paint so it holds enough for a smooth, continuous coat without dripping.
Use proper roller loading techniques to achieve consistent roller paint distribution; load in the tray’s shallow well, roll along the grid, and avoid oversaturation.
You’ll control pressure and speed for even coverage.
- Load evenly
- Roll on grid
- Remove excess
- Check nap consistency
Maintain Wet Edge
When you keep a wet edge, you overlap each new pass into the still-tacky paint so seams vanish and the finish stays uniform; focus on consistent speed, light pressure, and working in sections.
You’ll use wet edge techniques to avoid lap marks, keeping roller application continuous across boundaries.
Pause only to reload and blend quickly, maintaining a seamless, even finish.
Use the “W” or “M” Pattern for Even Coverage
Swing the roller in a loose “W” or “M” across a section of the wall, then fill in the gaps without lifting the roller, so you lay down paint evenly and avoid lap marks.
Swing a loose “W” or “M,” then fill gaps without lifting to lay paint evenly and avoid lap marks.
You’ll use proven roller techniques to guarantee consistent paint application and seamless blending across the surface.
- Cover a 3×3 foot area
- Overlap strokes slightly
- Work top to bottom
- Reload evenly
How Much Pressure to Apply When Rolling
Start with light pressure so the roller lays down paint without splattering.
Keep your pressure even as you move to avoid streaks and patchy coverage.
Only increase pressure where you need to push paint into textured areas or seams.
Start With Light Pressure
Begin with a light touch: press the roller gently against the wall so the nap makes contact without flattening, which lets paint spread evenly and prevents splatter or drips.
Use light pressure as your basic roller technique, release when lifting, and gauge coverage by sight.
- Start gently
- Load evenly
- Smooth short passes
- Check nap coverage
Maintain Even Pressure
Once you’ve practiced the light touch, keep that same control as you move across the wall by applying steady, even pressure—enough to spread paint uniformly but not so much that the nap flattens or leaves streaks. You’ll monitor paint consistency and refine your roller technique to maintain coverage and avoid ridges.
| Pressure | Effect |
|---|---|
| Light | Thin coverage |
| Even | Smooth finish |
| Heavy | Streaks |
Increase Pressure Strategically
Press more firmly in targeted areas when you need fuller coverage—like over thin spots, rolled edges, or textured surfaces—but ease up as the roller fills and paint spreads to avoid ridges and splatter.
Use roller pressure techniques and painting consistency strategies to control finish.
- Apply firm, brief pressure
- Lighten for feathering
- Match pressure across passes
- Re-load before overworking
Keep a Consistent Rolling Speed and Direction
While you roll, keep a steady pace and move in the same direction so the nap lays uniformly and you avoid streaks or lap marks.
Maintain consistent pressure and a steady rolling rhythm across the section. Don’t pause or speed up mid-stroke; overlap each pass slightly, keeping edges wet so texture and sheen match.
This prevents uneven coverage and visible roller lines.
Blend New Paint Into Adjacent Sections Seamlessly
If you roll into a fresh edge and immediately feather the new paint into the adjacent section, you’ll avoid visible seams and create a uniform finish.
You should use consistent pressure, overlap slightly, and work wet edges for smooth color blending and subtle edge feathering.
- Keep a light touch
- Overlap by a few inches
- Work quickly while wet
- Match roller nap
Deal With Corners and Edges Using a Roller
After feathering your fresh roll into adjacent sections, shift focus to corners and edges where rollers naturally struggle.
Work a slightly loaded mini-roller into corner techniques: roll toward the corner, then pull back to soften ridges.
For edge blending, overlap the roller onto taped or protected trim lightly, then feather outward to match texture and eliminate visible seams.
When to Cut In With a Brush vs. an Edging Tool
When should you reach for a brush and when is an edging tool the smarter choice? You’ll pick based on precision, speed, and surface detail.
Use brush techniques for tight corners and textured trim; choose edging tools for long straight lines and faster coverage. Match tool to task to avoid overlap and wasted touch-ups.
- Tight corners: brush techniques
- Straight runs: edging tools
- Trim detail: brush techniques
- Large edges: edging tools
Spot and Fix Roller Lines While Paint Is Wet
Spot roller lines as you go so you can smooth them out before the paint skins over; wet paint blends easily, but once it dries those ridges and streaks become permanent. Use light pressure and a clean roller for spot correction, employ wet techniques like gentle feathering, and re-roll blended areas immediately to match texture.
| Action | When to do it |
|---|---|
| Feather | While wet |
| Re-roll | After blending |
| Light pressure | Continuous |
| Spot touch | Immediately |
Troubleshoot Uneven Coverage After Drying
Noticed patchy areas once the paint has dried? Check for thin spots from roller gaps, uneven absorption, or poor color selection; lighting effects can exaggerate flaws.
Noticed patchy dry spots? Check for thin roller coverage, uneven absorption, or color choice—lighting can magnify flaws.
Address with spot-sanding, feathering edges, and targeted touch-ups.
- Inspect under different lighting effects
- Note variations from color selection
- Sand and clean problem spots
- Re-roll lightly for uniform texture
When and How to Apply a Second Coat
If the first coat looks even and feels dry to the touch but still shows slight thinness or color variance, plan for a second coat—usually after the manufacturer’s recommended dry time, which is often 2–4 hours for latex and longer for oil-based paints.
Apply the second coat with consistent pressure, overlapping wet edges, and maintain a wet edge to avoid lap marks; check drying time before final inspection.
Sand Lightly Between Coats for Ultra‑Smooth Walls
After the second coat has dried to the manufacturer’s recommended time, lightly sand the surface to knock down any tiny bumps, brush marks, or dust nibs before applying additional coats or the final finish.
You’ll use gentle sanding techniques to achieve an ultra smooth finish without removing paint. Clean dust, inspect, then continue.
- 220–320 grit sandpaper
- Light, even pressure
- Tacky cloth wipe
- Reinspect for flaws
Temperature and Humidity: Effects on Finish and Drying
Temperature and humidity directly affect how fast your paint dries and how it lays down, with colder temps slowing curing and high humidity causing tacky or blotchy finishes.
Excess moisture can prevent proper paint flow and adhesion, while very hot, dry conditions can make paint skin over before it levels.
Aim to paint in moderate temperatures (typically 50–85°F/10–30°C) with humidity below about 70% for best curing and finish.
Temperature Effects On Drying
Because paint chemistry and moisture movement change with the air around you, room conditions strongly affect how fast paint sets and how the finish looks.
You’ll notice temperature impact on drying speed: warmer air speeds curing, colder slows it. Control thermostat to match paint recommendations and avoid temperature swings.
- Aim for steady temperature
- Avoid painting near heaters
- Use slow-drying formulas if cold
- Monitor manufacturer’s range
Humidity And Paint Flow
While you’re painting, humidity controls how paint flows, levels, and dries—high moisture can slow evaporation and make paint sag or sag, while very dry air speeds skinning and can leave brush marks.
You’ll adjust technique and timing to counter humidity effects: work smaller sections, maintain a wet edge, and choose formulations that suit local paint viscosity, avoiding overworking the roller to prevent streaks.
Ideal Conditions For Curing
Ideal curing depends on two things you can control: consistent warmth and moderate humidity.
You’ll shorten curing time and avoid tacky or cloudy finishes by keeping conditions steady. Aim for the ideal temperature range on your paint can and control ventilation to manage moisture.
- Keep thermostat steady
- Maintain 40–60% humidity
- Avoid drafts and direct sunlight
- Follow manufacturer curing time
Paint Around Outlets, Fixtures, and Trim Cleanly
Start by turning off power to outlets and switches so you can work safely and remove their cover plates; that gives you clear access and prevents paint from getting on hardware. Use painter’s tape, a small brush for fixture edges, and a steady hand for trim painting and clean corners.
| Task | Tool | Tip |
|---|---|---|
| Outlets | Brush | Remove outlet covers |
| Fixtures | Tape | Paint edges carefully |
| Trim | Roller/Brush | Feather into wall |
Work Efficiently in Large Rooms Without Streaks
Because large rooms demand a consistent approach, plan your rolling pattern and keep a wet edge so you won’t get lap marks; work in manageable sections, reload the roller frequently, and overlap each pass by about 30% to blend strokes seamlessly.
Use an efficient technique: move steadily, use extension poles, maintain rhythm, and enlist a helper.
- Start at a corner
- Work in zones
- Keep paint reserves
- Check for streaks
Handle Textured Walls While Maintaining a Smooth Look
Start by evaluating the texture so you know whether the surface needs a nap roller or a specialty cover.
Pick a roller with the right nap to reach crevices without leaving excess buildup.
Feather and blend each pass to hide overlap and keep the finish looking smooth.
Assess Wall Texture
Texture affects how paint covers and what tools you’ll need, so take a close look and feel the surface before you pick a roller.
You should identify wall texture and common texture types, estimate paint absorption, and plan roller techniques that suit peaks and valleys to minimize streaks.
- Smooth or eggshell
- Orange peel or knockdown
- Heavy stipple or popcorn
- Patch and primer needs
Choose Appropriate Roller
Pick a roller that matches the wall’s profile so you can get good coverage without accentuating bumps.
For light orange peel choose a short-nap roller; for heavy texture use a thicker nap to reach crevices.
Match roller types to surface roughness and pick roller size to fit your wall height and trim.
That balance yields even coverage and fewer touch-ups.
Feather And Blend Edges
When you reach the edges of a painted section, roll lightly outward from the wet edge and lift the roller at the end of each pass so the paint tapers off—this feathering prevents ridges and helps the new area blend with surrounding texture.
Use feathering techniques and blending methods to match texture, pressure, and overlap.
- Vary roller pressure
- Work wet-on-wet
- Light cross-rolls
- Match nap length
Repaint Patched Areas to Blend Invisibly
Although the patch may look smooth once it dries, you’ll need to feather and blend paint carefully so the repair disappears against the surrounding wall; use light overlapping strokes and staggered pressure as blend techniques.
Check color matching in natural light, apply thin coats, and feather edges outward with the roller or brush until texture and hue align seamlessly.
Then let cures fully before inspecting.
Clean and Store Roller Covers to Preserve Nap
Clean your roller cover right after you finish painting to prevent paint from drying into the nap.
Rinse until the water runs clear and spin or shake out excess moisture.
Store the cover dry and wrapped or in a sealed bag to keep dust off and preserve the nap.
Clean Roller Immediately
Rinse your roller cover right away after you’re done painting to prevent paint from drying into the nap and making it stiff.
You’ll protect nap and guarantee even paint coverage by flushing out excess pigment. Good roller care preserves paint consistency and performance for the next job.
- Squeeze out excess paint
- Rinse until water runs clear
- Use mild soap if needed
- Spin to remove water
Store Dry And Covered
After you’ve rinsed and spun the roller dry, let it air completely before storing so moisture doesn’t promote mildew or damage the nap. You should wrap covers in plastic or use a sealed container for paint storage and roller care. Label and date containers, keep them cool and dry, and rotate stock to preserve performance.
| Item | Action | Tip |
|---|---|---|
| Cover | Wrap | Seal tight |
| Container | Store | Cool/dry |
| Label | Date | Rotate |
| Inspect | Before use | Replace if matted |
Extend the Life of Your Roller Frame and Brushes
1 simple habit will go a long way: treat your roller frame and brushes like tools, not disposables. You’ll use roller maintenance tips and brush longevity techniques: clean immediately after use, remove excess paint, dry fully, and store protected.
- Rinse thoroughly after each job
- Use mild solvent when needed
- Inspect and tighten parts
- Store covered and dry
Dispose of Leftover Paint and Materials Responsibly
Keeping your roller and brushes in good shape also means handling leftover paint and materials responsibly when the job’s done.
Don’t pour paint down drains; check local recycling options for empty cans and usable paint donations. Seal partial cans for future touch-ups or take them to a hazardous waste facility if required.
Dispose rollers, tape, and liners per local rules to avoid contamination.
Avoid the Common Mistakes That Cause Streaks
Streaks usually come from four common mistakes: using the wrong roller nap, overworking partially dried paint, applying uneven pressure, or failing to maintain a wet edge.
You can prevent them by practicing streak prevention and refining your roller techniques. Follow these tips:
- Keep a consistent pressure
- Work a small wet area
- Use correct nap for surface
- Reload roller before it skins over
Choose Pro‑Grade Tools for Large Roller Projects
For large roller jobs, pick pro-grade tools that hold more paint, lay it down evenly, and stand up to heavy use—so you spend less time refilling, get fewer lap marks, and finish faster.
Choose the right roller types for your surface nap and frame strength. Invest in sturdy frames, quality covers, and follow simple tool maintenance—clean promptly and store properly—to guarantee consistent, streak-free results.
Estimate Time and Stages for a Streak‑Free Job
Plan on dividing the job into clear stages—prep, priming (if needed), rolling, touch-ups, and drying/curing—and block out time for each so you won’t rush and create lap marks.
Use time management to build a realistic project timeline, allocating extra for drying between coats. Keep a steady pace and check progress regularly.
- Prep: 30–60 min
- Prime: 1–2 hrs
- Roll: 1–3 hrs
- Dry/cure: 24–48 hrs
Touch Up Small Blemishes After the Job Is Done
When you’ve finished and the paint’s fully dry, walk the wall closely to spot small blemishes like drips, thin spots, or missed patches.
For blemish repair, sand tiny bumps lightly, wipe dust, and apply paint with a small brush or mini roller. Match texture and feather edges into surrounding paint.
Use tested touch up techniques and let dry before reevaluating.
Evaluate Whether Your Finish Looks Professional
After you’ve touched up blemishes and the paint’s fully cured, step back and assess the overall finish from several angles and distances.
Do a professional evaluation by comparing wall sections to reference areas for consistency. Note texture, sheen, and coverage for a finish comparison.
Compare repaired sections to reference areas—assess texture, sheen, and coverage to ensure a consistent professional finish.
Take photos in different light to confirm uniformity.
- even sheen
- consistent texture
- uniform coverage
- edge sharpness
Avoid Streaks When Using Specialty Paints (e.g., Eggshell)
Because eggshell and other low-sheen finishes show roller marks more easily, use a slow, consistent technique and a high-quality short- or medium-nap roller to lay down even coats.
Work in manageable sections, keep a wet edge, and avoid overworking the paint so you don’t leave streaks or lap marks.
For specialty paints, prep thoroughly, thin slightly if recommended, and use proper roller techniques to blend seams.
Decide When to Call a Pro for Flawless Results
If you’ve tried the careful techniques for specialty paints and still see visible seams, it might be time to contemplate hiring a pro for flawless results.
If careful specialty-paint techniques still leave seams, consider hiring a pro for a truly flawless, uniform finish.
You should consider consulting experts when texture, lighting, or scale reveal flaws beyond DIY fixes; hiring professionals saves time and guarantees uniform finish.
- persistent seams
- complex textures
- large surface area
- time or skill limits
Frequently Asked Questions
How Do I Prevent Streaks When Painting Over Wallpaper?
You should avoid painting directly over wallpaper; do wall preparation and perform wallpaper removal first, then prime properly, fill seams, sand lightly, and use a quality roller with even pressure and slow, consistent strokes to prevent streaks.
Can Streaks Form From Poor Ventilation or Dust During Drying?
Yes — poor ventilation or dust during drying can cause streaks. You’ll want ventilation tips and dust control: open windows, run fans, filter air, wipe surfaces, and avoid painting when dust’s airborne to prevent ruined finishes.
Will Tinted Primers Cause Color Variation or Streaking?
Yes — tinted primers can cause color variation if applied unevenly, but they won’t inherently create streaking. You’ll want to choose appropriate primer types for color consistency, apply evenly, and let coats dry properly to avoid issues.
How Do I Avoid Lap Marks When Painting Ceilings With a Roller?
Perfectly parallel: you’ll practice proper roller techniques and prioritize ceiling preparation, working wet edges, maintaining consistent pressure, overlapping strokes, and blending quickly so seams vanish; don’t stop mid-panel, and keep a loaded roller for uniform coverage.
Can Water Spots From Condensation Create Streaks After Painting?
Yes — condensation effects can cause water spots that create streaks after painting because moisture alters paint absorption; you should wait for surfaces to fully dry, control humidity, and avoid painting when condensation’s likely.
Conclusion
You’ll get streak-free results when you prep, use the right roller and paint, and work methodically—clean, sand, prime, cut in, then roll with a “W” or “M” pattern and finish each section while the paint’s wet. For example, a neighbor who cleaned and sanded their patched plaster, used a ¾” nap roller, and kept a wet edge, transformed a blotchy eggshell wall into a smooth, professional-looking finish in one afternoon. Call a pro for large or tricky jobs.