How Much to Paint Interior Walls? Cost Breakdown Guide
You’ll typically pay $1.50–$4.00 per square foot (about $200–$800 per room) to paint interior walls, though final costs hinge on paint quality, surface prep, repairs, and labor. Expect higher prices for textured, dark, or specialty finishes and for high ceilings or tricky access that need scaffolding. DIY saves labor but risks time and mistakes; pros bring speed and warranties. Keep a clear scope and budget, and keep going to see detailed cost examples and tips.
Quick Answer: Typical Interior Paint Costs
Most homeowners pay between $1.50 and $4.00 per square foot to paint interior walls, though your total cost will depend on room size, paint quality, and prep work required.
You’ll factor paint finish types and how they hide imperfections, plus color psychology’s effect on mood and perceived space.
Pick durable finishes for high-traffic rooms and calming hues for bedrooms to maximize value.
Painting Costs: Materials, Labor, Extras
When you break down interior painting costs, materials, labor, and extras each play a distinct role: paint and primers set the baseline, labor often makes up the largest share, and extras like patching, trim work, or ceiling painting add up quickly.
You’ll weigh material selection, finish types, color trends, preparation techniques, painter ratings, regional pricing, seasonal considerations, project budgeting, quality assurance, and environmental factors.
Weigh paint choices, finishes, prep, pro ratings, regional costs, timing, budgeting, quality, and environmental impact.
- Fear of overspend
- Relief from clear quotes
- Pride in smart color choices
- Frustration with delays
- Satisfaction of durable results
Cost Per Square Foot for Painting Walls
When you look at cost per square foot, you’ll see it combines labor and material costs into one easy figure.
You’ll want to note how paint quality, wall condition, ceiling height, and trim work push that number up or down.
Knowing those factors helps you compare quotes and plan your budget.
Labor And Material Costs
Because paint jobs vary by room size, surface condition, and finish, you’ll see the cost per square foot change a lot; labor typically makes up the bigger share while materials add a predictable but smaller amount.
You’ll weigh labor rates, material quality, painter experience, paint type, and preparation work.
Emotions arise from cost variance, regional differences, project duration, job complexity, seasonal pricing:
- Frustration
- Relief
- Anticipation
- Confidence
- Regret
Factors Affecting Price
If you want an accurate cost per square foot for painting interior walls, you’ll need to contemplate a handful of key factors—room size and ceiling height, surface condition and prep required, paint quality and finish, labor rates in your area, and any special-access or trim work.
You should also factor paint type selection, room accessibility, number of coats, color changes, and needed repairs to estimate materials and labor precisely.
Average Cost to Paint One Room
Expect to pay between $200 and $800 to have one average-sized room professionally painted, depending on factors like room size, surface condition, paint quality, and labor rates in your area.
Plan on roughly $200–$800 to professionally paint an average room, depending on size, surface condition, paint quality, and local labor.
You’ll weigh color choice, wall condition, paint type, finish options, wall texture, prep work, furniture arrangement, climate impact, local rates, accessibility issues, labor availability, seasonal trends, safety measures, design styles, personal preferences, equipment rental, environmental factors, and budget constraints.
- Excited to refresh your space?
- Nervous about costs?
- Hopeful for a perfect finish?
- Worried about disruptions?
- Ready to invest in comfort?
Small, Medium, Large Room Price Examples
Next, you’ll see concrete price examples for small, medium, and large rooms so you can compare costs quickly.
I’ll outline typical small room pricing, give medium room estimates, and show what to expect for larger spaces.
Use these examples to gauge your budget and decide if you need a contractor or can DIY.
Small Room Pricing
When you’re budgeting for a paint job, thinking regarding room size helps you get realistic price examples—small rooms usually cost less because they need less paint and take less time to prepare and finish.
You’ll see savings with small room transformations and smart color scheme selection. Expect quick prep, lower labor, and faster turnaround.
- Cozy excitement
- Fresh confidence
- Calm renewal
- Simple delight
- Proud comfort
Medium Room Estimates
Moving from a cozy small room to a medium-sized space changes the math a bit: you’ll need more paint, a bit more prep time, and slightly higher labor costs, but you still get a good balance between price and impact.
For a medium room, plan on moderate paint quantities, careful wall preparation, and thoughtful color selection to maximize value without unnecessary extras.
Large Room Costs
Large rooms raise the stakes: you’ll need considerably more paint, longer prep and drying times, and higher labor—so expect a noticeable jump in total cost compared with small or medium spaces.
For accurate cost estimation consider paint selection, room size, color impact, wall preparation, labor pricing, budget planning and project timeline.
- Overwhelmed
- Excited
- Anxious
- Relieved
- Empowered
How Painting Ceilings Affects Total Cost
Because ceilings add both surface area and prep work, painting them will raise your overall project cost more than you might expect. You’ll pay more for high ceiling height, extra scaffolding, and a smoother paint finish. Expect added time for masking and repairs.
| Factor | Impact | Typical extra cost |
|---|---|---|
| Height | High ceilings need lifts | $50–$200 |
| Finish | Smooth/flat vs. textured | $20–$100 |
Trim, Baseboards, and Doors: Added Cost
Don’t forget that trim, baseboards, and doors usually add to your painting bill because they require different prep and paint.
You’ll pay by linear foot or per door, with trim often costing less per foot than a full door.
Knowing those per-unit rates helps you budget the total project accurately.
Trim Painting Costs
Adding trim, baseboards, and doors usually raises your interior paint bill because they require more prep, finer brushes or rollers, and multiple coats for a crisp finish.
You’ll pay for trim preparation, trim painting, trim installation, and choices in trim materials, trim types, trim finishes, trim color, trim styles, and trim durability.
Emotions:
- Pride
- Relief
- Frustration
- Satisfaction
- Anticipation
Doors & Baseboards Pricing
Doors and baseboards typically add 10–25% to your interior painting bill because they need more prep work, tighter brushwork, and extra coats for a clean, durable finish.
You’ll pay more for complex door styles, taller baseboard materials, and premium paint finishes.
Confirm prep requirements—sanding, caulking, and priming—beforehand, since they drive labor time and overall cost.
How Paint Quality Changes the Bill
While higher-quality paint costs more up front, it usually saves you time and money down the line by covering better, requiring fewer coats, and resisting wear and stains.
Spending more on quality paint pays off—better coverage, fewer coats, and longer-lasting resistance to wear and stains.
You’ll notice differences in paint durability, color impact, finish types, brand reputation, and environmental factors.
Consider application techniques, maintenance costs, and resale value.
- Relief
- Pride
- Confidence
- Frustration avoided
- Long-term satisfaction
Primer: When You Need It and Cost
Primer lays the groundwork for a smooth, long-lasting finish, and you’ll need it whenever bare drywall, stains, drastic color changes, or high-porosity surfaces are involved.
You’ll pay $15–$40 per gallon depending on primer types and performance.
Primer benefits include better adhesion, uniform coverage, and fewer topcoats.
Choose oil, latex, or specialty primers based on surface and stain-blocking needs.
Surface Prep That Increases Painting Costs
Because proper prep determines how well paint sticks and how long it lasts, expect costs to rise when walls need more than a quick wipe-down.
You’ll face added prep material costs, consider equipment rental options, and weigh professional assessment benefits versus DIY prep tips.
Remember paint adhesion importance and efficient surface cleaning techniques.
- Frustration
- Relief
- Urgency
- Confidence
- Regret
Drywall, Plaster, and Damage Repair Costs
If your walls have holes, cracks, or uneven plaster, expect repair work to be the biggest variable in your paint estimate. Patching drywall, re-taping seams, or skim-coating plaster can add significant labor and materials.
You should schedule a wall inspection and damage assessment, then choose repair techniques for drywall repair or plaster restoration. Proper surface preparation and texture application guarantee paint adhesion and lasting results.
Texture Work and Skim Coat Pricing
Before you paint, you’ll want to assess wall damage to see if texture repairs or a full skim coat are needed.
Costs vary based on damage severity, room size, and the finish you want.
We’ll break down the factors that drive pricing so you can budget accurately.
Assessing Wall Damage
When you’re estimating texture work or a skim coat, start by inspecting the surface for gouges, nail pops, water stains, and previous patching—those defects drive both scope and cost.
Do a thorough wall inspection and damage assessment: surface evaluation, moisture issues, paint adherence, crack filling, peeling paint, repair techniques, mold treatment, and prep essentials.
- Frustration
- Relief
- Urgency
- Confidence
- Clarity
Skim Coat Cost Factors
Skim coating costs depend on the room size, the extent of surface damage, and the finish you want, so you’ll want a clear scope before pricing.
You’ll weigh skim coat benefits, skim coat techniques, skim coat preparation, and skim coat materials.
Skim coat pricing varies with skim coat thickness, skim coat application labor, and skim coat finish; compare skim coat alternatives and factor skim coat lifespan.
How Color Changes and Extra Coats Add Cost
Because darker or more saturated colors tend to show imperfections and require heavier coverage, switching your wall color can raise labor and material costs.
Darker, bolder paints reveal flaws and demand more primer, coats, and time—expect higher costs and effort.
You’ll also weigh color psychology choices and coat thickness when planning. Expect more primer, extra labor, and longer drying times.
- Frustration over extra coats
- Excitement for bold transformation
- Anxiety about patchy coverage
- Relief after flawless finish
- Pride in the result
Specialty Finishes: Cost Differences Explained
If you want a textured, metallic, or faux-finish look, expect higher material and labor costs than for standard flat paint.
These techniques need specialized products, more prep, and craftsmen with specific skills, so pricing can jump considerably per room or per square foot.
You’ll pay more for specialty techniques and longer labor, but you gain unique aesthetics and often improved finish durability—budget accordingly.
Painting High Walls, Vaulted Ceilings, and Stairwells
When you’re planning paint for high walls, vaulted ceilings, or stairwells, think about access and safety—ladders, scaffolding, and fall protection add cost and complexity.
Those precautions slow the job and often require more experienced crews, which raises labor time and rates.
Expect the overall project to take longer and cost more than a standard room because of these added time and safety needs.
Access And Safety Considerations
Although high walls, vaulted ceilings, and stairwells can transform a room, they also demand careful planning for safe access; you’ll need the right ladders or scaffolding, fall protection, and clear workspace to avoid accidents and guarantee a quality finish.
Use safety gear, access tools, ladder safety, ladder positioning, electrical safety, workspace organization, wall protection, paint disposal, ventilation needs, and child safety.
- Fear of heights melts away
- Confidence in each step
- Relief from cluttered zones
- Pride in spotless walls
- Calm knowing hazards are handled
Time And Labor Impact
Because high walls, vaulted ceilings, and stairwells require extra setup and careful movement, expect the job to take considerably longer than painting standard-height rooms.
You’ll spend more time on ladders or scaffolding, prepping hard-to-reach areas, and working in smaller sections to maintain a consistent finish.
You’ll plan for reduced time efficiency, higher labor costs, and additional crew coordination to guarantee safety and quality.
How Room Shape and Obstacles Add Labor
If your room has an irregular layout—bay windows, alcoves, multiple corners, or angled ceilings—you’ll spend more time cutting in and rolling than you’d in a simple rectangular space.
You’ll notice room dimensions and obstacle types, wall angles, furniture placement, ceiling height, door frames, window features, architectural details, wall finishes, and lighting effects all slow progress.
- Frustration
- Tedium
- Patience
- Precision
- Relief
Protecting Floors, Furniture, and Fixtures
Before you start painting, you’ll want to protect floors with drop cloths or plastic sheeting taped at the edges to prevent spills and tracked paint.
Move or cover furniture with fitted sheets or lightweight tarps and secure fixtures like light switches and trim with painter’s tape.
Taking these simple steps cuts cleanup time and lowers the risk of damage.
Protecting Floors Properly
Start by covering floors thoroughly so paint splatters and drips never reach your flooring or baseboards.
You’ll choose durable floor covering and simple protective measures, use heavy drop cloths, and plan surface preparation to avoid tracking paint.
Keep cleanup tips handy and consider minimal furniture protection nearby.
- Relief
- Confidence
- Control
- Calm
- Pride
Covering Furniture & Fixtures
Once your floors are secure, turn attention to furniture and fixtures so paint won’t splatter onto cushions, lamps, or hardware.
For furniture protection, use drop cloths or plastic sheeting and plan furniture arrangements to allow access. Consider moving items to temporary storage if needed.
Apply fixture coverage to knobs and lights, watch for paint overspray, and follow safety precautions during room preparation and painting.
Masking, Taping, and Cutting-In Costs
Masking, taping, and cutting-in are the detail steps that set the stage for a clean, professional paint job, and they usually account for a noticeable portion of labor costs.
You’ll use masking techniques, tape types, cutting in methods, and preparation essentials to protect surfaces and boost labor efficiency.
Apply cost saving tips without sacrificing surface protection.
- Relief
- Confidence
- Precision
- Calm
- Pride
Typical Painter Hourly Rates Explained
Hourly rates for painters typically range widely depending on experience, location, and the job’s complexity, and knowing those variables helps you budget accurately.
You’ll see lower hourly costs from less-experienced workers and higher rates for pros with strong painter qualifications. Factor in regional pricing differences, overtime, and specialty techniques.
Request itemized estimates so you can compare skill level, time, and total expected labor.
How Contractors Estimate Paint Jobs
When you hire a contractor, they’ll estimate your paint job by measuring surfaces, evaluating prep needs, and factoring labor, materials, and overhead into a clear scope.
This lets you compare bids and avoid surprises. You’ll get contractor quotes and painting estimates that list tasks, timelines, and costs so you can decide confidently.
- Relief
- Trust
- Control
- Confidence
- Clarity
Hire a Pro vs. DIY: Cost Comparison
Deciding whether to hire a pro or tackle painting yourself comes down to time, skill, and true cost—both upfront and hidden.
You’ll weigh cost benefits: pros charge labor but deliver speed and finish, while DIY saves labor yet can incur mistakes.
Consider project timelines—pros finish faster; you’ll spend more time but may cut expenses if confident and efficient.
DIY: Step-by-Step Paint Job Cost Estimate
If you opt to DIY, you’ll want a clear, itemized plan that converts room size and prep needs into exact material and time costs so surprises don’t blow your budget.
If you DIY, create an itemized plan converting room size and prep needs into exact material and time costs.
You’ll factor paint preparation and smart budgeting strategies into each step, estimate hours, and total costs.
Consider emotions and commitment:
- Excitement about saving money
- Anxiety over hidden repairs
- Pride in finished walls
- Frustration with delays
- Satisfaction with results
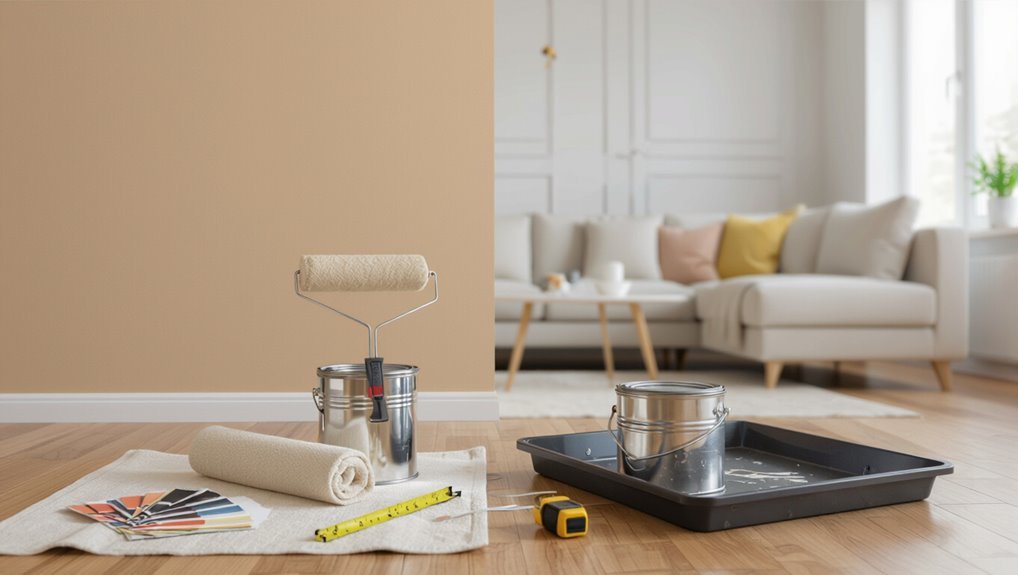
DIY Tools and Supplies: Price Ranges
Because you’ll be buying both basics and extras, it helps to budget by item rather than guessing a single lump sum:
expect paint roller prices from $8–$30 depending on nap and frame,
brushes $5–$25 where brush quality matters,
tape and drop cloths $10–$40,
trays and extension poles $10–$50,
plus primers and miscellaneous rollers or caulk totaling $20–$60.
Hidden and Unexpected Painting Costs to Budget
Don’t forget to factor in prep work costs like patching holes, sanding, and priming—these can add up quickly.
You’ll also want to budget for unexpected repairs such as drywall replacement, mold treatment, or fixing water damage that contractors often find once they start.
Planning for these contingencies will keep your final bill from blowing past your estimate.
Prep Work Costs
Before a single brush touches your walls, prep work can add surprising time and expense to your paint project.
You’ll need prep work essentials and realistic prep work timelines to avoid delays. Expect labor for masking, moving furniture, sanding, priming, and cleaning.
These costs protect your finish and schedule.
- Frustration
- Relief
- Urgency
- Hope
- Confidence
Unexpected Repairs
If you skip a quick walkthrough, you could run into hidden repairs that drive up your paint bill—peeling drywall, water stains, rotten trim, or mold all demand fixes before paint goes on. You’ll face hidden damage, assessment challenges, repair costs, and unexpected delays. Prioritize wall preparation, contingency planning, and budget surprises to avoid emergency fixes.
| Issue | Typical Cost |
|---|---|
| Drywall patch | $50–$200 |
| Mold remediation | $200–$1,500 |
| Trim replacement | $30–$150 |
| Water stain repair | $75–$300 |
| Emergency fixes | Variable |
How Location Changes Paint Job Prices
Where you live has a big impact on what you’ll pay to paint interior walls, because labor rates, material costs, and local demand vary widely from one area to another.
You’ll notice location impact through regional pricing, urban vs. rural contrasts, labor availability, local material costs, climate considerations, market demand, and broader economic factors.
- Frustration over high quotes
- Relief finding bargains
- Pride in value
- Anxiety about timing
- Satisfaction with results
Questions to Ask When Getting Quotes
What should you ask when getting paint quotes to make sure you’re comparing apples to apples?
Ask for clear quote details and pricing transparency, defined project scope, service timelines and payment schedule.
Confirm material choices, cleanup procedures, additional services and warranty options.
Ask about painter experience and certifications so you can judge value and risks before committing.
Compare Bids and Spot Lowball Estimates
When you compare bids, focus on the total value—not just the lowest number—so you can spot lowball estimates that often cut corners on prep, materials, or labor.
Use bid evaluation and estimate comparison to guide contractor selection, pricing strategies, quality assessment, negotiation tips, project scope, and budget alignment.
- Frustration
- Relief
- Caution
- Confidence
- Satisfaction
Ways to Save Without Cutting Quality
You can save on a paint job without sacrificing results by choosing the right materials and techniques.
Start with a quality primer to reduce coats, then pick reputable but affordable paint brands that offer good coverage.
Use time-saving methods—like rolling efficiently and prepping smart—to cut labor and still get a professional finish.
Buy Quality Primers
Although skimping on primer can seem like an easy way to cut costs, buying a quality primer actually saves you time and money by reducing coats, improving adhesion, and preventing stains from bleeding through.
Choose based on primer types and know proper application techniques. You’ll feel confident and relieved when surfaces look flawless.
- Pride
- Relief
- Confidence
- Satisfaction
- Calm
Choose Affordable Brands
Picking the right brand can shave a lot off your paint bill without sacrificing finish—look for reputable mid-tier labels, store-exclusive lines, and seasonal sales that offer professional-quality formulations at lower prices.
You’ll find affordable paint that still covers well and resists stains. Compare open-can samples, read reviews, and choose budget options with solid warranties so you don’t compromise longevity.
Time-Saving Techniques
When you plan rooms and supplies before the first drop of paint, you’ll cut hours off the job without sacrificing finish quality.
Embrace efficient preparation: smart color selection, tool organization, and project planning speed paint application. Use quick drying formulas and teamwork strategies to boost time management.
- Plan zones
- Prep surfaces
- Organize tools
- Rotate tasks
- Choose fast-dry paint
When Cheap Paint Backfires Long-Term
If you try to save by buying the cheapest interior paint, you’ll often pay more later in repairs, recoats, and touch-ups.
You’ll face cheap paint that peels, fades, or stains, creating long term issues and quality concerns. That leads to unexpected repairs and higher maintenance costs, and the aesthetic impact lowers your home’s value and satisfaction—so choose durability over upfront savings.
Scheduling and Seasonality for Paint Projects
Choosing higher-quality paint helps avoid future touch-ups, but timing your project matters just as much for getting lasting results.
You should align seasonal trends with your home’s humidity and temperature, plan realistic project timelines, and pick windows that minimize disruption.
Consider emotional impact and momentum:
- Relief when work’s done
- Pride in fresh walls
- Frustration if delayed
- Excitement for change
- Calm with clear schedule
Insurance, Permits, and Liability for Big Jobs
Because large interior jobs can trigger local regulations and greater risk, you’ll want to confirm permits, contractor insurance, and liability coverage before work begins. Check permit requirements, contractor insurance, policy limitations, and legal obligations. Keep job documentation for compliance checks, risk management, and liability concerns. Enforce job site safety and note insurance coverage details.
| Item | Action | Proof |
|---|---|---|
| Permits | Verify | Permit |
| Insurance | Confirm | Policy |
Sample Budgets for Common Room Types
Now that you’ve handled permits and insurance, let’s look at realistic sample budgets for common room types so you can plan costs by space.
You’ll weigh budget considerations: room dimensions, paint selection, color impact, surface conditions, finish types, regional pricing, and labor rates.
- Small bedroom: comforting, affordable
- Living room: bold, impactful
- Kitchen: bright, practical
- Bathroom: precise, moisture-resistant
- Hallway: cohesive, connective
Track Spending and Avoid Scope Creep
Set a clear budget before work starts and review spending weekly so you catch overruns early. You’ll use budget tracking and expense management to enforce spending limits, update cost estimation, and protect project scope. Do financial planning with clear expense categories and allow for budget adjustments. Track receipts, log changes, and stop unauthorized extras to prevent scope creep.
| Item | Purpose |
|---|---|
| Budget tracking | Monitor costs |
| Expense categories | Organize spending |
| Spending limits | Control scope |
| Budget adjustments | Handle surprises |
Decide: DIY, Hire Pros, or Hybrid
With your budget and spending controls in place, it’s time to decide whether you’ll tackle painting yourself, hire professionals, or combine both approaches.
Balance DIY Considerations and Professional Benefits by weighing Cost Trade offs, Time Investment, Skill Level, Project Scope, Budget Constraints, Experience Factors, and Long term Value.
- Pride of doing it yourself
- Faster, higher-quality finish
- Middle ground control
- Financial relief vs risk
- Future resale boost
Frequently Asked Questions
Can Paint Color Affect Indoor Air Quality or VOC Exposure Levels?
Yes — color selection can matter because pigments and finishes sometimes contain more VOCs; you should choose low‑VOC paints and prioritize ventilation importance during and after painting to cut exposures and protect your household’s indoor air.
Will Painting Interior Walls Impact My Home’s Resale Value?
Yes — you can boost resale value by choosing neutral colors and durable paint finish; buyers prefer clean, modern looks. You’ll get better offers if walls look fresh, consistent, and use low-VOC, easy-to-maintain finishes.
How Long Should I Wait Before Moving Furniture Back Into a Painted Room?
You should wait until paint’s tack-free drying time finishes—usually 24–48 hours—before furniture placement; heavier items and high-traffic use should wait 72 hours to a week to avoid scuffs, sticking, or trapped moisture.
Can Paint Help With Minor Mold or Mildew Issues on Walls?
Yes — paint can cover minor mold, but it won’t fix the cause. You should clean and treat surfaces first, use mold resistant paint as a preventive measure, and address humidity or leaks to avoid recurrence.
Are There Tax Deductions or Rebates for Eco-Friendly Paint Upgrades?
Picture a green ribbon around your home: you can get tax incentives for eco friendly certifications and energy-saving upgrades, and you’ll likely qualify for local rebates too, so check federal, state, and utility programs before upgrading.
Conclusion
You’ve got the tools to budget smart: pros charge widely, but most homeowners pay about $2–$6 per square foot for interior walls. Picture a 2000 ft² house—about 5,000 linear feet of wall that, at $3/ft², means roughly $15,000 to paint inside. Whether you DIY, hire, or mix both, plan for prep, extras, and a 10–20% buffer. Stay realistic, get a few quotes, and you’ll avoid surprises.