
Can You Paint Over Peel and Stick Wallpaper? Full Guide
Yes — you can paint over peel-and-stick wallpaper, but it needs prep and the right products. Clean grime, sand glossy or slick vinyl, repair seams and bubbles, then prime with a bonding primer made for vinyl or paper-backed surfaces. Use quality low-VOC paint and expect 1–3 coats depending on color change. Note painting can make future removal harder and risks bubbling if adhesion’s poor. Keep going to learn how to test, prep, and avoid common problems.
Can You Paint Over Peel-And-Stick Wallpaper?
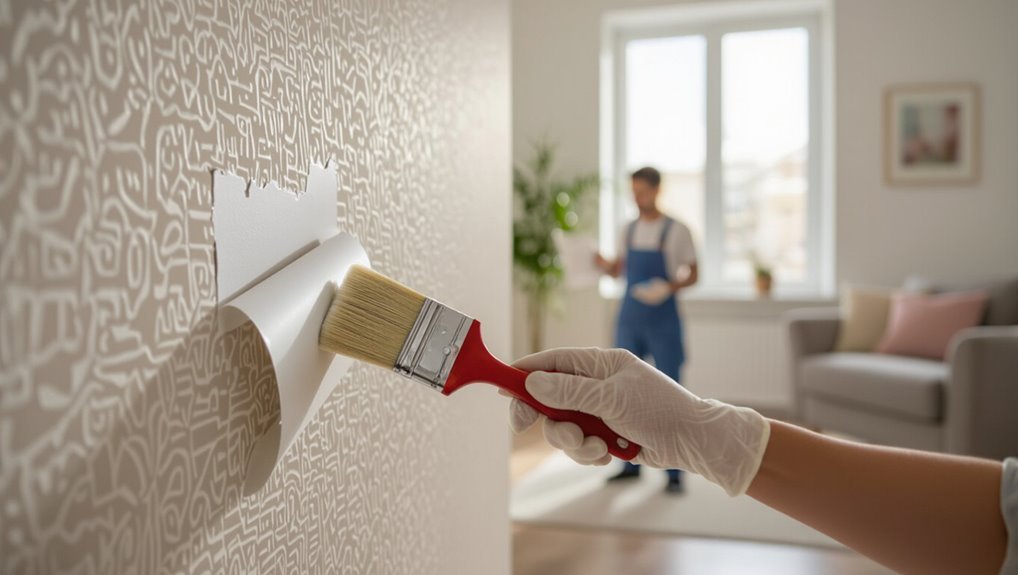
Can you paint over peel-and-stick wallpaper? You can, but you’ll weigh design considerations like texture, pattern scale, and adhesive condition before starting.
Prep includes cleaning, light sanding, and a quality primer to guarantee adhesion. Painting can extend wallpaper longevity if applied properly, yet results vary.
Test a small area first to confirm finish, adhesion, and appearance before committing to the whole wall.
Quick Decision: Paint Or Remove?
Wondering whether to paint or remove peel-and-stick wallpaper? You’ll weigh design considerations like pattern, room style, and how permanent you want the look.
Remove if seams, damage, or heavy texture limit results; paint if surface is smooth and temporary change suffices.
Factor a quick cost analysis: removal labor/time versus paint prep and supplies to decide efficiently.
How Peel-And-Stick Materials & Adhesives Affect Paint Adhesion
Peel-and-stick wallpapers come in several face materials—vinyl, paper-backed vinyl, and fabric-backed options—and each plus the adhesive layer changes how well paint will bond.
You’ll check adhesive types (permanent vs. removable) and surface compatibility: slick vinyl resists paint, paper accepts primers better, and fabric can soak adhesives.
Test small areas, sand glossy faces, and use appropriate primer for reliable adhesion.
When Painting Is a Good Alternative to Removal
If you’ve tested adhesion and found that sanding and priming will give paint a fighting chance, painting can be a practical alternative to pulling off the wallpaper.
Choose painting when the peel-and-stick surface is intact, seams are minimal, and substrate damage would result from removal.
Consider wallpaper types, expected lifespan, and whether simple removal techniques risk wall harm.
Proceed with proper primers and durable topcoats.
When You Should Remove Peel-And-Stick Instead of Painting
When the adhesive has bubbled, lifted at the seams, or the pattern’s edges are badly misaligned, you should remove the peel-and-stick rather than try to paint over it. You’ll choose removal strategies when damage, odors, or short wallpaper longevity make painting futile. Remove compromised sections, repair substrate, then repaint for best results.
| Issue | Action |
|---|---|
| Bubbling | Remove |
| Seams lifting | Remove |
| Pattern misaligned | Remove |
| Odor/damage | Replace |
How To Test Peel-And-Stick for Paint Adhesion
Before you paint, you’ll want to clean the peel-and-stick surface, sand any glossy areas lightly, and remove loose edges so paint can grip.
Then try simple adhesion tests: press a square of painter’s tape down firmly and pull it off, and apply a small test patch of primer and paint to see if it peels or bubbles after it dries.
Use those results to decide whether priming will work or if the wallpaper needs removing.
Surface Preparation Steps
Start by identifying a small, inconspicuous test area on the peel-and-stick wallpaper—about 6 inches square—so you can check adhesion without risking visible damage.
Clean lightly with a damp cloth and mild detergent, remove dust and oils, and let dry.
Note adhesive types and wallpaper textures; sand glossy spots gently.
Mark the area and follow manufacturer prep: no residue, flat surface, and steady temperature before painting.
Adhesion Test Methods
Because peel-and-stick wallpapers vary in adhesive formulation and surface texture, you’ll want to run a few simple adhesion tests to see whether paint will stick and how it’ll behave.
- Tape pull: press painter’s tape, wait, peel; note adhesion types and lift.
- Small painted patch: paint 3×3″, cure, scratch test.
- Crosshatch: score, apply tape, check flakes to predict wallpaper longevity and finish stability.
Tools & Supplies for Painting Peel-And-Stick Wallpaper
Painting peel-and-stick wallpaper takes a handful of specific tools and the right supplies to get a smooth, lasting finish.
You’ll need quality primer suitable for vinyl, a latex or acrylic paint, high-density foam rollers, angled brushes, fine-grit sanding pads, mild degreaser, and tack cloths.
Use tools matched to painting techniques for even coverage and to preserve wallpaper finishes. Test compatibility first.
Prep Step 1: Cleaning the Surface for Paint
Before you paint, you’ll need to remove surface dirt so the primer and paint can stick properly.
Use a mild cleaner or degreaser to deodorize and cut through any grease, especially in kitchens.
Wipe the wall with a clean, damp cloth and let it dry completely before moving to the next step.
Remove Surface Dirt
Start by wiping the peel-and-stick wallpaper with a dry microfiber cloth to lift loose dust and cobwebs.
Then follow with a mild detergent solution and a soft sponge to remove grease and fingerprints; you want the surface clean and residue-free so paint will adhere evenly.
Use proper cleaning techniques and surface tools, then:
- Vacuum edges with brush attachment.
- Wipe with damp sponge.
- Dry thoroughly before priming.
Deodorize And Degrease
After you’ve removed dust and grime, you’ll want to neutralize odors and cut through any oily residue so primer and paint will stick.
Use mild detergent solutions, trisodium phosphate or degreasing wipes for effective grease removal. Rinse thoroughly and let the surface dry.
For persistent smells, try vinegar or baking soda deodorizing techniques before priming to guarantee adhesion and a clean finish.
Prep Step 2: Repairing Seams, Bubbles, and Tears
You’ll need to fix any loose seams, bubbles, or tears before painting so the finish stays smooth and durable.
Fix loose seams, pop bubbles, and repair tears before painting to ensure a smooth, durable finish.
Tackle seam repair and bubble removal promptly, use tear treatment with adhesive reinforcement, and sand lightly for texture smoothing.
Follow these steps:
- Lift edges, apply adhesive reinforcement, press seams tight.
- Pop bubbles, smooth adhesive, clamp until set.
- Patch tears, sand and feather edges.
Prep Step 3: Priming Made for Peel-And-Stick Wallpaper
Having smoothed seams and repaired tears, move on to priming the peel-and-stick surface so paint adheres evenly and lasts.
You’ll choose priming techniques that seal the textured vinyl and bridge any remaining imperfections.
Test for adhesive compatibility by applying a small primer patch first.
Let the test cure, check for lifting or bleeding, then proceed across the wall if results are clean.
Best Primer Types for Different Peel-And-Stick Finishes
Different peel-and-stick finishes need different primers to bond well and hide texture; match the primer to the vinyl type and surface condition before you start.
You’ll choose based on adhesion and finish compatibility, avoiding excessive build-up.
Consider:
- Bonding primer for smooth vinyl with low porosity.
- Shellac or oil-based primer for glossy, slick finishes.
- Stain-blocking latex primer for printed or porous surfaces.
Best Paints for Painting Peel-And-Stick Wallpaper
When you paint peel-and-stick wallpaper, pick paints that stick well and breathe with the surface.
Water-based latex is a reliable all-purpose choice. Primer-bonding paints help grip slick finishes, and low-VOC acrylics keep fumes down if you’re working indoors.
I’ll explain when to use each so you get a durable, even result.
Water-Based Latex Paint
If you want the easiest, most forgiving option for painting peel-and-stick wallpaper, water-based latex is it: it dries fast, cleans up with soap and water, and flexes with temperature changes so it’s less likely to crack or peel as the wallpaper expands and contracts.
You’ll enjoy water based benefits and reliable latex paint performance. Consider:
- Low VOC, easy cleanup
- Quick drying time
- Flexible finish that resists cracking
Primer-Bonding Paints
Latex paints are forgiving, but primer-bonding paints are what you want when peel-and-stick wallpaper has a slick or glossy finish that repels ordinary paint.
You’ll choose products designed for adhesion; primer selection depends on finish and substrate.
Apply thin, even coats and use recommended bonding techniques—scuff, clean, and dry—so paint adheres without lifting, ensuring durable, uniform coverage.
Low-VOC Acrylic Paint
Anyone looking to refresh peel-and-stick wallpaper without strong fumes should reach for low-VOC acrylic paint, which balances adhesion and indoor-air safety.
You’ll get low VOC benefits like reduced odor and faster reuse of rooms. Choose eco-friendly options with good scrub resistance and flexible binders so the coating moves with the wallpaper.
- Prep surface
- Test adhesion
- Apply thin coats
How Many Coats You’ll Need (And Why)
How many coats you’ll need depends on the wallpaper’s finish, the primer you use, and the color change you want—typically two to three coats will give even, durable coverage on most peel-and-stick surfaces. You’ll use specific coating techniques to boost paint durability; lighter colors may need extra coats. Test a small area first.
| Situation | Recommended Coats |
|---|---|
| Minimal change | 1–2 |
| Bold change | 2–3 |
| High-traffic | 3+ |
Painting Patterns & Textured Peel-And-Stick: Tricks That Work
Before you paint patterned or textured peel-and-stick wallpaper, you’ll want to prep the surface by cleaning and letting it fully dry.
Smooth out bumps or lifting edges with a light sanding and seam adhesive so the texture doesn’t telegraph through your finish.
Finally, pick a high-quality primer and paint designed for adhesion to guarantee even coverage and durability.
Prep Surface First
Start by cleaning and inspecting the peel-and-stick surface so your paint will adhere and look smooth.
Check for lifting edges, dust, and oils, and note surface texture and wallpaper patterns so you can choose appropriate primer and paint.
Then:
- Wipe with mild detergent and dry.
- Secure loose seams with adhesive.
- Test primer on an inconspicuous area.
Smooth Imperfections Out
If your peel-and-stick has visible seams, embossed patterns, or texture that will telegraph through paint, you can smooth most imperfections without removing the wallpaper by feathering joint compound into seams, lightly sanding raised patterns, and spot-priming low spots to even porosity.
Use targeted smoothing techniques: apply thin compound layers, sand between coats, clean dust, and follow surface preparation steps so the finish looks uniform before painting.
Choose Proper Paint
When you pick paint for patterned or textured peel-and-stick wallpaper, choose a product that bonds well to slick vinyl and hides surface irregularities without emphasizing seams.
You’ll focus on color selection and paint durability while keeping texture subtle. Consider:
- Adhesion-promoting primer then high-adhesion latex.
- Satin or eggshell sheens to mask flaws.
- Test small area for compatibility and wear.
Dealing With Metallic, Vinyl, and Glossy Peel-And-Stick
Curious whether metallic, vinyl, or glossy peel-and-stick can take paint? You’ll assess metallic finishes, vinyl types, and glossy textures for paint compatibility and surface variations.
Test adhesion since wallpaper durability and adhesive properties vary. Sanding or deglossing helps some surfaces; primers improve bonding.
Weigh design considerations—painting can mute patterns but may alter sheen and longevity—so test small areas first.
Temperature & Humidity Tips for Painting Wallpaper
You’ll get the best results when you paint at moderate temperatures—typically between 50–85°F (10–29°C)—so the paint cures evenly.
Keep indoor humidity around 40–60% and use a dehumidifier or fan if levels are high to prevent long drying times or adhesion issues.
Plan for extended drying between coats (often 24 hours in humid or cool conditions) to avoid lifting the peel-and-stick surface.
Optimal Painting Temperature
If the temperature and humidity aren’t right, paint won’t adhere properly to peel-and-stick wallpaper and you’ll end up with tacky, blistered, or flaking results.
You should aim for an ideal humidity and a steady temperature range so paint cures correctly.
Follow these steps:
- Work between 50–70°F (10–21°C).
- Avoid rapid temperature swings.
- Paint when relative humidity stays below 60%.
Controlling Indoor Humidity
When humidity’s too high, paint on peel-and-stick wallpaper won’t dry evenly and can stay tacky or peel, so keep indoor relative humidity below about 60% while you prep and coat. You’ll use humidity control and moisture management: run dehumidifiers, increase ventilation, and avoid humid activities. Monitor levels with a hygrometer to protect adhesion and finish.
| Action | Effect |
|---|---|
| Dehumidifier | Lowers RH |
| Ventilation | Speeds drying |
| Hygrometer | Monitors RH |
| Avoid showers | Reduces moisture |
| Timing | Better adhesion |
Drying Time Recommendations
Although paint can feel dry to the touch within an hour, you should allow much longer for proper curing on peel-and-stick wallpaper: aim for at least 24–48 hours between coats and a full 7 days before heavy use, keeping temperature around 65–75°F and relative humidity below 50–60% to guarantee even drying and strong adhesion.
- Use fans and HVAC for controlled drying techniques.
- Monitor humidity effects with a hygrometer.
- Delay heavy handling until full cure to prevent lifting.
Edge and Trim Techniques to Avoid Lifting Wallpaper
1 smart cut at the seams and secure trim will keep peel-and-stick wallpaper from peeling at the edges; you’ll want to trim precisely, press firmly, and seal vulnerable joints so the adhesive stays put.
You’ll prevent edge lifting by addressing adhesive issues, doing proper surface preparation, choosing trim techniques that preserve wallpaper integrity, matching colors for a seamless finish, and ensuring paint durability.
Rollers, Brushes, and Sprayers for Smooth Coverage
If you want a smooth, durable finish over peel-and-stick wallpaper, pick the right applicator for the surface and paint type: rollers give even coverage on flat areas, angled brushes handle trim and seams, and HVLP or airless sprayers cover large surfaces fast with minimal streaking.
Choose based on paint types and application techniques, test first, and work wet edges.
- Roller: uniform laydown
- Brush: precision at edges
- Sprayer: fast, fine mist
How To Avoid Bubbling, Peeling, and Flaking Later
Start by cleaning and sanding the peel-and-stick surface so the paint has something solid to grip.
Make sure you use a primer that’s compatible with both the adhesive and your chosen paint to prevent chemical reactions that cause bubbling or peeling.
Test a small patch first so you can confirm adhesion before committing to the whole wall.
Surface Preparation Essentials
Good surface prep determines whether painted peel-and-stick wallpaper will look smooth and stay put, so you’ll need to clean, sand, and prime the area before applying paint.
Focus on surface texture and paint compatibility to prevent failures.
- Degrease and remove dust.
- Lightly scuff to create tooth.
- Apply a thin, suitable primer and inspect seams.
Paint And Primer Compatibility
Because peel-and-stick wallpaper reacts differently than drywall, you’ll need to match your primer and paint to its vinyl surface to prevent bubbling, peeling, or flaking.
Choose primer options labeled for glossy or non-porous vinyl and use stain-blocking products.
Pick compatible paint types—water-based acrylic often bonds best.
Test a small area, follow manufacturer drying times, and avoid heavy textures that stress the adhesive.
How Long To Wait Between Primer and Paint Coats
Once the primer’s dry to the touch, you’ll typically wait about 1–4 hours before applying the first paint coat, depending on the primer type and room conditions.
Monitor paint drying times and humidity; slow drying needs longer waits. Follow product instructions and test a small patch.
- Check primer types for recommended recoat time.
- Measure humidity and temperature.
- Do a touch test before painting.
Handling Seams and Overlaps for a Seamless Look
When you’re working with peel-and-stick wallpaper, smoothing seams and trimming overlaps carefully will make the finish look professional.
Use a straightedge and a sharp utility knife to trim excess, then press seams flat with a seam roller or a clean cloth to remove air pockets and guarantee adhesive contact.
You’ll focus on precise seam alignment, minimal overlap techniques, and gentle pressure to hide joins before priming.
Painting Peel-And-Stick in High-Traffic Areas
After smoothing seams and ensuring good adhesive contact, think about how the finished surface will hold up in busy spots like hallways, kitchens, or kids’ rooms.
After smoothing seams and securing adhesive, consider durability in busy areas—choose prep, paint, and colors that hide wear.
You’ll want paint and prep that maximize high traffic durability and thoughtful color selection to hide wear.
- Use durable primer and semi-gloss or satin paint.
- Pick mid-tone colors for concealment.
- Add washable topcoats for longevity.
How Painting Affects Later Wallpaper Removability
If you paint over peel-and-stick wallpaper, you’ll likely seal the adhesive beneath the paint.
That sealing makes future removal messier and can leave sticky residue or torn paper on the wall.
Before painting, you should weigh whether the short-term look is worth a harder cleanup later.
Paint Seals Adhesive
Because paint soaks into and bonds with the adhesive layer, it can effectively seal the paste and make future removal much harder. You’ll often find the paper rips or the wall stays sticky instead of peeling cleanly.
You should consider adhesive longevity and paint compatibility before coating peel-and-stick paper.
- Test a small patch.
- Use compatible primers.
- Expect tougher cleanup.
Removal Becomes Messier
Sealing the adhesive with paint doesn’t just make the surface tougher to clean — it makes future removal a real headache.
When you paint, the sealant binds layers, causing messy removal and increasing wallpaper damage. Strips tear, backing peels in shards, and adhesive glues to drywall.
You’ll spend more time scraping, patching, and refinishing, or pay pros to salvage walls you could’ve preserved.
Project Cost & Time Estimates
When you budget for painting over peel-and-stick wallpaper, account for materials, prep time, and possible removal costs if the adhesive fails.
Do a quick cost analysis and use realistic time estimates so you’re not surprised.
- Materials: primer, paint, rollers — $30–$120.
- Prep: cleaning, patching — 1–3 hours per room.
- Contingency: removal labor — $50–$300.
Quick Fixes for Small Damaged Wallpaper Areas
If your cost estimate included a cushion for removal, you can often avoid that expense by fixing small tears and bubbles yourself.
Use simple repair techniques: press bubbles out with a smoothing tool, inject adhesive under lifted edges, trim frayed spots, and patch with matching scrap.
Regular wallpaper maintenance—cleaning and quick touch-ups—keeps peel-and-stick looking good and delays costly full removal.
Common Mistakes DIYers Make When Painting Wallpaper
Although painting over peel-and-stick wallpaper can seem like an easy shortcut, many DIYers skip essential prep and end up with peeling paint, visible seams, or trapped moisture.
You’ll avoid common DIY pitfalls by addressing wallpaper choices, paint selection, and preparation mistakes early. Consider adhesion issues and cost considerations before starting.
- Poor prep
- Wrong paint
- Ignored seams
When To Call a Pro: Signs You Need Professional Help
Because DIY fixes only go so far, call a pro when the wallpaper or paint shows structural issues, extensive bubbling, or repeated peeling despite proper prep.
If seams keep lifting, mold appears, or adhesive failure is widespread, get a professional assessment.
You’ll save time and money by seeking expert advice for underlying damage, moisture problems, or when removal and repair exceed your skills.
Eco-Friendly Primers and Paints for Wallpaper Projects
When you’re painting over peel-and-stick wallpaper, choosing low-VOC primers and paints keeps indoor air safer and reduces environmental impact.
You should pick eco friendly options and sustainable materials that bond to slick surfaces and resist peeling.
Consider these choices:
- Water-based bonding primer with low-VOC.
- Zero-VOC latex paint formulated for adhesion.
- Natural-oil or plant-based topcoat for durability and low odor.
Matching Color & Pattern When Covering Wallpaper
If you want the new finish to look seamless, start by matching both the wallpaper’s dominant color and its visual texture—flat colors hide patterns, while textured or glossy finishes can make motifs pop through paint.
Check color harmony with swatches under room light, test small sections, and assess pattern compatibility before committing.
Layer primers or thin coats to balance sheen and minimize show-through.
Safety Tips: Ventilation, Fumes, and Surface Chemicals
Before you paint over peel-and-stick wallpaper, make sure the room is well ventilated so fumes from primers and paints don’t build up.
Open windows, run fans, and consider a respirator if you’re using strong solvents.
Also avoid mixing chemicals on the surface and wipe it down with a mild cleaner to reduce residual residues that could react with coatings.
Ensure Adequate Ventilation
Because peel-and-stick wallpaper and the primers or paints you use can release strong fumes, make sure you have steady airflow while you work.
You should prioritize ventilation importance to protect air quality and comfort. Open windows, use fans, and pause if odors intensify.
Follow these steps:
- Open opposite windows for cross-ventilation.
- Run exhaust or box fans toward outdoors.
- Limit time in the room; take breaks.
Mitigate Chemical Fume Exposure
While you’re ventilating the room, take extra steps to limit your exposure to fumes and surface chemicals by wearing appropriate protection, choosing low-VOC products, and keeping time near treated surfaces short.
Use fume masks rated for organic vapors, run ventilation fans continuously, and open windows.
Wipe sticky residues with damp cloths and mild detergent, and store solvents in sealed containers away from living areas.
Troubleshooting: Fixes for Common Post-Paint Problems
If paint on your peel-and-stick wallpaper bubbles, wrinkles, or peels after drying, you can usually fix it without stripping the whole wall; start by identifying the issue—poor adhesion, trapped moisture, or incompatible paint—and then apply targeted repairs like smoothing and re-securing edges, spot-priming, or sanding and recoating.
Address peel adhesion and paint compatibility quickly.
Act fast: tackle adhesion and paint compatibility issues promptly to prevent further peeling.
- Smooth and re-secure edges.
- Spot-prime trouble spots.
- Sand lightly and recoat.
Decision Checklist: Paint Over or Remove-Final Guide
Wondering whether to paint over or remove peel-and-stick wallpaper? Assess adhesion, seams, texture, and wall condition.
If seams lift or texture shows, choose removal techniques; if adhesive is stable and pattern simple, paint over after proper priming.
Consider room use, longevity, and wallpaper alternatives like removable panels or fresh paint.
Budget time, tools, and desired finish before deciding.
Frequently Asked Questions
Can Painting Peel-And-Stick Wallpaper Void My Home Insurance or Warranty?
Yes — painting can affect insurance implications and warranty concerns. You’ll risk voiding a manufacturer’s warranty and possibly complicating claims if paint causes damage or hides defects, so check policies and warranties before you proceed.
Will Painted Peel-And-Stick Wallpaper Affect Indoor Air Quality Long-Term?
Yes — painted peel-and-stick wallpaper can affect indoor air quality long-term if the original material or fresh paint emits volatile compounds. You’ll want low-VOC products; monitor odor emissions and check the chemical composition to minimize risks.
Can I Apply Wallpaper Border Over Painted Peel-And-Stick Wallpaper?
Yes — you can apply a wallpaper border over painted peel-and-stick wallpaper if the surface’s paint and sealer cure fully. Check adhesive compatibility, use a compatible adhesive or double-sided tape, and press firmly for secure border application.
Will Paint Change the Fire-Retardant Rating of Peel-And-Stick Materials?
No, paint usually won’t change certified fire safety ratings, but you should check the product label and manufacturer. You’ll also confirm paint adhesion compatibility, since poor adhesion or added coatings could affect performance or void fire-retardant warranties.
Can Pets or Children Damage Painted Peel-And-Stick Surfaces More Easily?
Yes — you’ll likely see more scuffs and tears from pets or kids on painted peel-and-stick surfaces. Use pet proofing strategies and child safe paints, reinforce edges, apply durable topcoats, and supervise rough play to minimize damage.
Conclusion
You can paint over peel-and-stick wallpaper sometimes, but don’t treat it like a magic shortcut—your results’ll range from “looks brand new” to “why did I think this was a good idea?” If the adhesive’s stable, seams are tight, and surface is clean, painting saves time. If it’s peeling, textured, or smells like chemical soup, remove it. Ventilate, prime, and test a small patch first. When in doubt, remove—your future self will thank you.
