
Can You Use Paint in a Stain Sprayer? What Works and What Doesn’t
You can use some paints in a stain sprayer, but you’ll need to confirm viscosity, tip size, pump limits and filter compatibility first; thin water‑based paints almost always work, heavy enamels and high‑solids latex usually won’t without major thinning or tip changes. Test on scrap, start at low pressure, and clean/flush thoroughly to avoid clogs or damage. If you’re unsure, renting a proper paint sprayer often saves time and risk — keep going to learn the specific checks and fixes.
Quick Answer: Can You Use Paint in a Stain Sprayer?
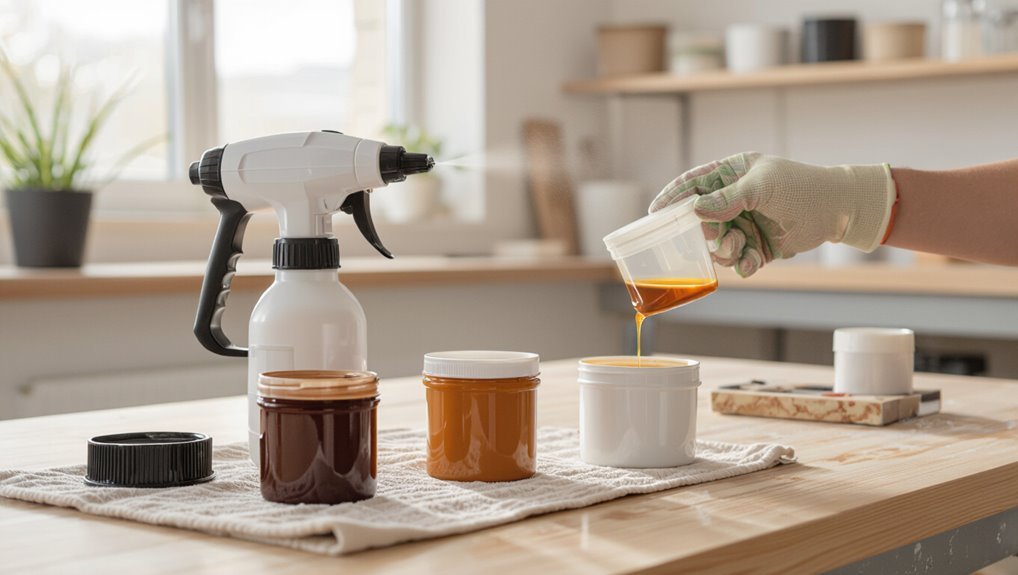
Wondering whether you can put paint in a stain sprayer? You can sometimes, but it hinges on sprayer compatibility and paint type.
Thicker paints often need thinning or tip changes; water‑based paints usually work better than heavy enamels.
You’ll adjust application techniques—spray pressure, tip size, and multiple thin passes—to avoid clogging and runs.
Adjust spray pressure, pick the right tip, and apply thin, multiple passes to prevent clogs and runs.
Test first on scrap material.
Three‑Step Decision Checklist: Use, Modify, or Rent
Start with three quick checks to decide whether you should use your stain sprayer as-is, modify it, or rent a different machine:
assess the paint’s viscosity and compatibility with your sprayer,
inspect the sprayer’s tip and filtration to see if they’ll handle thicker material,
and weigh the cost/time tradeoffs of thinning, changing parts, or renting.
If paint compatibility concerns crop up, favor renting; if not, enjoy stain sprayer benefits.
How Stain Sprayers Differ From Paint Sprayers
Because stain is thinner and designed to soak into wood rather than build a film, stain sprayers use different tips, pressures, and filtration than paint sprayers.
Those differences affect how you’ll set up and operate the equipment. You’ll notice sprayer compatibility matters: tip size, pump calibration, and filter media differ.
Adjust your application techniques accordingly to avoid overspray, clogging, or uneven penetration.
Check Your Sprayer Manual and Technical Limits First
Now that you’ve seen how stain sprayers differ from paint sprayers, check your sprayer’s manual and technical limits before you load any product.
Read manual guidelines for approved materials, pressure ranges, and nozzle sizes to confirm sprayer compatibility. Ignoring specs risks clogs, motor strain, or voided warranty.
When in doubt, contact the manufacturer for clarification before proceeding.
Measure Paint Viscosity (Sec/Viscosity Cup)
You’ll want to check paint viscosity with a viscosity cup to guarantee smooth atomization.
Hold the cup steady, fill to the lip, start a stopwatch when you lift it, and record the seconds until the stream breaks.
Aim for the manufacturer’s recommended seconds for your stain—typically in the low-to-mid range for most sprayers—and thin only if readings are too high.
How To Use Viscosity Cups
If you’re getting consistent spray results, measuring paint viscosity with a viscosity cup will help you repeat them every time.
You’ll fill the cup, time the flow until the stream breaks, and record seconds. Use viscosity measurement techniques to compare batches, adjust thinning, and log values.
Regular checks become part of sprayer maintenance tips, preventing clogs and ensuring uniform atomization.
Target Seconds For Paint
Target seconds tell you the ideal flow time to aim for when measuring paint with a viscosity cup, and they make thinning decisions repeatable across jobs.
You’ll measure paint viscosity in seconds, compare to manufacturer target seconds, and thin accordingly. Matching target seconds improves sprayer compatibility, reduces clogging, and yields consistent atomization.
Record values for each paint and sprayer setup to speed future jobs.
Which Sprayer Types Handle Thick Materials (And Which Don’t)
Not all sprayers are built to handle thick materials like heavy-bodied stains, latex primers, or textured paints—some clog or strain under the load while others run smoothly.
You should check sprayer compatibility and material viscosity before loading.
Consider these types:
- Airless: handles higher viscosity, but needs larger tips.
- HVLP: best for thin to medium materials.
- Stain sprayers: optimized for low-viscosity liquids.
Paint Types That Usually Work in a Stain Sprayer
You can often use thin-bodied latex paints in a stain sprayer if they’re well-thinned and filtered for smooth flow.
Oil-based enamels also work, especially for durability on trim and furniture, though they may need slower spray settings.
Urethane and acrylic blends are another good choice, offering toughness and compatibility with many sprayers when properly thinned.
Thin-Bodied Latex Paint
If you’ve got a thin-bodied latex paint, it can often work in a stain sprayer with minimal prep because its low viscosity lets it flow through the pump and tip more easily than heavier formulas.
You’ll enjoy thin bodied paint benefits and clear stain sprayer compatibility when you prep and test first:
- Smooth application on porous wood
- Less filtering and thinning needed
- Faster cleanup and less clogging
Oil-Based Enamel Options
Thin-bodied latex works well in many stain sprayers, but oil-based enamels bring different strengths—durability, harder film, and smoother leveling—that often make them a better fit for high-wear surfaces when your sprayer can handle thicker material. You should consider oil based finishes for cabinets and trim, checking sprayer compatibility, thinning per manufacturer, and using proper cleanup and ventilation.
| Feature | Note |
|---|---|
| Durability | High |
| Thinning | Often required |
| Cleanup | Solvent |
| Use | Trim/cabinets |
| Compatibility | Check sprayer specs |
Urethane And Acrylic Blends
Because they combine the toughness of urethane with the flexibility and ease of acrylic, urethane-acrylic blends spray smoothly through many stain sprayers and give you a durable, attractive finish for furniture and trim.
You’ll appreciate urethane applications’ resistance to wear and acrylic durability for UV and color retention.
Tips:
- Thin per manufacturer
- Test spray pattern
- Use proper tip size
Paint Types That Won’t Work in a Stain Sprayer
When you’re choosing materials for a stain sprayer, know that many paints simply won’t work and can clog or damage the machine; oil-based enamels, heavy latex paints, textured coatings, and products with high solids or additives are common culprits.
You should check sprayer compatibility before use.
Avoid gel stains, masonry paints, thick primers, and paints with heavy fillers or particulates that’ll foul tips or pumps.
Safe Thinning for Water‑Based Paints
Before you thin water‑based paint, check the manufacturer’s thinning specifications so you don’t void the product warranty or clog your sprayer.
Use the recommended thinner—usually water or a specified reducer—and add it slowly, mixing thoroughly.
Always test the spray pattern on scrap material and adjust viscosity as needed before you start the main job.
Check Manufacturer Thinning Specs
Consult your paint and sprayer manuals before adding any water: manufacturers test their formulas and give exact thinning ratios and nozzle recommendations to keep flow, coverage, and finish consistent.
You’ll follow specs to preserve sprayer compatibility and correct paint viscosity. Check labels and tech sheets, then:
- Confirm recommended dilution percentage
- Match nozzle sizes to viscosity
- Note maximum solids and recoat times
Use Appropriate Thinner
If you’re thinning water‑based paint for a stain sprayer, pick a compatible thinner and add it sparingly—too much water or the wrong product will clog nozzles, weaken coverage, and cause runs. Use manufacturer‑recommended thinner types and precise application techniques to keep viscosity right. Consult labels, stir gently, and strain before loading.
| Thinner | Use |
|---|---|
| Water‑based reducer | Minor adjustments |
| Manufacturer solvent | When specified |
Test Spray Pattern First
Want to know if your thinning is right? Test spray pattern first on cardboard before committing.
Adjust viscosity until the fan is even, then tweak spray technique and pattern adjustment on each pass. Check for runs, splatter, or dry edges.
- Short bursts to assess mist
- Overlap passes for consistent coverage
- Increase thinning slightly if edges feather
How to Tell if Thinning Ruined Coverage
How can you tell whether thinning the paint cost you coverage? Check for streaks, translucency, or needing extra coats—those coverage issues point to over-thinning.
Inspect dried panels at different angles and under good light. If color looks faded or you see substrate through the film, thinning effects reduced hiding power.
Adjust ratio, retest, and only add thinner sparingly to restore opacity.
Nozzle and Tip Choices for Stain Sprayers
When you pick the right nozzle and tip for a stain sprayer, you control spray pattern, flow rate, and final appearance—so choose based on stain type and project size.
You’ll match nozzle types and tip sizes to material viscosity and coverage needs. Consider:
- Fine nozzles for thin stains and detailed work
- Medium tips for decks and siding
- Large tips for oil-based, heavy stains
Pressure and Spray Settings to Prevent Spitting
Start by turning the pressure down and increasing it incrementally until the spray stays smooth.
Use a nozzle size rated for thicker coatings to avoid clogging and spitting.
Keep a steady, consistent distance from the surface so the pattern remains even and spit is minimized.
Adjust Pressure Gradually
Because inconsistent pressure is the main cause of spitting, you should raise and fine-tune the sprayer’s pressure slowly rather than cranking it up all at once.
You’ll find ideal pressure by testing small increments and making smart sprayer adjustments. Follow these quick checks:
- Start low, increase in tiny steps
- Spray on cardboard to observe flow
- Pause, readjust pressure if sputtering occurs
Choose Proper Nozzle
If you want to stop spitting, pick a nozzle that matches the paint’s viscosity and your sprayer’s pressure range—too small and the paint clogs, too large and you’ll get drips and uneven atomization.
Check nozzle selection charts, test with waste material, and adjust pressure within sprayer compatibility limits.
Clean or replace worn tips frequently to maintain smooth flow and consistent pattern without sputtering.
Maintain Consistent Distance
Keep your nozzle at a steady distance—typically 6–12 inches for most stain sprayers—to maintain even atomization and prevent spitting; move too close and you’ll overload the surface, move too far and the pattern breaks up and spits.
You’ll improve spray technique and distance control by keeping consistent motion and pressure.
Tips:
- Smooth, steady passes
- Test on scrap wood
- Adjust pressure, not distance
Prep Before Adding Paint to a Stain Sprayer
Before you pour paint into the spray tank, take a few minutes to prepare both the sprayer and the work area so you avoid clogs, overspray, and uneven coverage.
Check sprayer maintenance items: filters, seals, and nozzle condition.
Verify paint compatibility with your model and thin to manufacturer specs.
Mask surrounding areas, lay drop cloths, and guarantee proper ventilation before you start spraying.
Cleaning and Flushing to Avoid Clogs and Damage
Once you’ve prepped the sprayer and work area, plan for thorough cleaning and flushing right after you’re done painting so dried paint doesn’t clog the system or damage seals.
You’ll protect pumps, hoses, and tips with diligent clog prevention and simple maintenance tips:
- Flush with compatible solvent until clear.
- Disassemble and soak removable parts.
- Wipe seals and lubricate per manufacturer instructions.
Common Spraying Problems and Quick Fixes
If your spray pattern goes bad or the sprayer sputters, don’t panic—you can usually fix common issues quickly by checking a few key parts: filter, nozzle, and material viscosity.
Clean or replace clogged tips, thin paint per manufacturer guidelines, and secure loose fittings.
Adjust spray techniques for even coverage.
Keep troubleshooting tips handy to minimize downtime and prevent repeat problems.
When to Rent or Buy a Paint Sprayer Instead (For This Job)
Wondering whether to rent or buy a paint sprayer for this job? Decide by scope, budget, and paint sprayer types available.
If it’s occasional, rent; if frequent, buy. Consider rental benefits like lower upfront cost and trying models first.
If you only spritz occasionally, rent — for frequent use, buy; rentals lower upfront cost and let you test models.
- Small DIY weekend project
- Large multi-room or repeated jobs
- Specialty finishes needing specific sprayer types
Safety, Environmental, and Warranty Items to Check First
Before you pick up the sprayer, check safety, environmental, and warranty factors so you don’t run into costly problems mid-job.
Inspect seals, hoses, and guards; wear respirator and eye protection; follow safety precautions for flammability and ventilation.
Verify local disposal rules to minimize environmental impact.
Confirm the sprayer’s manual and manufacturer warranty to ascertain using paint won’t void coverage or damage equipment.
Frequently Asked Questions
Can I Use a Stain Sprayer for Automotive Touch-Up Paint?
You can, but you shouldn’t unless you verify automotive paint compatibility and modify spray technique adjustments; you’ll need proper thinning, pressure control, and a clean gun to avoid clogs, poor finish, or contamination on automotive surfaces.
Will Paint Pigments Stain or Discolor My Sprayer’s Internal Parts Long-Term?
Indeed — you’ll risk long-term pigment residue buildup staining seals and passages; with diligent sprayer maintenance and solvents you’ll prevent damage, but neglect lets pigments discolor internal parts, so clean promptly after each use.
Can I Spray Paint Over a Previously Stained Surface Without Stripping?
Yes — you can, but you’ll need proper surface preparation to guarantee spray adhesion. You’ll clean, sand, and prime the stained surface; otherwise paint won’t bond well and will peel or flake over time.
How Do Temperature and Humidity Affect Paint Atomization in a Stain Sprayer?
Higher humidity and low temperature thicken paint, reducing atomization and clogging nozzles; you’ll need thinner mixes, more frequent sprayer maintenance, and strict climate control to guarantee consistent spray pattern and proper finish.
Are There Compatible Spray Tips for Metallic or Pearlescent Paints?
About 70% of pros use finer tips for specialty finishes; yes, you’ll find spray tip compatibility for metallic paint application—choose hardened, larger-orifice tips and filters to prevent clogging, and test flow rates before full spraying.
Conclusion
You can sometimes use paint in a stain sprayer, but don’t assume it’s interchangeable. Picture a nimble sprayer meant for thin stain suddenly choking on thick paint—one tool designed for finesse, the other for coverage. Check viscosity, manuals, and clean thoroughly, or risk clogs, ruined finishes, and voided warranties. When in doubt, modify, thin, or rent a proper paint sprayer so you get smooth results without turning a quick job into a costly headache.
