
How to Get Greasy Fingerprints Off Painted Walls Safely
You can get greasy fingerprints off painted walls safely by dampening a microfiber cloth with warm water and a drop of mild dish soap, blotting and gently wiping the mark without scrubbing; rinse the cloth often to avoid spreading grease. Test the solution in a hidden spot first to check for paint lifting or dulling, and use a magic eraser or commercial degreaser only after testing. Keep cleaners gentle and follow up for tips on finishes, tougher stains, and prevention.
Quick Safe Method to Remove Greasy Fingerprints Now
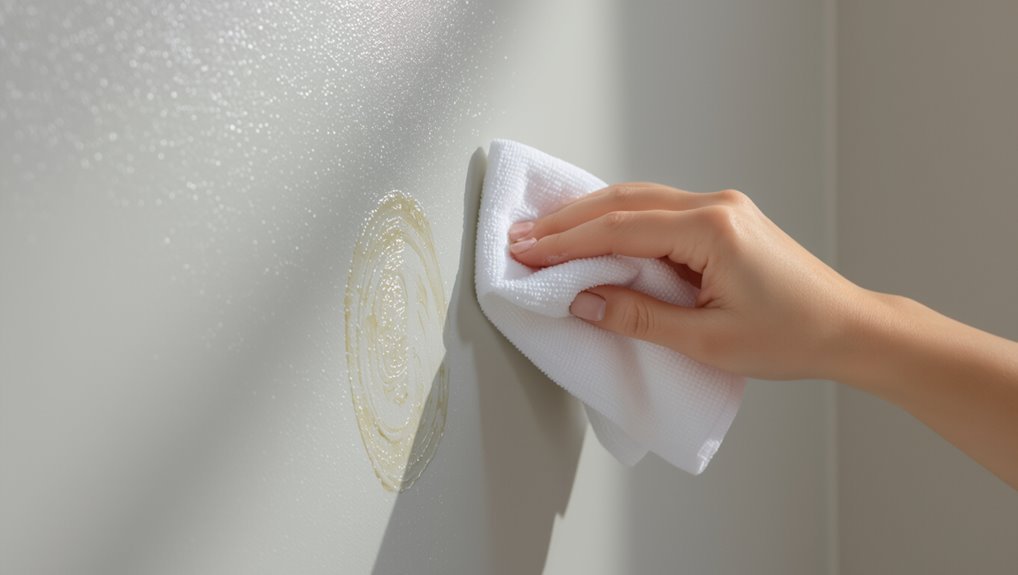
Grab a microfiber cloth and a mild all-purpose cleaner or a solution of warm water and a few drops of dish soap—this quick combo will lift grease without harming most paint finishes.
Dampen the cloth, gently blot and wipe fingerprints, rinse the cloth often, and avoid scrubbing. You’ll achieve efficient grease removal while protecting paint preservation and keeping walls streak-free.
How to Test a Hidden Spot Before You Clean
Before you start cleaning, pick an inconspicuous area like behind a door or inside a closet to test.
Apply your prepared cleaning solution with a soft cloth and wait a few minutes.
Check for any paint lifting, discoloration, or texture change before treating the visible marks.
Choose An Inconspicuous Area
When you’re about to clean greasy fingerprints, test your cleaner on a hidden spot first to avoid surprises. A small dab behind a light switch plate or inside a closet corner shows how the paint or finish will react without risking visible damage.
Pick an inconspicuous area matching typical wall texture, perform a quick color test, and wait for any fading or sheen change before proceeding to larger sections.
Prepare The Cleaning Solution
Although you’ll be testing a hidden spot first, mix only a small amount of your chosen cleaning solution — a mild dish soap diluted in warm water or a 1:1 white vinegar-and-water blend — in a spray bottle or bowl so you can easily control application and avoid overwetting the wall.
Then follow these steps to test cleaning agents on different surface types:
- Dab a bit, wait.
- Blot, don’t rub.
- Compare finish.
- Note reaction and dry time.
Observe For Paint Damage
To make sure your cleaner won’t harm the paint, pick an inconspicuous spot—inside a closet, behind furniture, or near a trim—and apply the solution sparingly so you can watch for fading, bubbling, or finish changes as it dries.
If the test shows no damage, proceed; note paint durability and adjust cleaning frequency accordingly, since softer finishes need gentler, less frequent care.
Tools and Household Supplies You’ll Need
Before you start scrubbing, gather a few basic tools and household supplies so you won’t need to stop mid-task.
You’ll want gentle cleaning tools and simple household supplies to protect paint while removing grease. Keep everything within reach and test a hidden spot first.
- Microfiber cloths
- Mild dish soap
- Soft sponge or magic eraser (light touch)
- Spray bottle with water
Which Paint Finish You Have : And Why It Matters
Now that you’ve gathered your cleaning tools, check which paint finish is on the wall because it determines how aggressive you can be. Identify paint types and sheen effects; finish importance affects cleaning techniques, surface durability, color impact, wall maintenance and aesthetic choices.
| Finish | Durability | Cleaning notes |
|---|---|---|
| Flat | Low | Gentle |
| Eggshell | Medium | Moderate |
| Satin | High | Tough |
| Semi-gloss | Very high | Vigorous |
Choosing the Right Cleaner for Your Paint Finish
Because different sheens respond differently to cleaners, pick a product that matches your paint’s finish: you should check labels for cleaner compatibility with your paint types and test an inconspicuous spot.
Choose mild, non-abrasive options for delicate sheens and stronger, residue-free cleaners for durable finishes.
- Test first
- Match cleaner compatibility
- Avoid harsh abrasives
- Rinse and dry promptly
Gentle Water-and-Soap Method for Washable Paint
For washable paint, mix a few drops of mild dish soap with a quart of warm water so the solution’s weak but effective.
You’ll want to use a soft microfiber cloth, wringing it nearly dry before gently wiping the prints in circular motions.
Rinse the area with plain water and pat dry with a clean towel to avoid streaks or damage.
Soap And Water Ratio
A simple 1:10 soap-to-water ratio works well for removing greasy fingerprints from washable paint without stripping the finish.
You’ll balance soap concentration to lift oils while minimizing residue. Adjust for tougher spots and note cleaning frequency to avoid overdoing it.
- Test hidden area first.
- Use lukewarm water.
- Rinse sponge often.
- Dry promptly to prevent streaks.
Soft Cloth Technique
Now that you’ve got the right soap-and-water ratio, switch to a soft cloth for the actual cleaning.
Dampen the cloth, wring it until barely moist, and gently blot and wipe fingerprints in circular motions. You’ll notice soft cloth benefits: reduced paint abrasion and controlled, even pressure.
Choose non-abrasive cleaning fabrications like microfiber or cotton to protect washable paint while lifting grease effectively.
Rinse And Dry Carefully
Once you’ve lifted the grease with your damp cloth and mild soap, rinse the area with a clean, barely damp cloth to remove any soapy residue without over-wetting the paint.
Pat dry with a soft towel, avoid rubbing harshly, and let the wall air-dry fully. Good cleaning techniques prevent damage and support regular wall maintenance.
- Blot excess moisture
- Use gentle pressure
- Check edges for residue
- Allow full drying
Dish Soap Degreasing for High-Traffic Areas
For heavily trafficked spots where greasy fingerprints build up fast, dish soap gives you an efficient, low-risk way to cut through oil without damaging paint.
Mix a few drops of mild dish soap with warm water, test a hidden area, then gently wipe with a soft cloth in high traffic areas.
Rinse with clean water and dry to prevent streaks.
Vinegar Solution: When to Use It and How to Mix
If fingerprints are light or the paint’s water-safe, reach for a vinegar solution instead of harsher cleaners.
Mix one part white vinegar with two parts warm water for general cleaning, and use a weaker 1:4 ratio on delicate finishes.
Always test a small, hidden spot first and wear gloves if you have sensitive skin.
When To Use Vinegar
Use a vinegar solution when fingerprints are greasy but the paint is water-safe—it’s ideal for kitchen walls, high-traffic hallways, and areas with oil-based residues because vinegar cuts grease without harsh chemicals.
You’ll appreciate vinegar benefits but consider vinegar alternatives if paint is delicate or odor is an issue.
- Test hidden spot first
- Use gentle cloth
- Rinse afterwards
- Dry promptly
Correct Mixing Ratios
Since vinegar works well on water-safe paint, you’ll want the right mix to cut grease without damaging finishes.
Use simple mixing guidelines: combine one part white vinegar with two parts warm water for general grease, or three parts water to one part vinegar for gentler cleaning.
Label the spray bottle and shake before use.
Note dilution ratios clearly so you repeat the same result.
Safety And Test Spot
When you’re preparing to clean greasy fingerprints with a vinegar solution, always test a hidden spot first to make sure the paint won’t dull or lift; follow safety precautions and gentle test methods to protect finishes.
- Mix 1 part vinegar to 3 parts water.
- Dab with a soft cloth.
- Wait five minutes.
- Inspect for changes before proceeding.
Baking Soda Paste for Stubborn Grease Spots
If a greasy fingerprint won’t budge with soap and water, make a thick baking soda paste to lift the oil without damaging paint.
Mix baking soda with a little water to a spreadable paste. Apply gently with a soft cloth, rub lightly in circular motions, then wipe clean and dry.
Repeat once if needed for stubborn grease removal.
Using a Magic Eraser Safely on Painted Walls
Magic Erasers can remove greasy fingerprints quickly, but you’ll want to use them gently to avoid dulling or removing paint.
You should test a hidden spot first and work light strokes.
Note Magic Eraser precautions and check wall paint compatibility before use.
- Test hidden area.
- Use gentle pressure.
- Rinse sponge frequently.
- Stop if finish dulls.
Alcohol Spot-Cleaning: What Paints Tolerate It?
You can use rubbing alcohol for spot-cleaning, but you need to know which finishes will handle it.
Flat and matte paints are delicate and can dull or remove pigment if you scrub with alcohol, so test a hidden spot first.
Semi-gloss and gloss finishes are tougher and usually tolerate quick alcohol wipes without damage.
Flat And Matte Paints
Flat and matte paints hide imperfections and scuff marks better than sheens with more gloss, but they also tend to be less tolerant of alcohol-based spot cleaners.
You’ll want to test first and protect matte textures to preserve paint longevity.
- Dab alcohol on hidden spot.
- Blot; don’t rub.
- Rinse with damp cloth.
- Touch up with matching paint if dulling appears.
Semi-Gloss And Gloss
While matte finishes need gentler handling, semi-gloss and gloss paints tolerate alcohol-based spot cleaners far better and can stand up to more vigorous wiping. You’ll enjoy semi gloss benefits like easier stain removal and a durable gloss finish; test a hidden spot, dab gently, then wipe. Visual guide:
| Surface | Test | Result |
|---|---|---|
| Trim | Small dab | No damage |
| Door | Wipe | Sheen intact |
| Wall | Spot | Cleaned |
Commercial Degreasers: When to Use Them and Risks
When should you reach for a commercial degreaser instead of household cleaners? Use them for heavy, recurring grease after testing a hidden spot; know commercial degreaser types and safe application techniques to protect paint.
For stubborn, recurring grease, test a hidden spot first and use a commercial degreaser—ventilate, glove up, rinse.
Expect stronger solvents and follow label precautions.
- Test first
- Ventilate area
- Wear gloves
- Rinse thoroughly afterward
Remove Old, Set-In Grease (Step-by-Step)
Start by gathering everything you’ll need—gloves, goggles, a gentle degreaser or dish soap, a soft sponge, nylon scrub pad, spray bottle, and clean rags—so you can work without stopping.
Mix solution, mist the area, let it sit two minutes. Use progressive pressure with effective scrubbing methods, rinse frequently, repeat if needed.
Dry and inspect. These grease removal techniques restore finish safely.
Remove Stains From Flat/Matte Paint Without Sheen Loss
Want to lift stains from flat or matte paint without turning the spot glossy? You can, with gentle methods that respect paint durability and proper surface preparation.
Lift stains from flat or matte paint gently—test first, use mild cleaners, and avoid overworking to prevent shine.
Test first in an inconspicuous spot. Then try:
- Mild detergent solution, soft cloth, blotting.
- Baking soda paste, gentle rub, rinse.
- Magic eraser lightly, minimal pressure.
- Rinse and dry, avoid overworking.
Small-Area Touch-Up When Cleaning Removes Paint
If cleaning a greasy fingerprint strips a small patch of paint, don’t panic—you can usually repair it without repainting the whole wall.
Lightly sand edges, clean dust, and apply matching touch-up paint with a small brush or sponge for seamless small touch ups.
Feather the edges, let dry, and consider clear seal or spot primer as part of routine paint maintenance.
Clean Greasy Fingerprints Around Switches, Trim, and Textured Walls
When grease lands near switches, trim, or on textured walls, you’ll need a gentler, more precise approach than you’d use on flat paint—work around hardware, protect edges, and adapt your technique to the surface texture to avoid streaks or damage.
- Turn off power, remove switch plate, clean edges gently.
- Use cotton swabs for trim lines.
- Blot textured wall areas with mild detergent.
- Rinse, dry, and consider fingerprint prevention.
Preventing Future Fingerprints: Coatings and Placement Hacks
Once you’ve removed existing smudges and protected hardware, take steps to reduce how often you’ll need to clean by applying the right coatings and rethinking placement.
Choose easy-clean coating options like satin or washable eggshell, or clear protective films near high-touch zones.
Use placement strategies: move hooks, remount thermostats slightly higher, and route traffic away from painted focal walls to minimize future fingerprints.
Frequently Asked Questions
Can Greasy Fingerprints Transfer to Clothing or Upholstery During Cleaning?
Yes — greasy transfer can happen to clothing or upholstery while cleaning, so you should use proper cleaning techniques, wear gloves, blot rather than rub, and protect fabrics to prevent spreading oils and stains.
Are There Child- and Pet-Safe Natural Degreasers?
Like a gentle breeze, yes — you can use natural ingredients like vinegar, baking soda, mild castile soap and lemon as safe alternatives; they’re child- and pet-safe when diluted, tested on a hidden spot first.
How Long After Painting Must Walls Be Before Safe Cleaning?
You should wait about two weeks for paint curing before gentle cleaning; some finishes need up to 30 days. Use mild cleaning techniques—soft cloths, diluted soap—and spot-test to avoid damaging the cured paint surface.
Will UV Exposure or Sun Fade Cleaned Spots Differently?
Yes — you’ll see UV damage cause fading differences: cleaned spots may reflect light differently and reveal less sun-faded paint, so cleaned areas can look darker while surrounding sun-exposed paint appears lighter, creating visible contrast over time.
Can Oily Residue Cause Odor That Needs Treatment?
Yes — oily residue can smell, but don’t worry; you’ll picture stale grease clinging to paint. You’ll use oil absorption powders, clean thoroughly, and apply odor elimination methods like vinegar or baking soda to neutralize lingering scents.
Conclusion
Now you know how to tackle greasy fingerprints without wrecking your paint, and you can test, clean, or touch up with confidence. Remember: about 80% of people admit they touch walls frequently—so those smudges aren’t rare. With the right cleaner, gentle tools, and a quick hidden-spot test, you’ll keep walls looking fresh. Preventative placement and protective coatings cut future marks, so you won’t be wiping the same spot every week.
