
Can You Use Goo Gone on Painted Walls Safely?
You can usually use Goo Gone on painted walls if you take precautions: spot-test a hidden area first, use it sparingly, blot instead of rubbing, and rinse with warm soapy water afterward. Avoid older, brittle, low-quality, or unsealed finishes and don’t let the solvent sit or soak. Wear gloves and ventilate the room, and try gentler options for delicate paint. Keep going to learn how to tell which paints are safe and safer application steps.
What This Guide Covers and How to Use It
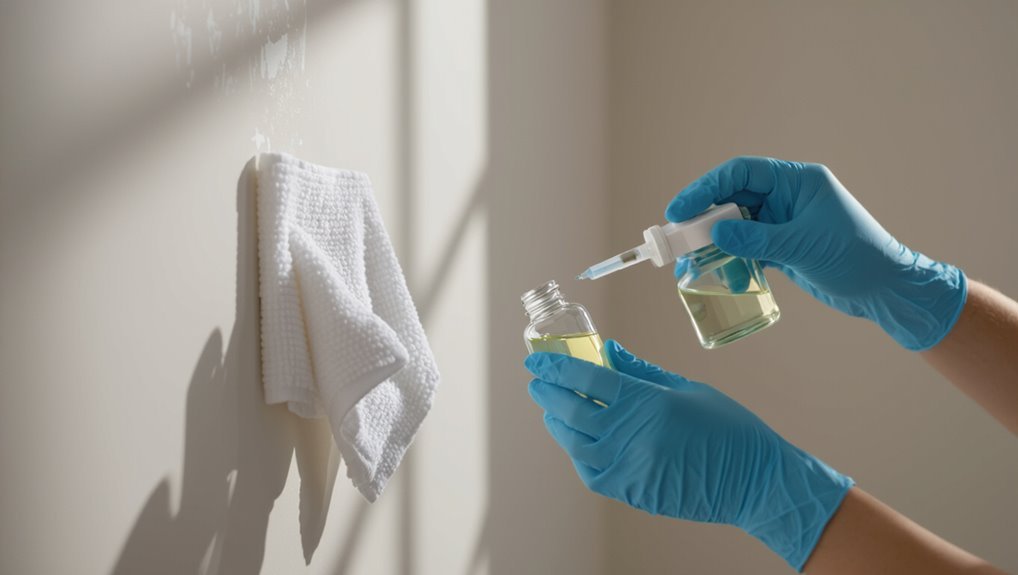
Before you start removing sticky residue or stains, this guide tells you exactly what to expect and how to use Goo Gone safely on painted walls.
You’ll learn steps, testing, and contact time to preserve finish. It explains Goo Gone effectiveness, compatibility with common paint types, and painted wall maintenance tips so you can remove gummy spots without harming color or sheen.
Quick Answer: Is Goo Gone Safe on Painted Walls?
Now that you know what this guide covers and how to test and apply products, here’s a quick answer: yes, Goo Gone can be safe on many painted walls when used properly, but it isn’t universally harmless. You should spot-test, avoid prolonged rubbing, consider Goo Gone alternatives for delicate finishes, and prioritize paint protection.
| Use | Risk | Tip |
|---|---|---|
| Latex | Low | Spot-test |
| Oil | Medium | Dilute |
| Satin | Low | Wipe gently |
| Flat | High | Use alternatives |
When to Use Goo Gone : Quick Decision Checklist
When you’re deciding whether to reach for Goo Gone, check the paint type, the age and condition of the finish, and how stubborn the residue is—if the paint’s fresh, chalky, or flat, skip Goo Gone and choose a gentler method.
Use Goo Gone only on cured, glossy or semi-gloss surfaces for tough adhesive removal.
Test a hidden spot, ventilate, wipe clean, and consider alternative cleaning techniques first.
What Goo Gone Is Made Of and How It Works
Goo Gone is a solvent-based product that mixes petroleum distillates with citrus-derived oils and mild detergents.
You’ll recognize the Goo Gone composition by its oily feel and citrus scent; solvents dissolve tacky residues while detergents lift loosened particles.
For adhesive removal, you’ll apply, wait briefly, then wipe; always test a hidden spot first to check finish compatibility.
Which Paint Types Are Vulnerable to Solvents
Because solvents strip binders and soften finishes, some paint types are much more vulnerable than others.
You’ll find older oil-based and low-quality latex paints show high solvent sensitivity, blistering or lifting quickly.
Acrylic and high-quality alkyd formulas resist solvents better, offering greater paint durability.
Test an inconspicuous spot first, blot gently, and avoid prolonged exposure to minimize damage.
How Paint Sheen Affects Solvent Safety (Flat → Gloss)
Beyond paint formulation, the sheen level also changes how solvents behave on a surface.
You’ll see glossier finishes resist penetration better, improving paint durability, while flat finishes absorb cleaners more and risk softening.
Consider solvent interaction with film thickness and surface hardness before treating marks.
- Flat: higher absorption
- Eggshell: moderate risk
- Satin: balanced resistance
- Semi-gloss: good protection
- Gloss: best resistance
How to Perform a Safe Spot Test on Painted Walls
Before you apply any solvent, pick an inconspicuous area—like inside a closet or behind a piece of furniture—and test there first.
Use gentle spot test techniques: apply a small dab on a cotton swab, wait, then blot.
Check for immediate changes and let it sit several hours to gauge paint durability.
If unchanged, proceed cautiously on visible areas.
What to Watch During a Spot Test (Blanching, Softening, Sheen)
When you test Goo Gone on paint, watch for any blanching—pale or white spots that mean the pigment’s lifting.
Pay attention to softening, where the finish feels tacky or dentable under your fingernail.
Also look for changes in sheen, since a dull or glossier patch shows the cleaner is altering the topcoat.
Paint Blanching Signs
Although a small dab of Goo Gone might seem harmless, you need to watch closely for paint blanching during a spot test: look for pale, whitish patches, areas that feel softer or tacky to the touch, and any change in sheen compared with the surrounding finish.
For paint preservation and wall maintenance, note these signs immediately:
- Pale, chalky discoloration
- Irregular light spots
- Loss of pigment depth
- Slight tackiness under fingertip
- Matte areas amid gloss
Finish Softening Indicators
If you spot a change after applying a tiny amount of Goo Gone, pay attention to how the finish feels and looks—softening often shows up as a subtle loss of firmness, a dulling of sheen, or slight tackiness under your fingertip.
During your finish assessment, try gentle softening techniques like brief contact and blotting; note any persistent tack or film and stop if texture alters.
Sheen Change Detection
Because finishes can react subtly, pay close attention to any change in sheen during a spot test—you want to catch dulling, whitening (blanching), or increased gloss before it becomes permanent.
You’ll monitor sheen variation and aim for long-term sheen maintenance.
Watch for:
- subtle dull spots
- white or cloudy blanching
- tacky softening
- localized gloss increase
- edge haloing
Tools and Supplies to Gather First
Before you start, gather the essentials: a soft cloth, cotton swabs, a plastic scraper, and a small bowl of warm water.
Put on gloves and protective eyewear so you don’t get solvents on your skin or in your eyes. Having these tools and gear ready will make the cleanup quicker and safer.
Essential Cleaning Tools
Gather the right tools so you can remove sticky residues without damaging paint: you’ll need a mild cleaner or Goo Gone, soft microfiber cloths, a nonabrasive sponge, a plastic scraper or old credit card, cotton swabs for edges, and a bucket of warm water for rinsing.
Use quality cleaning supplies for effective wall maintenance; keep tools ready.
- Microfiber cloths
- Nonabrasive sponge
- Plastic scraper
- Cotton swabs
- Bucket and warm water
Protective Gear Needed
Have a few basic protective items on hand so you can work safely and avoid harming your skin, eyes, or lungs when using Goo Gone on painted walls. Wear protective gloves and safety goggles, and ventilate the room. Keep a respirator, paper towels, and mild soap nearby.
| Item | Purpose |
|---|---|
| Protective gloves | Skin protection |
| Safety goggles | Eye protection |
| Respirator | Fume control |
| Paper towels | Cleanup |
| Mild soap | Residue removal |
How to Apply Goo Gone Safely
When you’re ready to remove sticky residue, work in a well-ventilated area and test a small, inconspicuous spot first to confirm the product won’t discolor or soften the paint.
You’ll apply sparingly, let sit briefly, then blot. Consider Goo Gone alternatives and other wall cleaning techniques for sensitive finishes.
- Use minimal product
- Blot, don’t rub
- Wait briefly
- Rinse area
- Repeat if needed
How to Remove Goo Gone and Leftover Residue
1 simple way to guarantee no Goo Gone residue stays behind is to rinse the area with warm, soapy water: blot gently with a microfiber cloth, then wipe in light circular motions.
For stubborn spots, apply a diluted vinegar solution, rinse again, and dry.
These residue removal cleaning techniques prevent streaks and lingering odor, protecting paint finish without harsh scrubbing.
How Long You Can Safely Leave Goo Gone on Paint
After you’ve removed Goo Gone and rinsed the area clean, you’ll want to know how long the product can safely sit on painted surfaces before it risks damage.
You should limit dwell to minutes, not hours, especially on delicate finishes. For paint preservation, rinse promptly and test first; consider solvent alternatives for sensitive areas.
- Short dwell time
- Patch test first
- Immediate rinsing
- Use mild cleaners
- Monitor finish
Handling Old, Flaky, or Brittle Paint Before Solvents
Before you reach for Goo Gone, check the paint adhesion by gently pressing and scraping with a fingernail or a putty knife to see if it flakes or peels.
If you find loose flakes, remove them carefully to avoid spreading debris or creating larger loose areas.
Only apply solvents to sound paint to prevent lifting or further damage.
Check Paint Adhesion
If paint flakes or feels brittle when you press a fingernail against it, don’t use solvents yet — you’ll make the problem worse.
Test adhesion across the area to judge paint durability and plan surface preparation. If weak, stabilize before cleaning.
Consider these checks:
- press test for brittleness
- tap for hollow sound
- inspect edges
- note paint age
- record affected area size
Remove Loose Flakes
Gently remove any loose, flaking paint with a putty knife or stiff brush so you’re left with a stable surface before you reach for solvents. You should clear flakes, vacuum dust, and inspect for wall damage; sand edges smooth to prevent spreading. Only then test Goo Gone on a small area.
| Action | Purpose |
|---|---|
| Scrape | Remove flaking paint |
| Brush | Clear debris |
| Vacuum | Prevent dust |
| Sand | Smooth edges |
| Inspect | Check wall damage |
Removing Sticker and Adhesive Residue With Goo Gone
Start by testing Goo Gone on an inconspicuous spot to make sure your paint won’t lift or discolor.
For sticker removal, apply a small amount, wait, then gently wipe; repeat as needed. You’ll find Goo Gone among effective adhesive solutions when used carefully.
Rinse the area with soapy water afterward to remove residue.
- apply sparingly
- wait briefly
- wipe gently
- rinse thoroughly
- dry completely
Using Goo Gone for Crayon and Marker Marks
Before using Goo Gone on crayon or marker, test it on a hidden spot to make sure the paint won’t soften or discolor.
Apply a small amount, let it sit briefly, then gently rub with a soft cloth or cotton swab using light pressure and circular motions.
Keep in mind that flat or matte finishes are more sensitive than semi-gloss or gloss, so adjust your technique and contact time accordingly.
Test On Hidden Area
Although Goo Gone usually works well, you should always test it on a hidden area first to make sure it won’t damage the paint’s finish or color.
Choose a discreet spot location that matches the stained area and check paint compatibility.
Apply a dab, wait, then inspect. If safe, proceed cautiously; if not, stop.
- small dab
- match texture
- 5–10 minute wait
- gentle blot
- document result
Application Technique Tips
Work in small sections and be patient: apply a little Goo Gone to a soft cloth or cotton swab and gently rub the crayon or marker mark in circular motions, letting the solvent loosen the pigment for 10–30 seconds before blotting with a clean cloth.
Use gentle pressure, change swabs as they pick up pigment, rinse residue with mild soap, and follow safety precautions like ventilation and gloves.
Paint Finish Considerations
Along with technique, your wall’s paint finish will affect how Goo Gone behaves and how gently you need to work: glossy and semi-gloss surfaces are more forgiving and resist solvent penetration, so you can clean with slightly firmer pressure and shorter dwell times, while flat or matte finishes absorb more and can dull or soften if you apply too much solvent or rub aggressively.
- Test hidden spot first
- Use minimal product
- Blot, don’t scrub
- Rinse and dry promptly
- Prioritize paint durability and wall care
Tackling Scuff Marks and Shoe Scuffs Safely
When you spot scuff marks or shoe scuffs on painted walls, act carefully to avoid stripping paint while still removing the blemish; start with gentle scuff removal techniques like a soft eraser or microfiber with mild wall cleaning solutions. Test an inconspicuous spot, then work gently.
| Method | Strength |
|---|---|
| Eraser | Low |
| Microfiber + soap | Medium |
| Goo Gone (tested) | Use cautiously |
Removing Tape, Label Glue, and Caulk Smears
When tape or label glue won’t come off, you’ll want a gentle solvent that lifts residue without harming paint.
Goo Gone can loosen adhesive, and with careful rubbing and a soft cloth you can usually remove sticky patches.
For stubborn caulk smears, apply a small amount, let it sit briefly, then gently scrape or wipe away to avoid damaging the finish.
Tape And Label Residue
Peel off what you can, then use Goo Gone to lift stubborn tape adhesive, label glue, and caulk smears without stripping paint.
You’ll dab, wait, and wipe gently; repeat as needed for tape residue and label removal. Test first in an inconspicuous spot, then rinse with mild soap.
- Dab small amount
- Let sit briefly
- Wipe with soft cloth
- Repeat if needed
- Rinse and dry
Caulk Smear Removal
If caulk smears or dried bead residue has spread onto painted walls, you can remove it carefully with Goo Gone without harming the finish—just work slowly and test first.
Apply a small amount, let it sit briefly, then gently scrape with a plastic scraper. After removal, clean residue and rinse.
For future caulk application and caulk maintenance, protect edges with tape and wipe excess immediately.
What to Do If Goo Gone Dulls or Strips the Finish
Although Goo Gone usually cleans without harm, it can occasionally dull or strip paint, and you’ll want to act quickly to limit damage.
You should blot, rinse, and dry the area, then assess for sheen loss. Use paint restoration tips and finish repair techniques as needed.
Consider:
- Rinse with mild soap
- Pat dry gently
- Test small polish
- Feather-sand edges
- Touch-up paint carefully
Safer Alternatives to Goo Gone for Delicate Paints
If Goo Gone feels too strong for your painted wall, try a mild dish soap solution first to lift residue without harming the finish.
For tougher spots, you can test a small amount of rubbing alcohol on an inconspicuous area or use gentler alcohol-based cleaners specifically labeled safe for paint.
If you prefer oil-based options, apply a light touch with something like mineral oil or a commercial oil-based remover, always testing first and wiping residue thoroughly.
Mild Dish Soap Solution
When you need to remove sticky residue from delicate painted walls, a mild dish soap solution often does the job without harming the finish.
You’ll mix warm water with a few drops, test a hidden spot, and gently wipe. Enjoy mild soap benefits and safe cleaning that won’t strip paint.
- Mix 1 tsp soap per cup water
- Use soft cloth
- Test first
- Rinse well
- Pat dry
Rubbing Alcohol Alternatives
Because rubbing alcohol can dull or soften some paints, you’ll want gentler options that still lift sticky residue without risking the finish. Try diluted vinegar, baking soda paste, or mild dish soap for natural cleaning and eco friendly alternatives that’re safe on delicate paint. Test first in an inconspicuous spot.
| Option | Mix | Use |
|---|---|---|
| Vinegar | 1:1 water | Dab, rinse |
| Baking soda | Paste | Rub gently |
| Soap | Mild soap + water | Wipe, dry |
Oil-Based Remover Options
You can use several gentle oil-based removers that lift sticky residue without stripping delicate paint finishes.
Test first on an unseen spot, work gently, and wipe residue away with a soft cloth to minimize risk.
Consider these oil based alternatives while prioritizing solvent safety:
- Baby oil
- Mineral oil
- Olive oil
- Commercial citrus oil remover
- Petroleum jelly
DIY Mild Cleaners to Try Before Goo Gone
If the sticky residue is light or you’re unsure how the paint will react, try a few DIY mild cleaners before reaching for Goo Gone. Use natural cleaning options: vinegar solution, baking soda paste, citrus cleaner, or a soap mixture with essential oils. Test first, rub gently with microfibre cloths, and rinse. Homemade remedies often work safely.
| Cleaner | Use |
|---|---|
| Vinegar solution | Light residue |
| Baking soda | Paste spot clean |
| Citrus cleaner | Sticky labels |
| Soap mixture | General wash |
| Essential oils | Scent boost |
Using Rubbing Alcohol, Oil, and Baking Soda Safely on Paint
When tackling stubborn spots, try rubbing alcohol, a light oil, or a baking soda paste in small tests to see how your paint reacts; each removes residue differently and demands a gentle touch.
You’ll protect paint preservation by testing, using soft cloths, and rinsing well for safe cleaning.
- Test hidden area
- Blot, don’t rub
- Use minimal product
- Rinse and dry
- Wait before repeating
How Professional Restorers Approach Solvents on Walls
Although solvents can seem like a quick fix, professional restorers treat them as precision tools and start by identifying the paint type, surface condition, and any underlying finishes before applying anything.
You’ll see them test small areas, choose mild cleaners first, control ventilation, wear PPE, and document results.
Their restoration techniques prioritize solvent safety, minimizing exposure and avoiding irreversible damage while achieving targeted removal.
When to Call a Painter or Restoration Pro
Pro restorers know the limits of solvents, and that’s your cue to call in a painter or restoration pro when a stain, damage, or paint reaction goes beyond a small, tested area.
You’ll want clear Painter communication and realistic Restoration timelines to minimize risks.
- large stains
- softened or peeling paint
- color mismatch after spot cleaning
- structural substrate exposure
- time-sensitive water damage
How to Restore Sheen After Solvent Use on Paint
If solvent cleaning dulled the sheen on your painted wall, you can usually bring it back without repainting by carefully matching the finish and using the right products—start small, test, and proceed gradually.
Use mild polishing compounds or specialty restorers, applying with a soft cloth in small sections.
These sheen restoration techniques and simple paint maintenance tips help blend affected areas; stop if finish worsens.
Ventilation, PPE, and Keeping Kids/Pets Safe
Because Goo Gone and similar solvents release fumes and can irritate skin, make sure you ventilate the room well, wear basic PPE, and keep kids and pets out of the area while you work.
Follow ventilation tips and safety measures for air circulation and protective gear, prioritize child safety and pet precautions, and adopt careful cleaning practices to limit environmental impact.
- open windows and use fans
- wear gloves and goggles
- move children away until dry
- secure pets in another room
- dispose wipes safely
Disposing Goo Gone and Environmental Considerations
Once your cleanup is finished and the room is aired out, think about how you’ll dispose of leftover Goo Gone and any used rags or wipes.
Seal containers, don’t pour solvent down drains, and check local hazardous-waste rules.
For eco-friendly disposal, use community drop-off or hazardous collection events.
Handle contaminated rags with care—proper containment helps guarantee solvent safety and prevents accidental fires or pollution.
Common Mistakes People Make and How to Avoid Them
When you tackle Goo Gone on painted walls, the biggest mistakes are easy to make but avoidable: using too much solvent, scrubbing hard, or skipping a spot test.
You should follow paint maintenance tips, try adhesive removal alternatives, and protect finish with gentle methods.
- Test a hidden area first
- Blot, don’t rub
- Use minimal product
- Rinse thoroughly
- Work slowly and patiently
Preventing Future Adhesive Problems on Painted Walls
If you want to keep your painted walls free of sticky residue, take a few simple preventative steps: use painter’s tape or removable adhesives designed for walls, test in an inconspicuous spot, and clean surfaces before applying anything.
Rotate hanging spots, avoid long-term tapes, and consider clear protective strips. These measures help adhesive prevention and maintain paint protection without risking damage.
Quick Troubleshooting: Stain Won’t Budge or Paint Damaged
If a stain won’t budge or the paint looks damaged, first identify your paint type so you know how much abrasion it can handle.
Test Goo Gone on a hidden spot to confirm it won’t discolor or soften the finish. If it’s safe, use gentle removal techniques—soft cloths, light blotting, and minimal product—to avoid further harm.
Assess Paint Type
Because different paints react differently to solvents, you’ll want to identify the finish and base before proceeding.
Check gloss level and latex vs. oil; know that paint durability affects how aggressively you can clean and future wall maintenance.
Assess sheen, age, previous touch-ups, manufacturer’s label, and odor sensitivity.
- Sheen
- Base (latex/oil)
- Age
- Touch-ups
- Label info
Test Hidden Spot
When a stain won’t budge or the solvent seems to be affecting the finish, you’ll want to test a hidden spot first to avoid visible damage—choose an inconspicuous area like behind furniture, inside a closet, or along baseboards.
Apply the Goo Gone sparingly, wait the manufacturer’s recommended time, then blot and inspect for discoloration, softening, or sheen loss.
Afterward, expand spot testing to another hidden area before full use.
Gentle Removal Techniques
Start gently: blot the stain with a soft cloth dampened in warm soapy water before reaching for stronger solvents, and only escalate if that won’t lift the residue.
If residue persists, try gentler solvents and prioritize paint protection. Test each step in a hidden spot, work outward, and stop if paint softens.
- Blot, don’t rub
- Use mild solvent
- Rinse frequently
- Pat dry
- Touch up if needed
FAQ: Short Answers to Common Goo Gone on-Paint Questions
Got questions about using Goo Gone on painted walls? You’ll want tips on paint protection and residue prevention. Use small tests, gentle application, and quick wipes. Avoid prolonged soaking.
| Question | Short Answer |
|---|---|
| Test first? | Yes, always. |
| Safe on latex? | Usually, if tested. |
| Remove residue? | Wipe immediately. |
| Damage risk? | Low with care. |
Final Checklist: Should You Use Goo Gone on This Wall?
Check what type of paint is on the wall—latex and enamel react differently to solvents.
Always test a small, inconspicuous spot first to make sure the finish won’t soften or discolor.
If the test looks good, proceed cautiously; if not, try a gentler method.
Surface Paint Type
Because the paint’s finish and formulation determine how solvents react, you should verify the wall’s surface type before using Goo Gone.
Check gloss level and manufacturer info, since paint durability affects solvent resistance and different adhesive types may bond differently.
Consider these factors:
- High-gloss: more resistant
- Satin: moderate resistance
- Flat/matte: more vulnerable
- Latex vs. oil-based
- Textured surfaces: absorbent
Test Spot First
Before using Goo Gone on the whole wall, always test a small, inconspicuous spot first so you can confirm it won’t damage the paint or finish.
You’ll verify spot test importance and paint compatibility quickly: apply a tiny amount, wait a few minutes, wipe gently, and inspect for discoloration, softening, or dulling.
If any change appears, don’t use Goo Gone on that surface.
Frequently Asked Questions
Can Goo Gone Remove Wallpaper Adhesive Without Damaging Paint Underneath?
Yes — you can often remove wallpaper adhesive with Goo Gone if you test first; you’ll use careful wall adhesive techniques and paint preservation methods, apply gently, let it soak briefly, then wipe without scrubbing too hard.
Can Goo Gone Affect Painted Trim or Baseboards Differently Than Walls?
About 60% of finishes are more delicate; yes, Goo Gone can affect painted trim or baseboards differently than walls. You’ll want trim safety measures and careful baseboard care—test small areas, blot gently, then rinse promptly.
Is Goo Gone Safe on Painted Metal Surfaces Like Radiators?
Yes — you can use Goo Gone on painted metal surfaces like radiators cautiously. You’ll test first, apply minimally, and wipe promptly to protect painted metal durability; the Goo Gone application shouldn’t soften tough, cured radiator finishes.
Can Temperature or Humidity Change Goo Gone’s Effect on Paint?
Yes — temperature and humidity can alter Goo Gone effectiveness and paint compatibility. You’ll find warmer, drier conditions speed action and increase solvent strength, while cold or humid environments slow removal and may reduce adhesion or soften some paint finishes.
Will Mixing Goo Gone With Other Cleaners Harm Painted Surfaces?
Mixing Goo Gone with other cleaners can harm painted surfaces; don’t gamble. You’ll risk chemical reactions that strip finishes. Use safe cleaning techniques, test surface compatibility on an unseen spot, and avoid mixing products.
Conclusion
You can use Goo Gone on painted walls, but only when the paint’s cured and the finish is durable — and by testing first on an unseen spot. Coincidentally, the sticky mess you just inherited often reveals the wall’s true condition: glossy, satin, or flat reacts differently. If the test passes, apply gently, rinse, and dry; if not, stop and choose a gentler method. That small trial often saves repainting later.
