
Can You Use a Paint Roller for Stain? Best Application Methods
Yes — you can use a paint roller for stain, and it’s great for large, flat surfaces when you pick the right nap and work slow, even passes to control absorption. Use short naps on smooth wood, longer naps on rough decks, load properly to avoid puddles, back-brush for smoothness, and keep a wet edge to prevent lap marks. For grainy or detailed trim switch to a brush or sprayer, and keep going to learn more techniques.
Quick Verdict: Can You Use a Paint Roller for Stain?
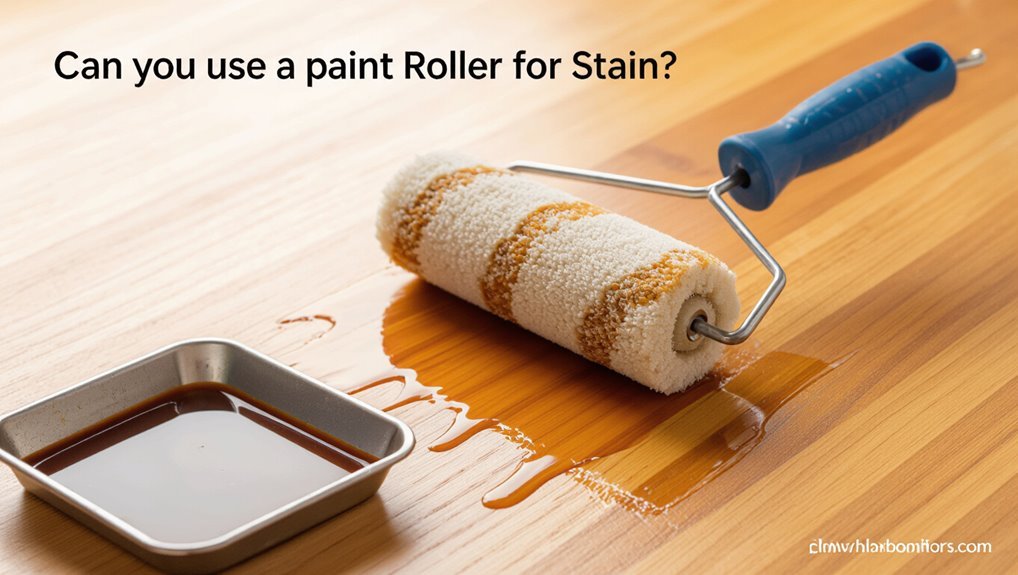
Wondering if a paint roller will work for stain? You can, but results vary: roller efficiency depends on nap and stroke, and you’ll need slow, even passes to control stain absorption.
Rollers suit sealed or flat surfaces where pooling’s minimal. For pronounced grain or detailed trim, choose other tools.
Test a scrap piece first to confirm coverage and appearance before committing.
When a Roller Is the Fastest Choice for Staining
When you’re covering large, flat surfaces like a deck floor or interior plywood sheathing, a roller often gets the job done fastest because it lays down wide, even coats with fewer passes and less fatigue than brushing.
You’ll appreciate roller efficiency for broad stain application, reaching consistent penetration quickly. Use a quality nap, maintain a loaded roller, and work methodically for uniform coverage.
When to Skip the Roller and Use a Brush or Sprayer
If your surface is uneven or highly porous, a brush or sprayer will reach into crevices that a roller misses.
You’ll also want a brush for tight corners and detailed trim where a roller can’t control application.
And when you need very fast, even coverage over large areas, a sprayer is usually the quickest, most consistent option.
Uneven Or Porous Surfaces
Because rollers sit on the surface instead of sinking into gaps, you’ll get poor coverage on uneven or highly porous materials—brushes or sprayers pick up stain better in those cases. You should assess stain absorption and surface texture first; choose a brush for deep pores or a sprayer for irregular profiles to guarantee even penetration and consistent finish.
| Surface | Recommended tool |
|---|---|
| Rough wood | Brush |
| Knotty grain | Sprayer |
| Old siding | Brush |
| Patching | Sprayer |
Tight Corners And Detail
Although a roller speeds up large flat areas, it can’t reach tight corners, trim edges, or intricate details, so you should switch to a brush or sprayer for those spots.
You’ll use a small angled brush for tight spaces and fine lines, ensuring precision application along joints and molding.
A sprayer suits complex profiles, but practice to avoid overspray and pooling.
Fast Coverage Needs
When you need to cover large areas quickly—like a whole wall, deck, or fence—reach for a roller only when its speed and finish match the job; otherwise skip it and grab a brush or sprayer. You’ll choose based on stain application goals and roller advantages versus speed, control, and finish.
| Tool | Speed | Finish |
|---|---|---|
| Roller | Medium | Smooth |
| Brush | Slow | Precise |
| Sprayer | Fast | Even |
What Wood Types Work Best With a Roller
Different woods accept stain in different ways, so pick species that match the look and performance you want when using a roller.
You’ll find softwoods benefits with pine or cedar—they soak stain faster and suit rustic looks.
For smoother, even results, consider hardwood suitability like oak or maple.
Think grain, porosity, and finish prep.
- Pine
- Cedar
- Oak
- Maple
Which Stain Types Work With Rollers (Oil, Water, Gel)
Now that you’ve picked a wood that suits your look, pick a stain that works with a roller and the surface porosity. You’ll find oil stains penetrate deeply, water stains dry faster, and gel stains sit atop dense woods. Consider roller compatibility, stain absorption, and application techniques to match finish and drying time.
| Type | Penetration | Best Use |
|---|---|---|
| Oil stains | High | Porous wood |
| Water stains | Medium | Quick jobs |
| Gel stains | Low | Dense wood |
Roller Cover Naps: Which to Choose for Stain
Because nap length affects how much stain the roller holds and how it lays into wood grain, pick your cover to match the surface texture:
Because nap length changes stain load and grain lay-in, choose a roller cover that matches your wood’s texture.
- Smooth surfaces — short nap for even film.
- Lightly textured — 3/16″ nap balances hold and control.
- Rough or knotty — 1/4″ nap grabs more stain.
- Test first to avoid blotching.
Consider roller cover considerations and roller cover types when choosing.
Best Roller Materials for Penetrating Wood Grain
Choose roller materials that push stain into the grain instead of just smearing it across the surface. You’ll prefer natural-fiber and high-density synthetic roller types for superior stain absorption and fiber density that force pigment into pores.
Consider application techniques that leverage roller advantages, balancing material durability with finish quality while ensuring proper surface compatibility for even penetration and long-lasting results.
Recommended Roller Sizes and Frame Types for Stain
You’ll want to match roller nap length to the grain and texture of the wood so stain penetrates evenly without leaving streaks.
Pick a frame type—straight or swivel—that’s comfortable for the surface you’re staining and gives consistent pressure.
Choose a roller width that balances coverage and control, using wider rollers for floors and narrower ones for trim or tight spots.
Roller Nap Lengths
Think of nap length as the roller’s fiber height—short naps (1/4″–3/16″) lay down stain smoothly on fine-grained woods, while medium naps (3/8″) work well for slightly textured siding and decks; use long naps (1/2″ or more) only on very rough surfaces where deep penetration is needed.
You should match roller nap to surface and follow these application techniques:
- Fine trim
- Smooth hardwood
- Composite decking
- Rough cedar
Frame Type Options
While the roller nap determines how stain contacts the wood, the frame you pick controls reach, stability, and how evenly you apply it—so match frame size to the job: use a 4–6″ mini frame for trim and tight spots, a 9″ standard frame for most siding and deck boards, and a 12″ or telescoping frame for large, flat areas to cut time and reduce lap marks.
| Feeling | Choice |
|---|---|
| Confidence | Steel frames (durability) |
| Ease | Lightweight materials |
| Pride | Trusted frame brands |
| Control | Various frame types |
| Joy | Useful frame features |
Roller Width Sizes
Size matters when you’re choosing a roller for stain: match roller width to the surface to get even coverage and fewer lap marks.
Pick from roller size options that suit boards, decks, or railings.
Consider these ideal roller widths:
- 4″ — tight spots
- 6″ — balusters, railings
- 9″ — narrow boards
- 18″ — wide decks and floors
How Much Stain to Load on a Roller (Avoid Oversaturation)
If you load too much stain on the roller, you’ll end up with drips, puddles, and uneven absorption; aim to transfer a thin, even film instead.
Gauge load by dipping lightly, rolling off excess on a tray, and repeating short passes. Proper roller technique controls stain absorption, prevents pooling, and guarantees consistent coverage.
Stop and reload before the roller glazes or sags.
Preparing New Wood Before Rolling Stain
Preparation matters: before you load a roller, make certain new wood is clean, dry, and sanded smooth so the stain penetrates evenly.
Preparation matters — ensure new wood is clean, dry, and smoothly sanded so stain soaks in evenly.
You’ll do simple wood preparation and surface cleaning steps to guarantee absorption and uniform color.
- Sand with progressively finer grits
- Remove dust with vacuum and tack cloth
- Check for mill glaze; re-sand if needed
- Confirm bone-dry wood before staining
Preparing Weathered Wood Before Rolling Stain
Before you roll stain on weathered wood, first assess its condition for rot, loose boards, or deep cracks so you know what repairs are needed.
Next, remove surface contaminants like dirt, mildew, and old finish with a mild detergent, a scrub brush, or a pressure washer on low.
Finally, smooth rough fibers and brighten the grain with light sanding or a wood brightener so the stain absorbs evenly.
Assess Wood Condition
Weathered wood tells you what it needs, so take a careful look and feel for soft spots, deep cracks, old finish, or raised grain before you roll stain.
Check wood moisture and identify wood species to choose products and drying time.
Then inspect and note:
- Soft or spongy areas
- Splits or deep cracks
- Raised grain
- Remaining finish
Remove Surface Contaminants
Once you’ve assessed the wood, clear away dirt, dust, mildew, and old loose debris so the stain can penetrate evenly; you’ll want a clean, dry surface before you roll. Do surface preparation using a stiff brush, mild detergent, or pressure rinse; focus on contamination removal to guarantee even absorption and adhesion.
| Step | Tool | Note |
|---|---|---|
| 1 | Brush | Dry sweep |
| 2 | Detergent | Spot clean |
| 3 | Rinse | Gentle pressure |
| 4 | Dry | 24 hours |
| 5 | Inspect | Ready to roll |
Smooth And Brighten Grain
If the wood’s grain looks dull or rough after cleaning, you’ll want to smooth and brighten it so the stain soaks in evenly and shows true color.
You focus on wood preparation to improve stain absorption. Follow these steps:
- Sand with medium grit.
- Finish with fine grit.
- Remove dust with tack cloth.
- Test stain absorption on scrap.
Thinning Stain for Rollers: When and How
When your stain feels too thick to spread evenly with a roller, you’ll need to thin it slightly so it lays down smoothly without puddling or shedding fibers. You’ll test stain consistency, add solvent sparingly, and stir. Keep roller maintenance in mind—clean immediately and don’t overwork nap.
| Action | Result |
|---|---|
| Test | Even lay |
| Add solvent | Flow improved |
| Stir | Uniform |
| Clean roller | Longevity |
| Small batches | Control |
Correct Rolling Technique for Even Coverage
Start by loading your roller evenly—dip it, roll it in the tray’s well, then roll along the tray’s slope to remove excess so you don’t puddle stain on the floor.
Load the roller evenly—dip, roll in the tray, then along the slope to remove excess and avoid puddles.
Use consistent rolling techniques and coverage patterns:
- Roll in an M or W.
- Feather edges.
- Overlap passes 50%.
- Maintain wet edge.
How to Back-Brush and Why It Matters
Brush through the fresh stain with a clean brush right after rolling so the color sinks into the wood and any roller texture disappears. You’ll improve penetration and smoothness; back brushing benefits include even absorption and reduced lap marks. Use consistent strokes as one of the best application techniques.
| Step | Tool | Result |
|---|---|---|
| Roll | Roller | Coverage |
| Brush | Natural brush | Penetration |
| Finish | Light pass | Smoothness |
Tipping Explained: What It Is and When to Use It
Tipping is the final light pass you make with the edge of a dry brush or roller to smooth out lap marks and raise any missed grain.
You’ll use it when the stain’s tack is low enough to blend without lifting product—usually right after initial coverage but before it fully sets.
Learn the correct angle and pressure so you can tip effectively without overworking the surface.
When To Tip
If you want crisp, even edges after rolling stain, you’ll need to know when to tip: it’s the moment you smooth out excess stain and blend lap marks before it begins to set.
Tip while stain’s still wet to maximize tipping techniques and roller advantages. Watch sheen change, test a corner, and avoid overlap.
- Wet
- Slightly tacky
- No skinning
- Even sheen
How To Tip
Smooth the stain with light, deliberate strokes to blend roller marks and remove excess—that’s tipping.
You’ll follow the roller with a lightly loaded brush or a clean, dry roller, working along the grain.
Use the tipping technique immediately after rolling, keeping strokes short and even.
Practice improves rolling finesse; stop when sheen evens and no puddles remain.
How to Avoid Lap Marks and Overlap Problems
Because lap marks show where wet and dry edges meet, you need to work wet‑into‑wet and keep a consistent roller pressure and pace.
Because lap marks reveal wet and dry edges, work wet‑into‑wet with steady roller pressure and pace.
Use these lap mark prevention overlap techniques:
- Start at a corner and roll outward.
- Maintain even pressure.
- Keep a wet edge moving.
- Blend overlaps while stain stays wet.
Stay steady and finish each section before it dries.
Preventing Puddles, Drips, and Runs With a Roller
One simple rule prevents most puddles, drips, and runs: don’t overload the roller.
Work with light, even passes, roll off excess on the tray’s slope, and reload sparingly.
Stop and smooth any pooling immediately with gentle passes.
For puddle prevention and drip control, monitor roller saturation, keep a consistent rhythm, and use shorter strokes near seams to avoid excess build-up.
Reaching Edges, Joints, and Tight Spots After Rolling
After you’ve rolled the main surfaces without overloading the nap, tackle edges, joints, and tight spots with the right tools and a steady hand.
Use brush and mini-roller for roller precision and detail application. Focus on edge techniques, joint coverage, tight areas, and corner strategies.
Steps:
- Cut in with angled brush
- Use mini-roller
- Touch up gaps
- Smooth shifts
Using Rollers on Vertical Surfaces Safely
Roll vertical surfaces in manageable sections so the roller stays evenly loaded and you can control drips and runs. Keep a light, steady pressure, work top-to-bottom, and check for sagging. Prioritize roller safety with drop cloths and a stable ladder; don’t overreach.
| Risk | Prevention |
|---|---|
| Drips | Light pressure |
| Falls | Stable ladder |
Combining Roller, Brush, and Sprayer Effectively
Before you start, plan the prep sequence so you know whether you’ll spray, roll, or brush first and how you’ll protect adjacent areas.
Use the sprayer for large, even coverage, the roller for fast lay-in on flats, and a brush for edges and tight spots, switching tools as needed to maintain a wet edge.
Blend and feather where tool strokes meet so you won’t see lap marks or brush lines.
Prep Sequence Planning
When you plan the prep sequence, think through how a sprayer, brush, and roller will work together so you’re not redoing work or chasing drips.
You’ll sequence tasks to optimize stain application and roller benefits:
- Mask and sand surfaces
- Spray large areas first
- Back-roll for even penetration
- Touch up edges with a brush
Follow drying times between steps.
Tool Combination Techniques
Coordinate your tools so each one does what it does best: spray for speed on open expanses, roll for consistent penetration on flats, and brush for crisp edges and detail.
You’ll plan sequences: spray broad areas, follow with roller application techniques to work stain into grain, then finish with a brush for corners and grooves.
This tool synergy saves time and improves coverage.
Blending And Feathering
After you’ve used each tool where it performs best, you’ll need to blend their effects so the finish reads as one surface.
Use blending techniques and feathering methods to hide joins. Work quickly while stain is wet, keeping edges soft.
Tips:
- Light roller pass
- Brush feather into overlap
- Sprayer mist for evenness
- Sand lightly between coats
Drying Times and Recoat Windows After Rolling Stain
Because drying depends on temperature, humidity, and the type of stain you used, you should plan recoat timing rather than guessing—and check the manufacturer’s label for specific windows.
After rolling, monitor drying conditions closely: touch tests and visual cues tell you when stain forms a film.
Typical recoat timing ranges from a few hours for thin stains to 24+ hours for oil-based products; don’t rush.
How Weather Affects Rolling and Drying
Weather plays a big role in how your rolled stain behaves—temperature, humidity, wind, and direct sunlight all change drying speed, penetration, and final appearance.
You’ll watch humidity impact and moisture levels closely, use temperature considerations for timing, and avoid strong wind effects or harsh sunlight exposure.
Plan around seasonal timing.
- Check forecast
- Pick ideal temp
- Avoid wind
- Manage humidity
Cleaning Roller Covers After Staining
Rinse your roller cover immediately after staining to prevent the stain from soaking in and hardening; doing this while it’s still wet makes cleaning faster and preserves the nap.
Work stain out with a brush under running water, then use appropriate cleaning solutions for oil- or water-based stains.
Squeeze excess moisture, reshape the cover, and let it air dry completely as part of routine roller cover maintenance.
Storing and Reusing Rollers Between Stain Colors
Once your roller covers are clean and dry, you’ll want a simple system for storing them so you can reuse the right one for each stain color.
Label bags or bins for roller storage, note color, and seal to prevent dust. For quick color change, keep a spare wrapped roller ready.
- Label
- Bag
- Date
- Reserve
Troubleshooting Blotchy or Uneven Stain
If your stain looks blotchy or uneven, check for missed spots, inconsistent roller pressure, and surface contamination before adding more product.
You should evaluate stain absorption across the wood; patchy areas often need light sanding and re-cleaning.
Adjust your application techniques—use even pressure, work wet edges, and maintain a wet film.
Test a small area before continuing to guarantee uniform results.
Fixing Tacky or Slow-Drying Stain Problems
When stain remains tacky or dries slowly, you’ll want to identify and correct the underlying cause before applying more product or sealer.
Check humidity, ventilation, and temperature; remove excess stain; wait appropriate dry times; and test a small area.
Use these tacky stain solutions and slow drying fixes:
- Improve airflow
- Thin heavy coats
- Wipe excess stain
- Allow longer cure time
When to Switch to a Brush or Sprayer Mid-Project
If your roller is leaving noticeable streaks, switch to a brush to smooth and blend those areas before the stain dries.
You’ll also want a brush for tight detail work near trim and corners where the roller can’t reach.
For large surfaces that need to be done quickly, grab a sprayer to get even, fast coverage.
When Roller Leaves Streaks
Although rollers save time on large surfaces, they can sometimes leave visible streaks or uneven coverage that undermine the finish.
If you see streaks despite proper roller technique and streak reduction efforts, switch tools. Consider:
- Brush for edges
- Sprayer for uniform coats
- Thin additional coats
- Blend wet edges immediately
Act quickly to prevent set-in lines and uneven sheen.
Detail Work Near Trim
Because trim and corners demand precision, switch from a roller to a brush or sprayer as soon as you hit narrow edges, molding, or tight gaps where the roller can’t reach cleanly.
Use a small angled brush for detail precision and reserve a sprayer for delicate profiles if you’re confident with masking.
Prioritize trim protection with tape and drop cloths to avoid blotches and overlap errors.
Fast Coverage Needs Sprayer
Once you’ve handled the edges and tight spots with a brush or sprayer, you’ll notice areas—large decking boards, expansive siding, or long fence runs—where a roller or small brush will slow you down and risk uneven coverage.
You should switch to a sprayer for fast application and efficient coverage when you need:
- Speed
- Uniform finish
- Less lap marks
- Reduced effort
Cost and Time Comparison: Roller vs. Brush vs. Sprayer
When you’re weighing roller, brush, and sprayer options, think about both upfront costs and the time each method will actually save you; rollers strike a balance with low equipment expense and moderate speed, brushes cost little but take the most time and effort, and sprayers run higher on price but dramatically cut application time for large or complex jobs.
| Method | Cost & Cleanup | Speed & Skill |
|---|---|---|
| Roller | cost efficiency, moderate cleanup process | |
| Brush | low cost, high labor intensity, finish quality | |
| Sprayer | higher cost, less material waste, project scope, time management, skill level |
Safety Gear, Ventilation, and Environmental Tips
If you’re staining with a roller, wear proper PPE: chemical-resistant gloves, eye protection, and a respirator rated for organic vapors if you’re working with solvent-based stains.
Confirm ventilation, keep kids/pets away, and handle rags safely. Follow safety precautions and environmental considerations when disposing of waste.
- Open windows
- Use fans
- Seal rags
- Recycle cans
Pro Tips for a Professional-Looking Stained Finish
A few simple techniques will make your rolled stain look like it was done by a pro: sand progressively, tack cloth between coats, and wipe excess immediately to control absorption.
Work with the grain, maintain a wet edge, and thin coats improve stain application.
Finish with proper sealer and follow cure times to boost finish durability.
Inspect and touch up seams for a seamless result.
Frequently Asked Questions
Can You Use a Roller on Previously Painted/Stained Wood Without Stripping First?
Yes — you can, but you’ll need to sand glossy surfaces and clean thoroughly first. For best results, follow roller application tips, test adhesion, and consider stain absorption factors on old finishes to guarantee even coverage and bonding.
Will Rollers Work With Colored or Pigmented Wood Conditioners?
About 70% of pros report faster prep when using rollers. Yes, you can use rollers with colored or pigmented wood conditioners. You’ll gain roller advantages for even application techniques, though light brushing finishes pores for best absorption.
Can You Roller-Stain Over Filler or Wood Putty Effectively?
Yes — you can roller-stain over filler or wood putty, but you’ll need to test first: filler absorption varies, and roller texture can highlight seams, so sand smooth, use compatible filler, and apply thin, even coats for best results.
How Do Rollers Perform on Curved or Contoured Wood Surfaces?
Like running your hand over river-worn wood, you’ll find rollers struggle on curves; use a careful roller technique, follow with a brush to coax stain absorption into contours, and you’ll avoid blotches and missed grooves.
Are Disposable Roller Covers Better for Solvent-Based Stains?
Yes — you’ll often prefer disposable roller covers for solvent-based stains: disposable roller benefits include easy cleanup, no long-term solvent damage, and better solvent stain compatibility, letting you work quickly and discard contaminated covers afterward.
Conclusion
You can use a roller for stain when you want speed and even coverage, but remember it’s not a cure-all — sometimes detail work or heavy-grain wood needs a brush or sprayer. Choose stain type and wood wisely, watch for lap marks, and switch tools if absorption or finish control becomes finicky. With safety gear and patience, your project will whisper “professionally done” rather than shout “home job,” leaving a quietly confident finish.
