
How to Fill Cracks Before Painting for a Perfectly Smooth Wall
You can get a perfectly smooth wall by first identifying the crack type, cleaning and opening it slightly, then choosing the right filler—spackling for hairlines, joint compound with tape for seams, and patching or epoxy for deep cracks. Apply in thin layers, let each dry, sand smooth, prime with a stain-blocking primer, and inspect under good light for feathered edges before painting. Follow these steps and tips below to learn how to handle each crack and avoid common mistakes.
How to Fill Cracks Before Painting for a Perfectly Smooth Wall Quick Answer
For a fast, reliable fix, you’ll clean the crack, apply a ready-mixed spackling compound with a putty knife, then sand smooth once it’s dry.
Use a thin layer for hairline cracks and a couple of passes for wider gaps, feathering the edges to blend with the wall.
Prime the repaired area before painting to guarantee an even finish.
One-paragraph direct answer summarizing the fastest reliable method
When you need a fast, reliable fix before painting, clean the crack, widen it slightly with a putty knife, then apply a premixed, fast-drying spackling compound or acrylic caulk for hairline cracks; press it in, smooth with a damp putty knife, let it dry, sand flush, and prime the spot—this sequence gives a smooth surface ready for paint in the least time without sacrificing durability.
Follow these steps for how to fill cracks before painting efficiently.
Basic Understanding What Causes Wall Cracks and Why Filling Matters
You’ll run into different crack types—hairline, settlement, drywall seams, and plaster—and each needs a slightly different fix.
Cracks can ruin paint adhesion and show through finishes if you don’t fill them properly.
Learn to spot when cracks are just cosmetic versus when they hint at structural trouble so you know how thorough your repairs must be.
Common types of cracks (hairline, settlement, drywall seams, plaster)
Cracks come in a few distinct types, and knowing which one you’re looking at helps you choose the right repair.
Hairline cracks are thin, surface-only lines.
Settlement cracks are wider, often near foundations or corners.
Drywall seam cracks follow taped joints.
Plaster cracks can be hairline or jagged where lath separates.
Identify type, then pick appropriate filler and method.
How cracks affect paint adhesion and finish
Because paint needs a stable, continuous surface to stick to, even small openings can undermine adhesion and spoil the finish.
You’ll get peeling, blistering, and visible seams where paint can’t bridge gaps. Cracks also trap dust and moisture, causing uneven sheen and accelerated wear.
Properly filling and sanding restores a uniform substrate so your paint lays smooth and lasts longer.
When a crack indicates structural issues vs. cosmetic issues
If a crack runs in a straight, narrow line and stays the same width, it’s usually cosmetic and you can fill it yourself; but if it widens over time, follows stair-step patterns along mortar joints, or causes doors and windows to stick, you may be looking at a structural issue that needs a professional evaluation.
- Hairline, stable cracks: cosmetic
- Wide, growing gaps: structural
- Stair-step in brick: structural
- Misaligned doors/windows: structural
- Consult an engineer for doubt
Materials and Tools You Need Before You Start
Before you start filling cracks, you’ll want the right fillers, tools, and safety supplies on hand so the job goes smoothly.
Here are the essentials to gather before you begin:
- Spackling compound, joint compound, or epoxy filler
- Putty knife, sanding block, utility knife, caulk gun
- Primer and paint
- Safety gear (gloves, mask, eye protection)
- Surface prep supplies (cleaner, scraper, drop cloth)
Recommended fillers (spackling compound, joint compound, epoxy filler)
When you’re prepping cracks for paint, choosing the right filler matters: spackling compound handles small hairline gaps quickly, joint compound works well for larger interior seams and skim coats, and epoxy fillers give the strongest, most durable bond for structural or exterior repairs.
Pick spackle for quick indoor fixes, joint compound for broader smoothing, and epoxy for deep, load-bearing or outdoor cracks that need lasting strength.
Tools (putty knife, sanding block, utility knife, caulk gun, primer, paint)
Gather the right tools so you can tackle cracks cleanly and fast: a sturdy putty knife for applying filler, a sanding block to smooth cured compound, a sharp utility knife for widening or cleaning out gaps, a caulk gun for sealants, plus primer and paint to finish the repair.
Keep a range of knife sizes, medium-grit sanding blocks, and matching primer/paint for seamless blending.
Safety gear and surface preparation supplies
You’ll want basic protective gear and prepping supplies on hand to keep you safe and guarantee the surface is ready for filler and paint.
Wear goggles, a dust mask or respirator, gloves, and old clothes.
Gather drop cloths, painter’s tape, a stiff brush, vacuum, rubbing alcohol or TSP substitute, clean rags, and a small heat gun or hair dryer for stubborn damp spots.
Step-by-Step Process to Fill Cracks for a Smooth Paintable Surface
Start by inspecting each crack to classify its type and size so you know what repair it needs.
Clean and, if necessary, widen the crack to a V-groove, removing loose material, dust, and grease before applying the appropriate filler—spackling for small cracks, joint compound for seams, and epoxy for deep or structural damage.
Use thin layers, allowing proper drying time between coats to build a smooth, paintable surface.
Inspect and classify cracks
Before you grab a filler, walk the surface and note each crack’s length, width, depth, and pattern so you can choose the right repair method.
Then classify cracks to plan repairs:
- Hairline: very thin, surface only
- Fine: under 1/8″, shallow
- Structural: wide, may need reinforcement
- Spiderweb: branching pattern
- Settling: diagonal, repeat movement
Clean and prepare the crack (remove loose material, dust, grease)
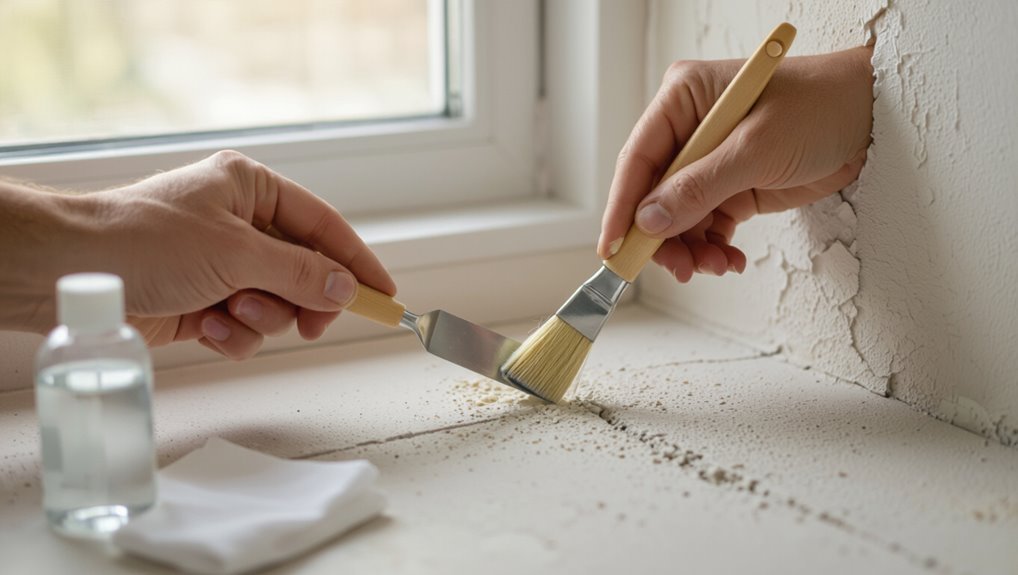
1 minute of careful prep makes the repair last: clear out loose material, dust, and grease so the filler bonds well.
Use a stiff brush or vacuum to remove crumbling plaster, paint flakes, and dust.
Wipe the area with a damp cloth or mild detergent to eliminate grease, then let it fully dry.
Clean edges guarantee reliable adhesion and a smooth finish.
Widen or V-groove for better adhesion when necessary
If the crack is hairline or has loose edges, you’ll often need to widen or V-groove it so filler can key in and adhere properly.
Use a utility knife or masonry chisel to open the crack into a uniform V shape, removing weak material.
Work to a consistent depth and clean debris. This creates a better bonding surface for the filler.
Apply appropriate filler by crack type (spackling for small, joint compound for seams, epoxy for deep/structural)
Choose the right filler for the crack’s size and function so your repair will hold and finish smooth.
Pick spackling for hairline chips, joint compound for drywall seams, and epoxy for deep or structural gaps. Match filler to substrate and drying needs, then apply and tool flush.
- Spackling: small, quick fixes
- Joint compound: seams, tape
- Epoxy: deep, load-bearing
- Sandable: finish smooth
- Paintable: after cure
Layering technique and drying times between coats
Once you’ve applied the right filler and tooled it flush, build the repair in thin, controlled layers so each coat bonds and cures properly.
Wait manufacturer-recommended times; don’t rush. Use light coats to avoid shrinkage and cracking.
- Apply 1–2 mm per pass
- Let each layer dry fully
- Check tack before next coat
- Reserve deep fills for multiple passes
- Follow temperature/humidity guidance
Sanding and feathering edges for seamless transition
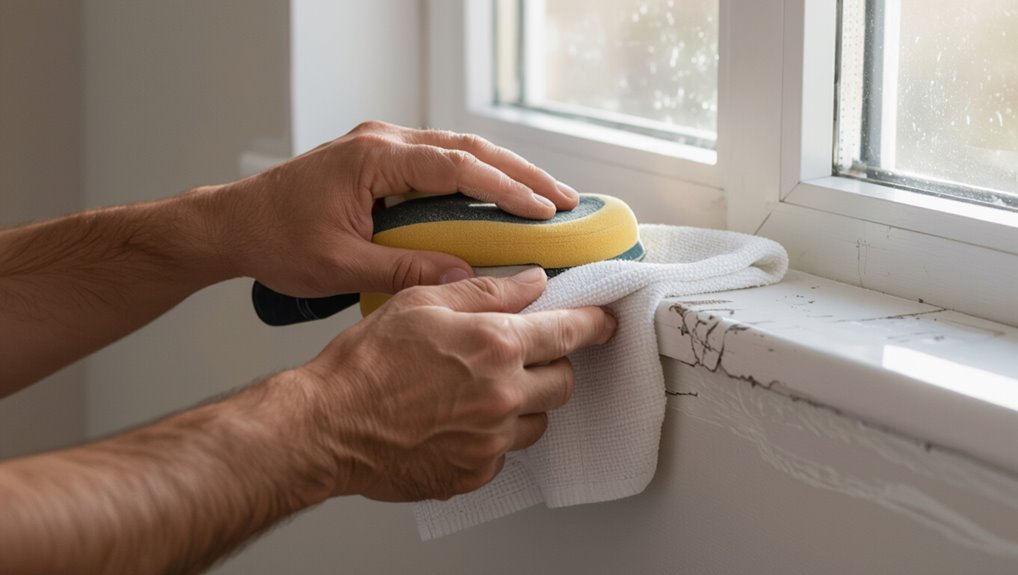
After your filler has fully cured, sand the repair so the patch blends smoothly into the surrounding surface; work from coarse to fine grit and feather the edges until there’s no visible ridge or abrupt change in contour.
Use a sanding block for flatness, sand lightly beyond the patch, wipe dust with a damp cloth, inspect under angled light, and repeat until shifts vanish.
Prime the repaired area and why priming matters
Because the repair compound soaks and seals differently than the surrounding wall, you should prime the patched area before painting to verify even adhesion and color uniformity.
Use a stain-blocking, water-based or oil-based primer suited to your compound. Apply thin, even coats, let dry fully, and lightly sand between coats if needed.
Proper priming prevents blotchy finish and guarantees paint bonds uniformly.
Final inspection before painting
Before you pick up a paintbrush, give the patched area a careful final inspection to confirm the surface is smooth, clean, and properly primed.
Run your hand lightly to feel for ridges or dust, check edges for feathering, and use good light to spot imperfections.
Touch up any flaws with fine sandpaper or filler, then wipe clean before painting.
Choosing the Right Repair Method by Crack Type
You’ll pick different tools and materials depending on the crack type, so you’ll want a quick checklist to guide your repair. Below is a simple table to help you match crack scenarios to the right approach. Use it as a starting point before you choose filler, tape, or a more involved fix.
| Crack Type | Typical Cause | Recommended First Step |
|---|---|---|
| Hairline / surface cracks | Shrinkage or minor settling | Clean and apply thin spackling |
| Corners and seams | Movement or unsupported joints | Use joint tape and flexible compound |
| Deep or recurring cracks | Structural movement or old damage | Open, reinforce, and use patching compound |
| Plaster vs. drywall | Material difference affects adhesion | Match filler to substrate and prime |
Hairline and surface cracks
When you’re dealing with hairline and other shallow surface cracks, you’ll usually use lightweight fillers or paintable caulk rather than heavy patching compounds; these cracks rarely need deep repair and respond best to methods that flex with the surface.
Clean the area, widen slightly if needed, apply a thin bead of caulk or spackle, smooth with a damp finger or putty knife, sand lightly, then prime and paint.
Cracks at corners and seams
Cracks that appear where walls meet—at outside corners, inside corners, and along joints between drywall sheets—need a different approach than surface fissures because these areas move and often hide gaps behind trim or tape; you should pick a repair method that restores strength and allows flexibility.
Use joint compound with paper or fiberglass tape on seams, corner bead repair for outside corners, and flexible caulk where trim meets drywall.
Deep or recurring cracks
Corners and seams often need reinforcement because they move, but deep or recurring cracks demand a different strategy: you should diagnose why the crack keeps coming back and pick a repair that addresses movement, substrate failure, or structural issues.
Probe for moisture, loose lath, or settling. Use flexible fillers, backing rods, stitching, or consult a pro for structural fixes before priming and painting.
Cracks in plaster vs. drywall
Although both look similar at a glance, plaster and drywall behave differently and need different fixes, so you should identify the substrate before you start repairing.
Plaster often cracks from structural movement; use bonding agent, plaster repair, and hairline fill.
Drywall cracks usually stem from joint tape failure; remove loose tape, apply joint compound, embed new tape, sand, and finish for a seamless result.
Common Mistakes and How to Avoid Them
Don’t overfill or underfill cracks, and make sure you use a filler that’s matched to the crack type.
Don’t skip or skimp on primer, sand gently and evenly, and avoid aggressive sanding that creates dips.
Also check for moisture or structural problems first so you don’t fix the same crack repeatedly.
Overfilling or underfilling
If you overfill a crack, the patch will bulge, sand poorly, and show through your paint; if you underfill it, the repair will sink and reappear after drying.
Aim for a slight concave finish so material settles flush. Apply in thin layers, let each cure fully, then sand level.
Test with your fingertip to confirm smoothness before final sanding and painting.
Skipping primer or improper priming
Frequently, painters skip primer or apply it wrong, then wonder why patches show through or paint won’t adhere.
You should clean and dry patched areas, choose a primer compatible with filler and topcoat, and feather edges for uniform absorption.
Apply the recommended coat count and let it cure fully.
Proper priming locks filler, equalizes porosity, and guarantees smooth, lasting paint coverage.
Sanding too aggressively or unevenly
Sand lightly and evenly when smoothing patchwork—sanding too hard or in uneven strokes can gouge filler, thin surrounding paint, and leave ridges that show through the finish.
Use fine-grit sandpaper, a sanding block, and steady pressure. Check from multiple angles, feather edges into existing paint, and wipe dust often.
Stop as soon as surfaces feel uniformly smooth to the touch.
Using incorrect filler for crack type
After you’ve smoothed the patch and checked for feathered edges, pick a filler that matches the crack’s cause and location—using the wrong product is a common mistake that will make repairs fail or telegraph through paint.
Use flexible fillers for hairline or movement cracks, gypsum-based for interior plaster, and exterior-grade caulk for outside joints.
Test adhesion and cure before priming and painting.
Ignoring underlying moisture or structural causes
If you skip diagnosing what’s driving a crack—like a leak, rising damp, or structural movement—you’ll just be masking a symptom and the problem will come back.
You should inspect for moisture, plumbing faults, or settling before filling. Fix the root cause, allow full drying, then use appropriate repair methods.
Otherwise patches will fail, paint will blister, and you’ll repeat costly repairs.
Best Practices and Pro Tips for a Professional Finish
To get a pro finish, you’ll want to control conditions, match textures, and use a few smart tricks so repairs blend seamlessly.
Here are quick, actionable points to keep in mind:
- Check temperature and humidity before you start.
- Match the wall texture (stipple, knockdown, etc.) for a seamless repair.
- Use tool hacks—angled putty knives, mixing paddles, and sanding blocks—for smoother application.
- Employ time-saving methods like working in zones and using larger batches of compound.
- Let each layer fully cure to avoid rework.
Temperature and humidity considerations
Because curing times and adhesion change with the air, you should plan crack repairs when temperature and humidity fall within the filler manufacturer’s recommended range; working in conditions that are too cold, hot, dry, or humid can cause shrinkage, poor bonding, blistering, or extended drying that delays sanding and painting.
Monitor conditions, use heaters or dehumidifiers as needed, and wait for full cure before priming and painting.
Matching texture for textured walls
When you’re repairing cracks on a textured wall, matching the surrounding texture is as important as getting the filler smooth — otherwise the patch will stand out even after paint.
Assess the existing pattern, practice on scrap, apply thin layers, and recreate the texture with dabbing, stippling, or rolling techniques.
Feather edges to blend, let cure, then prime before painting.
Tools hacks for smoother application
1 simple trick will change how cleanly you apply filler: keep your tools sharp, clean, and the right size for the crack.
Use narrow knives for hairline gaps and wider scrapers for larger seams.
Keep a damp rag to wipe edges, sand with a fine block, and rotate blades to avoid drag.
Replace nicked tools immediately for flawless, even passes.
Time-saving tips for large areas
Tackle large areas efficiently by breaking the surface into manageable sections and using the right tools—wide blades, a hawk, and an extendable sander—to cover more ground with fewer passes.
Plan work in rows, mix compound for continuous use, keep spare buckets ready, and use a drywall cart or platform to reduce trips.
Work wet-sand lightly and inspect under good light to speed finishing.
When to Call a Professional vs. DIY
You can handle small surface cracks yourself, but you should call a pro if signs point to structural issues or the job will eat up too much time or money.
Below are quick checkpoints to help you decide:
- Visible foundation movement or large, widening cracks
- Repeated repairs that keep failing
- Cracks near load-bearing walls or windows/doors
- Limited time or lack of tools/skill for proper repair
- Repair costs that approach professional estimates
Signs you need structural repair or specialist assessment
When cracks look like more than surface blemishes—wider than a pencil, running diagonally, stepping along a foundation, or accompanied by doors and windows that stick—you should consider a professional assessment rather than a DIY patch.
Also call a structural specialist if you see sagging floors, bulging walls, new moisture around cracks, hairline cracks multiplying rapidly, or visible foundation gaps; these suggest underlying movement or failure.
Cost and time considerations
Although small hairline or paint-surface cracks can usually be fixed over a weekend with basic materials, larger or recurring cracks often demand more time, specialized tools, and expert judgment.
Frequently Asked Questions (FAQ)
You probably have a few quick questions about timing, materials, and techniques before you start.
You’ll learn how long filler should dry before sanding, whether primer is needed over caulk or filler, and how to stop cracks from returning.
I’ll also cover the best fillers for exterior walls and whether the same methods work on textured surfaces.
How long should filler dry before sanding?
How long should filler dry before sanding? It depends on depth and product, but typically wait 30 minutes to 24 hours.
Small surface patches often sand in under an hour; deeper fills need several hours or overnight.
Check manufacturer instructions and touch-test for firmness.
Don’t rush — sanding soft filler tears; fully cured filler sands cleanly and holds paint better.
Can I paint over caulk or filler without primer?
Can you paint directly over caulk or filler without primer?
Sometimes you can, but it depends on the product and surface.
Latex paint often bonds to cured acrylic caulk and water-based filler; oil-based surfaces or silicone caulk usually need a primer or special paint.
Always check manufacturer instructions, test a small area, and verify the filler is fully cured and sanded for best adhesion and finish.
How to stop cracks from coming back?
If you want cracks to stay fixed, address the root causes before filling: remove loose material, use the right filler or flexible caulk for the substrate, reinforce wide or moving gaps with tape or backer rod, and prime and paint with compatible products once everything’s fully cured.
Monitor moisture and structural movement, repair underlying issues, use flexible finishes on joints, and avoid reloading stress on repaired areas.
What filler is best for exterior wall cracks?
Choosing the right filler for exterior wall cracks depends on the crack size, wall material, and movement—use elastomeric or polyurethane sealants for active or wide cracks,
cement-based patching compounds for static masonry cracks, and acrylic or latex-based fillers for small, hairline gaps on painted surfaces.
Match filler flexibility and adhesion to substrate, follow manufacturer curing times, and prime appropriately before repainting for lasting results.
Can I use the same method on textured walls?
You can use many of the same repair steps on textured walls, but you’ll need to adapt your approach to preserve or recreate the texture.
Match filler type to wall material, apply in thin layers, and texture the final wet layer with a sponge, brush, or spray to mimic the existing pattern.
Sand lightly only where necessary, then prime before painting.
Quick Checklist Before Painting
Before you start painting, make a quick checklist so you won’t miss any prep steps.
Use this simple list to confirm inspections, gather materials, and set a realistic timeline. Keep it handy and check each item off as you go:
- Inspect cracks and surfaces for damage
- Confirm filler type and sanding supplies
- Gather tools: putty knife, sandpaper, primer, tape
- Plan a drying and curing timeline between steps
- Set a start date and buffer for unexpected fixes
Inspection checklist
Wondering what to look for before you start filling cracks? Inspect for hairline versus structural cracks, loose plaster, peeling paint, damp spots, and mold.
Tap surfaces to find hollow areas, note crack length and depth, and mark recurring problem zones.
Check trim, corners, and seams for gaps. Document findings so you can prioritize repairs and choose appropriate fillers later.
Materials and tools checklist
1 essential checklist will keep your repair work efficient: gather the right fillers, applicators, and safety gear before you open a paint can.
You’ll need spackling compound or joint compound, a tube of caulk, putty knives (various sizes), sanding block or sandpaper (120–220 grit), a utility knife, vacuum or brush, painter’s tape, drop cloths, gloves, eye protection, and a dust mask.
Pre-painting timeline
Now that you’ve gathered your fillers, tools, and safety gear, set a simple timeline to keep your repair and paint work on track.
Plan:
- cleaning and sanding (30–60 minutes),
- filler application (per crack, 10–20 minutes),
- drying time (check product—usually 1–24 hours),
- sanding and touch-ups (15–45 minutes),
- priming and paint (allow recommended cure between coats).
Adjust for room conditions.
Conclusion and Call to Action
You’ve now got the key steps to clean, fill, sand, and prime for a perfectly smooth wall.
If you’re ready, start the repairs using the checklist above or contact a pro if the job feels beyond your tools or time.
Taking action now will save you time and give you a better final paint finish.
Summary of key steps for a perfectly smooth wall
Wrap up the prep by following these core steps: clean and widen the crack, remove loose debris, apply the right filler in thin layers, sand smooth once dry, prime the repair, and finish with your chosen paint.
Inspect the area, blend edges, and wipe dust. Let each layer cure fully, sand between coats as needed, and match paint sheen for an invisible repair.
Encourage reader to start the repair or contact a pro
With the prep steps complete, you’re ready to tackle the repair or call in a pro if the job feels beyond your comfort level.
Start small—patch one crack, sand, prime, and assess results.
If cracks are extensive, structural, or you’re unsure, get a professional quote.
Taking action now prevents worse damage and guarantees your paint job looks seamless.
