How to Paint High Exterior Walls Safely and Without a Pro
You can paint high exterior walls yourself if you plan carefully, use proper fall protection, and pick the right access method—ladder, scaffold, or lift—based on height and time. Inspect and repair surfaces, pressure-wash and prime, then paint from top down with suitable tools and PPE. Mark a clear work zone, assign roles, and check weather and permits. Use rented gear to save money, but call a pro for complex repairs or risky heights; more tips follow.
How to Paint High Exterior Walls Safely and Without a Pro (Quick Answer)
You can tackle high exterior walls yourself by following a clear sequence: plan the job, gather proper gear, set up stable access, and prep surfaces.
Wear fall protection, eye and respiratory gear, and use a scaffold or extension pole instead of risky ladders.
Move methodically, work with a spotter, and stop if conditions feel unsafe.
Quick summary of steps and safety essentials
When tackling high exterior walls yourself, plan the job, secure safe access, and follow protective measures so you can work efficiently and avoid accidents.
You’ll learn how to paint high exterior walls safely: prep surfaces, pick scaffolding or tall ladders, and use PPE.
- Prep and plan
- Safe access setup
- Protective gear and technique
Basic Understanding What Painting High Exterior Walls Involves
Painting high exterior walls is different from lower work because you’ll need taller access equipment, heavier gear, and techniques that account for wind and reach.
You should know the risks—falls, equipment failure, and local safety or permit rules—and follow them closely.
If the height, complexity, or legal requirements overwhelm you, hire a pro; otherwise plan carefully and use the right gear for a safe DIY job.
Differences between low and high exterior wall painting
Although both involve applying paint to exterior surfaces, high wall jobs demand different planning, equipment, and safety measures than low-height projects.
You’ll need longer ladders or lifts, heavier gear, and extended prep for access and weather. Coverage techniques, paint quantities, and drying times differ.
Work pace changes — you’ll move slower, plan lifts, and stage materials to minimize trips and fatigue.
Risks and legal/safety considerations
Moving from low to high exterior work brings higher stakes: falls, falling objects, and equipment failures pose greater risk at height, and you’ll face stricter legal and safety obligations.
You must follow local regulations, use inspected fall protection, secure tools, and maintain clear exclusion zones.
Document training and permits, check insurance implications, and report hazards promptly to reduce liability and injury.
When to consider hiring a pro vs DIY
Anyone tackling high exterior walls should weigh the complexity, cost, and risk before deciding whether to DIY or hire a pro.
Consider your experience with ladders, scaffolding, and height work; budget for equipment and time; and assess strict safety or permit requirements.
Hire a pro if conditions are hazardous, surfaces need repair, or you want guaranteed results; DIY if you’re skilled, equipped, and confident.
Planning and Preparation
Before you start, survey the job: note wall height, surface type, access points, and any permits or neighborhood rules that apply.
Check the weather window, pick exterior-grade paint and the right tools, and calculate how much paint you’ll need.
Finally, budget for equipment rental and any unexpected costs so you’re ready to work safely and efficiently.
Assessing the job scope: height, surface type, and access points
Because working on high exterior walls raises unique risks and logistical challenges, start by measuring the height, identifying the surface material, and mapping all access points so you know exactly what equipment and safety measures you’ll need.
Then evaluate condition, plan access, and inventory tools.
- Measure verticals and estimate reach.
- Note surface (brick, stucco, wood).
- Identify ladders, scaffolds, or lifts.
Required permits, neighborhood rules, and weather windows
After you’ve measured heights and mapped access, check what permits and neighborhood rules apply and pick reliable weather windows so your work stays legal and safe.
Contact your city for permits, HOA for paint or scaffold restrictions, and note noise or timing limits.
Plan around multi-day dry spells, low wind, and moderate temperatures; document approvals and reschedule if forecasts threaten safety or compliance.
Choosing the right paint and materials for exterior high walls
Choosing the right paint and materials for high exterior walls starts with matching product performance to the job: pick high-quality, exterior-grade acrylic latex or elastomeric paints for durability and flexibility, a primer formulated for your substrate, and rust- and weather-resistant metals for fasteners and scaffolding connections.
You’ll also select brushes, rollers, sealants, and PPE suited to height and exposure.
- Weatherproof coatings
- Corrosion-resistant hardware
- High-adhesion primers
Calculating paint quantity and budgeting for equipment rental
Start by measuring the wall areas you’ll paint—length times height for each section—and subtract openings like windows and doors to get the true square footage.
That number tells you how much paint and how many coats you’ll need based on the product’s coverage rate, while also guiding rental choices for lifts, scaffolds, and extra tools so you can budget time and costs accurately.
Calculate gallons, factor primer, waste, delivery, rental daily rates, fuel, and contingency.
Safety Equipment and Setup
Before you start, make a quick PPE checklist—gloves, eye protection, dust mask or respirator, and sturdy footwear—and inspect your fall protection gear like harnesses, anchors, and lanyards.
Choose the right access method (ladder, scaffold, or aerial lift) based on height, surface, and duration, and follow safe setup rules for whichever you pick.
Finally, cordon off the area, post clear signage, and keep a tidy work zone to protect yourself and passersby.
Personal protective equipment (PPE) checklist
What protective gear do you need to stay safe while painting high exterior walls?
You should wear PPE that protects eyes, lungs, skin, and footing. Choose durable, breathable items and inspect them before use.
- NIOSH-rated respirator and safety goggles
- Chemical-resistant gloves and long sleeves
- Slip-resistant boots and a hard hat
Fall protection systems: harnesses, anchors, and lanyards
When you’re working on high exterior walls, reliable fall protection systems—properly fitted harnesses, correctly rated anchors, and shock-absorbing lanyards—are your last line of defense against serious injury.
Inspect each component for wear, confirm anchor load ratings meet the job’s requirements, and guarantee your harness is adjusted snugly so the D-ring sits between your shoulder blades.
- Verify anchor certification and placement.
- Fit and double-check harness buckles.
- Use shock-absorbing lanyards and replace after any arrest.
Safe ladder use vs scaffolding vs aerial lifts quick decision guide
Choosing between a ladder, scaffolding, or an aerial lift comes down to height, task duration, reach, and the level of stability you need; pick the simplest option that keeps you safe and efficient. You’ll assess duration, load, stability, access, and training—choose ladder for short, scaffolding for extended, aerial lift for complex reach or heavy gear.
| Option | Best use |
|---|---|
| Ladder | Short, simple jobs |
| Scaffolding | Long tasks, team work |
| Aerial lift | High reach, heavy tools |
| Training | Required for lifts |
Setting up a safe work zone and signage
Start by marking a clear work zone that keeps bystanders and traffic at a safe distance—use cones, barrier tape, or portable fencing to create a visible perimeter, and place warning signs at every approach so people know to stay back.
Keep tools, paint, and ladders inside the zone, lay non-slip mats, secure drop cloths, and use high-visibility vests to alert helpers and passersby.
Step-by-Step Painting Process
Start by inspecting the wall and fixing cracks or loose material so the surface is sound.
Then clean and prep the area—pressure wash, remove mildew, and mask off windows and landscaping before priming.
Finally, choose the right application method for height—extendable rollers, spray, or brush—and follow safe techniques as you paint.
Step 1 Surface inspection and necessary repairs
Inspection sets the tone for a safe, lasting paint job: walk the perimeter, scan the surface for loose or peeling paint, cracked masonry, rotten wood, rusted metal, and failing sealant, and note any areas that need patching or structural repair before you raise ladders or scaffolds.
Then assess hazards and plan fixes.
- Prioritize structural and safety repairs.
- List materials and tools needed.
- Schedule professional help for major defects.
Step 2 Cleaning and surface preparation (pressure washing, mildew removal)
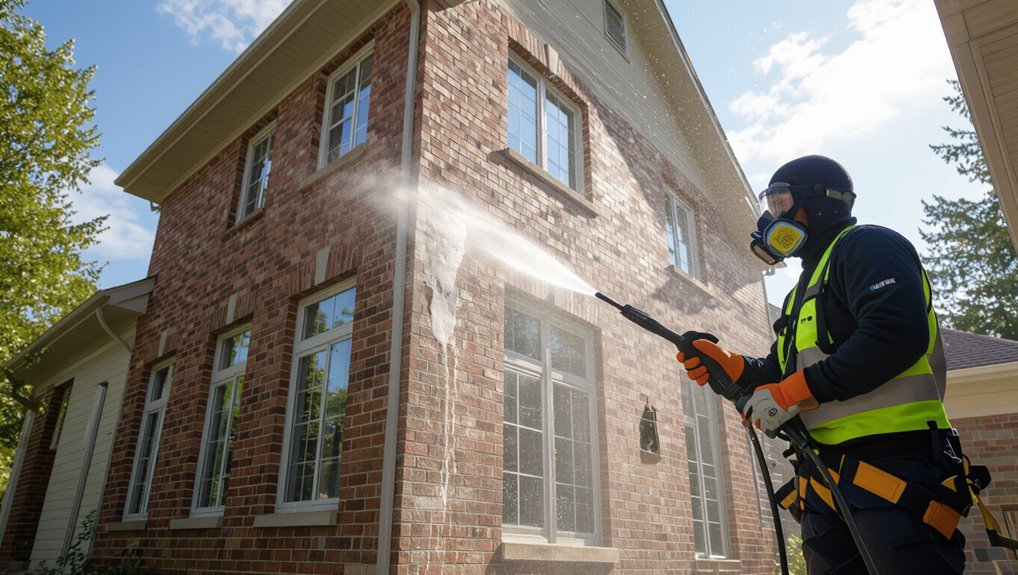
1. You’ll pressure-wash walls to remove dirt, chalking, and loose paint, keeping pressure moderate to avoid damage.
Treat mildew with a bleach-based cleaner or mildew remover, rinse thoroughly, and let surfaces dry fully.
Scrape any remaining loose material, sand rough spots, and vacuum or blow debris away.
Clean, dry surfaces guarantee primer and paint adhere properly.
Step 3 Masking, taping, and protecting surrounding areas
Before you paint, protect everything you don’t want covered in paint: cover windows and doors with plastic sheeting, roll up drop cloths to shield walkways and plants, and apply painter’s tape along trim, flashing, and joints for clean lines.
Secure sheeting with tape, fasten drop cloths to prevent trips, and mask vents, light fixtures, and gutters so paint only hits designated surfaces.
Step 4 Priming high exterior surfaces
Now that surrounding areas are protected, you’re ready to prime the high exterior surfaces.
Choose a quality exterior primer suited to substrate—masonry, wood, or previously painted surfaces. Work methodically from top down, applying even coats and avoiding drips.
Allow full drying per manufacturer instructions, inspect for missed spots, and sand any rough patches lightly before moving to the final paint stage.
Step 5 Techniques for painting at height (rollers with poles, spray, brush)
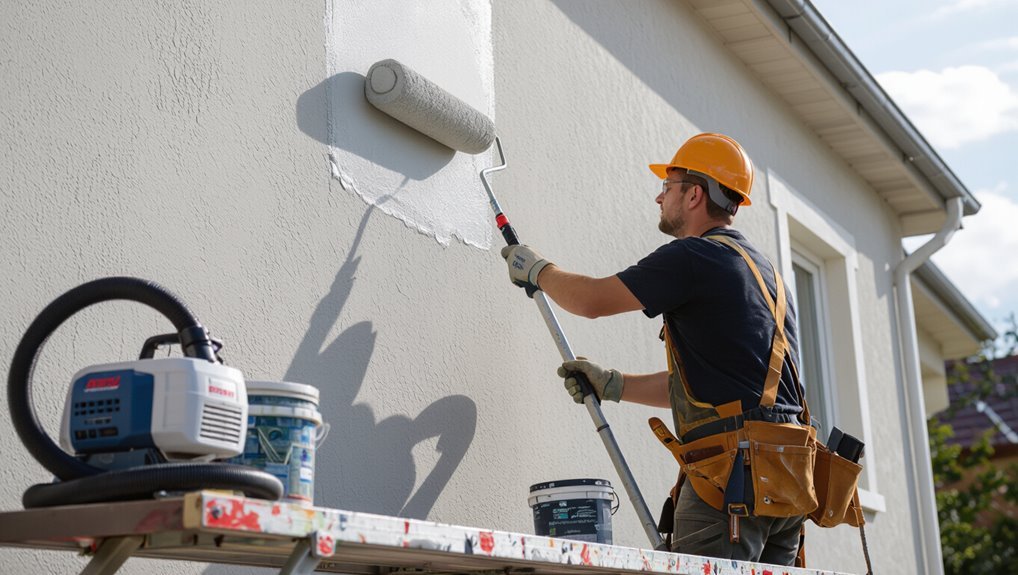
Tools matter: when painting at height you’ll choose between rollers on extension poles, spraying, or brushing, and each method demands different technique, safety checks, and preparation.
Use balanced poles, secure ladder or scaffold, and counterweight the roller. Hold sprayers steady, mask surrounding areas, and test spray pattern.
For brushes, work in manageable sections, maintain wet edges, and keep a stable stance while reaching.
Step 6 Applying multiple coats and curing times
Once the first coat’s dry to the touch, you’ll assess coverage and decide where additional coats are needed, applying them in thin, even layers to build color and durability without trapping solvents.
Wait manufacturer‑recommended recoat times, usually a few hours to a day, check for runs or texture changes, sand lightly between coats if specified, and avoid painting in extreme heat or humidity to guarantee proper curing.
Step 7 Clean-up, tool care, and waste disposal
After the final coat has dried to the manufacturer’s specs, shift your focus to clean-up, tool care, and proper disposal so your worksite stays safe and your equipment lasts.
Remove tape, collect drop cloths, and wash brushes/rollers with recommended solvent.
Inspect and store ladders and scaffolding.
Label leftover paint, seal cans, and dispose of hazardous waste per local regulations.
Recycle empty containers where allowed.
Equipment Options, Costs, and Comparison
You’ll need to weigh ladders, scaffolding, and aerial lifts for height, safety, and cost so you pick the right access method for your walls.
Consider ladder types and limits, scaffolding rental pros and setup time, and when a boom or aerial lift — plus a qualified operator — makes sense.
Then compare paint sprayers, rollers, and brushes for speed, finish quality, and how they change your equipment needs and expense.
Ladders: types, safe usage, and limitations
1 common tool for reaching high exterior walls is the ladder, but choosing the right type and using it properly makes the difference between a quick job and a serious hazard.
Pick an extension or step ladder sized for reach, inspect for damage, set on firm level ground, angle correctly, tie or brace the top, maintain three points of contact, and never overreach or stand on the top rung.
Scaffolding: pros, cons, rental considerations
Scaffolding gives you a stable, wide work platform for painting high exterior walls, making long runs and heavy equipment much easier to handle than ladders.
You’ll appreciate increased safety, faster coverage, and tool staging.
Downsides: setup time, cost, and storage.
Rent modular frames or rolling towers, check load ratings and rental insurance, and inspect locking mechanisms before use.
Aerial lifts and boom lifts: when to rent and operator tips
When your project requires reach, mobility, and quick repositioning, renting an aerial or boom lift can be smarter than building scaffold towers.
These machines get you to high exterior walls fast while carrying tools and a partner.
Choose a machine rated for your height and load, inspect controls and safety features, secure harnesses, follow rental insurance rules, and practice movements before starting work.
Paint sprayers vs rollers vs brushes for high walls
Choosing between sprayers, rollers, and brushes for high exterior walls comes down to the height, surface texture, speed needs, and your budget. You’ll likely pick a sprayer for speed and smooth coverage, a roller for textured walls, and a brush for detail. Compare features:
| Tool | Best for | Cost |
|---|---|---|
| Sprayer | Large, smooth surfaces | $$$ |
| Roller | Textured walls | $$ |
Common Problems and How to Avoid Them
You’ll want to spot and stop common issues like paint drips, runs, and uneven coverage before they set.
Learn to recognize surface failures — peeling, blistering, or mold — and apply the right prep and remedies to fix them.
And don’t ignore safety: know the incidents that happen on high-wall jobs and the simple precautions that prevent them.
Paint drips, uneven coverage, and runs prevention and fixes
Start by recognizing that drips, runs, and patchy coverage usually come from applying paint too thickly, working in poor conditions, or rushing the job.
Thin coats, stir paint, and maintain proper temperature/humidity. Use quality rollers and tip brushes, load them evenly, and work top-down.
Catch drips immediately with a brush, sand dried runs smooth, then feather in a thin touch-up coat for uniform finish.
Surface failure causes: peeling, blistering, mold diagnosis and remedies
Paint failures like peeling, blistering, and mold usually signal an underlying moisture or adhesion problem rather than bad paint alone.
So you’ll want to diagnose the root cause before repainting. Inspect for leaks, trapped moisture, poor surface prep, or incompatible coatings.
Remove loose paint, treat mold with a fungicide, repair substrate and seal, then prime with a compatible exterior primer before repainting for lasting results.
Safety incidents common during high-wall painting and how to prevent them
After you’ve diagnosed and fixed moisture, adhesion, and mold issues, the next priority is keeping people safe while working on high exterior walls.
Falls, ladder slips, tool drops, and electrical contact are common. Use stable scaffolding or rated ladders, tie off harnesses, secure tools with lanyards, mark hazards, de-energize nearby circuits, wear PPE, and work with a spotter to prevent incidents.
Best Practices, Tips, and Time-Saving Tricks
When you’re working on high walls with a crew, assign clear roles and choreograph movements so ladders, lifts, and brushes don’t get in each other’s way.
Plan around the forecast and use weather-ready handling—like keeping cans sealed and using fast-dry primers—to avoid wasted trips.
Finish with a simple maintenance checklist (gutter clearing, caulk touch-ups, and annual inspections) to make the paint job last.
Efficient team roles and choreography for multi-person jobs
Organize your crew around clear, complementary roles so everyone knows exactly what to do and when.
Assign a lead to oversee safety and timing, a scaffold operator, a primer/patcher, two painters (roller and detail), and a runner for supplies and cleanup.
Rehearse movements, maintain clear sightlines, use hand signals for noise, and rotate tasks to keep energy and focus consistent.
Weather-proofing your schedule and paint handling tips
Because weather can flip fast, build a flexible schedule that prioritizes paint-friendly windows and keeps your crew ready to move, not wait.
Check forecasts daily, set backup days, and plan critical coats for dry, mild hours.
Store unopened paint in shaded, cool spots; keep mixed batches covered and use fast-acting thinners per label.
Label cans with date and batch for quick touch-ups.
Maintenance checklist to extend paint life
After you’ve locked in weather windows and handled paint properly, keep that investment looking fresh with a simple, regular maintenance checklist.
Inspect annually for cracks, peeling, mildew. Clean surfaces with mild detergent and rinse. Touch up chips within weeks.
Trim vegetation and clear gutters to prevent moisture. Repaint high-wear areas every 5–7 years and address issues promptly to extend paint life.
Cost-Saving Strategies for DIY Without Compromising Safety
Decide whether to rent or buy gear based on how often you’ll use it—rent scaffolding or lifts for one-off jobs and buy basics like brushes you’ll reuse.
Choose lower-cost paints and safety gear that still meet standards, balancing durability with budget.
For electrical or rigging work, hire a specialist for those specific tasks instead of a full contractor to keep costs down without risking safety.
When to rent vs buy tools and equipment
Wondering whether to rent or buy tools for painting high exterior walls?
Consider frequency, cost, and storage: buy ladders, quality harnesses, and reusable safety gear if you’ll tackle multiple projects; rent scaffolding, lifts, or specialty sprayers for one-off jobs.
Factor maintenance, transport, and insurance. Renting lets you test equipment and avoid long-term upkeep; buying saves money over repeated use.
Trade-offs: lower-cost materials that still perform
If you’re watching your budget, you can still choose lower-cost materials that perform reliably on high exterior walls — you just need to know where to compromise and where not to.
Pick affordable acrylic latex paints with good UV and mildew resistance, skip premium brushes only for trim, invest in a quality extension pole, and use contractor-grade caulk sparingly to seal joints for long-lasting results.
Hiring specialized help for discrete tasks (electrical, rigging) without full contractor hire
You can save money and stay safe by hiring specialists for just the risky bits—like a certified electrician to relocate an exterior light or a rigger to set up temporary anchors—while handling the rest yourself.
Hire licensed pros for tasks that need permits or specialized gear, get written scopes and quotes, schedule work to match your painting timeline, and verify insurance and references first.
When to Stop and Call a Professional
If the job’s height, unstable structure, or limited access make your scaffold or ladder unsafe, stop and call a pro.
Also contact a contractor if local regulations, permits, or your insurance require certified work to keep coverage valid.
It’s smarter to pay for expertise than risk injury, fines, or a denied claim.
Height, structural, or access conditions requiring pros
When a wall’s height, slope, or neighboring structures push your ladders or scaffolding beyond safe limits, it’s time to call a pro.
If walls exceed typical ladder reach, have unstable footing, tall parapets, or require work over ledges, trees, or power lines, don’t risk it.
Professionals have equipment, training, and fall-protection systems to handle complex access and structural concerns safely.
Legal and insurance triggers for contractor involvement
How do legal requirements and insurance rules affect whether you should hire a contractor?
Check local codes, permits, and height limits—violating them can void permits or insurance.
If your insurer requires licensed pros for ladder or scaffold work, or if permits mandate contractor-licensed signaling, hire one.
Also call a pro if your policy excludes DIY claims or if required bonding, certification, or OSHA compliance applies.
FAQ Frequently Asked Questions
You’ve probably got a few quick questions about height limits, ladder use, and whether spraying or rolling is safer for tall walls.
You’ll also want to know what training or certifications you should have to operate an aerial lift and how long paint typically lasts up high.
Below are clear, practical answers to those common concerns.
How high is too high to paint without a pro?
Wondering whether that upper-story siding is a DIY job or not? You can handle one- to two-story sections with proper equipment, experience, and a helper.
Anything above second-floor eaves or requiring complex roof access, scaffolding over obstacles, or prolonged high-altitude work is better left to pros.
Factor height, wind, surface condition, your comfort with heights, and local safety regulations before deciding.
Can I safely use a ladder for an entire exterior wall?
Can you safely use a ladder to paint an entire exterior wall? You can for short sections if the wall height, ladder angle, ground stability, and your comfort allow it.
Move the ladder frequently, secure its base, use a stabilizer, and avoid overreaching.
For tall or uneven walls, consider scaffolding, aerial lifts, or hiring help to reduce fatigue and fall risk.
Is spray painting better than rolling for high surfaces?
If you’re moving from ladders or scaffolding to technique, spray painting and rolling each have strengths for high exterior walls.
Spray covers quickly, reaches crevices, and gives smooth finishes but needs masking and wind caution.
Rolling wastes less paint, builds texture, and’s easier to control on windy days.
Choose based on surface, weather, and cleanup willingness.
What safety certifications or training should I have to operate an aerial lift?
Before you step onto an aerial lift, get hands-on training and the proper certification—most jurisdictions and employers require OSHA-compliant training (or an equivalent local standard), which covers equipment inspection, fall protection, safe operation, and emergency procedures.
You should also complete refresher courses, learn manufacturer-specific controls, practice rescue techniques, and carry proof of certification on site.
Check local rules before renting.
How long does exterior paint typically last on high walls?
How long will exterior paint last on high walls? Expect 5–15 years depending on paint quality, surface prep, exposure, and climate.
Use high-quality exterior acrylics, prime properly, and address moisture or cracks to extend life.
South- or wind-facing walls fade faster.
Regular inspections and touch-ups every few years prevent larger failures and maximize longevity.
Quick Checklist and Job-Day Timeline
Before you start, make a quick pre-job checklist that covers materials, permits, and all safety gear so nothing blindsides you on site.
I’ll give a clear example timeline for a one-day job and a multi-day job so you can plan setup, painting, and cleanup.
Follow the checklist and timeline to keep the work efficient and safe.
Pre-job checklist (materials, permits, safety)
Start by confirming you’ve got everything on hand and a clear plan for the day: materials (paint, primer, rollers, brushes, caulk), equipment (scaffolding, extension ladders, harnesses, drop cloths), permits or HOA approvals, and a safety briefing for everyone involved.
Check inventory, weather, and site hazards. Assign roles and emergency contacts.
- Verify permits and HOA rules
- Inspect gear and anchors
- Prep surface, protect landscaping
Example timeline for a one-day and multi-day job
A clear timeline keeps your crew efficient and safe, whether you finish in a single long day or stretch the work across several.
Below are quick checklists and sample job-day timelines you can adapt to your crew size, site conditions, and weather.
For one-day: morning prep, prime, paint main area, touchups, teardown.
For multi-day: day one prep/prime, day two paint, day three touchups and cleanup.