How to Remove Peeling Bathtub Paint Without Wrecking the Tub
You can remove peeling bathtub paint without wrecking the tub by working carefully and choosing the right method for the damage. First, test adhesion and protect surrounding surfaces, then use gentle scraping, fine sanding, or a tub-safe chemical stripper for stubborn areas. Wear gloves, goggles and a respirator, rinse and degrease thoroughly, repair chips or rust, and etch or prime as recommended before refinishing. Follow proper curing and maintenance steps to prevent recurrence, and keep going to learn the full process.
Quick Answer Can You Remove Peeling Bathtub Paint Without Wrecking the Tub?
Yes — you can usually remove peeling bathtub paint without wrecking the tub by using gentle methods like manual scraping, chemical paint strippers formulated for tubs, or light sanding with fine-grit paper.
But expect some surface prep and possible refinishing. Try DIY when the damage is superficial and you’re comfortable with basic tools; call a pro if the coating is thickly bonded, the tub is old or fragile, or you see rust or underlying damage.
A pro can prevent costly mistakes and often guarantees the outcome if you’re unsure.
Short summary of safe options and expected outcomes
You can remove peeling bathtub paint without wrecking the tub by choosing a safe method matched to the underlying finish and the paint type.
For small flakes, gentle scraping, sanding, and an etching cleaner work.
For larger failures, strip with a noncaustic remover or refinish with tub-specific primer and epoxy topcoat.
Expect improved adhesion, durable finish, and some prep time.
When to call a pro vs. DIY
If the prep steps and safe methods described above sound manageable and the peeling is limited to small flakes, you can probably handle the repair yourself without wrecking the tub—just take your time, use the right cleaners and a gentle scraper or sandpaper, and follow product instructions.
Call a pro if paint covers large areas, bonding fails, you suspect lead or extensive underlying damage, or you lack tools or confidence.
Basics What Is Causing Bathtub Paint to Peel?
You’ll usually see paint peel because of moisture, poor surface prep, the wrong paint type, or simple age-related breakdown.
Different tub materials react differently—enameled cast iron and porcelain hold up better to paint than softer acrylic or fiberglass, which flex and shed coatings more easily.
Knowing the cause and the material helps you choose the right removal and repair approach.
Common causes (moisture, poor prep, wrong paint type, age)
When bathtub paint starts peeling, it’s usually because one or more basic problems undermined the coating: lingering moisture, inadequate surface prep, the wrong kind of paint, or simply age.
You can diagnose common causes quickly:
- Moisture trapped under paint from leaks or poor ventilation.
- Poor prep—grease, soap scum, or insufficient sanding.
- Wrong paint or old finish losing adhesion over time.
How different tub materials react (enameled cast iron, acrylic, fiberglass, porcelain)
Surface material plays a big role in why bathtub paint peels, because each substrate—enameled cast iron, acrylic, fiberglass, and porcelain—bonds differently to coatings and reacts uniquely to moisture, cleaning chemicals, and wear.
You’ll find enameled cast iron holds paint well but chips under impact; acrylic and fiberglass flex, stressing coatings; porcelain resists adhesion unless properly etched.
Match prep and paint to the material.
Safety and Preparation What You Need Before Starting
Before you start stripping paint, make sure you’ve got proper safety gear—gloves, goggles, a respirator—and good ventilation to avoid fumes.
Gather the right tools and materials like scrapers, sandpaper, chemical stripper or a heat gun, drop cloths, and painter’s tape.
Protect surrounding surfaces and plumbing by covering fixtures, sealing drains, and taping off tiles to prevent damage and mess.
Safety gear and ventilation requirements
Because you’ll be working with old paint, chemical strippers, and dust, you need proper protection and strong ventilation to keep yourself safe.
Wear gear, clear air paths, and monitor exposure.
- NIOSH-rated respirator (organic vapor + particulate)
- Chemical-resistant gloves, eye protection, and coveralls
- Open windows, use exhaust fan, and run an air purifier with HEPA filter
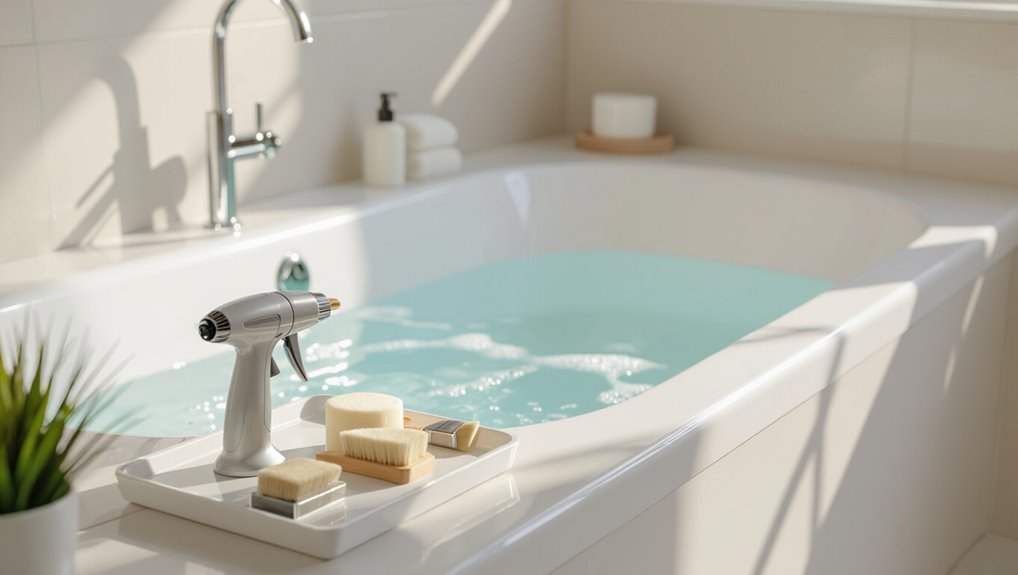
Tools and materials checklist
You’ve got your respirator, gloves, and ventilation set up—now gather the tools and materials that’ll let you remove peeling bathtub paint efficiently and safely.
Pick items that protect the finish and speed work:
- Chemical stripper rated for bathtubs, plastic scraper, nylon pad.
- Sandpaper (320–400 grit), sanding block, tack cloth.
- Painter’s tape, drop cloths, plastic sheeting, waste bags.
How to protect surrounding surfaces and plumbing

While you work on the tub, protect nearby walls, floors, and fixtures by sealing them off with drop cloths, plastic sheeting, and painter’s tape so overspray, stripper drips, and dust don’t cause damage or extra cleanup.
Turn off water, cap faucets, and cover drains. Remove or mask hardware and electrical plates.
Secure sheeting with tape, weight edges, and ventilate to control fumes and dust.
Quick Inspection Assessing Damage and Choosing a Method
Before you start scraping, test adhesion by pressing a putty knife to suspect areas and tapping—if large flakes come away easily, the peel is active and widespread.
Look for soft spots, rust, or visible cracks, which can mean the tub’s substrate is damaged and needs repair before any cosmetic work.
Based on what you find, decide whether a targeted spot fix will do, or if you should strip and refinish or reglaze the entire surface.
How to test adhesion and extent of peeling
Start by giving the painted surface a quick visual and hands-on check to see how far the coating has failed and whether it’s still adhering around the edges.
Press gently with your thumbnail or a flat tool to lift loose flakes, probe seams, and note bubbling.
Map affected areas, mark margins, and decide if spot-sanding or full stripping is needed based on adhesion and peel pattern.
When peeling indicates underlying structural damage
If peeling reveals soft spots, rust, deep pitting, or active water damage beneath the coating, you’re dealing with more than a failed finish and should pause to assess the tub’s structural condition before choosing a repair method.
Probe with a screwdriver, check for flexing, inspect drains and surrounding drywall for leaks, and document corrosion or delamination.
If damage is significant, consult a pro for structural evaluation.
Choosing between partial spot repair, full strip-and-refinish, or reglazing
Once you’ve ruled out structural problems, decide whether to patch a small area, strip and refinish the whole tub, or reglaze the surface as-is.
If peeling is isolated and substrate sound, spot repair saves time and cost.
Widespread flaking or discoloration calls for full stripping and refinishing.
Reglazing suits moderately worn surfaces when adhesion is good but expect a shorter lifespan than full restoration.
Step-by-Step: Removing Peeling Paint Safely
Now you’ll work through a clear, safe sequence to strip the loose paint and prep the tub for refinishing.
Start by preparing the area and removing fixtures.
Then use scraping and sanding to get rid of flaky paint before choosing chemical strippers or mechanical tools as needed.
Finish by thoroughly cleaning, etching, and neutralizing the surface so it’s ready for primer or new coating.
Step 1 Prepare the area and remove fixtures
Before you start scraping, clear the room and protect everything you want to keep clean: cover floors and nearby fixtures with drop cloths or heavy plastic, tape seams to prevent dust and chips from escaping, and open a window or run a fan for ventilation.
Remove shower curtains, soap dishes, drain covers, and any loose hardware; label and bag screws. Turn off water and cap lines.
Step 2 Remove loose paint: manual scraping and sanding techniques
Start by loosening all flaky paint with a sturdy scraper or putty knife so you’re only working with well-adhered surfaces.
Scrape gently at a low angle to avoid gouging enamel.
Follow with 120–220 grit sanding by hand or with a sanding block to feather edges.
Vacuum debris, then wipe with a damp cloth.
Inspect for remaining lifts and repeat as needed.
Step 3 Chemical paint strippers: selection, application, neutralization, and rinsing
After you’ve removed loose paint and smoothed edges, chemical strippers can tackle stubborn, well-adhered layers that scraping and sanding won’t reach.
Choose a tub-safe gel stripper labeled for your finish, wear gloves, goggles, and a respirator, apply per instructions, wait recommended dwell time, then scrape gently.
Neutralize with the specified solution, rinse thoroughly, and ventilate until surfaces are fully dry.
Step 4 Mechanical removal options: orbital sander, oscillating tool, media blasting (small scale) with precautions
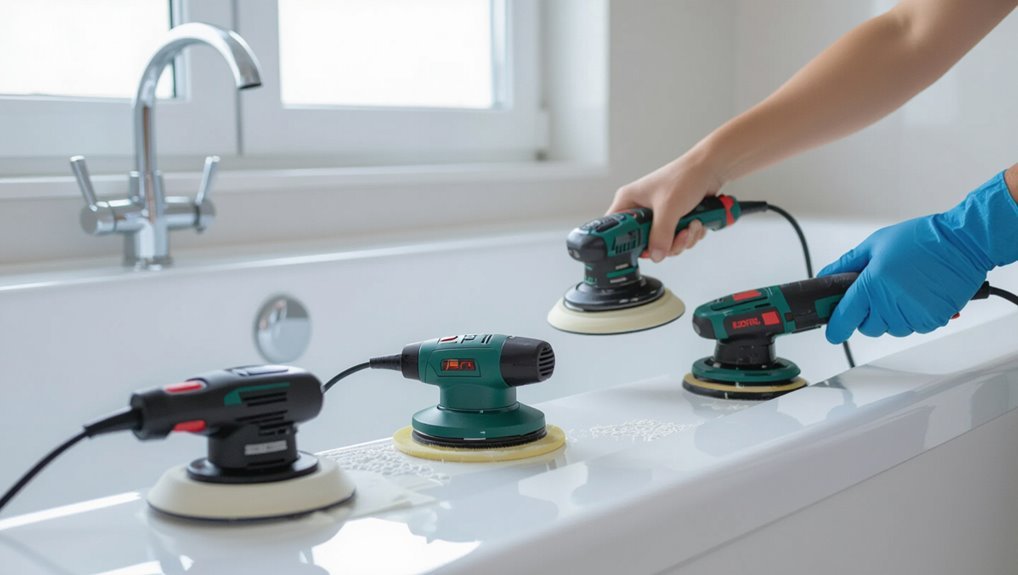
Use mechanical tools when chemical strippers and manual scraping can’t reach stubborn paint, but pick the right method and take strict safety steps.
Use an orbital sander with fine-grit discs for gentle, even removal; an oscillating tool with scraper blades for edges and thin spots; consider small-scale media blasting (baking soda) for tough areas.
Always wear respirator, eye protection, and contain debris to avoid inhalation or damage.
Step 5 Clean, etch, and decontaminate the tub surface
Once mechanical removal has lifted the loose paint, you’ll need to thoroughly clean, etch, and decontaminate the surface so new finish will bond and any contaminants are removed.
Rinse, scrub with a mild degreaser or trisodium phosphate substitute, then etch per manufacturer instructions (acid etch for enamel/porcelain).
Neutralize, rinse thoroughly, and dry.
Wear gloves, eye protection, and ventilate throughout.
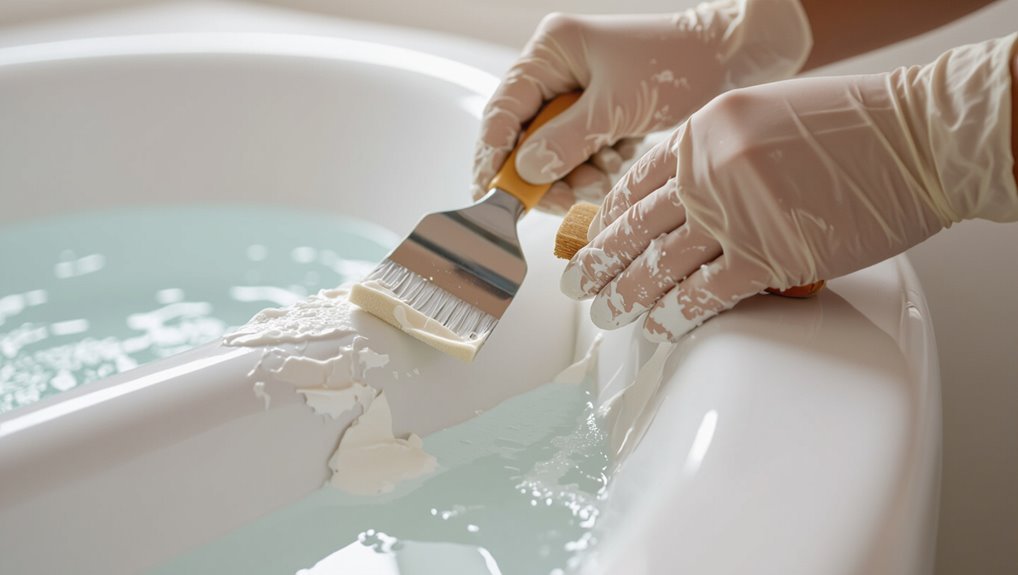
Step 6 Repair chips, pits, and rust spots (fillers and primers)
Patch visible chips, pits, and rust spots before priming so the new finish goes on smooth and lasts.
Remove loose rust with a wire brush, clean the area, then apply a metal-appropriate filler or epoxy putty to low spots.
Sand the repair flush once cured, clean residue, and spot-prime with a corrosion-blocking primer compatible with your chosen topcoat to guarantee adhesion and durability.
Step 7 Final surface preparation before repainting or reglazing (sanding grits and tack cloth)
Get the surface perfectly smooth by following a short, systematic sanding and cleaning routine before you repaint or reglaze.
Start with 220–320 grit to feather edges, then 400–600 grit for a satin finish.
Remove dust with a damp cloth, then wipe with a tack cloth to capture fine particles.
Let everything dry fully before applying primer or coating.
Alternative: When to Use Reglazing or Professional Refinish
If your tub has deep chips, stains, or wide areas of peeling, you might consider professional reglazing instead of repainting yourself.
Reglazing includes stripping, repairing, priming, and spraying a durable finish, and it’s worth weighing its longer lifespan and cost against the lower price and quicker fix of a DIY repaint.
When you shop for contractors, ask about their process, materials, warranties, and get itemized written quotes so you can compare apples to apples.
What professional reglazing includes
Think of professional reglazing as a one-stop resurfacing service: technicians strip loose paint, repair chips and rust, etch the old surface for adhesion, and then apply bonding primer and multiple topcoats to restore a smooth, durable finish.
You’ll get thorough cleaning, precise sanding, rust treatment, high-quality coatings cured under controlled conditions, and post-job inspection so your tub’s surface looks even, sealed, and ready for use.
Pros and cons vs. DIY repainting
While a DIY repaint can quickly freshen a tub and costs less upfront, it won’t match the durability or prep that a professional reglazing job delivers; you’ll save money but likely face peeling, staining, or shorter-lived results unless you’re meticulous about stripping, etching, and using the right products.
| Option | Cost | Longevity |
|---|---|---|
| DIY repaint | Low | 1–3 yrs |
| Professional reglaze | High | 7–15 yrs |
| Refinish pros | Medium | 5–10 yrs |
How to evaluate contractors and get accurate quotes
Money saved on a DIY repaint can be tempting, but when you’re considering a longer-lasting fix—like professional reglazing or a full refinish—you’ll want to evaluate contractors carefully to get accurate quotes and avoid surprises.
Check references, certifications, and insurance. Ask for written estimates covering prep, materials, labor, and warranty. Compare timelines and cleanup policies before you commit.
- Verify credentials
- Get itemized quotes
- Confirm warranty
Paint and Coating Options After Removal
Once you’ve stripped the old finish, you’ll need to pick the right coating for your tub material—epoxy for cast iron, acrylic enamel for acrylic tubs, and polyurethane for certain metal or specialty surfaces.
You’ll also need a compatible primer and to follow its specified cure time before topcoating to guarantee adhesion and durability.
Finally, decide on application: spray gives the smoothest result for most coatings, while high-quality brushes or short-nap rollers work for touch-ups or smaller bathrooms.
Best coatings for each tub material (epoxy, acrylic enamel, polyurethane)
Choosing the right coating depends on your tub’s material—cast iron, steel, acrylic, or fiberglass—and what you want from the finish, like durability, gloss, or ease of application.
For cast iron or steel pick epoxy for toughness and chemical resistance.
Use acrylic enamel on acrylic tubs for flexibility and adhesion.
Choose polyurethane for high-gloss durability on fiberglass, but verify compatibility with substrate.
Primer requirements and curing times
Because different tub substrates and topcoats demand specific adhesion and corrosion protection, you’ll need the right primer for proper bonding and to meet the manufacturer’s curing times before recoating.
Choose primers rated for your substrate (metal, fiberglass, or porcelain), follow temperature and humidity guidelines, and allow full cure—often 24–72 hours—before applying the topcoat to guarantee adhesion and long-term durability.
Application methods: spray vs. brush vs. roller and recommended coatings
You’ve got three practical ways to apply tub coatings—spray, brush, or roller, each with trade-offs in finish, speed, and ease.
Spray gives the smoothest, fastest result but needs masking and ventilation.
Brush handles edges and repairs. Microfiber rollers reduce texture on flats.
Use epoxy or polyurethane tub-specific coatings for durability; follow manufacturer thinning, recoat windows, and cure times precisely.
Common Mistakes That Wreck Tubs and How to Avoid Them
Don’t reach for any stripper or abrasive without confirming it’s safe for your tub material, because the wrong choice can eat finishes or chip enamel.
Prep thoroughly—skipping etching or leaving contaminants will keep coatings from bonding.
Always use ventilation and PPE, and follow thinning and cure-time directions so paint doesn’t blister or fail.
Using wrong stripper or abrasive for tub material
If you pick the wrong stripper or abrasive for your tub’s material, you’ll quickly make peeling worse or permanently damage the surface.
Match product to material—enamel, fiberglass, acrylic—using manufacturer recommendations. Test a small hidden area first.
Avoid harsh chemical strippers on plastic and coarse pads on soft finishes. Use gentle, material-specific removers and nonwoven abrasives to strip paint without etching or cracking.
Insufficient surface prep or skipping etching
When you skip proper surface prep or the etching step, new paint won’t stick and will start peeling faster than you expect.
You need to clean, degrease, sand glossy spots, and etch according to the tub material. Don’t assume fresh paint bonds to slick surfaces.
Follow manufacturer instructions, rinse thoroughly, and let the surface fully dry before recoating to guarantee durable adhesion and a smooth finish.
Poor ventilation and safety oversights
Because paint fumes and solvent vapors concentrate quickly in small bathrooms, poor ventilation is one of the fastest ways to create a health hazard and damage the tub finish.
You should open windows, run a strong exhaust fan, and use a respirator rated for organic vapors.
Don’t leave wet rags or solvent containers near the tub, and keep pets and children out until fumes clear.
Applying paint too thick or not following cure times
Although rushing the job might seem faster, slathering on thick coats or ignoring recommended cure times guarantees peeling, tacky surfaces, and weak adhesion.
You should apply thin, even layers per manufacturer instructions, allow full flash and cure times between coats, and control humidity and temperature.
Cure fully before regular use to prevent damage; otherwise you’ll repeat stripping and refinishing far sooner than expected.
Maintenance and Prevention How to Keep New Finish from Peeling
Once you’ve refinished your tub, keep it looking good by using mild, nonabrasive cleaners and wiping it down regularly.
Make sure the bathroom has good ventilation and control humidity to prevent moisture-related lifting.
Learn to spot small chips early so you can touch them up promptly instead of waiting for a full refinish.
Proper cleaning products and routines
If you want your new bathtub finish to last, pick gentle, nonabrasive cleaners and wipe up soap scum and hard-water deposits regularly.
Use soft cloths, mild dish soap, or a pH-neutral bathroom cleaner.
Don’t scrub with steel wool or harsh acids. Rinse thoroughly and dry after cleaning.
- Mild cleaner
- Soft tools
- Regular quick wipes
Controlling humidity and ventilation in the bathroom
Keeping your cleaning routine gentle will only get you so far — you also need to control moisture to protect a new finish.
Run an exhaust fan during and after showers, open a window when possible, and fix leaks promptly.
Use a timer or humidity-sensing fan, dry surfaces with a towel, and keep bathroom doors ajar to promote airflow so condensation won’t lift the coating.
When to reapply touch-ups vs. full refinish
When small chips, scratches, or a few bubbling spots appear, you’ll usually save time and money with targeted touch-ups rather than a full refinish.
Touch up if damage is localized, adhesion is good, and the original coating bonds.
Refinish when widespread peeling, multiple compromised areas, or structural surface damage exist.
Inspect yearly and address moisture or adhesion issues before reapplying finish.
Cost and Time Estimates
You can tackle this yourself with basic materials and expect a few hours of prep plus drying time, or hire a pro and save time but pay more.
Typical professional reglazing or refinishing runs from a few hundred to over a thousand dollars depending on scope and finish.
We’ll compare those upfront costs and time commitments to the longer-term value and expected lifespan of each option.
DIY materials and time breakdown
Plan on about a weekend and a modest budget to strip and refinish a peeling bathtub: expect to spend $60–$200 on supplies (abrasives, primer, epoxy or tub refinishing kit, brushes/rollers, gloves, respirator) and set aside 8–16 hours of hands-on work plus curing time.
Gather 120–220 grit sandpaper, chemical stripper (optional), tack cloths, painter’s tape, mixing sticks, small foam roller, and drop cloths.
Typical professional reglazing and refinishing cost ranges
A professional bathtub reglaze typically runs between $300 and $800 for a standard tub. You’ll pay more for clawfoot or severe damage; expect $500–$1,200. Jobs usually finish in a day; technicians charge labor plus materials. Compare quotes and warranties before hiring.
| Service Type | Typical Cost |
|---|---|
| Standard tub | $300–$800 |
| Clawfoot/repair | $500–$1,200 |
Long-term value and lifespan comparisons
Beyond upfront fees, think about how long each option will keep your tub usable and how often you’ll need to redo the work.
DIY paint may last 1–3 years, saving money now but costing time and frequent touch-ups.
Professional reglazing or replacing lasts 5–20+ years depending on quality and usage, offering better long-term value despite higher initial cost and downtime.
FAQ
You’ll find answers here to common concerns like using chemical strippers safely in a small bathroom, whether sanding will harm porcelain or enamel, and how long you should wait before using a refinished tub.
You’ll also get guidance on when repainting makes sense versus replacing an old tub, plus tips for removing odors and stubborn stains after stripping paint.
Ask any specific question and I’ll clarify the best, safest steps.
Can I use a chemical stripper in a small bathroom safely?
Wondering whether you can use a chemical stripper in a small bathroom safely? You can, but only with precautions: ventilate thoroughly (open windows, run a fan), wear gloves, goggles and a respirator rated for organic vapors, cover nearby surfaces, and follow the product’s instructions.
Keep children and pets out, work in short sessions, and dispose of waste as directed. If unsure, hire a pro.
Will sanding damage porcelain or enamel tubs?
If you sand a porcelain or enamel tub too aggressively, you can scratch or dull the finish, so proceed cautiously and use the right tools.
Use fine-grit sandpaper (400–600) or a sanding pad, light pressure, and keep the surface wet to minimize heat and clogging.
Test a small, hidden area first, and stop at feathering loose paint—don’t sand through the glaze.
How long after refinishing can I use the tub?
Once you’ve stopped at feathering and avoided sanding through the glaze, the next question is how long to wait before using the tub after refinishing.
Follow your refinisher’s cure-time: typically 48–72 hours for light use, 7 days for full chemical resistance.
Keep ventilation and temperature per product instructions.
Test gently before regular use; longer cures improve durability and adhesion.
Is repainting better than replacing an old tub?
Is repainting really the smarter choice, or should you bite the bullet and replace the tub?
Repainting saves time and money for cosmetic wear, minor chips, and sound structure.
Replace if the tub has deep cracks, persistent leaks, severe rust, or chronic drainage problems.
Evaluate cost, longevity, and future resale; choose replacement for lasting reliability, repainting for budget-friendly refreshes.
How do I remove odor or stains after stripping paint?
Got lingering odors or stubborn stains after stripping paint? Use white vinegar or baking soda paste to neutralize smells and lift residue—apply, let sit 15–30 minutes, then scrub with a nonabrasive pad.
For tougher stains, try diluted hydrogen peroxide or a commercial tub cleaner formulated for your tub material.
Rinse thoroughly, dry, and ventilate the room to remove lingering odors.