How to Prevent Acrylic Paint From Cracking on Fabric
To prevent acrylic paint from cracking on fabric, prep and choose wisely: wash and iron the fabric, pick a natural, tightly woven cloth, and use fabric-specific acrylics or mix in fabric medium to keep flexibility. Thin the paint and apply thin, even layers, drying flat between coats and curing per product instructions (heat-set or air-cure). Stretch gently while painting, avoid heavy buildup, and wash gently inside out. Keep going for step-by-step tips and fixes.
How to Prevent Acrylic Paint from Cracking on Fabric (Quick Answer)
Use fabric medium, thin your acrylics, and apply thin, even layers so the paint stays flexible and bonds to the fibers.
Let each layer dry fully, heat-set the design, and wash gently to preserve the finish.
Following these steps will cut cracking and keep your painted fabric wearable.
Direct answer key steps summarized
If you want painted fabric that stays smooth and flexible, follow a few key steps: practice how to prevent acrylic paint from cracking on fabric by prepping, thinning, and curing properly.
- Use fabric medium with acrylics
- Thin paint for flexibility
- Prewash and iron fabric
- Heat-set or air-cure per instructions
- Avoid heavy layering and stretch gently
Understanding Acrylic Paint and Fabric Interaction
You’ll want to know the difference between acrylic fabric paints, which are formulated to flex and bond with fibers, and regular acrylic craft paints that can stay brittle.
How well paint grips a material changes with fiber type—cotton soaks and bonds differently than slick polyester or mixed blends.
Cracking happens when the paint film and fabric move differently or the binder becomes too rigid, causing stress at a molecular and mechanical level.
What is acrylic fabric paint vs. acrylic craft paint
While both are labeled “acrylic,” fabric paint and craft paint are formulated differently so your shirts, bags, or canvas prints behave and wear as you expect.
Fabric paint includes flexible binders and additives for softness, washability, and adhesion on textiles.
Craft acrylics are thicker, more pigment-dense, and rigid when dry, suited for hard surfaces.
Choose fabric-specific paint for clothing to prevent cracking.
How paint bonds to different fabric types (cotton, polyester, blends)
Because different fibers present different surfaces and absorbency, acrylic paint bonds to cotton, polyester, and blends in distinct ways.
You’ll find cotton soaks paint into fibers, creating a matte, durable finish.
Polyester repels water, so paint sits more on the surface and may need a medium or primer for adhesion.
Blends require testing—adjust paint viscosity and curing to balance absorption and surface grip.
Why acrylic paint cracks on fabric (causes at molecular and mechanical level)
When acrylic paint cracks on fabric, it’s usually the result of mismatched flexibility and adhesion at both the molecular and mechanical levels.
You’re dealing with rigid polymer chains that cure into brittle films while fibers stretch and bend. Poor penetration, weak bonding, thickness, and stiffeners amplify stress concentration.
Repeated washing, heat, and abrasion fatigue bonds, causing microcracks that grow into visible fissures.
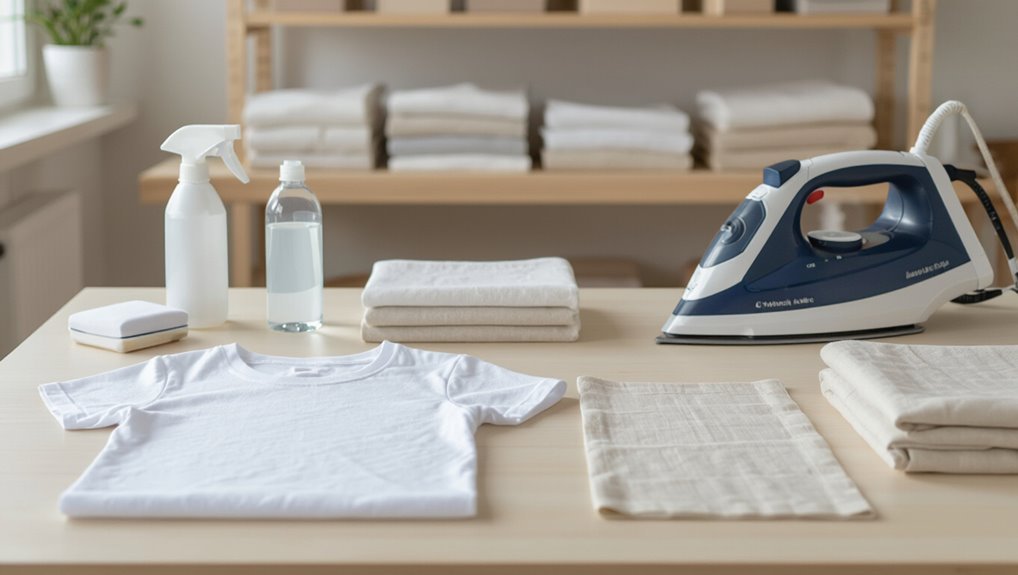
Preparation: Materials, Tools, and Workspace Setup
Before you paint, gather fabric-friendly acrylics or textile mediums and the right additives to keep your finish flexible.
Pick brushes and applicators that match your detail level—synthetic brushes, foam pads, and a palette for mixing—and have a fabric medium on hand.
Wash and iron the fabric and decide whether to paint it flat or stretched on a frame to prevent puckering and cracking.
Best paints and additives to use
If you want painted fabric that flexes and lasts, choosing the right paints and additives is essential. Use soft-body fabric acrylics or textile paints, mix with fabric medium, and add a bit of flow improver for even coverage. Heat-set when recommended and consider textile medium for stretch.
| Paint Type | Additive | Benefit |
|---|---|---|
| Fabric acrylic | Fabric medium | Flexibility |
| Soft-body | Flow improver | Smoothness |
| Textile paint | Heat-set | Durability |
Recommended brushes, applicators, and palettes
Pick a few quality brushes and applicators that match your painting style and the fabric’s weave—soft synthetic flats for broad coverage, small round or liner brushes for detail, foam brushes or sponge-tipped applicators for even layering, and a stiff-bristled toothbrush or stippling brush for texture.
Use plastic or stainless palettes for mixing, disposable palette paper for quick cleanup, and keep a spray bottle for thinning and misting.
Surface and workspace preparation (washing, ironing, flat vs. stretched)
Those brushes and applicators will only perform well if your fabric is ready to receive paint, so take time to prepare the surface and workspace.
Wash to remove sizing and oils, dry fully, then iron smooth.
Work flat for garments or stretch fabric on a frame for taut designs.
Tape edges, protect your table, and guarantee good light and ventilation before painting.
Step-by-Step Process to Prevent Cracking
Before you start painting, you’ll follow a clear step-by-step process covering fabric choice and pre-washing, proper preparation like stretching and stabilizers, and correct paint mixing with fabric medium.
Then you’ll apply paint in thin, controlled layers using techniques such as stippling to prevent heavy buildup.
Finally, you’ll dry the piece flat in stable humidity and avoid heat extremes to lock in a flexible, crack-resistant finish.
Step 1 Choose the right fabric and pre-wash guidelines
1. Choose natural, tightly woven fabrics like cotton or linen—they accept acrylic well and flex with wear.
Avoid stiff synthetics that resist paint. Pre-wash using mild detergent, no fabric softener, and warm water to remove sizing and shrinkage.
Dry and iron before painting. Cleaning and selecting compatible fabric reduces cracking risk and helps paint adhere evenly for long-lasting results.
Step 2 Prepare fabric (stretching, stabilizers, tape, underlayer)
Now that your fabric is clean, prepare it so the paint can flex instead of cracking: stretch the fabric tight on a frame or hoop, secure edges with low-tack tape, and add a lightweight stabilizer beneath delicate areas.
For garments, use tear-away or wash-away interfacing where needed and apply a thin, even underlayer to promote adhesion and prevent stiff spots.
Step 3 Mix paint correctly (dilution, fabric medium, flow improvers)
Mix your acrylics to the right consistency so the paint can move with the fabric instead of cracking.
Thin heavy acrylics with water sparingly and use a fabric medium to restore flexibility and adhesion.
Add a few drops of flow improver for smoother application without over-thinning.
Test mixtures on a scrap piece, let dry, and check for flexibility before painting your final fabric.
Step 4 Apply paint using techniques that reduce cracking (thin layers, stippling, avoiding heavy impasto)
Apply paint in thin, controlled layers so the fabric can flex without forcing thick, brittle ridges that crack when worn.
Use light, even brushstrokes or a stippling motion to build color gradually. Avoid heavy impasto and piling paint.
Work in multiple passes, letting each translucent layer set enough to accept the next, and smooth edges to prevent concentrated stiffness.
Step 5 Drying methods (flat drying, avoiding heat extremes, humidity control)
When you finish painting, let the fabric dry flat and undisturbed so the paint can set evenly without stretching or cracking.
Avoid heat sources and direct sunlight that can dry surfaces too fast and cause brittleness.
Keep the room ventilated but not drafty, and control humidity—moderate levels speed uniform drying.
Check periodically; don’t move the piece until fully dry.
Step 6 Curing and heat-setting methods (iron, dryer, oven alternatives)

Before you move or wear the painted fabric, you’ll need to cure the paint so it bonds to the fibers and resists cracking; heat-setting is the most common way to do that.
Use an iron (cotton setting, press with cloth for 3–5 minutes), a clothes dryer on high for 30–40 minutes, or a countertop heat press.
Test an inconspicuous spot first.
Step 7 Post-treatment and washing instructions to maintain flexibility
Once the paint’s cured, give your piece simple post-treatment and gentle wash care to keep the finish flexible and crack-free.
Seal with a compatible fabric medium or clear textile sealer sparingly.
Turn garment inside out, wash cold on gentle cycle or handwash, use mild detergent, avoid bleach.
Air-dry flat or tumble low.
Reapply sealer after several washes if edges show stiffness.
Supporting Strategies and Variations
You’ll want to tweak your approach for different projects—apparel needs more stretch-friendly methods than upholstery, and stretch fabrics require lighter, more flexible layers.
Try fabric mediums, additives, or flexible sealers but weigh their pros and cons: some improve flexibility while others can affect color or hand.
Plan layers and designs to avoid thick paint over seams or high-stress zones, using thinner coats and strategic placement to reduce cracking.
Techniques for different project types (apparel, upholstery, stretch fabrics)
When working with different fabric projects, you’ll need techniques that match the material and use: apparel demands flexibility, upholstery needs durability, and stretch fabrics require special bonding and paint choices to avoid cracking.
For apparel, prewash, choose soft brushes, layer thinly, and heat-set gently.
For upholstery, prime, use heavier application, and secure edges.
For stretch fabrics, test elasticity, apply minimal paint, and avoid stiff layers.
Using fabric mediums, additives, and flexible sealers (pros and cons)
Although fabric paint can work on its own, adding a fabric medium, flexible additive, or sealer will usually improve adhesion, stretch, and longevity—helping prevent cracking without sacrificing hand or color.
You should dilute heavy acrylics with medium for flexibility, use additives for added elasticity, and choose flexible sealers for wear.
Cons: altered sheen, reduced pigment intensity, or longer cure time. Test first.
Layering and design tips to minimize stress points (stretch zones, seams)
Because painted fabric stretches and rubs at certain points, plan your layers and design to avoid high-stress zones like elbows, knees, and seams.
Place thicker paint or detailed work on flat areas, use thinner base layers over joints, and stagger layered edges away from seams.
Consider pattern placement and stretch grain; test with movement, then reinforce vulnerable spots with flexible medium or backing.
Comparison: Common Products and Their Performance
You’ll want to compare fabric-specific acrylics to regular acrylics to see how each handles flexibility and adhesion on textiles.
Check different fabric medium brands and concentrations to learn how they thin paint without sacrificing hold.
Then evaluate sealers and fixatives for flexibility, durability, and washability so you can pick the right finish for your project.
Fabric-specific acrylic paints vs. regular acrylics
When you’re choosing paints for fabric projects, the key difference is formula: fabric-specific acrylics include plasticizers and binders that keep the film flexible on fibers, while regular craft acrylics dry harder and are more likely to crack or flake with wear. Pick fabric paints for stretch, regular for rigid items; test adhesion and washability first.
| Paint Type | Flexibility | Best Use |
|---|---|---|
| Fabric | High | Apparel |
| Regular | Low | Canvas |
Fabric medium brands and concentrations
If you want acrylics to behave like fabric paint, add a fabric medium — different brands and concentrations change flexibility, opacity, and washability, so pick one matched to your project. Test 1:1 and 2:1 ratios—lighter mixes keep drape, heavier mixes boost opacity. Compare brands for feel and durability; choose based on stretch, hand, and laundering expectations.
| Brand | Ratio | Feeling |
|---|---|---|
| A | 1:1 | Soft |
| B | 2:1 | Slightly stiff |
| C | 1.5:1 | Balanced |
Sealers and fixatives compared (flexibility, durability, washability)
Because sealers and fixatives sit on the surface of painted fabric, they determine how flexible, durable, and washable your project will be, so you should pick one that matches the fabric’s stretch and your laundering plans. Choose flexible textile medium for stretch, matte varnish for durability, and spray fixative for delicate detail. Compare options:
| Product | Typical performance |
|---|---|
| Textile medium | Flexible, washable |
| Fabric varnish | Durable, less stretchy |
| Spray fixative | Good detail, variable wash |
| Heat-set medium | Durable, moderate flexibility |
Common Mistakes That Cause Cracking and How to Fix Them
You’ll often cause cracks by glopping on too much paint, skipping prep like washing or stretching the fabric, or using the wrong dilution or additives.
Cure paint gently and fully—don’t blast it with heat—and if cracking happens, you can spot-touch, reinforce with a thin flexible medium, or reapply correctly after removing loose flakes.
Below we’ll cover each mistake and simple fixes so your design stays flexible and durable.
Over-applying paint and heavy build-up
Layering too much acrylic or piling it on thick will make your painted fabric stiff and prone to cracking as it flexes and wears.
Thin your paint with textile medium, apply multiple thin coats, and let each dry fully. Use a soft brush or sponge to control buildup.
If areas already feel rigid, gently sand raised edges and reapply a thin, flexible finish.
Skipping fabric preparation (not washing or not stretching)
If you skip washing or don’t stretch the fabric before painting, oils, sizing, or uneven tension can prevent paint from adhering properly and lead to cracking as the material moves.
Always wash to remove finishes and lint, dry thoroughly, then mount or hoop fabric tautly. That stabilizes the surface, guarantees even paint absorption, and reduces movement that causes flakes or hairline cracks.
Incorrect dilution or using wrong additives
Thinning acrylics too much or mixing in the wrong additives will weaken the paint film and cause it to crack as the fabric flexes.
You should use fabric medium, follow manufacturer dilution ratios, and test mixtures on scraps.
Avoid adding excessive water, household solvents, or non-fabric gels.
Let each layer dry fully before adding another, and thin only as needed for brush or flow control.
Improper curing or exposing to heat too quickly
When you speed up drying with heat or rush the curing process, the paint film can set unevenly and become brittle, which leads to cracking as the fabric flexes.
Let painted fabric air-cure at room temperature for the recommended time, avoid direct heat sources, and don’t force curing with hair dryers or hot irons.
Patience preserves flexibility and adhesion.
Repair techniques for cracked paint (touch-ups, reinforcing, reapplication)
Even with careful curing, paint can still crack over time from wear or earlier mistakes, and you can often fix those flaws without tossing the garment.
Clean and dry the area, then gently sand loose flakes. Use matching fabric acrylics for touch-ups, thin layers, and let each cure.
For larger damage, reinforce with textile medium or reapply design, heat-set, and wash gently.
Best Practices and Maintenance Tips
For long-term care, you’ll want to wash painted fabric gently, store it flat or rolled to avoid creases, and keep it away from abrasive surfaces.
When painting wearable garments, avoid high-friction areas like underarms and inner thighs and place designs on flexible panels so they move with the fabric.
Also keep painted items out of extreme heat, prolonged humidity, or freezing conditions to preserve elasticity and adhesion.
Long-term care (washing, storage, avoiding abrasion)
Because painted fabric faces wear long after the paint dries, adopting simple care routines will keep your design intact and vibrant.
Wash gently inside out on cold, using mild detergent and a short, low‑spin cycle. Air‑dry flat when possible.
Store folded in a cool, dry place away from sharp edges. Avoid scrubbing, machine drying on high, and abrasive surfaces that can flake paint.
Tips for painted wearable garments (areas to avoid painting, flexible placement)
Those care steps help preserve painted fabric, but when you’re planning wearable pieces you’ll also need to think about where paint will stress, crease, or rub.
Avoid high-friction zones—underarms, inner thighs, waistbands, and cuffs.
Place designs on flat, less-stretched areas like backs, shoulders, or chest.
Use smaller motifs near seams, allow ample drying and heat-setting, and test flexibility before regular wear.
Seasonal and environmental considerations (humidity, temperature extremes)
When you paint fabric, remember that humidity and temperature swings can stress the paint film and fabric, so plan your projects and care routines around seasonal conditions.
Store painted items in dry, moderate environments. Avoid painting before seasonal humidity spikes or freezes.
Allow extra curing time in cool or damp weather, and use breathable storage to prevent moisture buildup that causes adhesion failure and cracking.
Troubleshooting Guide
Start by diagnosing the issue based on symptoms—flaking, hairline cracks, or overall stiffness each point to different causes.
If the paint just cracked recently you can often smooth and seal small cracks with a fabric medium or thin topcoat.
For severe flaking or widespread stiffness it’s usually best to strip and repaint or replace the item.
Diagnose the problem by symptoms (flaking vs. hairline cracks vs. stiffness)
If your painted fabric is showing problems, diagnose the issue by the symptom: flaking, hairline cracks, or general stiffness each point to different causes and fixes.
Flaking means poor adhesion or thick, unsupported layers.
Hairline cracks suggest flexibility mismatch, heavy body paint, or insufficient curing.
Stiffness indicates too much medium, excessive layering, or lack of fabric prep—each needs targeted correction.
Quick fixes for recent cracks
Spot small cracks early and you can often fix them without redoing the whole piece.
Gently clean the area, let it dry, then apply a thin layer of textile medium or diluted acrylic with a fine brush to bridge cracks.
Press fabric flat while it cures. Once dry, heat-set per product instructions and test flexibility.
Repeat sparingly if needed.
When to repaint or replace
When should you consider repainting or replacing a painted fabric piece?
If paint repeatedly flakes, loses adhesion after fixes, or the design is distorted, repainting makes sense for salvageable areas.
Replace the item when structural fabric damage, persistent cracking, or stain-through ruins appearance or function.
For sentimental pieces, consult a conservator; for everyday wear, replacement often saves time and frustration.
FAQ
You’ll find quick answers to common concerns like whether fabric medium always stops cracking, if regular acrylics are safe on T‑shirts, and how long to wait before washing.
You’ll also learn when heat‑setting is necessary and how to restore softness and flexibility to painted fabric.
Read on for clear, practical guidance you can use right away.
Will adding fabric medium always prevent cracking?
Does adding fabric medium always stop acrylic from cracking? Not always. It greatly improves flexibility and adhesion, reducing cracking risk, but results depend on fabric type, paint-to-medium ratio, layer thickness, and curing.
Overly thick layers or insufficient curing can still crack. Test first, follow manufacturer ratios, apply thin even coats, and heat-set when recommended to maximize success.
Can I use regular acrylic paint on a T-shirt safely?
Can you use regular acrylic paint on a T‑shirt safely? Yes, but it needs adjustments: mix in a fabric medium and thin slightly to restore flexibility.
Apply thin, even layers and heat‑set per medium instructions to bond paint to fibers. Avoid heavy buildup and stiff finishes; they crack with wear.
Test on scrap fabric first to confirm hand, adhesion, and wash resilience.
How long should I wait before washing a painted garment?
After painting and heat‑setting your garment, wait at least 72 hours before the first wash to let the paint fully cure; some artists recommend up to 7 days for maximum durability.
When you do wash it, turn the garment inside out, use cold water and a gentle cycle, and avoid harsh detergents or bleach.
Air‑dry or tumble low to preserve the finish.
Is heat-setting necessary for all acrylic-on-fabric projects?
Is heat-setting always required? Not always.
You should heat-set most acrylic fabric paints and mixed-media pieces for durability and wash resistance, especially on garments.
For non-wear items, decorative accents, or when using fabric medium with flexible formulas, heat-setting may be optional.
Check paint manufacturer guidance and test a scrap to confirm adhesion and flexibility before skipping heat-setting.
How do I make painted fabric soft and flexible again?
Want the fabric to feel soft again? Gently wash it inside out with mild detergent, then air-dry.
Massage a small amount of fabric softener or diluted hair conditioner into painted areas, rinse lightly, and reshape while damp.
For stubborn stiffness, steam from the reverse side or press with a warm iron through a cloth.
Avoid heavy abrasion to preserve paint adhesion and flexibility.