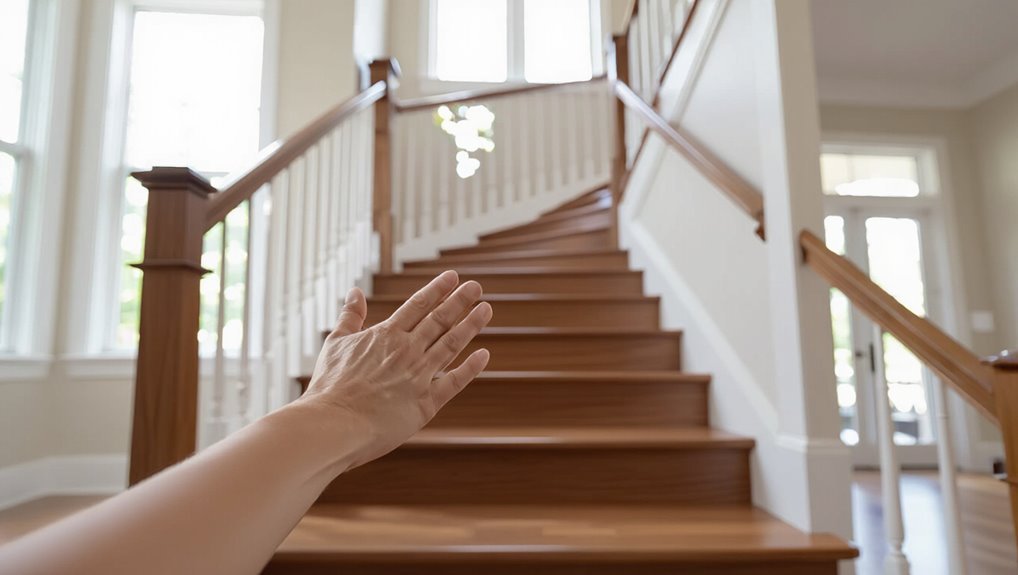
How to Paint a Stained Banister for a Clean, Lasting Finish
You can paint a stained banister for a clean, lasting finish if you prep it right: clean oils and grime, scuff or sand glossy areas, then prime with a stain-blocking or bonding primer to prevent bleed-through. Use a quality angled brush or spray for spindles, apply two to three thin coats of satin or semi-gloss paint, sanding lightly between coats, and allow full cure before heavy use. Keep going for step-by-step tips and timing.
Quick Answer Can You Paint a Stained Banister for a Clean, Lasting Finish?
Yes—you can paint a stained banister for a clean, lasting finish, but it takes proper prep and drying time.
Expect a typical project to take a weekend (6–12 hours of work spread over 1–2 days for sanding, priming, and two coats of paint).
In the best case you’ll get smooth adhesion, no bleed-through, and a durable, professional-looking result.
Direct verdict and time-to-complete estimate
You can paint a stained banister and get a clean, lasting finish if you prep it properly and use the right products. Plan on about 1–2 full days for a typical staircase (including drying and light curing), or up to 3 days for older finishes or ornate spindles that need more sanding and multiple coats.
You’ll need proper prep, primer, paint, and patience—this is how to paint a stained banister efficiently.
Best-case results summary
If you prep thoroughly, choose a bonding primer and durable semi-gloss or satin paint, and allow proper drying time, you’ll get a clean, lasting finish on a stained banister.
You’ll enjoy smooth coverage, minimal brush marks, and strong adhesion that resists chips and wear.
With careful sanding, tack cloth use, and proper curing, the result will look professional and stay attractive for years.
What You Need to Know First: Basics of Painting Over Stain
Before you start, know that painting over stained banisters isn’t the same as painting raw wood because the stain and finish can block primer and paint adhesion.
You’ll need to identify the type of stain and topcoat—oil- or water-based stains, and glossy or satin finishes—since those determine whether you can scuff and prime or must strip.
Finally, weigh how deep or worn the stain is: remove it if the finish is failing or very dark, but you can often keep and prep a stable, well-bonded stain.
Why painting a stained banister differs from painting bare wood
Because stained banisters already have a finish, painting them isn’t the same as painting bare wood—you’ll need to deal with adhesion, stain bleed-through, and surface preparation to get a durable, smooth result.
You can’t skip scuffing, cleaning, and priming; paint won’t bond to glossy or contaminated surfaces.
Take time to remove oils, sand lightly, and use a suitable primer so your new finish lasts without peeling or staining.
Types of stain and finish that affect adhesion
Now that you’ve prepared the surface, you’ll want to identify the kind of stain and finish you’re dealing with, since they directly affect primer choice and adhesion. You’ll check oil vs. water‑based stains and whether the finish is shellac, varnish, lacquer, or polyurethane. Match primer chemistry to the finish for proper bonding.
| Stain type | Finish | Adhesion note |
|---|---|---|
| Oil | Varnish | Use oil‑blocking primer |
| Water | Polyurethane | Use bonding primer |
| Gel | Shellac | Use shellac or shellac‑compatible primer |
When to strip or keep the stain
If the stain’s color and condition suit your design and the finish is sound, you can often paint right over it after proper cleaning and priming;
but if the stain is dark, bleeding, or the surface is rough or flaking, you’ll need to strip or thoroughly scuff it first.
Test adhesion with a tack cloth and tape; sand glossy finishes, remove contaminants, and spot-treat bleed-through before priming.
Tools, Materials, and Safety Gear
Before you start, you’ll want a clear list of essential tools—sanders, scrapers, tack cloths, and good-quality brushes or small foam rollers.
Pick a stain-blocking primer and a durable semi-gloss or satin paint made for trim, plus brushes sized for spindles and corners.
Also grab safety gear—respirator or mask, goggles, gloves—and plan for good ventilation while you work.
Essential tools list
You’ll need a compact set of tools, materials, and safety gear to get the job done cleanly and safely: sandpaper (various grits), a sanding block or orbital sander, wood filler, tack cloths, primer and paint suited for stained wood, high-quality brushes and a small foam roller, painter’s tape, drop cloths, and cleanup supplies (mineral spirits or appropriate cleaner).
- Respirator, gloves, eye protection
- Sanding and filling kit
- Brushes, roller, tape
Recommended paints, primers, and brushes for banisters
Choosing the right paint, primer, and brushes makes the difference between a lasting, smooth banister and one that chips or shows brush marks.
You’ll want durable, low-VOC satin or semi-gloss latex or alkyd paint. Use a bonding primer for bare wood.
Choose high-quality synthetic brushes and a small foam roller for grooves.
- Paint: satin/semi-gloss
- Primer: bonding
- Brushes: synthetic/foam
Safety equipment and ventilation tips
After picking your paint, primer, and brushes, make sure you wear the right safety gear and set up ventilation so fumes and dust don’t become a problem.
You’ll protect yourself and your home by using:
- N95 mask, eye protection, and disposable gloves.
- Cross-ventilation with fans and open windows.
- Drop cloths and a HEPA vacuum for dust cleanup.
Step-by-Step Preparation (Step 1 to 4)
Start by inspecting the banister for damage, loose joints, and any style choices that affect repairs.
Clean with a degreaser, then sand progressively from medium to fine grit—using flexible sanding pads for rounded areas.
Fill cracks, secure or re-glue loose balusters, and make the surface ready for priming in Step 5.
Step 1 Inspect and plan: damage, joints, and style considerations
Before you lift a brush, take a close look at the banister for damage, loose joints, and the overall style you want to keep or change.
Check for cracks, dents, or rot; tighten or mark loose spindles and newel posts; note moulding details and stain tones.
Decide whether you’ll preserve accents or simplify lines before proceeding.
Step 2 Clean thoroughly: degreasers and techniques
Anyone tackling a painted banister needs to remove grease, wax, and dust first, because contaminants stop paint from bonding.
Use a solvent cleaner or trisodium phosphate substitute, then rinse and dry. Follow with targeted spot-cleaning for grime.
- Degreaser: apply, agitate with brush, wipe.
- Rinse: clean water, microfiber.
- Dry: tack cloths or air-dry completely.
Step 3 Sanding: grit progression and how to sand rounded surfaces

Once the banister is clean and dry, you’ll sand to remove old finish and create tooth for the new paint, progressing from coarse to fine grits to avoid deep scratches.
Start with 80–120 grit, then 150–220 grit. Use a sanding sponge or wrapped sandpaper for rounded rails, sanding with the curve.
Finish by wiping dust with a tack cloth before priming.
Step 4 Repair: filling cracks, loose balusters, and glue techniques
With the surface sanded and wiped, it’s time to fix structural and cosmetic issues so your paint will stick and the railing will look smooth.
Inspect for cracks, holes, and loose balusters. Glue loose joints with wood glue and clamp until set.
Fill gaps with wood filler or epoxy, sand flush, and clean dust. Confirm tight, stable components before painting.
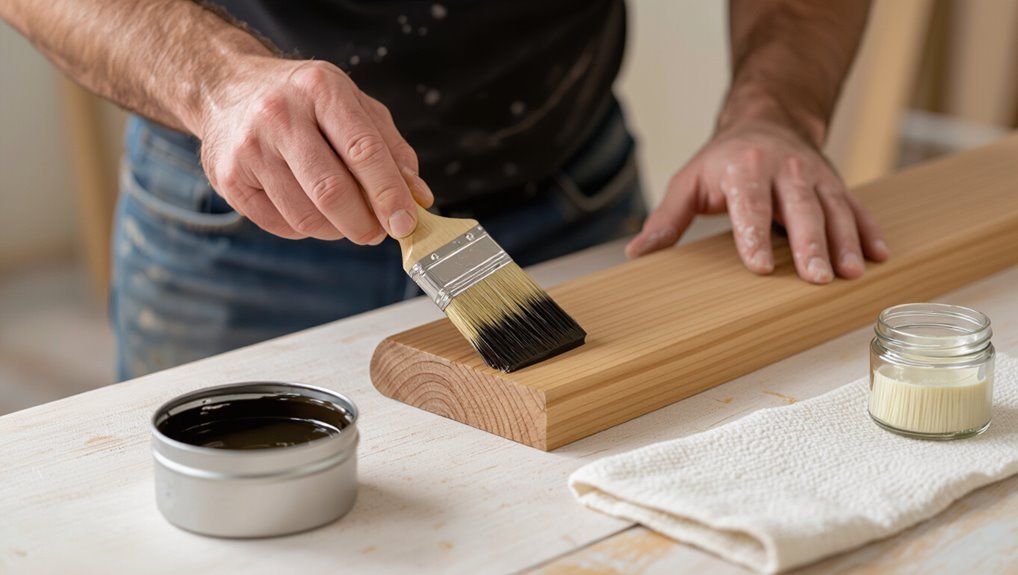
Priming and Choosing the Right Primer (Step 5)
Before you paint, you’ve got to prime: a good primer bonds to the stained wood and prevents tannin bleed-through that paint won’t stop on its own.
Choose a bonding primer for slick surfaces, shellac or oil-based for tough stain blocking, and consider spray for even coverage or a brush for control.
Allow the recommended drying times between coats so the primer fully cures before topcoating.
Why primer matters over stain
Even if the existing stain looks sealed and smooth, you’ll still need a quality primer to keep paint adhering evenly and prevent bleed-through.
Primer creates a uniform surface that bonds to the stained wood and gives your topcoat something to grip. It blocks tannins and color migration, evens porosity, improves durability, and reduces the number of finish coats you’ll need for a durable, consistent result.
Primer types: bonding, shellac, oil-based, and stain-blocking
Because the right primer determines how well your paint will stick and how long the finish lasts, you’ll want to pick one designed for stained wood: Choose bonding for adhesion, shellac for tannin blocking, oil-based for durability, or a stain-blocking primer for bleed-through control. Decide by wood type and finish desired.
| Primer | Feeling |
|---|---|
| Bonding | Secure |
| Shellac | Confident |
| Oil | Steady |
| Stain-blocking | Relieved |
Application tips: brush vs. spray and drying times
Now that you’ve picked the right primer for your stained banister, you’ll choose how to apply it—brush or spray—and factor in proper drying times.
Use a high-quality angled brush for control in crevices; spray for smooth, fast coverage on spindles.
Follow primer label for tack-free and recoat times, allow longer in high humidity, and lightly sand between coats for adhesion.
Painting the Banister (Step 6 and 7)
Now you’ll paint the banister, using long, steady strokes for smooth, even coats on rounded rails so the finish stays uniform.
Tackle spindles, newel posts, and tight spots with a small angled brush or foam brush, turning the piece as needed to reach all sides.
Plan for two to three thin coats with proper drying time between each—follow the paint’s recommended schedule for best results.
Step 6 Painting technique for smooth, even coats on rounded rails
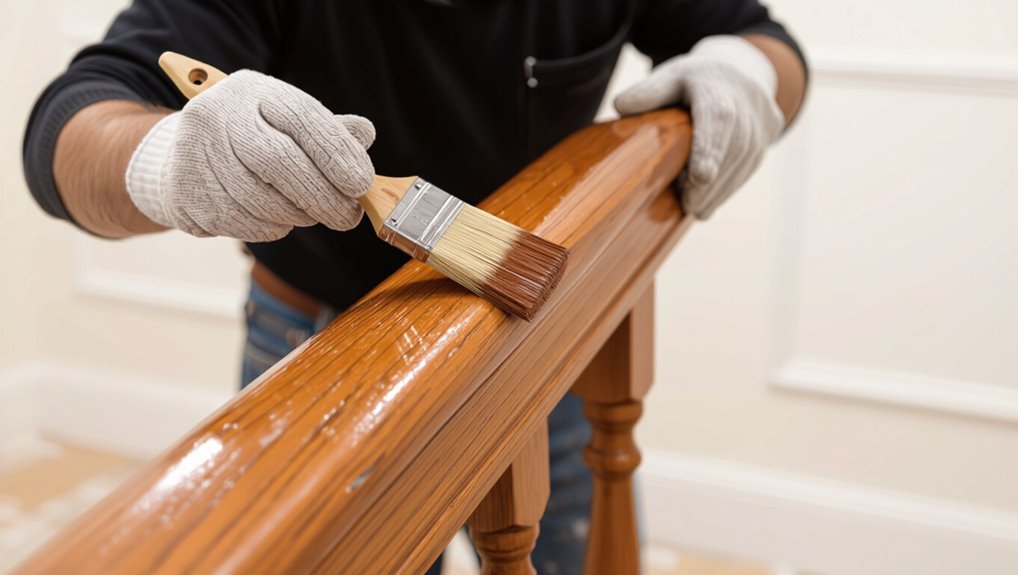
Start by laying out your tools and taking a moment to plan each pass along the rail so you’ll keep a wet edge and avoid brush marks; for rounded banisters, a small angled sash brush plus a soft foam brush or roller will give you the control and smooth finish you need.
Work from top downward, feathering strokes, rotating the rail as you go, and allow proper drying between thin coats.
Step 7 Handling spindles, newel posts, and hard-to-reach spots
Because spindles, newel posts, and tight corners need different tools and a steady approach, you’ll want to tackle them separately from the rails to avoid drips and uneven coverage.
- Use a small angled brush for grooves and spindle details.
- Wrap foam around a dowel to reach between balusters and wipe excess paint.
- Paint newel posts in sections, sanding light between passes for a seamless finish.
Recommended number of coats and drying schedule
Plan for at least two thin coats of paint and factor in proper drying time between them so your banister dries hard, looks smooth, and resists drips or tackiness.
Wait manufacturer-recommended dry times—typically 2–4 hours between coats for latex, longer for oil-based. Lightly sand between coats for adhesion, clean dust, then apply the final coat.
Allow full cure (24–72 hours) before heavy use.
Finishing and Protecting the Paint
Now that the paint’s cured, you’ll want to protect it with the right clear finish—compare oil-based polyurethane for durability versus waterborne finishes for lower odor and faster drying.
Wait the manufacturer’s recommended cure time before reassembling or heavy use, and plan for light handling during the initial 24–72 hours.
Finally, keep a small touch-up kit and a routine for repairing chips in high-traffic spots so the banister stays looking fresh.
Topcoats and clear finishes: polyurethane vs. waterborne finish
When choosing a clear topcoat, you’ll weigh durability, appearance, and ease of application—most people pick between oil-based polyurethane and waterborne finishes. You’ll prefer oil for toughness and ambering, waterborne for clarity and quick drying. Test compatibility, sand between coats, and apply thin layers.
| Type | Pros | Cons |
|---|---|---|
| Oil | Durable | Ambering |
| Water | Clear | Less robust |
When to reassemble and cure time recommendations
After your final coat has dried to the touch and you’ve followed the manufacturer’s recoat time, wait the recommended cure period before reassembling hardware or putting the banister back into regular use; this guarantees the paint and topcoat reach sufficient hardness so you don’t mar the finish or gum up hinges and screws.
Typically wait 24–72 hours for light handling, seven days for normal use, and 30 days for full cure.
Touch-up strategy for chips and high-traffic areas
Once the banister’s cured and you’ve reassembled hardware, plan for touch-ups to keep high-traffic areas from looking worn.
Keep a small jar of matching paint and a fine brush nearby. Sand chips lightly, clean dust, and apply thin, feathered coats.
After drying, blend edges and add a clear protective topcoat where contact is frequent to prolong the finish.
Comparison: Stripping Stain vs. Painting Over It
You’ll want to weigh stripping the stain completely against painting over it by comparing pros and cons for each method.
Stripping gives a clean, durable base but adds cost and time, while painting over saves money and time but can sacrifice adhesion and longevity if prep’s rushed.
Consider your budget, schedule, and how long you want the finish to last before choosing.
Pros and cons of stripping completely
Although stripping a stained banister down to bare wood takes more time and elbow grease, it gives you a clean, predictable surface and lets paint—or a new stain—adhere properly.
You’ll decide based on durability, effort, and cost:
- Durability: full strip prevents adhesion failures and hides old tannins.
- Effort: sanding/chemical stripping is labor-intensive.
- Cost: more prep raises time and material expenses, but improves results.
Pros and cons of painting over existing stain
If stripping down to bare wood sounds like too much work or expense, painting over the existing stain can be a practical alternative—just know what you’re trading off.
- Faster: you’ll skip deep sanding and chemical removers, so you’ll finish sooner.
- Easier adhesion needs: you may need deglosser or primer to prevent bleed-through.
- Cosmetic limits: old stains or repairs can show through thin paint if not prepped well.
Cost, time, and durability comparison
When weighing stripping versus painting over stain, think regarding upfront cost, time investment, and how long the finish will last—stripping demands more time and often higher material or labor costs but gives a longer-lasting, more durable surface, while painting over stain saves money and time initially but may need touch-ups or rework sooner if prep isn’t thorough.
| Option | Cost | Durability |
|---|---|---|
| Strip | Higher | Longer |
| Paint over | Lower | Shorter |
Common Mistakes and How to Avoid Them
When you paint a stained banister, common mistakes like poor adhesion, visible brush strokes or drips, and using the wrong or contaminated primer/paint will ruin the finish.
Check and prep the surface thoroughly, use the right primer for your topcoat, and keep brushes and cans clean to prevent problems.
I’ll walk you through simple fixes and techniques so your banister looks smooth and professional.
Poor adhesion causes and fixes
Although sanding and priming feel tedious, skipping or rushing those steps is the main reason paint won’t stick to a stained banister.
Remove gloss with proper sanding, clean all dust and oil, and use a stain-blocking primer.
If paint peels later, strip back to bare wood, re-sand, re-prime, and allow full cure between coats to guarantee lasting adhesion.
Visible brush strokes, drips, and runs
Watch for visible brush strokes, drips, and runs—they’re easy to fix if you catch them early but can ruin a smooth finish if you don’t.
Keep brush strokes light, work wet edges, and thin long strokes along the grain.
Tip excess paint, smooth drips immediately with a loaded brush, and sand tiny imperfections between coats.
Use thin, even layers for a factory look.
Wrong primer/paint choices and contamination issues
One wrong primer or contaminated surface can undo hours of careful prep and leave your banister peeling, blistering, or looking uneven.
Choose a stain-blocking, adhesion-friendly primer matched to your topcoat (latex vs. oil).
Clean, degrease, and sand thoroughly; remove dust and wax.
Test adhesion with a small patch.
Avoid mixing incompatible products or skipping primer on bare or stained wood.
Best Practices and Pro Tips for a Lasting, Clean Finish
Start by using smart prep shortcuts—like sticky microfiber tack cloths and targeted sanding—that save time without cutting corners on adhesion.
Keep your brushwork crisp by loading less paint, using long, even strokes, and cleaning tools promptly to maintain a professional finish.
Finally, plan your project for low-humidity, moderate temperatures so coatings cure properly and resist tackiness or bubbling.
Prep shortcuts that don’t sacrifice durability
Although you can skip a few steps, smart shortcuts let you save time without compromising durability—focus on targeted prep that removes contaminants, scuffs the finish for adhesion, and protects adjacent surfaces.
You’ll work efficiently by prioritizing essentials:
- Clean with degreaser, then wipe with tack cloth.
- Lightly sand high-contact areas only.
- Mask nearby trim and floor with low-tack tape and paper.
Professional-looking brushwork and tool maintenance
Lay down smooth, controlled strokes and keep a wet edge to avoid lap marks and visible brush strokes; you’ll get a salon‑clean finish by loading the brush correctly, working with the grain, and using long, even passes rather than short, choppy strokes.
Clean brushes promptly with the proper solvent, reshape bristles, store flat or hanging, and swap worn brushes or foam tools to maintain crisp lines.
Seasonal and humidity considerations
Because paint reacts to temperature and moisture, you’ll get the best, longest‑lasting finish when you match your timing and prep to seasonal conditions.
Work when temps are stable (ideally 50–85°F) and humidity is under 60%. Avoid painting in extreme heat, cold, or damp.
Use dehumidifiers or fans to speed drying, and delay staining or topcoats if condensation or rain is expected.
Maintenance and Long-Term Care
Keep your painted banister looking fresh with a simple weekly wipe-down using a soft cloth and mild cleaner, and avoid harsh chemicals that can strip the finish.
When you spot chips or scuffs, do small touch-ups with matching paint and a fine brush to prevent further damage.
If you notice widespread wear, persistent flaking, or finish loss, it’s time to plan a full repaint or refinish.
Cleaning routine to preserve painted banister
While regular touch-ups help, a simple cleaning routine is the best way to keep your painted banister looking fresh and lasting longer.
Weekly, dust with a microfiber cloth.
Monthly, wipe with a mild detergent solution and a soft sponge, then dry immediately.
Avoid abrasive cleaners and excessive water.
Use felt pads on furniture and advise family to avoid gripping with dirty or greasy hands.
When and how to perform touch-ups
When small chips or scuffs appear, do touch-ups promptly so damage doesn’t spread and repairs stay nearly invisible.
Lightly sand edges with fine-grit paper, clean dust, and apply matching paint with a small brush or cotton swab.
Feather strokes outward, let dry, then lightly buff to blend sheen.
Keep leftover paint sealed for future quick fixes.
Signs it’s time to repaint or refinish
If touch-ups start failing to hide wear or you notice recurring damage in the same spots, it’s a sign you should consider a full repaint or refinishing.
Look for peeling, deep scratches, soft or spongy wood, persistent water stains, or uneven gloss.
If structural integrity or finish longevity is compromised, refinish professionally or strip and repaint to restore protection and appearance.
Cost and Time Estimates
You’ll want a clear DIY cost breakdown outlining materials (primer, paint, brushes, sandpaper) and any tools you might need to buy or rent.
Expect the timeline to vary—a short stair run can take a weekend, while a full multi-level banister may stretch over several days for drying and multiple coats.
Use these estimates to plan budget and scheduling before you start.
DIY cost breakdown: materials and tools
A realistic DIY budget for painting a stained banister usually runs between $60 and $200, depending on the materials and tools you already have. You’ll need primer, paint, sandpaper, brushes/rollers, and maybe a scraper or orbital sander. Shop sales or borrow tools to cut costs.
| Item | Typical cost | Notes |
|---|---|---|
| Paint/primer | $25–$80 | Coverage varies |
| Sanding tools | $5–$70 | Hand vs power |
| Brushes/tape | $10–$30 | Quality matters |
Typical project timeline by banister size/type
Because banister size and style change prep and drying times, expect a straightforward upstairs railing to take far less time than a grand, curved staircase.
A short straight run: 4–6 hours prep/painting plus overnight drying.
Two-story or wrapped handrails: 1–2 days.
Curved staircases with many spindles: 3–4 days including sanding, priming, multiple coats, and cure time before heavy use.
FAQ
You’ve got practical questions about painting a stained, polyurethane-coated banister — from whether you need to strip it to which finish will hold up to constant touching.
You’ll also want clear guidance on drying times between primer and paint, whether spraying or brushing works better, and how big a color change you can make without stripping.
Read on for concise answers and quick tips to help you decide.
Can I paint over polyurethane-stained banisters without stripping?
If your banister has a polyurethane finish, you can often paint over it without fully stripping, but you’ll need to scuff the surface and use the right primer for adhesion.
Lightly sand to dull the gloss, clean thoroughly, then apply a high-bond primer designed for glossy finishes.
After priming, use a durable topcoat.
Test a small area first to confirm adhesion and appearance.
What paint finish is best for banisters that get touched often?
For banisters that get handled a lot, choose a semi-gloss or satin finish—they resist wear and wipe clean easily while still hiding minor imperfections better than high-gloss.
Pick a durable acrylic latex paint formulated for trim. Satin gives a softer look; semi-gloss offers more protection.
Test a small area to confirm feel and sheen, and clean gently with mild soap to maintain the finish.
How long should I wait between primer and paint coats?
After you pick the right finish and prime the banister, wait until the primer is fully dry before applying paint—usually 1 to 4 hours for latex primers and 24 hours for oil-based primers, depending on temperature and humidity.
Touch lightly to test dryness. Sanded primer needs a short tack-free wait.
If conditions are cool or humid, extend drying time; don’t rush coats or finish quality suffers.
Is spraying better than brushing for a banister?
Wondering whether to spray or brush your banister?
Spraying gives a smoother, faster finish and reaches tight curves, but needs careful masking and ventilation.
Brushing offers control for edges, fewer overspray risks, and works well on small projects.
Choose spraying for speed and uniformity; pick brushing if you’re cautious, dealing with intricate details, or lack a controlled workspace.
Can I change the color drastically without stripping?
If you want a drastically different color without stripping, you can — but the approach matters.
Sand lightly, clean thoroughly, then apply a high-bonding primer or shellac-based sealer to block stain bleed.
Use thin, even coats of paint and allow full drying between layers.
Expect slightly raised grain and minor texture differences; proper prep and primer give a durable, uniform result.
Checklist: One-Page Project Plan for Painting a Stained Banister
When you’re ready to tackle the job, a one-page checklist keeps the project focused and efficient: list materials, prep steps, safety gear, painting sequence, drying times, and cleanup so you don’t miss a key step or waste time hunting supplies.
- Gather: primer, paint, brushes, sandpaper, tape.
- Prep: clean, sand, mask, ventilate.
- Paint: prime, two coats, note dry times, tidy up.