How to Paint a Mural on a Concrete Wall: A Complete Beginner’s Guide
You can paint a durable, striking mural on concrete by preparing the surface, choosing masonry-grade paints and primers, and using proper tools and safety gear. Inspect and repair cracks, clean off efflorescence or mold, then prime with a concrete sealer to guarantee adhesion. Block in large shapes, layer detail with brushes or sprayers, and finish with a clear sealer or anti-graffiti coat. Keep weather and permits in mind—continue for step-by-step tips and troubleshooting.
How to Paint a Mural on a Concrete Wall Quick Answer and Overview
This quick overview tells you what the guide covers—surface prep, materials, design transfer, painting techniques, and sealing—so you can plan each step.
It’s written for DIYers and community artists with basic painting skills, and most murals here can be completed in a weekend to a few days depending on size and detail.
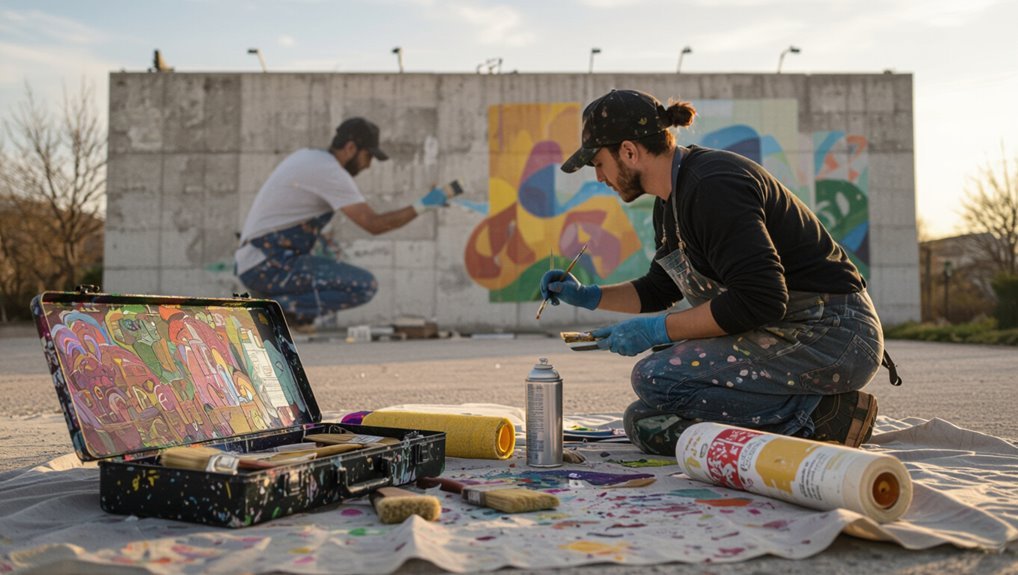
You’ll get a visual preview of the finished look and a clear project scope to match your time, budget, and skill level.
One-paragraph quick answer: What this guide covers
When you’re ready to transform a concrete wall into a lasting mural, this guide walks you step-by-step through planning, surface preparation, materials and tools, sketching and scaling your design, painting techniques for masonry, weatherproofing, and maintenance so you can create a vibrant, durable work of art.
You’ll get clear, practical instruction on how to paint a mural on a concrete wall safely and effectively.
Who this guide is for and expected time/skill level
Whether you’re a first-time hobbyist tackling a weekend project or an experienced muralist planning a larger public piece, this guide suits painters who can follow step-by-step instructions, handle basic tools, and commit a few hours to several days depending on mural size.
You’ll need patience, basic painting skills (brushes, rollers), and willingness to learn prep, safety, and finishing techniques to get reliable results.
Visual preview and project scope

If you want a quick sense of what’s involved, picture a simple three-panel design (sketch, block colors, details) on a 10–12 foot concrete wall that you can finish over a weekend with basic tools and weather above 50°F.
You’ll plan layout, prep and prime, roll base coats, mask areas, add details, and seal.
Estimate supplies, drying time, and one helper for efficiency.
Basic Understanding Materials, Terminology, and Why Concrete Is Different
Before you start, know that a mural is a planned, often large-scale work meant to become part of the wall, not just a random piece of wall art.
Concrete behaves differently than drywall or brick because it’s porous, can hold moisture, and often has a rough texture that affects adhesion.
That means you’ll choose paints and finishes made for masonry—like acrylics, elastomeric coatings, or specialty masonry paints—to get durable, flexible results.
What is a mural vs. other wall art
A mural is a large-scale artwork painted directly onto a wall or ceiling, designed as an integral part of the surface, while other wall art—like canvases, prints, or removable panels—sits on or is hung from the wall and isn’t bonded to the substrate.
When you plan a mural, you consider permanence, scale, public context, and surface preparation, unlike with portable or temporary wall pieces.
Properties of concrete that affect painting (porosity, moisture, texture)
Concrete’s porosity, moisture movement, and surface texture directly shape how paint bonds, wears, and looks, so you’ll need to treat it differently than wood or drywall.
You’ll test porosity (water drop test), check for rising damp or leaks, and note roughness or laitance.
These factors determine prep: cleaning, patching cracks, and choosing primers and sealers to guarantee adhesion and longevity.
Types of paints and finishes suitable for concrete (acrylic, elastomeric, masonry)
Paint choices for concrete fall into a few clear categories—acrylic, elastomeric, and masonry coatings—and each handles moisture, movement, and surface texture differently. You’ll pick acrylic for color and breathability, elastomeric for cracks and waterproofing, masonry for durability and texture. Match primer and sealer to concrete condition for adhesion and longevity.
| Type | Strength | Best use |
|---|---|---|
| Acrylic | Color, breathable | Interior/exterior murals |
| Elastomeric | Stretch, waterproof | Cracked, exterior walls |
| Masonry | Durable, textured | Rough concrete surfaces |
Planning Your Mural Design, Permissions, and Budget
Before you start sketching, pick a wall and inspect its condition so you know if repairs or priming are needed.
Get the necessary permissions and community support early, and factor permits into your schedule.
Then set a realistic budget and timeline while developing your design—scale, color palette, and mockups—to match the site and resources.
Choosing a wall and assessing surface condition
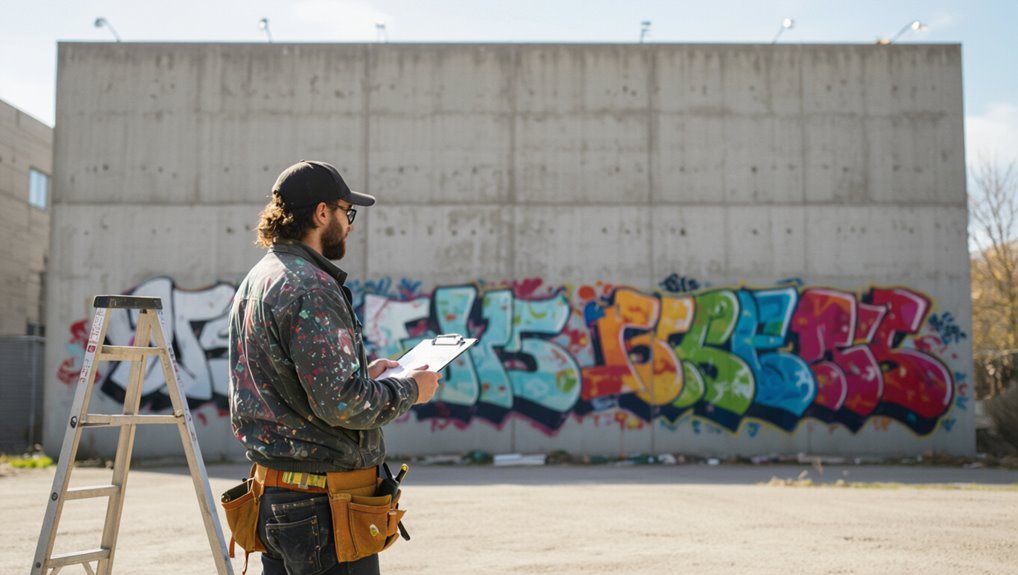
When you pick a wall, focus on location, visibility, and how the surface condition will affect both your design and the prep work you’ll need to do.
Inspect for cracks, spalling, efflorescence, moisture, and previous coatings. Note texture and porosity—smooth versus rough changes paint choice and adhesion.
Measure dimensions, check sunlight and water exposure, and plan necessary repairs and priming.
Securing permissions, permits, and community buy-in
If your mural will be on public property or a visible private building, you’ll need to secure the right permissions and permits before you touch a brush; local ordinances, building owners, and community stakeholders all have a say.
Contact the property owner, check municipal permit requirements, present clear design proposals, and gather community feedback.
Get approvals in writing and document any conditions before starting work.
Setting a realistic budget and timeline
While you’re still finalizing your design and permits, sketch a clear budget and timeline so you know what’s realistic and where to prioritize funds and time.
Break costs into essentials, labor, and contingency; set milestones tied to weather and permit dates. Use a simple tracking sheet and adjust as needed.
- Materials and tools
- Scaffolding and safety
- Labor and helpers
- Contingency fund
Designing the mural: concept, scale, color palette, and mockups
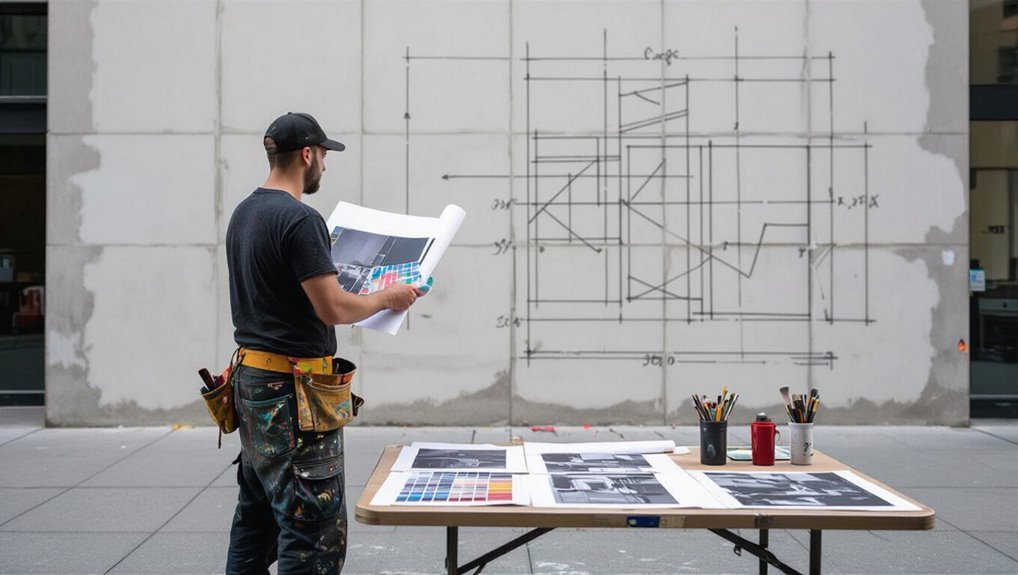
Concept and scale set the foundation for a successful mural, so start by defining the story you want to tell and the viewing context—who will see it, from what distance, and on what part of the wall.
Sketch proportions, choose a limited color palette for harmony and contrast, create digital or printed mockups to test visibility, and revise until composition, colors, and accessibility align with your budget and permissions.
Tools, Materials, and Safety Checklist
Before you start painting, gather the essential tools—brushes, rollers, sprayers, and safe scaffolding or ladders—and choose appropriate paints, primers, and sealers for concrete.
Don’t forget ancillary materials like cleaners, patching compounds, and masking tape, plus PPE such as fall protection, respirators or masks, and eye protection.
Check ventilation, weather forecasts, and environmental rules so you can work safely and protect your finish.
Essential tools (brushes, rollers, sprayers, scaffolding)
Gather the right tools and your mural will go on faster and look sharper: brushes for detail, rollers for broad coverage, sprayers for smooth gradients and speed, plus safe scaffolding or lifts to reach high areas.
- Choose varied brush sizes for edges and detail.
- Use rollers with appropriate nap for texture.
- Rent or test sprayers for control.
- Inspect and secure scaffolding before use.
Paints, primers, sealers, and ancillary materials
Now that your tools and access are in place, pick paints, primers, and sealers that match the wall’s condition and your design goals.
Use quality materials to guarantee adhesion and longevity.
- Masonry primer for porous concrete
- Exterior acrylic or elastomeric paint
- Clear UV-resistant sealer for protection
- Caulk, patching compound, and masonry cleaner for prep
PPE and safety equipment: fall protection, masks, ventilation
When you’re working on a mural—especially at height or with strong fumes—wearing the right PPE and using proper fall protection and ventilation keeps you safe and lets you focus on the art.
Use a fitted respirator or N95 for fumes, eye protection, gloves, and hearing protection.
Secure harnesses, guardrails, or stable scaffolding for height.
Always ventilate enclosed areas and inspect gear before each shift.
Weather and environmental considerations
After you’ve checked PPE, fall protection, and ventilation, you’ll want to factor weather and site conditions into every tool and material choice to keep the mural and crew safe.
Check forecasts, avoid painting in high humidity or extreme temperatures, and protect fresh paint from rain and wind.
Secure tarps, weights, and scaffolding; choose fast-drying, UV-resistant paints and corrosion-resistant hardware for longevity.
Surface Preparation Step 1: Inspecting and Repairing Concrete
Start by closely inspecting the wall for cracks, efflorescence, mold, and any signs of moisture so you know what needs attention.
Clean the surface with the appropriate method—pressure washing for heavy dirt, chemical cleaners for salts or mold, or scrubbing for localized stains—then let it dry completely.
Patch and fill cracks or re-trowel damaged areas, and call a professional if you suspect structural issues or persistent moisture.
Inspecting for cracks, efflorescence, mold, and moisture
Before you pick up any paint, thoroughly inspect the concrete for cracks, efflorescence, mold, and signs of moisture so you can address underlying problems that will ruin a mural.
Walk the wall, tap to locate hollow areas, mark hairline and structural cracks, note white powdery deposits and dark staining.
Record damp spots and sources of water intrusion before repairing or sealing.
Cleaning methods: pressure washing, chemical cleaners, scrubbing
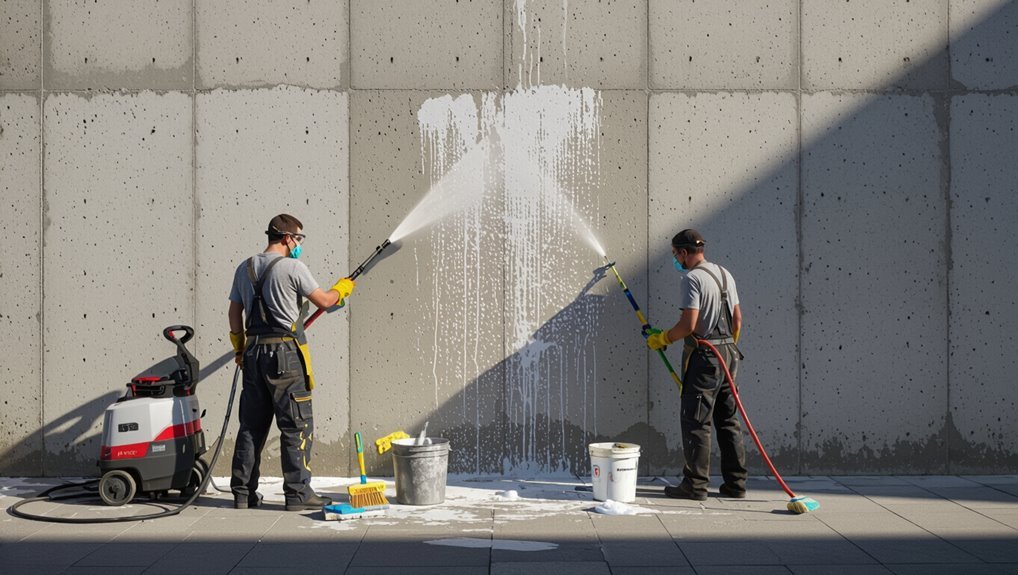
One or two thorough cleaning passes will save you time and guarantee paint adhesion, so choose between pressure washing, chemical cleaners, or manual scrubbing based on the wall’s condition and surrounding materials.
Use pressure washing for heavy dirt and loose paint, mild detergents or masonry cleaners for stains and efflorescence, and stiff-bristle scrubbing where power washing or chemicals might damage nearby surfaces or vegetation.
Repair techniques: patching, filling cracks, re-troweling
Walk the wall slowly and note every chip, crack, and delaminated patch you’ll need to fix before painting.
Remove loose material, brush away dust, and widen narrow cracks with a chisel. Use concrete patch or epoxy filler for cracks, tamping it smooth.
For larger damaged areas, re-trowel with a bonding mortar, feather edges, and let cures fully before priming and painting.
When to call a professional for structural issues
If you spot large cracks, significant settling, bulging, or mortar that’s crumbling away, call a structural pro—these signs can indicate underlying issues that simple patching won’t fix and could get worse or unsafe if ignored.
Don’t attempt major fixes yourself; a pro will assess foundation, drainage, and load-bearing concerns, recommend repairs, and provide permits or engineering reports so your mural rests on a safe, stable surface.
Priming and Undercoating Step 2: Creating a Paint-Ready Surface
Next you’ll pick a primer or sealer formulated for concrete to lock in dust and improve paint adhesion.
Apply it evenly with a roller, brush, or sprayer and follow the manufacturer’s drying times before proceeding.
Once dry, test adhesion and porosity in a small area so you can adjust products or coats if needed.
Choosing the right primer/sealer for concrete
Because concrete soaks up moisture and paint unevenly, choosing the right primer/sealer is essential to get a smooth, durable mural base.
Pick a masonry primer or acrylic concrete sealer that matches interior/exterior use and breathability. Look for alkali-resistant, penetrating formulas to prevent efflorescence and peeling.
Test adhesion on a small patch and ascertain compatibility with your topcoat.
Application methods and drying times
Start by choosing an application method that fits the wall’s texture and the sealer you picked: rollers cover large flat areas quickly, brushwork gets into crevices and edges, and a low-pressure sprayer gives the most even coat on rough concrete.
Apply thin, even coats, follow manufacturer drying times between layers, and allow full cure before painting—usually several hours to a couple of days depending on product and conditions.
Testing adhesion and porosity
Before you prime, test the wall’s porosity and adhesion so you know which products will bond and how much sealer you’ll need.
Wet a small area, note absorption speed; high soak means a penetrating primer.
Do a tape pull test after a dry coat to check adhesion.
Record results and choose a compatible primer, bonding agent, or extra coats to guarantee long-lasting mural paint.
Transferring the Design Step 3: Grid, Projection, and Freehand Techniques
You’ll pick a transfer method based on scale and detail: use a measured grid to accurately scale a small sketch up to a wall, or rely on projection for fast, precise outlines at night.
For organic lines or textured surfaces you’ll pounce, trace, or sketch freehand, and you can combine techniques—grid for complex sections and projector or freehand for larger sweeps.
I’ll cover tips, common pitfalls, and how to mix methods so your design lands exactly where you want it.
Grid method: measuring and scaling a design
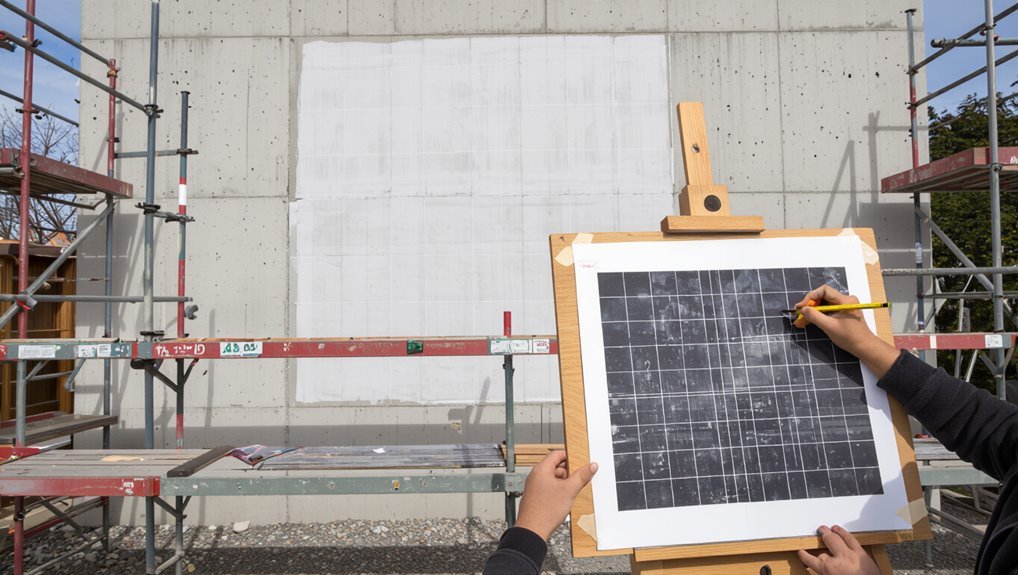
When you need precise scaling on an uneven concrete surface, the grid method gives you a reliable, low-tech way to transfer your design accurately; you’ll divide both the original artwork and the wall into proportional squares, then copy what’s in each square one at a time.
Measure the original, choose a scale, mark a matching grid on the wall with chalk or pencil, then transfer square by square.
Using a projector for night transfers: tips and pitfalls

Want to work after sunset? Use a bright, high-lumen projector, secure a stable power source, and mount it on a tripod to prevent drift.
Tape reference marks on the wall for alignment and check focus frequently. Watch for ambient light, uneven concrete texture, and keystone distortion.
Test a small section first, adjust contrast, and lock your setup before painting.
Pouncing, tracing, and sketching freehand techniques
Although projection and grids work great for large layouts, you’ll often rely on pouncing, tracing, or freehand sketching to lock in details and correct proportions on textured concrete.
Use charcoal or chalk for light marks, tape paper patterns for tracing, and a needle pounce bag for transferring outlines.
Work from general shapes to specifics, step back frequently, and refine lines before painting.
Combining methods for large or detailed murals
Because large, detailed murals often demand different strengths at different stages, you’ll get the best results by mixing grids, projection, and freehand work rather than sticking to just one method.
Start with a grid for accurate layout, use a projector to place complex elements quickly, then refine edges and add texture freehand.
Balance speed, accuracy, and expressive detail as needed.
Painting the Mural Step 4: Layering, Techniques, and Workflow
Start by blocking in large color areas, working from background to foreground so your composition reads correctly as you add detail.
Use brushes, rollers, and spray techniques to match the concrete’s texture, then blend and shade with smaller brushes for smooth shifts and fine detail.
Work in manageable sections and plan drying times so layers don’t smear and you can build depth efficiently.
Blocking in large color areas and working from background to foreground
Lay in your big color zones first, using broad brushes or rollers to establish the overall values and temperature of the wall; this gives you a clear framework to build on and prevents later colors from contaminating one another.
Work background to foreground, refining shapes and edges as layers dry. Block midtones, then add darker accents and highlights last, preserving depth and crisp composition.
Brush, roller, and spray techniques for concrete texture
Three main tools—brushes, rollers, and sprayers—give you distinct control over how paint interacts with concrete’s rough surface, so choose and use each to match the texture you want.
Use stiff brushes for crevices and directional strokes, medium rollers for even coverage and slight stipple, and sprayers for thin, uniform coats and soft mottling.
Adjust pressure, distance, and overlap for consistency.
Blending, shading, and adding fine details
Once your base layers have dried, you’ll build depth by working in successive, controlled passes: block in midtones, push shadows, and lift highlights, blending edges while keeping your focal details crisp.
Use soft brushes or dry-brush strokes for smooth changes, glazing for subtle shifts, and fine liners or small round brushes to add textures, veins, and sharp edges that define form and bring the mural to life.
Working in sections and managing drying times
Because large walls dry unevenly, work in manageable sections so you can control layering and timing; plan panels, finish one at a time, and keep edges feathered to blend when damp.
Monitor weather and humidity, use fast- or slow-drying additives as needed, and label wet areas.
Schedule glazing and varnish only after full cure to avoid tackiness and uneven sheen across the mural.
Sealing and Protecting Step 5: Finishing for Longevity
Now that your mural’s painted, you’ll pick a clear coat or anti-graffiti finish that matches the exposure and desired sheen.
Apply it with even strokes, following product instructions for drying time and layering to maximize UV and weather resistance.
Then set a simple maintenance schedule for inspections and touch-ups so small issues never become major repairs.
Choosing a suitable clear coat or anti-graffiti finish
A durable clear coat will protect your mural from weather, UV fading, and vandalism, so pick a finish that matches your wall’s exposure and your desired look.
Choose between sacrificial, sacrificial-removable, and permanent anti-graffiti films or coatings; consider gloss level, breathability for concrete, and compatibility with underlying paint.
Test a small area and confirm vendor durability claims before full application.
Application tips for UV and weather resistance
After you’ve chosen the right clear coat or anti-graffiti finish, focus on application techniques that maximize UV and weather resistance.
Work in dry, mild temperatures; apply thin, even coats; sand light between coats if product recommends; maintain recommended flash times; overlap strokes uniformly; tilt sprayer or brush for consistent coverage; avoid pooling; finish with manufacturer’s topcoat thickness for ideal UV protection and water shedding.
Maintenance schedule and touch-up strategies
While regular checkups keep your mural looking its best, a clear, practical maintenance schedule makes them easy to manage: inspect the surface every 3–6 months for UV fading, chalking, dirt buildup, and minor damage; rinse away dust and pollutants with a gentle, low-pressure wash and mild detergent as needed; and plan touch-ups each season or whenever protective coatings show wear.
- Keep a photo log for comparisons.
- Recoat clear sealer every 3–5 years.
- Match pigments for small spot repairs.
- Use artist brushes for feathered blending.
Troubleshooting Common Problems and Mistakes
You’ll want to catch and fix common issues like paint peeling, flaking, or delamination early by identifying surface adhesion or moisture causes and using proper primers or patching.
Watch for efflorescence and moisture bleed-through, which need drying, sealing, and sometimes masonry treatments before repainting.
Address uneven color, streaks, and texture mismatch with consistent technique and test patches, and always check local rules and safety requirements to avoid legal or hazardous problems.
Paint peeling, flaking, or delamination causes and fixes
Peeling, flaking, or delamination usually signal a bond failure between the paint and the concrete—common causes include inadequate surface prep, trapped moisture, incompatible primers or paints, and painting over contaminants like efflorescence or oils.
Scrape loose paint, clean thoroughly, etch or sand to profile, apply a compatible masonry primer, and use high-quality exterior acrylic paint.
Allow proper curing and address source moisture before repainting.
Issues with efflorescence and moisture bleed-through
After addressing loose paint and surface bond issues, you’ll often find efflorescence and moisture bleed-through are the next problems to tackle because they both indicate water is moving through or out of the wall.
You should remove salt deposits with a stiff brush, let the wall dry thoroughly, fix the moisture source, and apply a breathable masonry primer and paint designed to resist alkali and block water migration.
Uneven color, streaks, and texture mismatch
When your mural shows blotchy color, visible roller or brush marks, or areas that soak up paint differently, it’s usually because the surface and application weren’t uniform—different porosity, insufficient primer, or inconsistent paint thinning can all cause streaks and texture mismatch.
Reprime uneven areas, sand high spots, use consistent thinning and tools, apply even coats, and feather edges. Test small patches before proceeding.
Safety and legal problems to avoid
Fixing uneven color and texture is just one part of a successful mural—once the surface’s sorted, you still need to handle safety and legal issues before you paint.
Check permits, property permissions, and local ordinances. Wear PPE, secure ladders and scaffolding, and use respirators for sprays.
Document approvals, avoid protected imagery, and respect neighbors’ concerns to prevent fines, removal, or legal disputes.
Tips, Best Practices, and Time-Saving Strategies
Get your crew organized and sequence tasks so everyone’s working efficiently and you’re not wasting time or paint.
Consider budget-saving material swaps and smart quality trade-offs, and choose sustainable products when they make sense.
Involve the community and document the process so future caretakers know how to maintain the mural.
Efficient crew organization and task sequencing
Although a strong plan matters most, organizing your crew and sequencing tasks lets you finish faster with fewer mistakes. You’ll assign roles, set prep and paint phases, and keep communication tight to avoid rework.
- Assign clear roles: lead, prep, paint, finisher
- Prep first: clean, prime, grid
- Paint in zones, not by person
- Check quality after each stage
Budget-saving material swaps and quality trade-offs
Organizing your crew well gets you through the painting stages faster, but smart material choices can shave costs without wrecking the final look.
Choose mid-grade exterior acrylics for durability, swap expensive rollers for quality foam, and use economy brushes for broad strokes while reserving premium brushes for detail.
Buy primer and sealer in bulk, test cheaper pigments for colorfastness first.
Community engagement and documentation for future care
Why involve the neighborhood early and often? You’ll build ownership, reduce vandalism, and gather useful feedback.
Host brief meetings, collect contact info, and invite volunteers for prep or touch-ups.
Photograph stages, note materials and color codes, and store care instructions digitally.
Share a simple maintenance schedule with neighbors so future caretakers can quickly refresh the mural and preserve its impact.
Sustainable and eco-friendly material choices
Choose paints, primers, and sealers that minimize environmental harm and still stand up to weather and wear; look for low-VOC or zero-VOC acrylics, recycled-content acrylic latex primers, and water-based clear coats that block moisture without off-gassing.
Use brushes and rollers you can clean and reuse, buy concentrated colorants, donate leftovers, pick fast-drying formulations to save time, and store materials correctly to extend life.
Tools and Product Comparison Cheat Sheet
You’ll want a quick cheat sheet to pick the right products and tools for your concrete mural. Below is a compact comparison to help you decide between primer and masonry sealer, and between spray systems and brush/roller for speed and finish. Use it to match the prep and application method to your wall’s condition and the finish you want.
| Item | When to use / Notes |
|---|---|
| Primer | Use on new or patched concrete for adhesion and to block stains. |
| Masonry Sealer | Use on porous, weathered concrete to reduce moisture uptake before painting. |
| Spray vs Brush/Roller | Spray = fastest, smoother broad coverage; Brush/Roller = more control for detail and texture. |
Primer vs. masonry sealer: when to use each
Although both primer and masonry sealer protect and prep concrete, they serve different roles and aren’t interchangeable.
Use a masonry sealer to block moisture, salt efflorescence, and stabilize porous or new concrete.
Choose a primer (masonry or acrylic) to improve paint adhesion, hide stains, and create an even surface.
Seal first on damp-prone walls; prime when surface is dry and sound.
Spray systems compared to brush & roller for speed and finish
When speed matters and coverage is large, spray systems outpace brushes and rollers—but for crisp edges and texture control, hand tools still win.
You’ll use sprayers for base coats, gradients, and quick touch-ups; masks and ventilation are essential.
Choose brushes and rollers for detail, layering, and textured concrete.
Combine both: spray broad areas, then refine with brush and roller for a polished finish.
Project Examples and Mini Case Studies
You’ll look at three real-world examples to see how scope, timeline, and costs change with scale.
A small residential mural shows budgeting and a weekend-friendly schedule, while a large public project highlights permits, scaffolding, and community coordination.
I’ll also cover quick decorative solutions ideal for renters or temporary spaces.
Small residential mural: scope, timeline, and costs
A small residential mural usually covers one to three exterior wall panels or a single interior feature wall, and you can expect a straightforward scope: design, surface prep, priming, painting, and sealing.
Typically plan 2–7 days depending on complexity. DIY materials run $100–$500; hiring a local artist costs $500–$3,000.
Include paint, primer, sealant, brushes, rollers, and cleanup.
Large public mural: permits, scaffolding, and community process
Moving from a modest residential wall to a large public mural means adding layers of logistics: permits, scaffolding, insurance, and public engagement.
You’ll need to research local permit requirements, secure liability coverage, rent or hire scaffolding and safety gear, and schedule inspections.
Engage neighbors and officials early, present designs, gather feedback, and document approvals so your project proceeds smoothly and avoids costly delays.
Quick decorative concrete mural for renters or temporary spaces
If you want a bold, temporary splash without permanent alterations, quick decorative murals let you transform concrete walls fast and affordably.
Use removable adhesives, low-tack primer, or painted-on dropcloth designs that peel off later.
Pick simple geometric patterns or stencils for speedy results.
Work in sections, test removability on a hidden spot, and document placement to restore the original surface easily.
FAQ Common Questions Beginners Ask
You’ll have practical questions like how long a mural on concrete will last and whether you can paint over old graffiti without removing it first.
You’ll also want to know the difference between exterior and interior concrete murals, if spray paint is enough for outdoor work, and how to protect your piece from vandalism.
I’ll answer each so you can plan materials, prep, and protective measures with confidence.
How long will a mural on concrete last?
Lifespan depends on several factors: paint quality, wall preparation, local climate, and maintenance.
With good acrylics, proper priming and sealing, and routine cleaning or touch-ups, expect 5–15 years before significant fading or peeling.
Sun, moisture, freeze-thaw cycles, and pollution shorten life.
Using a UV-resistant topcoat and inspecting annually will extend durability and keep colors vibrant longer.
Can I paint over old graffiti without removing it first?
Wondering whether you can just paint over old graffiti? You technically can, but underlying paint and stains often bleed through and affect adhesion.
For best results, clean grease and loose paint, apply a stain-blocking primer, and use opaque exterior paint.
Removing stubborn marks first saves time and guarantees color accuracy and longevity.
Test a small area before committing to the whole mural.
What’s the difference between exterior and interior concrete murals?
Because exterior and interior concrete face different stresses, your approach, materials, and prep will change noticeably: outdoors you’ll prioritize weatherproofing, UV-resistant coatings, and tougher primers to handle moisture, temperature swings, and sunlight.
Indoors you can focus on smoother finishes, lower-VOC paints, and finer detail work.
Surface prep, sealers, and maintenance frequency will differ based on exposure and projected longevity.
Is spray paint sufficient for outdoor concrete murals?
Outdoor murals demand different materials than indoor work, so you’ll want to know whether spray paint can hold up on exterior concrete.
It can—especially high-quality acrylic-based sprays—if you prep the surface, use primer, and choose UV-resistant, fade-proof cans.
For large areas combine rollers with spray for speed and texture.
Expect more maintenance than with professional exterior wall paints.
How do I protect a mural from vandalism?
How can you keep a mural safe from graffiti and physical damage? Use anti-graffiti clear coats and sacrificial films so tags wash off easily.
Improve lighting and add motion-activated cameras or signs to deter vandals.
Plant thorny shrubs or install low barriers to limit close access.
Build community ownership by involving locals and maintaining the mural regularly to discourage defacement.
Final Checklist Before You Start
Before you touch paint, make sure everything’s lined up so the job runs smoothly and safely.
Check these essentials one last time:
- Site readiness, permits, materials, and safety
- Final mockup approval
- Weather window
- Crew briefing
Confirm each item so you can start with confidence.
Site readiness, permits, materials, and safety
Once you’ve checked the wall and secured any necessary permits, confirm your materials and safety gear so you can start without delays.
Verify paint types, primers, sealants, brushes, rollers, sprayers, ladders, and scaffolding.
Check PPE: gloves, masks, eye protection, and fall arrest if working high.
Guarantee power access, lighting, disposal plan for waste, and clear site access for deliveries and emergency exits.
Final mockup approval, weather window, and crew briefing
Now that your site, permits, materials, and safety gear are confirmed, get final sign-off on the mural mockup, lock in a weather window, and brief the crew before you start.
Confirm client approval, note any last tweaks, check forecasts for a consecutive dry stretch, assign roles, review safety procedures and timeline, gather tools, establish communication signals, and set a contingency plan.