How to Paint a Baseball Wall Mural Your Kids Will Love
You can create a bold, kid-friendly baseball mural in a weekend using basic acrylics, rollers, angled brushes, painter’s tape and a simple design like a giant baseball or bases. Prep by cleaning, patching, sanding and priming the wall, then block in large shapes before adding seams, shading and personalized lettering. Let layers dry and seal for durability. Get kids involved with big shapes and touches, and keep going to learn step-by-step tips and tricks.
How to Paint a Baseball Wall Mural Your Kids Will Love Quick Answer
Start with a simple, bold design—like a giant baseball and bases—to keep the project easy and kid-friendly.
You’ll need basic acrylic wall paints, brushes, painter’s tape, a pencil for sketching, drop cloths, and about 3–6 hours depending on size and drying time.
Involve your kids in painting large shapes and stencils so they feel proud of the result.
One-sentence summary of the easiest approach
If you want a quick, kid-approved baseball mural, pick a simple, large-scale design (like a baseball, bat, or field).
Choose bold shapes, block colors, and one or two accent details.
Sketch lightly, tape crisp edges, and roll or brush in even coats so you’ll finish fast and cleanly; this straightforward how to paint a baseball wall approach keeps kids excited and the project manageable.
Materials and time estimate
Tools and a short supplies list will get you ready: you’ll need exterior- or interior-grade acrylic or latex wall paint (base color plus 2–3 accent shades), a primer if your wall is new or patched, painter’s tape, a variety of brushes (angled 2″–3″ for edges, small round for details), a 9″ roller with a medium nap and tray, a pencil and level or ruler for sketching, drop cloths, sponges or rags for cleanup, and optional stencils or projector for complex designs.
- Paint and primer
- Brushes, roller, tray
- Tape, drop cloths, cleaning supplies
- Stencils/projector
Estimate: 4–8 hours total (prep, base coats, detailing, drying).
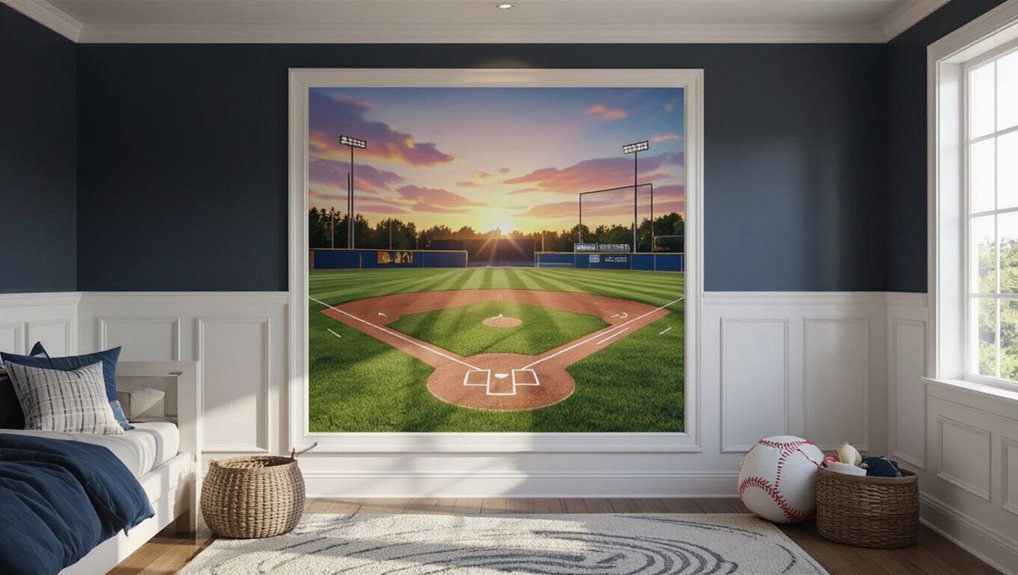
Why a Baseball Wall Mural Is a Great Choice for Kids
A baseball wall mural can boost your child’s creativity, motor skills, and sense of play while giving their room a lively focal point.
You can tailor the design to their age and interests—simple silhouettes for toddlers, action scenes for school-age kids, or retro team logos for teens.
Pick colors and themes that grow with them so the mural stays meaningful and stylish.
Benefits for child development and room design
Creativity and confidence grow naturally when you bring a baseball wall mural into your child’s room, because it turns their space into an inspiring, playful environment that encourages imaginative play, team-minded thinking, and pride in personal surroundings.
You’ll foster focus, motor-skill practice, and social play while improving room flow and visual interest.
- Encourages imaginative play
- Builds teamwork skills
- Enhances motor development
- Improves room cohesion
Design styles and themes to match age and interests
When you match a mural’s style to your child’s age and interests, the room becomes both personal and inspiring—think bold, graphic team logos for younger kids and detailed action scenes or vintage stadium art for older ones.
You’ll choose colors, scale, and motifs that spark play, reflect fandom, and grow with them.
- Logos and mascots
- Cartoon players
- Realistic action scenes
- Retro stadiumscape
Basic Planning and Preparation
Start by choosing the best wall and measuring the space so your design fits and sightlines work.
Decide whether you want realistic, cartoon, team-branded, or abstract art, then pick a color palette that works with the room’s lighting.
Finally, plan for safety: guarantee good ventilation and use child-safe paints and gear.
Choosing the right wall and measuring your space
Pick a wall that gets the most visibility and suits the mural’s scale, then measure carefully so your design fits and looks balanced.
Note windows, outlets, trim, and sightlines. Measure height and width, mark focal points, and photograph the space for reference.
- Measure overall wall dimensions
- Note obstacles and trim
- Mark eye-level and focal zones
- Photograph and sketch placement
Picking a mural style: realistic, cartoon, team-branded, abstract
Now that you’ve measured and mapped the wall, decide which mural style will best suit the space and your audience.
Think about energy, age, and how much detail you’ll paint. Pick a style that matches kids’ interests and your skill level.
Keep composition simple for large walls and bold elements for small ones.
- Realistic
- Cartoon
- Team-branded
- Abstract
Color palette selection and lighting considerations
When you choose a color palette, think about mood, visibility, and how lighting will change pigments on the wall.
Pick high-contrast accents for focal points, use durable matte or eggshell finishes to reduce glare, test swatches under daytime and artificial light, and coordinate with existing room tones so the mural feels integrated.
- Test swatches in different light
- Choose contrast for readability
- Prefer low-gloss finishes
- Match room tones
Safety, ventilation, and child-safe paint choices
Because you’ll be working in an indoor space—often around kids—prioritize ventilation, low-VOC or zero-VOC paints, and non-toxic finishes so the air stays safe while you paint and as the mural cures.
- Open windows, use fans, and run HVAC for crossflow.
- Choose certified low/zero-VOC acrylics labeled non-toxic.
- Wear masks when sanding or using primers.
- Store supplies locked and dispose of rags per instructions.
Materials, Tools, and Budget Breakdown
You’ll need to pick the right paints, primers, and sealants for durability and color accuracy.
Gather brushes, rollers, stencils, a projector, and any other tools that make layout and detail easier, plus optional decorative supplies like glow paint, decals, or trim if you want extras.
Finally, I’ll outline budget tiers—basic, mid-range, and premium—so you can match cost to the look you want.
Essential paints, primers, and sealants
Start by choosing paints, primers, and sealants that match your wall surface and the mural’s exposure—interior latex for indoor walls, exterior acrylic for outdoor surfaces, and UV-resistant finishes for sunny spots.
Pick a stain-blocking primer, high-quality acrylic paints, water-based clear coats, and weatherproof sealant for longevity. Use appropriate sheens for details and backgrounds.
- Primer
- Acrylic paint
- Clear coat
- Weather sealant
Brushes, rollers, stencils, projectors, and other tools
Once your paints and sealers are picked, gather the right tools to make the mural accurate and efficient:
- Angled and flat brushes for edges and detail work.
- Foam and nap rollers for smooth backgrounds and fast coverage.
- Stencils and low-tack masking for repeated shapes and crisp lines.
- Portable projector, level, and chalk/pencil for accurate grid transfers and alignment.
Optional decorative supplies (glow paint, decals, trim)
A few well-chosen extras—like glow-in-the-dark paint, adhesive decals, and decorative trim—can lift a baseball mural from nice to memorable without adding much time or cost.
You can highlight seams, add team logos, or create night-play effects. Choose safe, removable options for kids’ rooms and simple application methods.
- Glow paint accents
- Removable vinyl decals
- Wood or foam trim
- Stencil embellishments
Budget tiers: basic, mid-range, premium
Pick a budget tier that fits your goals and space—basic, mid-range, or premium—so you can match materials, tools, and time to the look you want without surprises. Choose basic for essentials, mid-range for better paints and tools, premium for pro finishes and extras. Balance cost, durability, and effort to suit your timeline and kids’ expectations.
| Tier | Typical items |
|---|---|
| Basic | Primer, budget paints |
| Mid-range | Better acrylics, rollers |
| Premium | High-quality paint, extras |
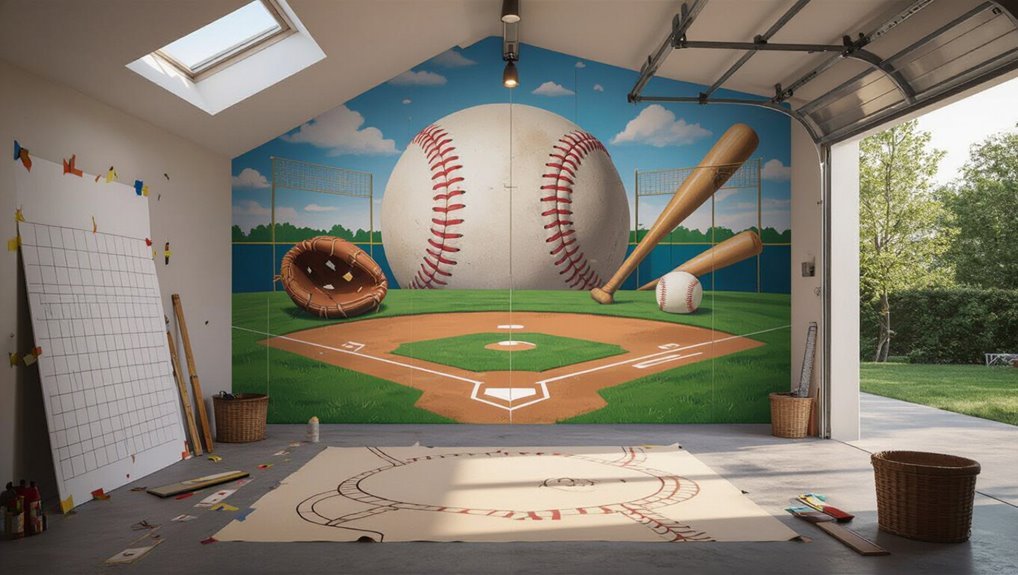
Step-by-Step Painting Process
Start by prepping the wall—clean, repair, and prime so your mural will last.
Then transfer your design with a grid, projector, or stencil. Block in base colors and large shapes, and work up to seams, shading, and highlights.
Finish with lettering, logos, and personalization tips to make the mural truly yours.
Step 1 Prep the wall: clean, repair, prime
Prep the wall thoroughly so your mural looks sharp and lasts—clean away dirt and grease, patch holes or cracks, and apply a suitable primer.
You’ll sand rough spots, wash with mild detergent, fill imperfections with spackle, then sand smooth. Choose a primer for drywall or masonry so paint adheres and colors pop.
- Clean and degrease
- Repair and fill
- Sand smooth
- Prime appropriately
Step 2 Transfer the design: grid method, projector, stencil
Now you’ll transfer your sketch to the wall using a method that fits your space and skills—grid, projector, or stencil—so your composition stays accurate and proportionate.
Choose one: measure and draw a matching grid to copy squares, use a projector for quick tracing, cut reusable stencils for repeating shapes, or trace scaled reference points with chalk/pencil before painting.
- Grid
- Projector
- Stencil
- Reference points
Step 3 Block in base colors and large shapes
With your sketch transferred, begin by blocking in the mural’s large shapes and base colors to establish the composition and overall value structure.
Use large brushes or rollers, working from background to foreground. Lay flat, even coats, keeping edges loose where elements overlap.
Step back often to check balance and color harmony. Let base layers dry fully before proceeding to finer work.
Step 4 Add details: seams, shading, highlights
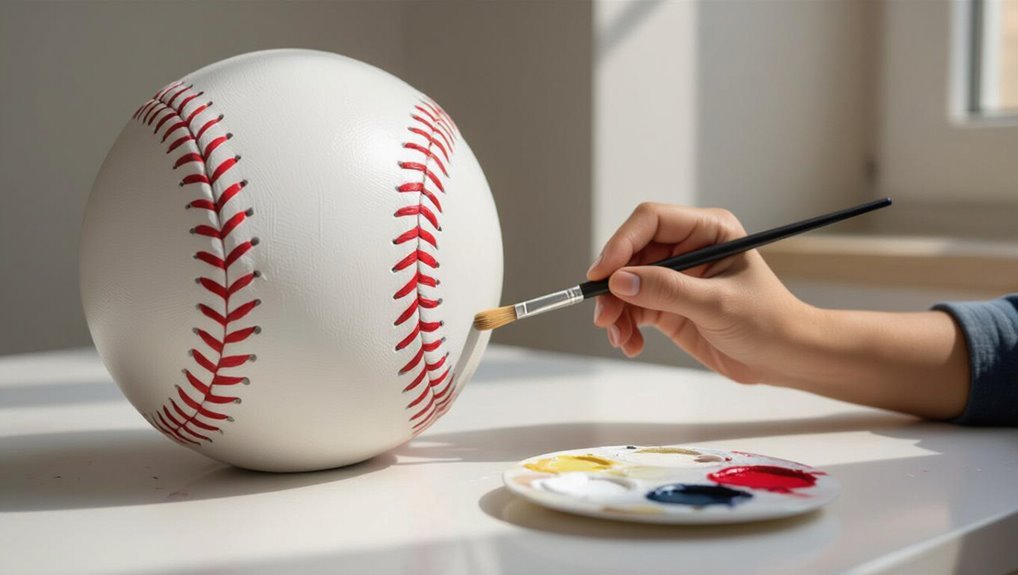
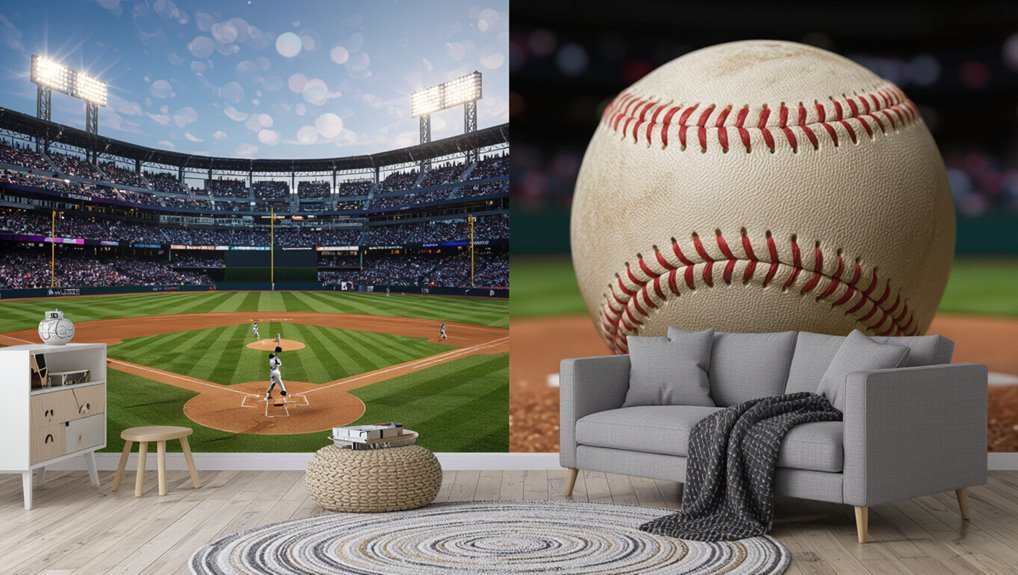
Begin refining the mural by painting the baseball’s seams. Then build shading and highlights to give the ball convincing roundness and texture.
Use a fine brush for crisp red stitches, spacing them evenly and angling to follow the curve.
Add soft shadows on the opposite side with diluted gray. Then lift subtle highlights with thin white glazes to suggest reflected light and worn leather.
Step 5 Lettering, logos, and personalization tips
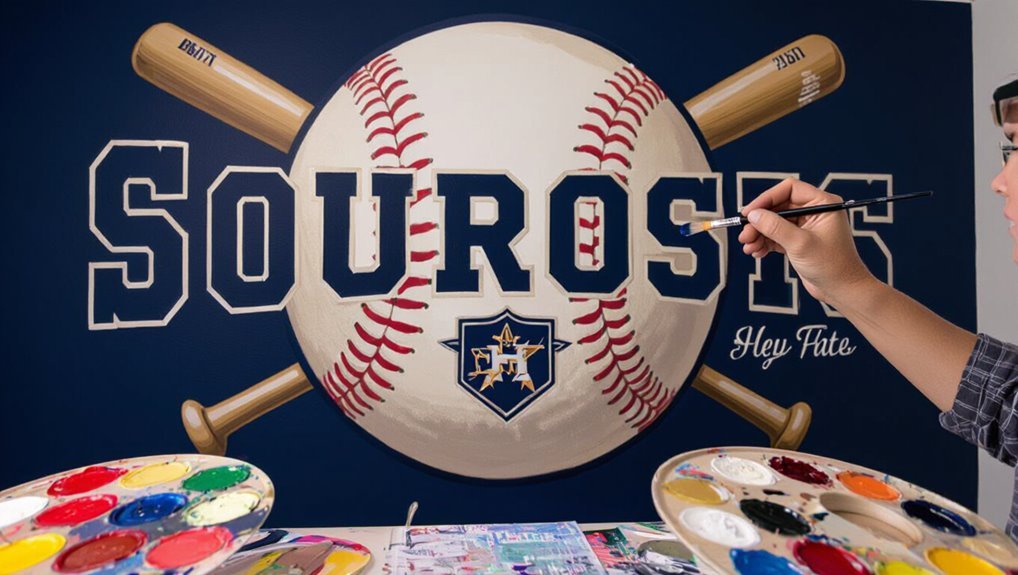
The final touch is adding lettering, logos, and personal details that make the mural yours; plan their placement and scale before you paint so proportions stay balanced.
Use stencils or projector outlines for clean letters, choose bold colors that contrast the background, and keep logos simplified.
Add your child’s name, jersey number, or team emblem with steady strokes. Test fonts on scrap paper first.
Step 6 Protective finish and dry time recommendations
Sealing your mural protects the paint and makes cleanup easier, so choose a clear protective finish suited to your paint type and the wall’s exposure.
Apply two thin coats of satin or matte polycrylic for indoor murals; use exterior polyurethane for outside walls. Allow recommended cure times, avoid humidity, and don’t touch until fully dry.
- Test finish compatibility
- Thin, even coats
- Follow dry times
- Light sanding between coats
Design Variations and Creative Ideas
You can choose between a full-wall baseball scene that immerses the room or a focused mural featuring a single baseball, glove, or bat as the focal element.
Mix in team colors, player numbers, or silhouettes to personalize the design and keep the palette cohesive.
For fun and function, add interactive touches like chalkboard paint, magnetic panels, or a growth-chart outline.
Full-wall baseball scene vs. focal baseball element
While deciding between a full-wall baseball scene and a focal baseball element, consider how much visual impact and storytelling you want to bring into the room—full scenes immerse viewers in a stadium atmosphere, while a single focal element like a giant glove, batter silhouette, or team logo creates a bold, clean statement.
- Dramatic panorama for storytelling
- Single icon for minimalist impact
- Hybrid: small scene with focal anchor
- Scale and furniture coordination
Incorporating team colors, numbers, and player silhouettes
Moving from your choice of scene scale, think about how team colors, numbers, and player silhouettes will shape the mural’s personality.
Use bold team palettes, contrast for readability, and simple silhouettes for motion.
Add a personalized number for your child and balance placement so elements don’t crowd focal points.
- Palette contrast
- Simplified silhouettes
- Personalized jersey number
- Balanced composition
Interactive elements: chalkboard paint, magnetic panels, growth chart
If you want the mural to do more than look good, add interactive elements like chalkboard paint, magnetic panels, or a built-in growth chart to encourage play and personalization.
You’ll let kids draw plays, stick magnets of players, and track growth milestones. Keep finishes washable and edges smooth for safety.
- Chalkboard section for plays and doodles
- Magnetic player pieces
- Built-in height chart
- Removable, washable panels
Common Problems and How to Fix Them
You’ll run into a few common issues—paint bleeding under the tape, uneven coverage or visible pencil lines, and colors that don’t match or fade over time.
You might also face peeling or bubbling paint, which usually signals adhesion or moisture problems.
In the next section we’ll cover quick fixes and prevention tips for each problem so you can keep your mural looking sharp.
Paint bleeding, uneven coverage, and visible pencil lines
When paint seeps under edges, coverage comes out streaky, or pencil marks show through, don’t worry—you can fix each issue with a few targeted steps that keep your mural crisp and professional.
- Use painter’s tape and press firmly to prevent bleeding.
- Apply thin, even coats; let each dry before next.
- Sand faint pencil lines lightly; erase remaining marks.
- Use a primer or opaque topcoat to unify coverage.
Color mismatch and fading over time
Although color can look perfect on a sample board, it often shifts once painted on the wall or after months of sun and humidity.
So you’ll want to plan for matching and long-term durability from the start.
- Test large swatches on the actual wall and view at different times.
- Use lightfast, exterior-grade pigments or UV-resistant varnish.
- Keep consistent batch numbers; remix if needed.
- Record formulas and take photos for future touch-ups.
Peeling or bubbling paint and how to repair
Color shifts often point to underlying problems with adhesion or surface prep, and those same issues can cause paint to peel or form bubbles.
You’ll fix it by removing loose paint, sanding to sound edges, cleaning, priming, and repainting with quality exterior or interior paint suited to the wall.
- Scrape and sand
- Clean and dry
- Prime damaged areas
- Repaint carefully
Best Practices, Tips, and Time-Savers
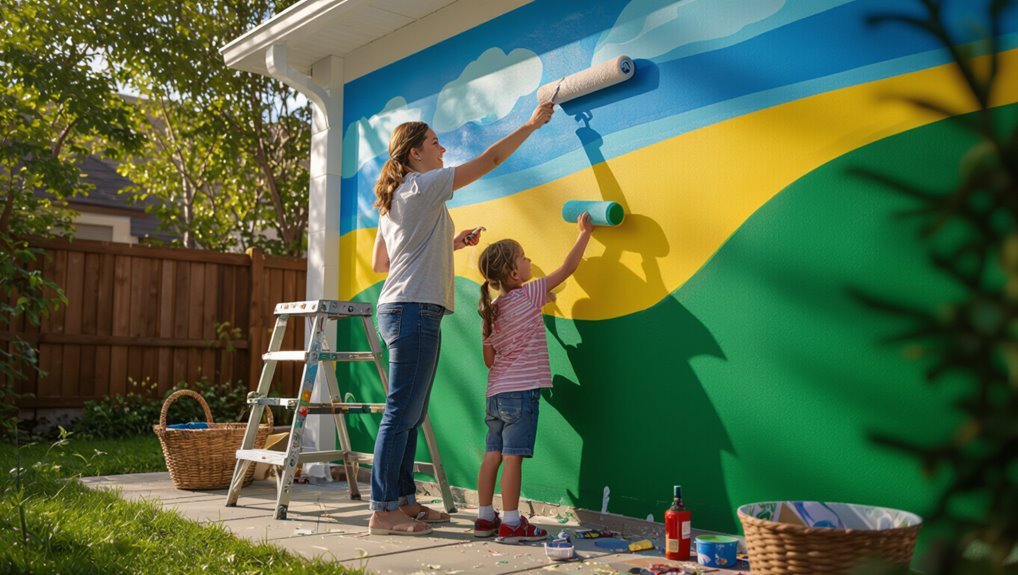
Include kids by giving them simple tasks like taping shapes, filling large color blocks, or signing a “team” section, and always supervise with non-toxic, washable paints and proper ventilation.
Use stencils or a projector for crisp logos and complex proportions, and freehand for softer, organic elements or when you want a personal touch.
Finish with a clear sealer, spot-clean yearly, and touch up chips quickly to keep the mural looking fresh.
Kid-friendly involvement ideas and safety tips
A few simple roles will keep kids engaged and safe while you paint the mural: assign small tasks, set clear boundaries, and model safe habits.
Use non-toxic paints, wear smocks, and keep brushes age-appropriate.
- Prep assistant: tape, drop cloths
- Color mixer: stir and pour
- Detail helper: dab small areas
- Safety monitor: remind about masks and handwashing
When to use stencils or a projector vs. freehand
When you want crisp logos, repeating patterns, or quick large shapes, reach for stencils or a projector; freehand works best when you need organic lines, on-the-spot adjustments, or a hand-painted look.
Choose based on detail, time, skill, and texture. Use stencils/projector for precision; freehand for character.
- Logos and lettering
- Large shapes fast
- Organic details
- Textured brushwork
Maintenance tips to keep the mural looking fresh
1 simple routine will keep your baseball mural looking sharp for years: inspect, clean, and touch up on a schedule.
Check for chips, dirt, mold, and sun fade monthly.
Clean gently, use mild soap, avoid harsh scrubbing, and touch up with matching paint.
Seal annually.
- Monthly inspection
- Gentle cleaning
- Prompt touch-ups
- Annual sealant
Tools and Materials Comparison
Now that you’ve got the basics, let’s compare the tools and materials you’ll actually use.
You’ll weigh brushes versus rollers for detail and coverage, and pick between acrylic, latex, or specialty mural paints based on durability, finish, and ease of use.
I’ll point out which combos work best for outlines, large fields, and outdoor walls.
Brushes and rollers: pros and cons by task
Choosing between brushes and rollers comes down to the job you want done: brushes give you precision for edges, details, and texture while rollers cover large areas quickly and smoothly. You’ll use brushes for trim, lettering, and touch-ups; rollers for backgrounds and base coats. Compare tasks:
| Task | Best tool |
|---|---|
| Edges/details | Brush |
| Large area | Roller |
Paint types compared: acrylic vs. latex vs. specialty mural paint
Picking the right paint will shape how your mural looks, lasts, and handles the wall—acrylics, latex, and specialty mural paints each have different drying times, durability, finish options, and surface adhesion. You’ll pick acrylic for vivid color, latex for easy cleanup, or specialty for longevity and UV resistance.
| Type | Strength | Best use |
|---|---|---|
| Acrylic | Color | Details |
| Latex | Cleanup | Base coats |
| Specialty | Durability | Outdoor murals |
Estimated Timeline and Project Checklist
Plan a clear day-by-day schedule for your weekend project so you know what to tackle on Friday evening, Saturday, and Sunday.
Checklists before painting—like surface prep, tape, and drop cloths—and after painting—like cleanup and sealant—will keep you on track.
Stick to the timeline and check off tasks as you finish them.
Day-by-day schedule for a weekend project
You’ll cover the whole mural in a single focused weekend if you follow a clear day-by-day schedule; plan tasks, gather supplies, and pace yourself.
- Day 1 morning: prep wall, sketch layout, tape edges.
- Day 1 afternoon: base coats and large shapes.
- Day 2 morning: add details, highlights, and lettering.
- Day 2 afternoon: touch-ups, sealant, and clean tools.
Pre-painting and post-painting checklist
1 checklist will keep the weekend on track: before you splash paint, confirm supplies, surface prep, and safety items; after you finish, run through touch-ups, sealing, and cleanup so nothing’s missed.
- Gather paints, brushes, drop cloths, tape, primer, and sealer.
- Clean, sand, and prime the wall; secure coverings.
- Do timed painting sessions; let coats fully dry.
- Inspect, touch up, apply sealer, then clean tools and space.
FAQ
You probably have a few practical questions before you start, like how long painting and drying will take and whether the mural can be removed or changed later.
We’ll cover safe paint choices for a child’s bedroom, how to match colors to your existing decor, and whether to hire a pro or tackle it yourself.
If you want, I can answer each question with timelines, product recommendations, and pros and cons.
How long will a mural take to paint and dry?
How long will it take to paint and dry a baseball mural?
Expect painting to take one to three full days for a simple to moderate design, longer for complex scenes.
Allow at least 24–48 hours for acrylic layers to dry between coats, and a final 48–72 hours before light use.
Total project time typically spans three to seven days from start to finish.
What paints are safest for a child’s bedroom?
Since kids spend a lot of time in their rooms, pick low-VOC or zero-VOC acrylic latex paints labeled “low odor” or “child-safe” to minimize fumes and toxins.
Use water-based primers and finishes, avoid oil-based and solvent paints, and choose washable, durable finishes for high-traffic areas.
Ventilate during application, wait recommended cure times before occupancy, and store leftover paint safely out of reach.
Can I remove or change the mural later?
Although murals are meant to be semi-permanent, you can remove or change one later with the right approach.
If you want to update it, paint over with primer then new colors, or add removable wallpaper/decals for a quick switch.
For full removal, use gentle scrapers, heat, and appropriate cleaners to protect drywall.
Test a small area first to avoid surprises.
How do I match paint colors to existing decor?
Want to make the mural feel like it was always part of the room? Pick two or three key colors from furniture, bedding, or rugs and use them in the mural’s palette.
Test small swatches on the wall at different times of day. Use undertones—warm or cool—to keep harmony, and balance bold accents with neutral backgrounds so the mural complements rather than clashes.
Should I hire a professional or DIY?
Curious whether to hire a pro or tackle the mural yourself? Decide based on skill, time, and budget.
If you’re confident with brushes, stencils, and patience, DIY saves money and adds personal charm.
Hire a pro for complex designs, perfect lines, or tight timelines.
Get quotes, check portfolios, and weigh cost versus your desired finish before committing.
Final Touches and Inspiration Gallery
As you wrap up your mural, consider simple accents like crown molding, focused lighting, or a few framed photos to make the scene pop.
Check out the inspiration gallery for color combos and layout ideas, and grab downloadable templates to scale designs to your wall.
These finishing touches turn a great painting into a polished, personalized space.
Accent ideas: molding, lighting, framed photos
When you’re wrapping up your baseball wall mural, the right accents—molding, lighting, and framed photos—can pull the whole room together and turn a painted scene into a curated space.
You’ll add crown molding for a stadium feel, install adjustable LED spotlights to highlight key elements, and hang framed game photos or jerseys.
Keep colors cohesive and mounts secure.
- Crown molding
- LED spotlights
- Framed photos
- Display shelves
Sources for inspiration and downloadable templates
Inspiration fuels the final touches, so look to pro murals, ballpark photography, and sports art blogs to shape your vision and color choices.
Use printable templates to scale logos, mascots, and diamond layouts. Download stencils or traceable PDFs to speed painting and keep proportions.
- Pro mural galleries
- Ballpark photo archives
- Sports art blogs
- Printable stencil libraries