Why Is My Paint Flaking Off? The Real Causes and How to Fix Them
Your paint’s flaking because it didn’t bond to a clean, dry, and compatible surface—usually from moisture, poor prep, or the wrong primer/paint combo. You’ve likely applied paint over dirt, glossy surfaces, or damp substrates, or used mismatched products that won’t adhere. Fixing it means removing loose paint, drying and cleaning the area, priming bare spots with the right primer, and recoating under proper conditions. Keep going and you’ll learn specific causes, fixes, and tools for each situation.
Quick Answer Why Your Paint Is Flaking Off
You’re most likely seeing flaking from poor surface prep, moisture, incompatible paint layers, or old, failing coatings.
If flakes come with bubbling, soft spots, or a musty smell, that often signals an urgent moisture or rot problem that needs fixing before repainting.
Otherwise, proper stripping, drying, and priming will usually stop it.
Direct summary of the most common causes
If paint’s flaking off, it’s usually because the coating couldn’t stick to the surface or was damaged after application.
You’ll want to know why is my paint flaking off so you can fix it fast.
Common causes:
- Poor surface prep or dirty substrate.
- Moisture or humidity beneath the paint.
- Wrong primer/paint or incompatible layers.
When flaking indicates an urgent problem
When paint peels in large patches or keeps coming off despite spot repairs, treat it as a potential urgent problem—you could be facing active water intrusion, structural movement, or widespread adhesion failure that will get worse and cost more to fix if ignored.
Act quickly: inspect for leaks, bulging walls, or soft substrates; stop water sources, document damage, and call a qualified contractor to diagnose and prioritize repairs before repainting.
How Paint Adheres Basic Understanding
To understand flaking, you need to know how paint layers bond and what weakens that bond.
You’ll learn the differences between peeling, flaking, blistering, and chalking so you can spot the real problem.
Then you’ll see how substrates—wood, drywall, metal, masonry, and previously painted surfaces—change adhesion and what that means for repairs.
Paint layers and adhesion science
Paint sticks when its ingredients form mechanical and chemical bonds with the surface and with previous coats, so understanding those bonds is key to preventing flaking.
You’ll manage adhesion by preparing surfaces, matching primer and topcoat chemistries, and controlling film thickness and curing.
Proper solvent balance and timing between coats prevents weak interfaces, while flexible systems accommodate movement to keep layers united.
Differences between peeling, flaking, blistering, and chalking
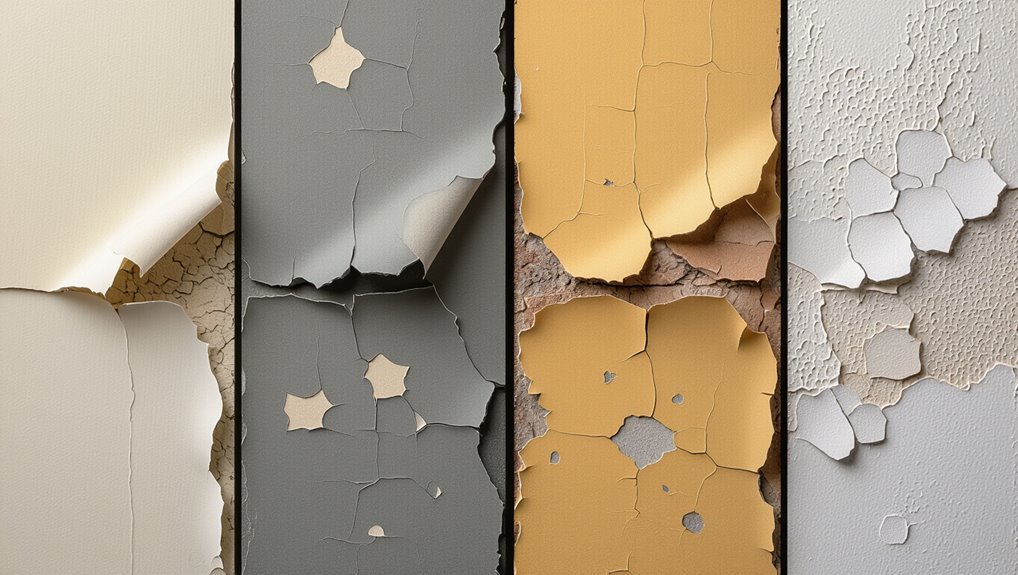
How can you tell whether your coating is peeling, flaking, blistering, or chalking?
Peeling lifts in large sheets from poor adhesion; flaking breaks into small, brittle fragments.
Blistering shows bubble-like domes from trapped moisture or solvent; chalking leaves a powdery residue as binder degrades.
You’ll inspect texture, size, and location to diagnose the failure and choose the right repair.
How substrate type affects adhesion (wood, drywall, metal, masonry, previously painted surfaces)
Different substrates grab and hold coatings in distinct ways, so you’ll get better adhesion when you match prep and products to the surface.
Wood soaks and needs sealing and sanding; drywall requires priming and dust removal; metal needs rust removal and a metal primer; masonry benefits from masonry primer and mortar repair; previously painted surfaces demand loose-paint removal and compatible primer to bond new coats.
Primary Causes of Paint Flaking (Problem-Solution)
When paint flakes, you usually have a few common culprits to check: poor surface prep, moisture (inside walls or outside exposure), incompatible or low-quality coatings, application errors like wrong temp or thickness, and underlying substrate failure such as rotting wood or rust.
Start by ruling out moisture and substrate damage, because fixing those without repairing the cause will only give you more peeling later.
Once the surface is sound and dry, use proper primers and compatible, high-quality paint applied under the right conditions to prevent recurrence.
Poor surface preparation
If paint’s peeling in patches, shows bubbles, or flakes off when you scrape it, those are classic signs you skipped proper surface prep.
You can fix it by stripping loose paint, sanding glossy spots, cleaning off dust and grease, and filling cracks before priming.
Follow that step-by-step routine and your new paint will stick and last.
Symptoms that point to prep issues
How can you tell paint is flaking because of poor prep?
Look for isolated patches peeling in sheets, paint lifting where surfaces were glossy, and flaking concentrated at edges or seams.
You’ll spot trapped dust, mildew, or loose previous coating under the paint, and poor adhesion near repairs or hardware.
These signs point to insufficient cleaning, sanding, or priming before painting.
How to fix: Step-by-step surface prep
Start by stripping loose paint and contaminants so new coatings can grip properly: scrape or use a chemical stripper for flaking areas. Sand glossy spots to dull the surface.
Clean thoroughly with a degreaser or TSP substitute, rinse and dry, then spot-prime bare wood, metal, or repaired patches with the right primer before repainting.
- Remove loose paint and dust.
- Sand and feather edges.
- Clean, prime, paint.
Moisture problems (interior and exterior)
If paint is flaking, moisture is often the culprit — from roof or plumbing leaks to condensation and rising damp.
You’ll want to check for wet spots, musty smells, bubbling paint, and use a moisture meter or infrared camera to confirm the source.
Fix the leak or dampness, dry and treat the substrate, then only repaint once the area is fully repaired and moisture-free.
Causes: leaks, condensation, rising damp
When paint peels in patches or sheets, moisture is usually behind it—whether from a hidden leak, persistent condensation, or rising damp from the ground.
You’ll see flaking where water soaks substrates, loosens adhesion, and promotes mold.
Leaks cause localized damage, condensation affects ceilings and cold walls, and rising damp ruins lower courses.
Addressing the moisture source stops further paint failure.
How to diagnose moisture-related flaking
Because moisture can come from several hidden sources, you’ll need a systematic approach to pinpoint why paint is flaking: inspect for visible leaks, check roof, gutters and plumbing, and look for blistering, salt stains or efflorescence.
Use a moisture meter on walls and floors, test for condensation patterns, and trace damp from outside in. Document findings before planning repairs.
Repair steps to resolve moisture before repainting
Before you repaint, stop the moisture at its source and let surfaces dry completely so new coating will bond and last.
Fix leaks, improve ventilation, and remove damaged material. Then prep and prime with a moisture-blocking product.
- Repair plumbing/roof leaks and redirect water.
- Install vents, dehumidifiers, or improve drainage.
- Replace rotted drywall/wood, dry fully, then prime with a vapor-resistant primer.
Incompatible or low-quality paint and coatings
If your paint is peeling in patches or forming blisters, you might be dealing with incompatible coatings—like applying latex over oil without proper prep—or with cheap products that won’t bond.
You’ll learn how to spot oil-vs-latex mismatches and wrong-primer mistakes so you can diagnose the problem quickly.
Then you’ll get clear steps for selecting the right products and making the proper change (cleaning, sanding, and using a compatible primer) to stop further flaking.
Signs of compatibility issues (oil vs. latex, wrong primer)
When paint starts to peel in sheets or chips off in sticky, uneven patches, you’re likely seeing a compatibility problem—most often oil-based undercoats clashing with latex topcoats or the wrong primer for the surface.
You’ll also notice poor adhesion at edges, blisters where layers separate, rapid yellowing or cracking, and new paint that won’t cure properly.
These are clear signs to investigate products used.
Correct product selection and transition steps
Those compatibility signs point to one common root: wrong or low-quality materials. Choose high-quality, compatible primer and paint; follow manufacturer procedures—clean, sand, prime, and test a small patch. If switching oil to latex, use a bonding primer. Replace failing coatings rather than layering.
| Step | Product | Tip |
|---|---|---|
| 1 | Cleaner | Remove contaminants |
| 2 | Sand | Feather edges |
| 3 | Primer | Bonding if needed |
| 4 | Topcoat | Match system |
Application errors (temperature, thickness, insufficient drying)
You’ll often see paint fail not because of the product but because it was applied in the wrong conditions or too thick.
Follow temperature and drying guidelines, apply even thin coats, and wait the recommended cure time before reapplying.
When you do need to repaint, sand loose areas, prime properly, and build layers gradually for a durable finish.
Common application mistakes and how to avoid them
If paint keeps flaking, chances are it came down to how it was applied—temperature extremes, overly thick coats, or not enough drying time all cause poor adhesion and premature failure.
Work within recommended temperature and humidity ranges, apply thin even coats, and follow drying times between layers.
Use proper thinning, quality brushes or sprayers, and test a small area before committing to full coverage.
Reapplication best practices
When paint flakes, reapplying without fixing the original application mistakes will only give you another failed finish.
So start by addressing temperature, coat thickness, and drying time before you roll or spray again. Prep the surface, scuff or sand to sound substrate, and remove dust.
Then follow these steps:
- Recoat only within recommended temperature/humidity.
- Apply thin, even coats.
- Allow full dry between coats.
Structural or substrate failure (rotting wood, rust, crumbling plaster)
Before you repaint, check the substrate for rot, rust, or crumbling plaster by probing soft spots, tapping for hollow sounds, and looking for corrosion or moisture stains.
If you find damaged areas, remove loose material and either repair with appropriate fillers or replace the affected boards, metal, or plaster sections.
Only repaint after the substrate is sound and fully dry to guarantee the new finish will adhere.
How to inspect for structural causes
Start by scanning the substrate for signs that the material itself is failing, because paint only peels when what’s underneath can’t hold it.
Tap wood and plaster for hollow sounds, probe suspect areas with a screwdriver, and pry back loose paint to reveal rot, rust, or crumbling.
Check for moisture stains, mold, and blistering; document locations and extent before deciding next steps.
Repair and replacement options before repainting

If your inspection found rot, rust, or crumbling plaster, you’ll need to repair or replace the damaged substrate so the new paint will adhere.
Remove loose material, cut out rotten wood or rusted metal, and patch plaster or replace sections.
Treat metal with rust converter and prime.
Use epoxy or wood filler for small repairs; replace severely damaged areas before priming and repainting.
UV and environmental degradation
When sunlight, temperature swings, and moisture break down paint binders, you’ll start to see chalking, cracking, and eventual flaking.
You can slow this by choosing UV-resistant paints, applying proper primers, and keeping surfaces clean and well-sealed.
I’ll explain how to spot weathering early and the best fixes to prevent further damage.
When weathering causes flaking and how to mitigate it
Although paint is meant to protect and beautify surfaces, prolonged sun, moisture, and temperature swings break its binders and pigments down, causing chalking, loss of adhesion, and eventual flaking.
You can mitigate this by choosing UV-resistant, breathable coatings, applying proper primers, ensuring surfaces are dry and clean, and maintaining sealants and flashing.
Regular inspections and timely touch-ups prevent small weathering issues from worsening.
Step-by-Step Repair Guide Fixing Flaking Paint
Start by evaluating and documenting the damaged areas so you know what tools and materials you’ll need.
Next, contain the work zone and protect nearby surfaces before removing loose paint with the proper tools and techniques.
Finally, repair the substrate as needed, then sand, clean, and prime the surface to guarantee a lasting finish.
Step 1: Assess and document the damage
Before you touch a brush, take a close look and record exactly what’s happening: note where paint is flaking, how large the affected areas are, any underlying materials exposed, and whether moisture, cracks, or bubbling are present.
Photograph each zone, date the images, and sketch boundaries.
List probable causes, affected layers, and urgency. This record guides repair steps and material choices.
Step 2: Contain the area and protect surroundings
Anyone working on paint repairs should first contain the work area and protect everything around it to prevent dust, debris, and loose flakes from spreading.
Lay drop cloths, tape plastic sheeting over vents, doorways, and furniture, and seal gaps with painter’s tape.
Wear a dust mask and goggles.
Keep pets and children away and post a warning sign until cleanup’s complete.
Step 3: Remove loose and flaking paint (tools and techniques)
Now that the area’s sealed and protected, it’s time to remove loose and flaking paint so the new finish will adhere properly.
Scrape with a putty knife or paint scraper at a shallow angle, then use a wire brush for remaining flakes.
For larger areas, employ an oscillating tool or heat gun carefully.
Sand smooth, vacuum dust, and wipe with a damp cloth before priming.
Step 4: Repair substrate (fillers, rust treatment, replace rotted sections)
Repair the underlying surface so the new paint has something sound to stick to: fill cracks and holes with a suitable filler, treat and remove rust, and cut out or replace any rotten wood or corroded metal.
Use epoxy or wood filler for gaps, wire-brush and rust converter for metal, and splice in new wood or patch with metal plates.
Verify repairs are sound before priming.
Step 5: Sanding, cleaning, and preparing for primer
Start by sanding all the repaired and surrounding areas until you reach a smooth, feathered edge between bare substrate, existing paint, and filler so the primer can bond evenly.
Remove dust with a vacuum and tack cloth, degrease with a suitable cleaner, and let dry.
Inspect for remaining loose paint or imperfections, touch up as needed, and verify surfaces are stable and clean before priming.
Step 6: Choosing and applying the right primer
Because a proper primer bridges old surfaces and new paint, choosing the right one and applying it correctly is essential to prevent future flaking.
Match primer type to substrate (wood, metal, plaster) and previous finish (oil vs. latex). Use rust-inhibiting primer on metal, stain-blocking on tannin bleed, and high-adhesion primers on glossy surfaces.
Apply thin, even coats and allow full dry time.
Step 7: Proper painting technique and curing times
1 key to a lasting finish is applying paint with consistent technique and then letting it cure fully; use steady, overlapping strokes, avoid overworking edges, and keep wet edges intact so the film forms uniformly.
Work in appropriate temperatures and humidity, apply thin even coats, allow manufacturer-recommended dry and cure times between coats, and resist handling until the film hardens to prevent adhesion failures.
Step 8: Final inspection and touch-ups
Once the paint has fully cured, inspect the surface carefully for missed spots, thin coverage, or tiny blemishes that could become future problems; use good light and run your hand over the area to feel for texture differences.
- Sand slight imperfections, clean residue, and feather edges.
- Spot-prime exposed areas, then recoat with matching paint.
- Reinspect, polish rough spots, and maintain ventilation to guarantee cure.
Common Mistakes That Make Flaking Worse
Don’t rush the prep: if you skip primer or use the wrong kind, paint won’t bond and will flake sooner.
Painting in high humidity, over damp or moldy surfaces, or using incompatible topcoats (or over-thinning or over-brushing paint) all make adhesion problems worse.
Fix conditions and use the right products to stop small mistakes from turning into a bigger repaint.
Skipping primer or using wrong primer
If you skip primer or use the wrong kind, paint has nothing to bond to and will lift or flake far sooner than it should.
You need primer matched to the surface and paint type—wood, metal, drywall, or glossy finishes each demand specific primers.
Use a stain-blocking or adhesion primer when needed, and don’t cut corners: proper priming prevents peeling and extends finish life.
Painting in unsuitable weather or humidity
When you paint in extreme temperatures or high humidity, the finish often won’t cure properly and is much more likely to blister, peel, or flake.
You should check the paint can for recommended temperature and humidity ranges, postpone jobs when conditions fall outside them, and store materials properly.
Drying times lengthen in humidity, so curing delays increase vulnerability to dust, moisture, and adhesion failure.
Over-thinning or over-brushing paint
Although thinning paint can help for certain applications, over-thinning breaks the binder-to-pigment balance and weakens adhesion, making coats prone to sagging and flaking.
If you thin too much or over-brush trying to spread thin coats, you strip binders, trap solvent, and create brittle films.
Follow manufacturer ratios, use proper brushes or rollers, and apply multiple thin, even coats for a durable finish.
Painting over damp surfaces or mold without remediation
Because moisture and mold undermine paint’s grip, slapping fresh paint over a damp or contaminated surface almost guarantees premature peeling, bubbling, and flaking.
You’ll trap moisture, feed mildew, and create weak adhesion. Always dry surfaces completely, remove mold with appropriate cleaners, and repair leaks or ventilation first.
Otherwise paint won’t bond and you’ll repeat costly rework.
Using incompatible topcoats
If you slap a new topcoat over an old finish that chemically clashes—like acrylic latex over failing oil-based paint—you’ll invite poor adhesion and rapid flaking.
You should test compatibility, strip or sand incompatible layers, and use proper primers designed to bridge different systems.
Follow manufacturer recommendations for solvent-based or water-based products, and always dry and cure substrates before recoating to prevent failure.
Prevention and Best Practices
To stop flaking before it starts, you’ll want to control moisture with good ventilation, flashing, and clean gutters.
Pick season- and material-appropriate timing and products for wood, metal, or masonry.
Follow a simple maintenance schedule so you know when to touch up or repaint, and choose compatible systems—proper primer, paint type, and finish—to maximize durability.
I’ll outline practical steps for each of these areas so you can prevent problems rather than fix them.
Long-term moisture control strategies (ventilation, flashing, gutters)
When paint keeps flaking, long-term moisture control is the fix you’ll need to stop the cycle at its source; improving ventilation, installing proper flashing, and keeping gutters functioning will prevent water from ever reaching the paint film.
You should vent attics and bathrooms, seal roof-to-wall connections with durable flashing, clear and pitch gutters, and inspect drains regularly so moisture never undermines adhesion.
Seasonal and material-specific painting tips (wood vs. metal vs. masonry)
Although the basics of prep and proper application stay the same, you’ll change techniques and timing depending on the material and the season: wood needs moisture balance and stain-compatible primers, metal needs rust control and high-adhesion coatings, and masonry often requires breathable paints and longer cure times in cool weather.
In summer, paint faster but avoid extreme heat; in spring/fall, watch humidity and use slow-curing formulations.
Maintenance schedule and when to repaint
Now that you’ve adjusted techniques for different materials and seasons, set up a simple maintenance schedule so small problems don’t become big ones.
Inspect painted surfaces twice yearly and after severe weather. Touch up cracks, blistering, or peeling promptly.
Clean surfaces yearly to remove dirt and mildew.
Repaint when more than 10–15% of an area shows failure or coatings no longer shed water.
Choosing paint systems for durability (primer, paint type, finish)
Because a durable paint job starts with compatible layers, pick primers and topcoats that work together and suit the surface and conditions they’ll face.
You’ll extend life by matching primer chemistry, choosing appropriate paint (acrylic for exteriors, alkyd for high-abrasion interiors), and selecting the right sheen for wear and moisture resistance.
- Match primer chemistry.
- Pick paint for exposure.
- Choose durable sheen.
Comparison: Repair Methods and When to Use Them
You’ll choose between spot repairs, partial repaints, or a full strip-and-repaint based on how widespread and deep the flaking is.
Consider cost, time, and complexity when weighing DIY fixes against hiring a professional contractor.
Below we’ll compare which method fits common scenarios so you can pick the most efficient solution.
Spot repair vs. partial repaint vs. full strip and repaint
Which fix makes sense — a quick spot repair, a partial repaint, or stripping everything back and starting fresh? You’ll choose based on damage, substrate condition, and desired longevity. Spot for isolated chips; partial for widespread peeling; full strip when adhesion fails across the surface.
| Method | Best use |
|---|---|
| Spot repair | Small, localized flaws |
| Partial repaint | Multiple areas, sound substrate |
| Full strip | Extensive failure, old layers |
DIY fixes vs. professional contractor jobs (cost, time, complexity)
When you’re weighing DIY fixes against hiring a pro, think about cost, time, and how complex the repair will be: a weekend touch-up might save money but won’t fix underlying adhesion problems, while a contractor will handle prep, matching, and warranties at higher expense and with less of your time involved.
Choose DIY for small, contained flaking; hire pro for widespread, recurrent, or structural issues.
Tools, Materials, and Safety
Before you start scraping or sanding, know which tools and abrasives suit the surface and which primers and paints bond best to wood, metal, or masonry.
Test for lead, use proper respirators and gloves, and set up containment to protect yourself and others.
I’ll walk you through tool selection, material choices, and safety steps so you can repair without creating bigger problems.
Recommended tools and abrasives for paint removal
Gather the right tools and abrasives to work efficiently and reduce damage to the substrate.
Use hand scrapers, putty knives, and wire brushes for loose paint; sanding blocks and orbital sanders for smoothing; and chemical strippers where mechanical methods risk harm.
Choose grit progressively—from coarse to fine—and keep disposable masks, gloves, and eye protection on hand to control dust and chemical exposure.
Best primers and paints for different substrates
Although the right primer and paint combo will vary by substrate, you should always match product chemistry to the surface: use oil- or alkyd-based primers for bare or rusted metal, high-adhesion bonding primers for glossy plastics, and alkaline-resistant primers for new masonry or concrete.
For wood, pick stain-blocking, moisture-resistant primers; for previously painted surfaces, use compatible acrylic or oil topcoats matched to the primer.
Safety precautions (lead paint testing, respirators, containment)
When paint’s failing, safety can’t be an afterthought: test for lead, ventilate and contain the work area, and wear the right respirator and disposable gear to protect yourself and others.
Use EPA-approved lead test kits or hire a pro. Seal floors and vents, set up negative pressure if sanding, and wear an NIOSH-rated respirator, gloves, coveralls, and eye protection.
Dispose of waste properly.
Case Examples and Real-World Scenarios
You’ll see three common situations that explain why paint flakes: exterior siding after winter, bathroom ceilings damaged by moisture, and metal railings affected by rust.
For each, you’ll get a quick diagnosis and the practical fix that worked.
Use these real-world examples to match symptoms on your own project and choose the right repair.
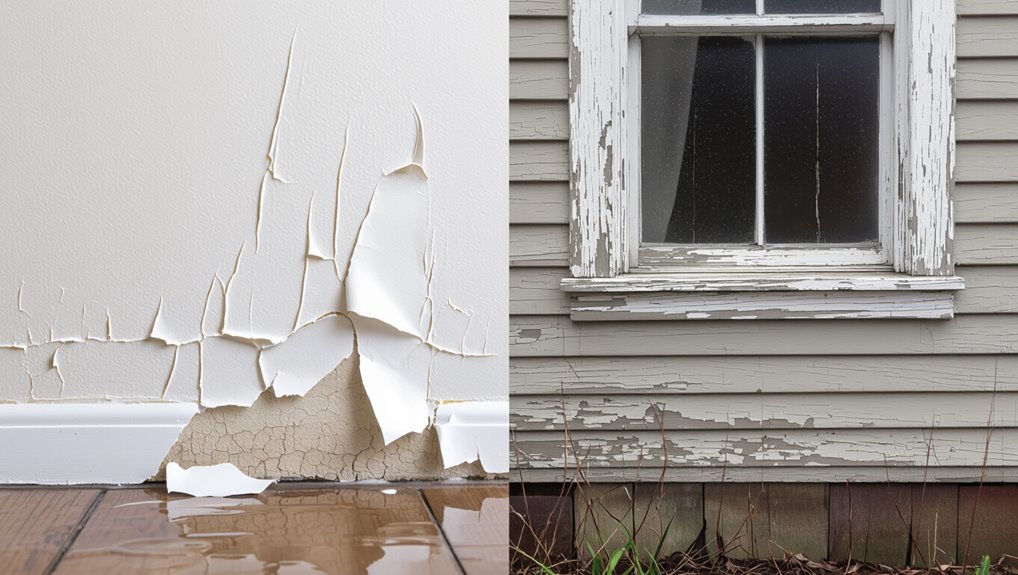
Exterior siding flaking after winter diagnosis and fix
If your exterior siding started flaking off after winter, don’t assume it’s just old paint — cold, moisture, and freeze-thaw cycles often combine to lift coatings and expose underlying damage.
Inspect for soft wood, separated joints, or trapped ice.
Remove loose paint, repair rot or gaps, dry thoroughly, prime with a bonding primer, and repaint with high-quality exterior paint to prevent recurrence.
Bathroom paint peeling from ceiling moisture remediation and repaint
Even though a steamy shower seems harmless, trapped moisture in your bathroom ceiling can break paint adhesion and lead to peeling.
You’ll need to diagnose the moisture source, remediate it, and then prep and repaint correctly to stop the problem from coming back.
Inspect vents, fix leaks, replace damaged drywall, dry thoroughly, use mildew-resistant primer and quality bathroom paint, and guarantee proper ventilation to prevent recurrence.
Metal railing flaking rust treatment and repaint strategy
Moisture problems in a bathroom teach a useful lesson about surface prep: trapped water and poor adhesion cause paint to fail, and the same principle applies to metal railings where rust, not mildew, is the enemy.
Remove loose paint, grind or wire-brush to bright metal, apply rust converter if needed, prime with a metal primer, then topcoat with oil- or enamel-based paint for durable protection.
Frequently Asked Questions (FAQ)
Got questions about flaking paint? You’ll want clear answers on whether you can paint over it, how to tell if moisture or poor prep caused the problem, and whether lead might be involved.
Also learn how long to wait between coats and which finishes hold up best in high-traffic areas.
Can I paint over flaking paint without removing it?
Can you paint over flaking paint without removing it? You shouldn’t. Painting over loose flakes traps adhesion problems and leads to rapid failure.
Instead, scrape loose paint, sand feathered edges, clean dust, and spot-prime bare areas before repainting.
For large sections, consider stripping and repairing substrate. Proper prep prevents repeat flaking and gives a durable, professional finish.
How do I tell if flaking is caused by moisture or poor prep?
How can you tell whether peeling paint comes from trapped moisture or just poor prep?
Check location: moisture-related flaking clusters near ceilings, bathrooms, basements, or around windows.
Peel patterns differ: moisture lifts whole sheets and may show soft, damp substrate; poor prep causes patchy, flaky edges on well-ventilated walls with chalky residue.
Use a moisture meter or fix ventilation to confirm.
Is flaking paint a sign of lead paint risk?
If paint is flaking, you should consider whether lead could be involved—especially in homes built before 1978—because older lead-based paint tends to chip and degrade as layers fail.
Assume risk until tested: use a lead test kit or hire a certified inspector.
Avoid sanding or scraping without precautions; disturbed lead paint creates toxic dust.
Follow local regulations for removal or containment.
How long should I wait between coats to prevent flaking?
While you’re aiming to prevent flaking, wait for the previous coat to dry and cure according to the paint type and conditions—typically 2–4 hours between latex coats and 24 hours for oil-based paint, though full curing can take days.
Check label recommendations, feel for tackiness, and confirm temperature/humidity are within range.
Rushing traps solvents and weakens adhesion; patience yields durable, nonflaking results.
What paint finish resists flaking best for high-traffic areas?
Because high-traffic walls take a beating, you’ll want a finish that stands up to scuffs, cleaning, and repeated contact—eggshell and satin are usually the best choices for durability without showing too many imperfections.
Semi-gloss and gloss offer the toughest, most washable surfaces for trim and areas that get the most wear.
Choose satin for hallways; semi-gloss for doors, kitchens, and bathrooms; use gloss sparingly.